Some ways of preserving require equipment, whilst others are low-technology approaches. I’ve also discovered the mixture of techniques that can help maintain.
I’ve done a lot of preserving meat. There are a few other styles that can also be used. The lack of comprehensive articles about this led me to create this resource for you.
Techniques for Preserving Meat
First let’s go over the various techniques, with some examples as well.
Primary Methods
| Method | Description |
|---|---|
| Salt | Draws moisture out of meat through osmosis, inhibiting bacterial growth. |
| Fermentation | Uses beneficial microbes to produce acids that preserve and flavor the meat. |
| Acidity | It applies antimicrobial compounds and dries the surface, often combined with salt. |
| Smoke | Applies antimicrobial compounds and dries the surface; often combined with salt. |
| Air Dried/Dehydrating | Removes moisture to inhibit microbial activity; may involve controlled airflow. |
| Freezing/Fridge | Slows microbial growth by reducing temperature; short to medium-term solution. |
| Canning/Thermal Process | Lowering pH (e.g., with vinegar or lactic acid) creates an environment where spoilage organisms can’t survive. |
| Method | Example |
|---|---|
| Salt | Pancetta, Salt Pork |
| Fermentation | Salami, Saucisson Sec |
| Acidity | Pickled Sausages, Escabeche |
| Smoke | Smoked Bacon, Smoked Ham |
| Air-Dried/Dehydrating | Biltong, Jerky |
| Freezing/Fridge | Raw Meat Storage, Fresh Sausages |
| Canning/Thermal Process | Canned Corned Beef, Pâté Jars |
Combined Methods
| Combined Method | Description |
|---|---|
| Salt, Fermentation | Salt inhibits bad bacteria while beneficial microbes ferment sugars, creating acidity and flavor. |
| Salt, Acidity | Salt draws moisture and preserves, while added acid (e.g., vinegar) lowers pH for extra safety. |
| Salt, Fermentation, Cold Smoking | Combines drying, microbial control, and smoke’s antimicrobial effects for flavor and long-term preservation. |
| Salt, Hot Smoking | Salt cures the meat, while hot smoke cooks and preserves by heat and smoke exposure. |
| Salt, Air-Dried | Salt cures and removes moisture; air-drying continues dehydration in a controlled environment. |
Here is a quote to highlight the ambiguity of it:
For example, dried fish are often salted prior to drying and some products usually considered salted may also be partially fermented. At the broadest possible level of product type categorization, all products may be categorized as either dried or fermented. Smoked fish, for example, are dried using smoke rather than sunlight, whereas fish sauce is a by-product of fish fermentation
To do preserving at home, here, an easier approach for more straightforward and proven methods.
Dried fish at the intersection of food science, economy, and culture: A global survey
Salt
This method covers preserving meat with a dry (dry curing) or wet cure.
Salt is often the first step and is used in combination with some of the other methods.
How Is Meat Preserved with Salt?
Salt is a powerful preservative that inhibits the growth of bacteria, molds, and other microorganisms that cause spoilage. It involves coating the meat with a layer of salt or submerging it in a salt solution, which inhibits the meat and slows down water activity (Aw) for unwanted bacteria.
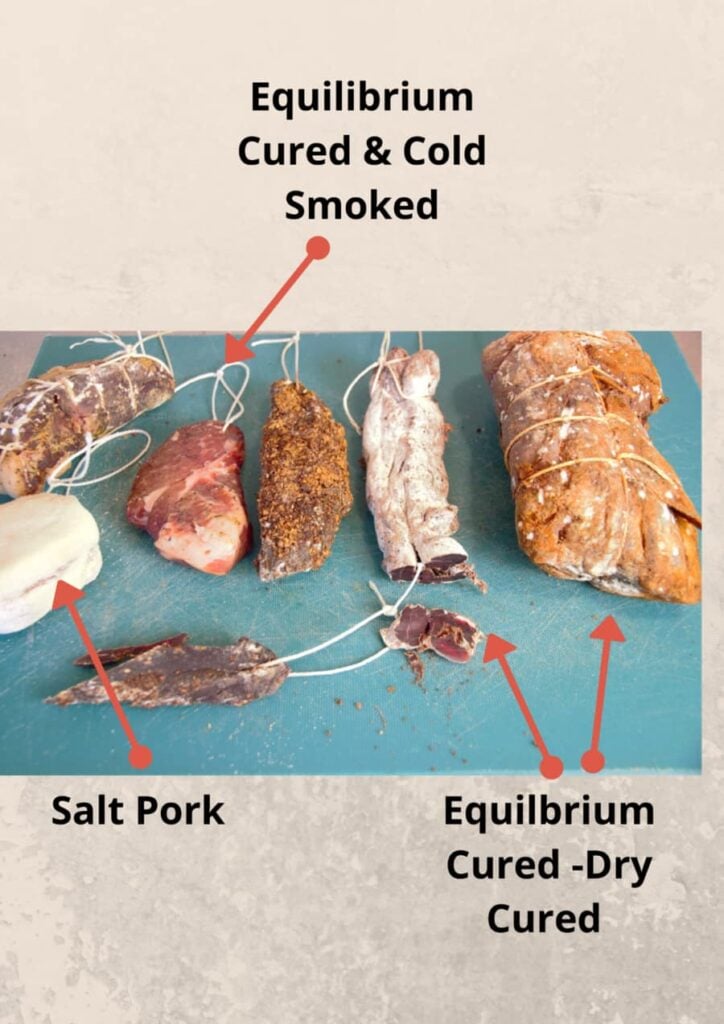
Salt can be used lightly or heavily to achieve different levels of preservation with meat, as you see in the picture above.
Different Ways to Preserve with Salt
- Dry Curing (for Dry Cured Meats)
- Wet Brining
- Saturation Salt Curing (for Salt Pork, Salt Fish)
Dry Curing Meats at Home
I’ve been practicing and learning about preserved dry-cured meats at home for decades; the main two scientific processes are salt binding and diffusion. Salt can stop some water activity; hence, unwanted bacteria will grow slower.
This is my preferred method of preserving meat. It lasts a long time, tastes very good, and can be stored for years with some care.
Different levels of salt will also affect the meat differently.
Tens of thousands of years have led us to the refining of this process into art, craft, and science (in my opinion)
3000 BC, preserving meat has been shown on records. I wrote this article if you’re interested in the history of preserved and cured meats.
Resources on Dry Curing Meat at Home
You can do small meat projects in a typical kitchen fridge I’ve found, if the temperature was similar outside the fridge – you could achieve similar results also.
I wrote this popular article about using a regular kitchen fridge or not to cure and preserve meat.
Wet Brining Meats at Home
For example, in dry curing, you want to use a saltwater mixture (brining, wet curing, wet brining) to inhibit the meat.
Salt takes time to ‘travel’ to the center of the meat when preserving, whether with dry or wet curing.
Meat that isn’t as thick will be able to cure or dry a lot quicker.
Salt brining can be used for a more dried or cold smoked product like:
Smoked salt-brined herrings, sardines, and oil anchovies are all labor- and equipment-intense projects.
For at-home meat preserving, I often prefer dry curing vs. wet brining.
Wet cure brining can also be used to hold moisture on the surface of the meat for cooking or hot smoking, such as:
Wet Brining a Turkey or Chicken for Roasting or Hot Smoking
Nowadays I use a meat syringe for this task, it speeds up the penetration of the wet brine into the meat. The commercial version of this is called needle injection, which is done for bacon and many other cured products you can buy.
I’ve used very strong wet brine, with a lot of salt (80-degree Baum salt levels) to quickly bring a large number of fish from a good day out. Then, we hot-smoked the fish after drying it out to form a pellicle (a key step when hot or cold smoking).
For smoked and cooked ham, you can wet or dry-cure the meat.
Dry Curing is more intense, especially if you add spices and aromatics
Wet Curing is more subtle, from my experience.
I wrote this about curing with dry or wet methods.
Saturation Dry Curing Meats at Home
‘Saturated dry curing’ is fully salt-saturated for the meat for complete preservation.
Examples of this are Salt Fish, Salt Pork, and Salt Beef.
They are commercially available in Western culture and come in a vacuum-packed wet brined – this is a ‘commercial’ version that isn’t preserved sometimes for the long-term outcomes.
Salted meat was used in long ship voyages to explore and discover the world. The salted meat was able to be stored onboard the ship without refrigeration.
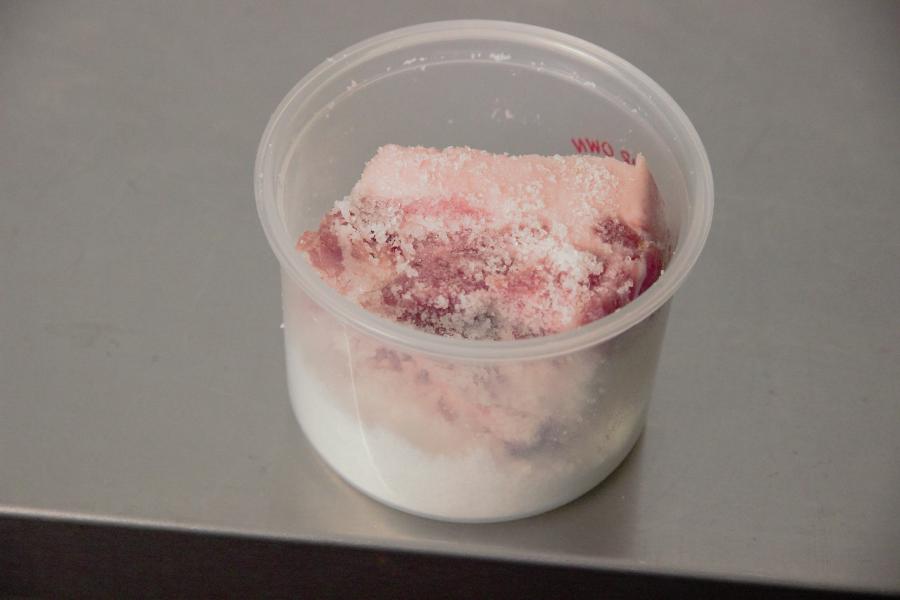
Saturating the meat with salt is one of the best ways to slow down the unwanted bacteria from spoiling meat.
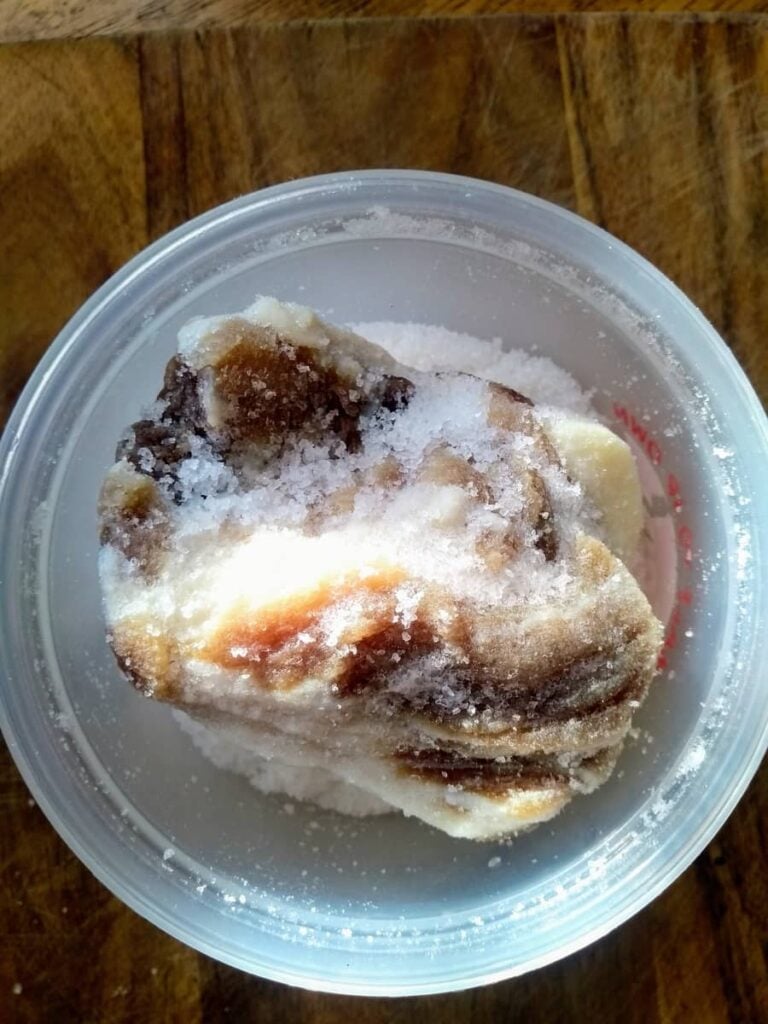
I made salt pork (recipe link here), which looked like this.
It was excellent. The salt and drying process has removed much of the 70% water content, likely 50-60%. Also, fat contains less water, which means it doesn’t shrink as much when saturated salting (also known as the excess salt method).
I wrote this about salt pork preservation.
Preserving vs Holding Moisture Whilst Cooking or Smoking
You can hold moisture on the surface when the meat is cooked; this is done by salting the cooked meat.
You may already be using this method at home, it’s not preserving – just another way to use salt for a desired outcome.
Done for cooking steaks, for ‘dry brining’ turkey – which technically is not a very good description in my eyes since a ‘brine’ should be a liquid base.
Types of Salt for Preserving Meat at Home
Pure sea salt is preferred because it has no additives that affect curing.
Iodized salt or salt with anti-caking agents can lead to undesirable effects when curing/brining meat for longer-term projects, which are more than 1 week.
Sodium Nitrates and Nitrites
For at-home use, a retail product called ‘pink curing salt’ (Number 1 or Number 2) is available in many countries worldwide.
Other names for this are:
- Instacure (Number 1 or 2)
- Tinting Curing Mix (TCM) – (Number 1 or 2)
- Prague Powder (Number 1 or 2)
Himalayan Pink Salt
It is not pink-curing salt; it does not contain sodium nitrates and nitrites. The color comes from many of the minerals in this salt.
Simple Techniques You Can Use to Preserve Meat at Home
- Dry Salt Curing to Make Salt Pork, Salt Beef, Salt Fish (long-term preserving)
- Dy Salt Curing for Dry Cured Meat in a Kitchen Fridge or Cellar (medium-term preserving)
- Salting Oily Fish to Create Lox, Gravlax (short-term preserving)
- Dry Curing Bacon and Hot Smoking to M(medium-term preserving)
Fermentation
Lactic acid is used to ferment at home. Often, the first step will be salt curing/brining, then fermentation.
This definition is an accurate description,
One ancient form of food preservation used in the meat industry is fermentation. Fermentation involves the addition of certain harmless bacteria to meat. These fermenting bacteria produce acid as they grow, lowering the pH of the meat and inhibiting the growth of many pathogenic microorganisms.
Meat Processing, Britannica
Different Ways of Fermenting Meat at Home
Fermented fish products across the Philippines, China, and Japan (many other Asian countries) are mainly sauces and paste/spreads.
Short-term beef fermentation at home can be achieved like Nen Chua (cured fermented minced/ground beef). This will last about 1 week in the fridge.
Fermented products across Europe or Western countries often contain lactic acid for taste and preservation in salami or dry-cured whole muscle meats.
As I’ve been writing this, I would say all dry-cured meats have some level of fermentation. WIth traditionally made dry-cured meats.
Fermentation is mainly secondary to a salt cure/brine. It’s another layer of protection that can be used to preserve meat at home.
Common Beneficial Bacteria
Behind the scenes of meat fermentation, a diverse community of beneficial bacteria performs their magic!
Let’s explore some of the good bacteria:
Lactic Acid Bacteria (LAB): These superstar bacteria play a vital role in meat fermentation. They convert sugars into lactic acid, preserving the meat and enhancing its flavors. Strains like Lactobacillus and Pediococcus are commonly used in various fermentation methods.
Like in French cheeses, some commercial yogurts, and Sauerkraut (fermented cabbage)
For preserving meat in the past, certain natural strains in salami-producing regions of Italy have been known for their distinct flavor because of their naturally occurring flora.
Nowadays, for at-home preservation, you can buy standardized starter cultures of lactic acid strains in various countries. The above picture shows ‘natural’ strains that were present around the meat and grew due to the salt keeping unwanted bacteria away (a suitable environment for dry cure helps, too).
Starter Culture
Utilizing a starter culture introduces specific strains of LAB to kick-start the fermentation process. I use these cultures to achieve different results and create unique flavor profiles with dry-cured salami.
The main fermented dry cured salami cultures category is slow fermentation or fast fermentation. Fast fermentation often has a tangy/sour taste; you may have experienced this with some salami.
Although, cheap salamis sometimes use additives to quickly drop pH and make meat shelf stable (days to make not months like traditional dry-cured salami).
Natural Good Bacteria & Buying/Inoculating
In the realm of fermenting meat, natural lactic acid fermentation is a time-honored technique that relies on the meat’s microbial population.
I visited a commercial operator called ‘Smoking Goose’ in Indianapolis, showcased where they ferment whole muscle cured meats for 20 days in favorable conditions, moist and warmer than dry chambers.
This helps flavor as well as preservation. From what I understand, this is a process where the natural LABs in the meat digest the sugars in the meat.
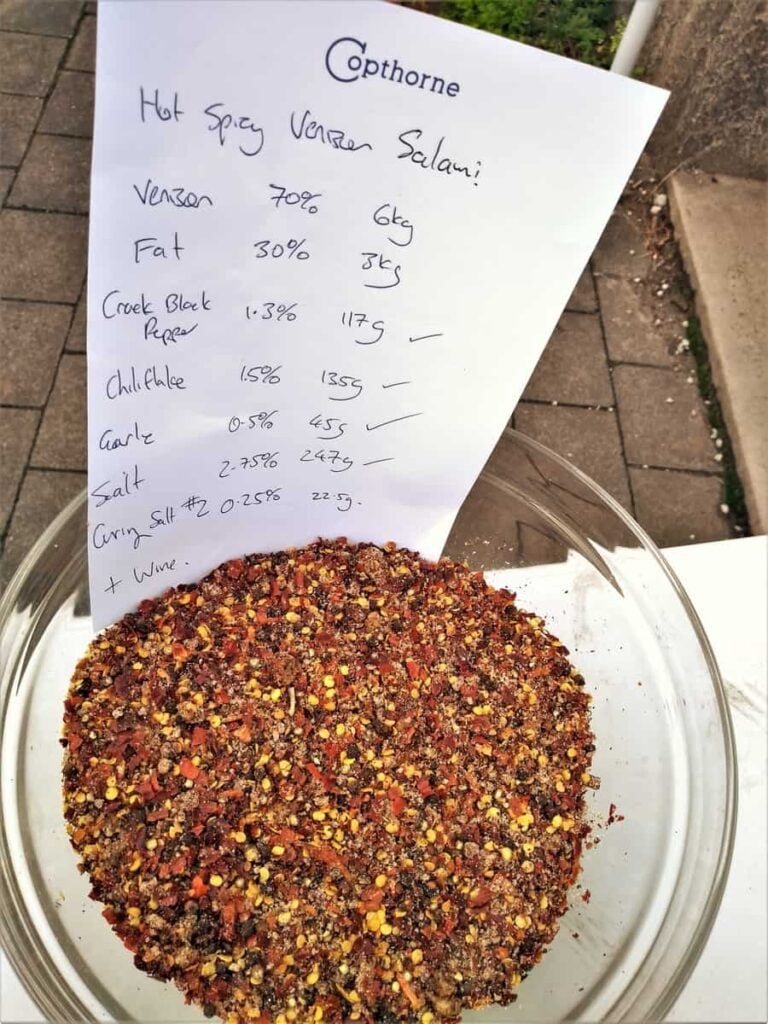
Another example is when I once made dry cured salami, I inoculated some with starter cultures (more on this below), whilst I also added red wine to one, and added nothing to another. All the salamis dropped the pH, the natural lactic acid was operating inside all of the salami, you can see this in the table below:
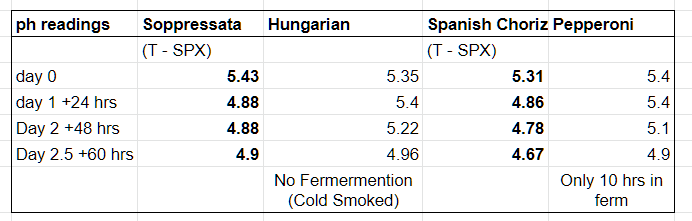
As the meat undergoes fermentation, the present beneficial bacteria transform sugars into lactic acid, acting as a natural preservative. This process extends the meat’s shelf life and bestows it with a complex and tangy flavor that is hard to resist for most!
Buying/Inoculating with Starter Cultures
Technically, but if you want to get consistently preserved fermented dry cured salami, this is important.
Different styles of good lactic acid bacteria are captured and standardized in the laboratory for use at home or commercial for preserved cured meats:
- Bactoferm T-SPX: Bactoferm T-SPX is a popular starter culture for salami. It contains a blend of Staphylococcus carnosus and Lactobacillus sakei, contributing to flavor development, acidification, and preservation.
- Bactoferm F-RM-52: This starter culture consists of a mix of Staphylococcus xylosus and Lactobacillus sakei. It promotes a slow fermentation process, resulting in the development of traditional flavors and textures in salami.
- B-LC-007: B-LC-007 is a freeze-dried starter culture containing a specific strain of Lactobacillus curvatus. It contributes to acidification, enhances flavor, and helps control undesirable bacteria.
- FLORA™ Italia: FLORA™ Italia is a blend of lactic acid bacteria, including Lactobacillus sakei, Staphylococcus xylosus, and Pediococcus acidilactici. It aids in acidification, flavor development, and the inhibition of pathogens in fermented sausages.
These starter cultures can be purchased from specialized suppliers or online retailers that cater to home charcuterie enthusiasts.
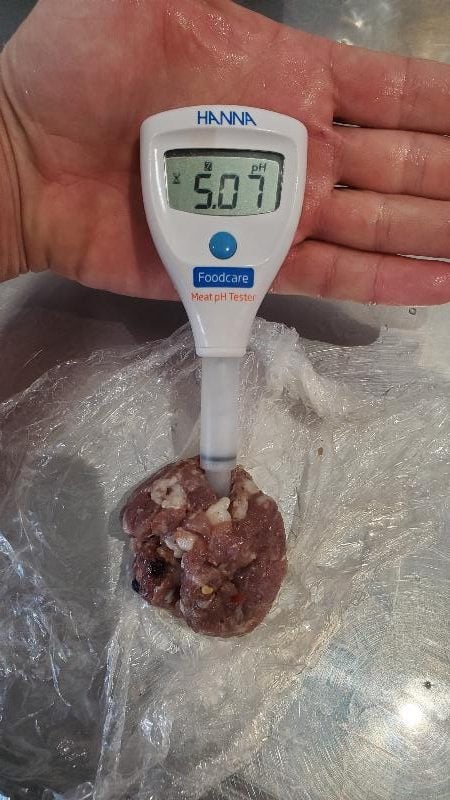
These are kept in a freezer in a small sachet, then you rehydrate them and add them to the mix when making certain styles of dry-cured salami. Adding them and measuring the pH is the foolproof way to achieve more consistent results.
For most folks that ask, I’ll first recommend whole muscle dry curing to preserve meat at home. Salami is more complex to master.
If you’re interested in dry curing at-home meat for preservation and flavor, I wrote an article about the joys I get out of it here.
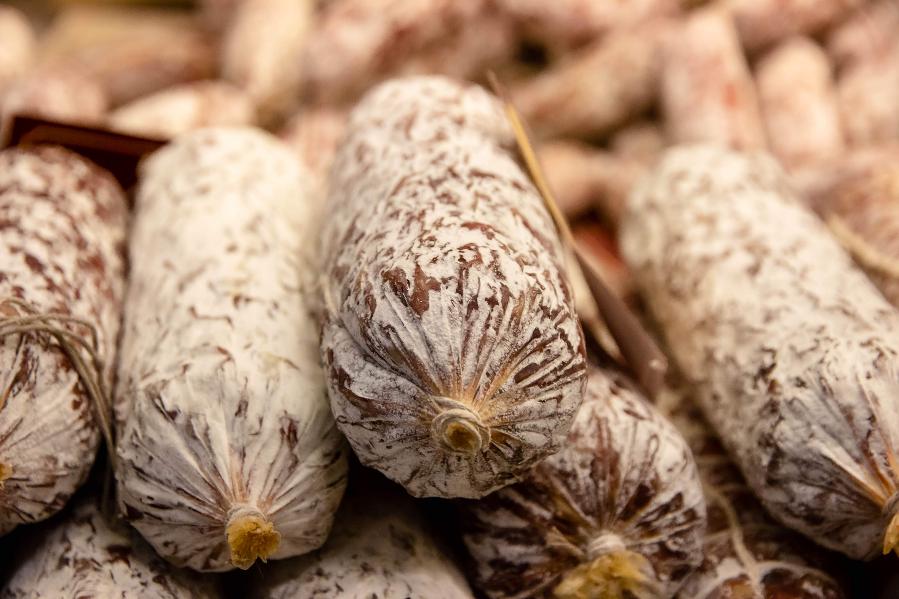
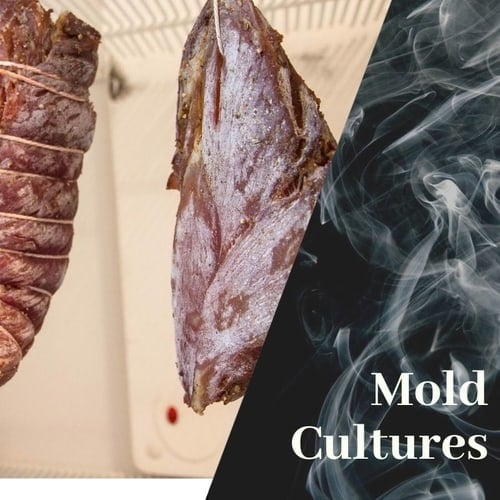
Natural White Mold Penicillin on Salami
The white mold commonly seen on dry-cured salami is typically a species called Penicillium nalgiovense.
The above is fermentation internally in meat, the following is an exterior protection. This specific mold is beneficial and desired in the traditional salami fermented curing.
Here’s why:
- Flavor development: The white mold contributes to the development of unique flavors in cured meat. It helps break down proteins and fats, contributing to the complex aroma and taste of the salami.
- Natural protection: The growth of Penicillium nalgiovense creates a protective layer on the surface of the salami, inhibiting the growth of harmful bacteria and molds that could spoil the meat.
- Moisture regulation: The mold helps regulate moisture on the surface of the salami, promoting an ideal environment for the curing process. It aids in maintaining proper moisture levels, preventing excessive drying or moisture retention.
At home, you can naturally ‘grow’ the good mold on your meat or meat casings – or you can buy a laboratory-created ‘culture’ which can be placed onto the meat before drying and weight loss begins.
Many ‘salamis’ you will find in supermarkets are produced quickly using acidity to kill off unwanted bacteria. These will often be seen without white mold – they are not a traditional dry-cured salami, which can take 1 to 6 months to dry and complete.
This can be one of the most rewarding ways to preserve and eat meat at home, though it’s definitely in an advanced meat-preserving at-home category!
Acidity
Above, I mentioned changing acidity with fermentation. You can also use acidity such as vinegar or citrus (lemon or lime) to lower the pH, therefore creating an acidic environment.
Short-term types of ‘pickling’ meat to preserve at home are Corned Silverside and Beef. Pastrami – short term preserving for a few weeks in a refrigerated area.
Whilst Pickling meat with pressure cooking/sterilization can last months.
Vinegar and Preserving Meat
Type of Pickling Meat & Shelf Life
This is a generic and approximate table since so many variations of this preserving at home exist.
| Type of Pickling | Shelf Life |
|---|---|
| Quick Pickling | 1 to 2 weeks |
| Meat Pickled in Vinegar | 1 to 6 months |
| Fermented Pickled Meat | 3 months to over a year |
With pickling, you are lowering the pH of the meat, either with or without beneficial bacteria.
Fermented Pickling: …… lacto-fermentation. This method relies on beneficial bacteria, specifically lactic acid bacteria, to ferment the food. These bacteria convert sugars into lactic acid, which acts as a natural preservative and creates a tangy flavor. Fermented pickling usually requires a longer fermentation period, ranging from several days to weeks or even months, depending on the recipe and desired flavor profile.
AI answer, with my help
Also, at home, I make a South African preserved meat called ‘Biltong’, which is a salt, acidic, dried preserved meat product.
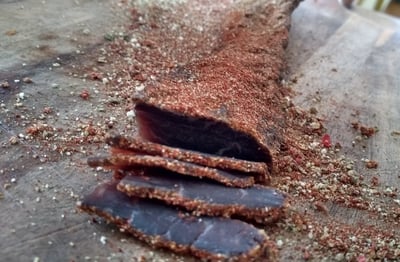
Worcestershire Sauce and Vinegar (malt often) are used with salt and spices. Some recipes also include cold smoking, then it’s dried either in a ‘drying box’, drying chamber, or oven at a very low temperature (with the door slightly open).
I wrote a post about making preserved biltong here.
It takes under a week to make and lasts 2-4 weeks. You can vacuum seal it, and it will last many months, when oxygen has been removed from packaging.
Many at-home biltong makers use a box with a 40-60W bulb for heat and a fan to circulate and dry.
It’s a very dry, preserved meat made out of many different types of animals in South Africa.
Smoke
You can also use campfire smoke to preserve meat; the distance between fire and meat must be enough for the smoke vapor to cool. This creates a ‘cold smoke’ and air-drying effect to preserve the meat. However, I prefer to have salt added as a precaution for preserving meat.
This is more of a survival preservation technique than something someone regularly does at home. Unless your home is rural or in a forest!
Since it has a drying effect, smoke preserving is done with cold smoke, not warm or hot smoke. Hot Smoked / Pickled meat like pastrami, can last 2 weeks refrigerated
Cold smoke is a vapor in a humid environment (60-80%), with a temperature under 30°C/86°F. It focuses on drying, and the cold smoke vapor flavors carry the beneficial properties of being antifungal and antibacterial.
This is because approximately 86°F/30°C pork fat begins to melt, and fish slowly starts to cook.
The first stage of cold-smoking meat at home is preserving it with salt to cure it.
So, really, cold smoke is part of the more consistent way of preserving meat at home – it’s like another layer of protection.
Helpful Links
My video below highlights key aspects of successfully cold-smoking food, including preservation.
Air Drying/Dehydrating
In certain Central and South East Asian cultures, seafood is directly placed in the sun on racks.
Some people make DIY dehydrated meat for hiking, camping, or other reasons.
Although you can dehydrate directly in a dehydrator, the USDA recommends cooking the meat first and then dehydrating it.
Traditional this was done without salt (like to info about drying without salt). Dried fruit was added to very dry meat/fat and mashed together by the Native American Indians; this was used as a traveling meal, more info on Pemmican here.
This type of preservation can make meat last years, especially if in a vacuum-packed bag, even without refrigeration.
Helpful Links
Here is a link to a summary write up – dehydrated meat
Here is a write-up from a commercial dehydrating site.
Freezing
A common approach used in many Western households, whether in a bag or vacuum packed, the meat will be well preserved and last several months; in my experience, it can be several years.
Here are some tables illustrating times for preserving different types of meat in the freezer as a rough guide.
Preserving Meat in Freezer Storage Guide
| Meat | Storage Time (Bagged) | Storage Time (Vacuum-Packed) |
|---|---|---|
| Beef (Steaks) | 6-12 months | 12-18 months |
| Beef (Ground) | 3-4 months | 6-8 months |
| Chicken (Pieces) | 9-12 months | 12-18 months |
| Chicken (Whole) | 1 year or more | 2 years or more |
| Pork (Chops) | 4-6 months | 6-8 months |
| Pork (Roasts) | 4-12 months | 12-18 months |
| Lamb (Chops) | 6-9 months | 9-12 months |
| Lamb (Roasts) | 6-12 months | 12-18 months |
| Fish (Lean) | 6 months | 12 months |
| Fish (Fatty) | 2-3 months | 4-6 months |
Temperature – Fridge
Again, a common approach is for fresh meats that can be preserved for a short period.
Here is a table illustrating various types of meat and approximate times.
Please note – this is based on my experience. The level of freshness of the meat, how it was stored before being placed in the fridge, and the number of harmful bacteria before – will all affect these approximations.
| Type of Meat | Bagged (Refrigerator Storage Time) | Vacuum-Packed (Refrigerator Storage Time) |
|---|---|---|
| Chicken | 1-3 days | 4-7 days |
| Beef (Steaks) | 3-5 days | 1-3 weeks |
| Beef (Ground) | 1-2 days | 5-7 days |
| Pork | 2-5 days | 1-2 weeks |
| Lamb | 3-5 days | 1-2 weeks |
| Fish | 1-2 days | 3-6 days |
| Shellfish | 1-2 days | 2-3 days |
Canning (Thermal Processing)
What is Canning?
Canning is a preservation method that involves sealing meat and other foods in airtight containers, typically glass jars, to create a vacuum-sealed environment. Either with pasteurization or a sterilization method. This prevents the growth of spoilage-causing microorganisms, providing long-term stability to the preserved meat.
From my research, I found that the technical commercial name for canning is thermal processing.
At home, we sterilized the dishes for preservation.
Pasteurization vs. Sterilizing at Home
Regarding canning, two key terms often pop up: pasteurization and sterilization.
Let’s differentiate between these methods and understand their implications for home canning.
Pasteurization: Pasteurization involves heating the canned meat to a specific temperature that kills harmful bacteria, yeast, and molds, while still retaining the quality of the product.
It eliminates most spoilage-causing microorganisms, rendering the meat safe for consumption.
Pasteurization is commonly used for low-acid foods such as meat and is achieved through precise time and temperature control.
Sterilizing: Sterilization takes preservation to the next level by subjecting the canned meat to higher temperatures for a more extended period. This process eradicates nearly all microorganisms, including spores, ensuring long-term shelf stability.
Sterilization is often required for high-acid foods or when long-term storage without refrigeration is desired.
Canning is an involved process, here are some points about preserving that are key.
Important Aspects of Canning at Home
- Quality and Freshness: Start with high-quality, fresh meat. It’s vital to work with fresh cuts, free from any signs of spoilage or degradation, to achieve the best results in terms of taste and safety.
- Proper Preparation: Thoroughly clean and sanitize all equipment, including jars, lids, and utensils, to maintain a sterile environment. Follow recommended food safety guidelines to prevent cross-contamination and ensure hygienic practices throughout the canning process.
- Recipe and Processing Time: Use trusted canning recipes that provide precise processing times and temperatures instructions. These recipes take into account factors such as the type of meat, jar size, and altitude to ensure safe and effective preservation.
- Pressure Canning Equipment: Invest in a reliable pressure canner designed explicitly for canning meat. Pressure canning is essential to achieve the high temperatures required for sterilization and eliminate the risk of botulism.
- Labeling and Storage: Label your canned meat with the date and contents. Store the jars in a cool, dark, and dry place, away from direct sunlight or extreme temperatures. Regularly inspect the jars for any signs of spoil
Helpful Links to Preserving Meat by Canning at Home
I’ve previously work below with the article creator, she does know the topic well.
It’s worth following her guidelines.
https://practicalselfreliance.com/canning-meat/
Secondary Measures for Preserving
I wanted to highlight some information about preserving meat that isn’t discussed much.
The secondary aspects aren’t often primarily preserving but can assist the main aspects like salt curing.
Spices and Herbs
While spices and herbs themselves do not possess the ability to preserve meat directly, they can play a role in meat preservation by providing antimicrobial properties and contributing to flavor development. Here’s how spices and herbs can contribute to preserving meat:
- Antimicrobial Properties: Many spices and herbs possess natural antimicrobial properties, which can inhibit the growth of bacteria, fungi, and other microorganisms on the meat’s surface. For example, ingredients like garlic, onion, oregano, thyme, and rosemary have been studied for their antimicrobial effects. They can complement other preservation methods and help delay spoilage.
- Meat Outside Protection: A barrier can help prevent moisture loss, protect against contamination, and potentially slow down the growth of microorganisms. Certain spices and herbs, such as cayenne, black pepper, and chili flakes, carry many beneficial properties.
It’s important to note that while spices and herbs can contribute to meat preservation, they should not be relied upon as the sole preservation method. Proper curing techniques, such as the use of salt, controlled temperature and humidity, and other proven preservation methods, are still essential for ensuring meat safety and longevity.
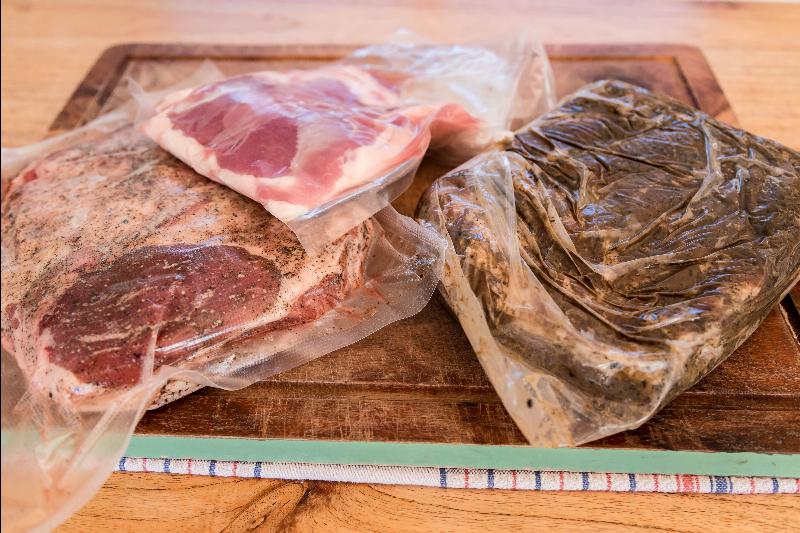
Removal of Oxygen
As you will see above in the tables about vac packed in fridges or freezers.
Vac-packed shorten the time meat can be preserved, this can be combined with salt, fridge temperature, freezing, thermal processing, spices, etc.
You can help preserve meat at home by inhibiting the growth of certain bacteria and microorganisms that require oxygen to thrive.
The removal of oxygen contributes to meat preservation by:
- Prevents Aerobic Spoilage: Many spoilage bacteria and molds are aerobic bacteria, requiring oxygen to grow and multiply. By removing oxygen from the meat’s environment, you create unfavorable conditions for these aerobic microorganisms, slowing down or preventing their growth. This helps extend the shelf life of the meat.
- Inhibits Oxidation: Oxygen exposure can lead to oxidation, which can cause changes in the meat’s color, flavor, and texture. Oxidation can result in rancidity and nutrient breakdown, compromising the meat’s quality. Removing oxygen helps minimize the oxidative processes, preserving the meat’s freshness and taste.
- Reduces Oxidative Spoilage Enzymes: Enzymes present in meat, such as oxidases, can react with oxygen and contribute to the spoilage process.
To remove oxygen and create an oxygen-free environment for meat preservation at home, here are a few common methods:
- Vacuum Sealing: Using a vacuum sealer, you can remove air from the packaging and create a sealed, oxygen-free environment around the meat. I’ve found reusable vac-pack bags for dry cured salami at home, rather than single-use vac-pack bags.
- Oil Immerison – Submerging meat in oil, can be done for steaks for instance, I’ve seen this used at commercial kitchens, the extra virgin olive oil is kept in the fridge, and the aged steaks could last up to 2 weeks.
It’s important to note that while removing oxygen helps preserve meat, it should be complemented with proper temperature control and other recommended storage practices. Maintaining low temperatures, refrigeration or freezing as necessary, and practicing good hygiene and sanitation are crucial for safe and successful meat preservation at home.
Vacuum Packed
Vacuum packing is a highly effective method for preserving meat due to its ability to create airtight packaging and remove oxygen from the surrounding environment.
If I have a large amount of meat, vac sealing the meat, the freezing will make it last many years (as long as there are no long power cuts) unless you have a generator.
Oil Immersion
Oil immersion is a preservation method that involves submerging meat in oil to create a protective barrier against oxygen, moisture, and microbial growth. This technique can help preserve meat at home in the following ways:
- Oxygen Exclusion
- Moisture Protection
- Microbial Inhibition
- Enhanced Flavor and Tenderness
Anchovies and sardines often come in cans of oil whether it’s sunflower, vegetable, or extra virgin olive oil. This can be done at home to preserve meat but would be an investment in time and money!
Oscar’s canned anchovies are salt brining and canned in oil (it’s a commercial product though).
I use this as an example of salt brining and oil immersion.
When using oil immersion for meat preservation at home, here are some important considerations:
- Choose a high-quality oil with a neutral flavor and a high smoke point, such as vegetable or canola.
- Ensure the meat is fully submerged in the oil, with no air pockets or exposed areas.
- Store the oil-immersed meat in a cool, dark place to prevent rancidity and maintain quality.
- Properly clean and sanitize the containers used for oil immersion to prevent cross-contamination.
You’ll find oil immersion is typically more suitable for short to medium-term preservation since we don’t have commercial sealing and canning well most of us don’t.
Always follow safe food handling practices and consult trusted sources or recipes for specific guidelines when using oil immersion as a meat preservation method.
Cheapest and Most Economical Methods for Preserving Meat
Economic way of meat preserving is thinly sliced meat and using the sun or campfire to dry the meat. Salt should ideally be used to create protection. Freezing is also effective and economical.
Traditional vs. Modern Methods of Meat Preservation
Nowadays we can combine the methods to create new ways of preserving meat at home.
| Traditional Methods | Modern Methods |
|---|---|
| Curing | Refrigeration |
| Smoking | Freezing |
| Drying/Dehydrating | Vacuum Packing |
| Fermentation |
Thanks fore reading, feel free to leave a comment.

Tom Mueller
For decades, immersed in studying, working, learning, and teaching the craft of meat curing, sharing the passion and showcasing the world of charcuterie and smoked meat. Read More