Some ways of preserving meat are very simple and low-tech. Others need equipment, planning, and control. After years of trial and error at home, I’ve found that combining techniques is what gives reliable, great-tasting results.
I’ve preserved a lot of meat at home using salt curing, drying, cold smoking, and long-term storage methods. I wrote this as a straight, practical guide you can actually use — not theory. The goal here is to help you choose the right method for what you want to preserve, how long you want it to last, and how much effort you’re prepared to put in.
How Meat Preservation at Home Actually Works
Every preservation method is trying to control one or more of these factors:
- Water activity (salt, drying)
- pH/acidity (fermentation, vinegar)
- Temperature (freezing, chilling, hot smoking)
- Oxygen exposure (vacuum sealing, fat or oil coverage)
- Heat processing (canning, hot smoking)
If you lower available moisture, lower pH, limit oxygen, or apply heat, you’re making it harder for unwanted microbes to take over. Most methods are not “one trick”. They layer together.
Core Preservation Methods (Overview)
Below is a high-level view of the main approaches used at home, along with what they do in simple terms.
| Method | What It Does |
|---|---|
| Salt | Pulls out moisture and lowers water activity so microbes can’t easily grow. |
| Fermentation | Vinegar or citrus directly lowers pH, making the surface less inviting to spoilage organisms. |
| Acidity | Vinegar or citrus directly lowers pH and makes the surface less inviting to spoilage organisms. |
| Smoke | Smoke adds antimicrobial compounds and supports surface drying. |
| Air-Drying / Dehydrating | Removes moisture in a controlled way. Less water = slower spoilage. |
| Freezing / Refrigeration | Cold slows down microbial activity. Vacuum sealing helps protect quality. |
| Canning / Thermal Processing | Heat process in sealed containers for shelf-stable storage when done correctly. |
Real-world examples of each method are below. Some are classic, some are modern home versions that use fridges, vacuum sealers, and decent thermometers.
| Method | Example |
|---|---|
| Salt | Pancetta, salt pork |
| Fermentation | Dry cured salami, saucisson sec |
| Acidity | Pickled sausages, vinegar-based preserved fish |
| Smoke | Smoked bacon, traditional smoked ham |
| Air-Drying / Dehydrating | Jerky, biltong |
| Freezing / Fridge Storage | Raw meat in vacuum-sealed packs, fresh sausages held cold |
| Canning / Thermal Processing | Canned corned-style beef, pâté in jars |
In practice, preservation usually isn’t just “one box”. The most reliable, longest-lasting meats I’ve made at home use at least two layers of control.
Combined Methods You Actually See in Real Food
| Combined Method | What’s Happening |
|---|---|
| Salt + Fermentation | Salt inhibits meat while lactic acid bacteria lower pH and add flavor. |
| Salt + Acidity | Salt inhibits meat. Adding acid (vinegar, wine) lowers the pH, providing another layer of control. |
| Salt + Fermentation + Cold Smoke | Multiple layers: controlled salt %, controlled pH, then cool smoke compounds and slow drying. |
| Salt + Hot Smoking | Salt cure first; then you cook with heat and smoke. Ready-to-eat style. |
| Salt + Air-Drying | Salt sets up the meat. Slow airflow and humidity management finish the drying. |
“Dried fish are often salted prior to drying and some products usually considered salted may also be partially fermented… Smoked fish are dried using smoke rather than sunlight, whereas fish sauce is a by-product of fish fermentation.”
Dried fish at the intersection of food science, economy, and culture
Salt & Curing Fundamentals
Salt is the backbone of traditional meat preservation. It can be applied dry (packed around the meat) or dissolved in water as a brine. Either way, the goal is the same: reduce the available water inside the meat so unwanted microbes lose their environment.
Different Ways to Use Salt
- Dry curing — rubbing or packing salt (and sometimes spices) directly on the meat and letting it cure under controlled conditions.
- Wet brining — soaking or injecting a saltwater solution so the salt works its way from the outside in.
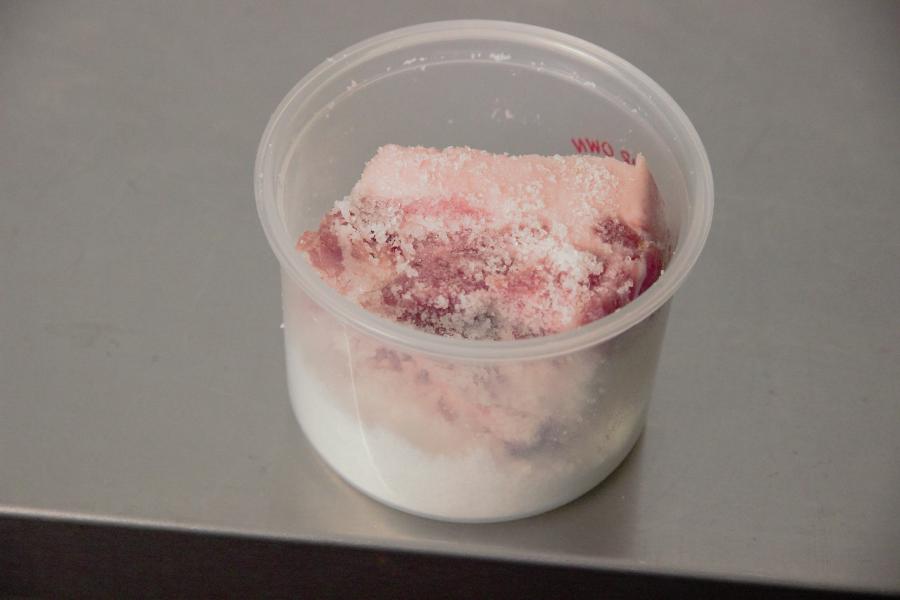
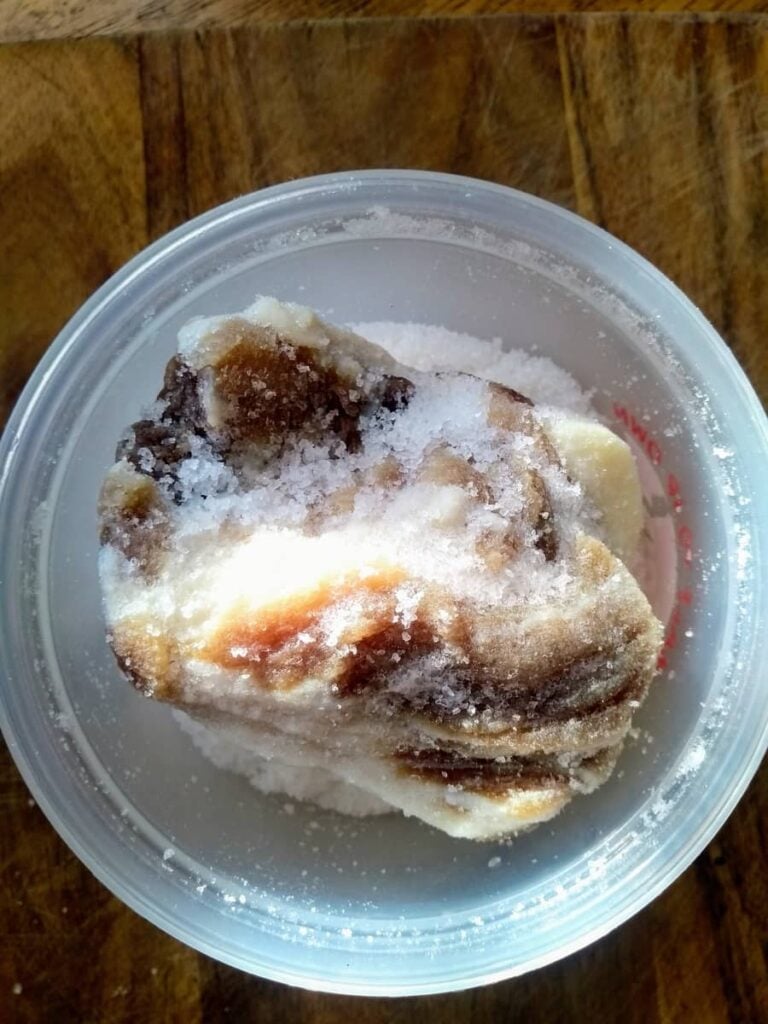
- Saturation curing — full burial in salt for a very firm, traditional preservation style like old-school salt pork or salt fish.
Salt amounts vary the effects, I made a video to elaborate on this here:
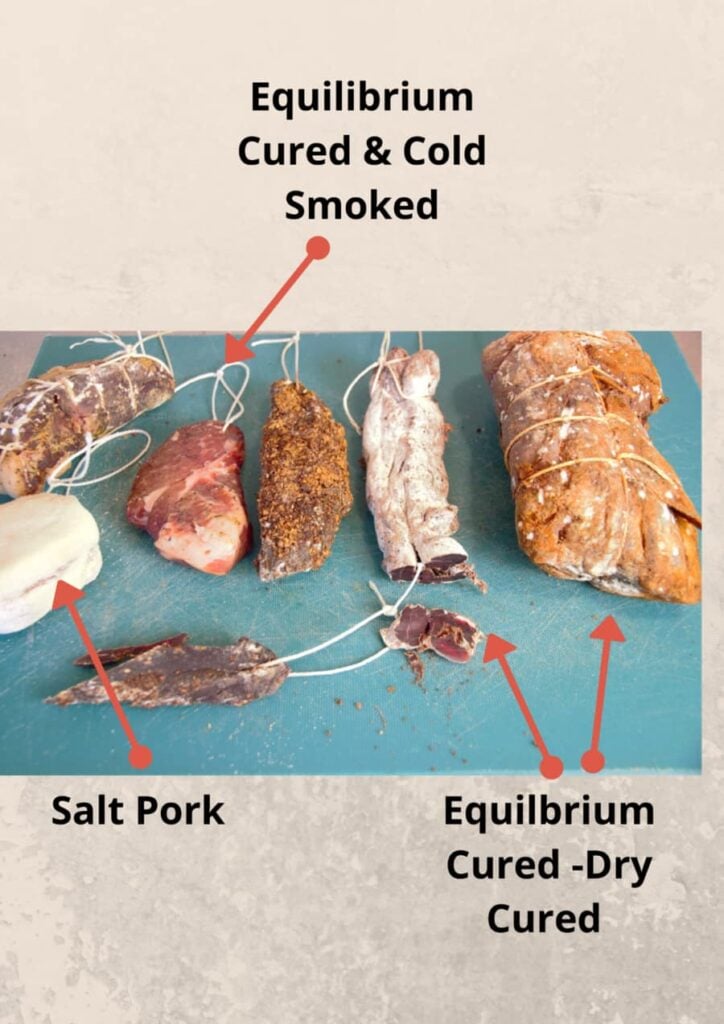
With dry curing, I often use what’s called “equilibrium curing”. That means I measure a calculated salt percentage based on the weight of the meat, apply it, and let the salt equalize all the way through. It’s predictable and repeatable.
Saturation curing is the other end of the spectrum. You surround the meat with a lot of salt and keep it there. It’s very old-school and very robust. This style is how people made salt pork and salt fish to sit for long periods.
Salt for Preservation vs Salt for Cooking
Sometimes people “salt meat” an hour or a day before cooking to help draw moisture to the surface and season deeper. That’s often called a dry brine on steaks or poultry, and it can make a big difference in texture and browning.
That is not preservation. That’s just good cooking prep. True preservation is about taking water activity down and keeping the meat stable over time, not just holding it overnight.
The Types of Salt I Use
Sea salt (preferred for longer projects): I choose clean sea salt with no added anti-caking agents when I’m doing longer cures. Additives can get in the way of how the cure behaves over weeks.
Table salt (with additives): Fine if I’m doing something short-term or I’m about to cook it. I don’t rely on it for multi-week or multi-month curing projects because of the additives and how aggressively it can taste in tight muscles.
Pink curing salt #1 / #2: This is where people get confused. Only curing salts contain nitrite (and for #2, nitrate as well). I treat these as optional tools. Generally, #1 is used for shorter cures (under roughly 30 days). #2 is used for longer dry-cured projects. They’re about style, control, and tradition.
Himalayan pink salt: It’s pink in color, but it’s just salt. It does not contain nitrite or nitrate. It is not a substitute for pink curing salt. I use it like sea salt for seasoning and for certain short-term or flavor-focused projects, not as a direct curing agent on something that needs the traditional nitrite/nitrate approach.
Fermentation
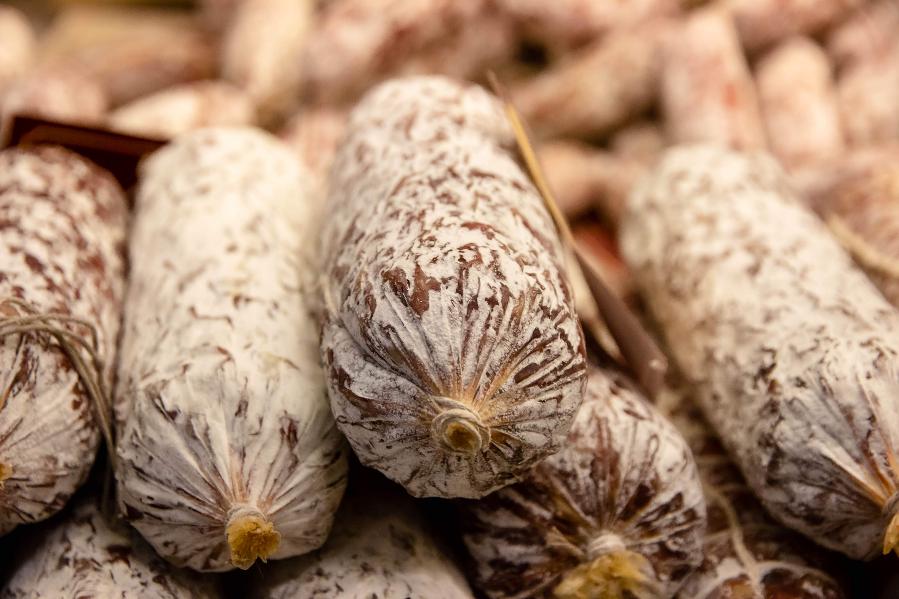
Fermentation is a living process that transforms texture and flavor while protecting the meat. Friendly lactic acid bacteria (LAB) consume sugars in the meat or spice mix and produce lactic acid. This acidification drops the pH, creating an environment that slows or stops spoilage microbes.
“Fermentation involves the addition of certain harmless bacteria to meat… These fermenting bacteria produce acid as they grow, lowering the pH and inhibiting many pathogens.”
Encyclopaedia Britannica — Meat Processing: Preservation
At home, I normally start with a salt cure and then ferment. This adds both flavor and security before the drying phase. Each starter culture has a different speed and flavor profile. A warmer, faster ferment gives a tangier flavor; a slower, cooler one builds subtle depth. Stable temperature and humidity are the difference between a consistent salami and one that fails.
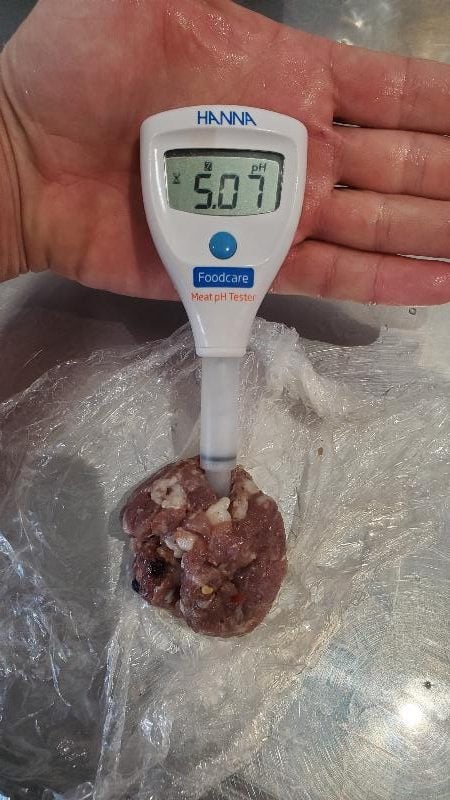
Common home cultures include T-SPX, F-RM-52, and B-LC-007. They’re stored frozen, rehydrated in water, and added to the mince during mixing. I like to verify each batch by testing pH before moving to drying — it shows that fermentation really happened, not just a guess.
For temperature and humidity control inside a curing chamber, see temperature & humidity for a meat-curing chamber.
Acidity (Pickling)
Acidic preservation has been used for centuries. Vinegar, wine, or citrus lowers pH and discourages spoilage. The technique suits shorter projects or cooked preparations such as corned beef, pastrami, or escabeche-style fish. It’s an approachable method if you want bright flavor and moderate shelf life without special gear.
| Type of Pickling | Approximate Shelf Life |
|---|---|
| Quick Pickling (in fridge) | 1 – 2 weeks |
| Meat fully pickled in vinegar | 1 – 6 months |
| Fermented pickled meat | 3 months – 1 year+ |
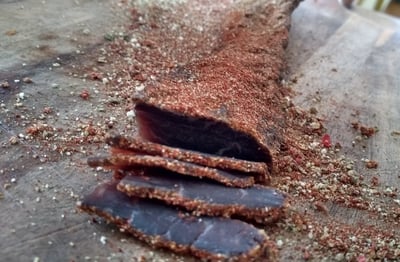
Biltong shows this combo clearly: salt for moisture reduction, vinegar for acidity, then airflow for drying. It’s ready in under a week and keeps for weeks longer when sealed and stored cool.
Smoke
Smoke adds both preservation and unmistakable flavor. The phenols and carbonyls in wood smoke have mild antimicrobial and antifungal properties, and smoke also helps form a dry surface that discourages mold growth.
Cold smoking is done below 30 °C / 86 °F after curing. The goal isn’t cooking — it’s layering smoky flavor and surface protection on an already salted product. Hot smoking both cooks and preserves briefly, great for ready-to-eat meats like smoked bacon or ham.
For a visual overview of my cold-smoking setup, here’s a video walk-through:
Air-Drying & Dehydrating
Drying is one of the oldest and simplest ways to make meat shelf-stable. By removing enough moisture, you take away what microbes need to grow. Sun-drying has been used for thousands of years; today we can control it with fans, dehumidifiers, or food dehydrators for safer, cleaner results.
Some authorities suggest lightly cooking meat before dehydrating for better safety margins, then drying until it reaches a stable texture. For reference, see How to Preserve Dehydrated Meat (summary).
Commercial drying operations simply scale up airflow and temperature control. A detailed example is this overview from Dehydrators America.
For home projects, I often hang smaller cuts in a regular fridge with managed airflow. This method for curing meat in a regular fridge is low-cost and surprisingly consistent for lean pieces.
Freezing & Refrigeration
Cold storage is the modern backbone of preservation. Freezers slow microbial activity almost to a stop, and fridges extend freshness when used correctly. Vacuum sealing reduces oxidation and freezer burn so flavor lasts much longer.
| Meat Type | Bagged in Freezer | Vacuum-Packed Freezer |
|---|---|---|
| Beef (Steaks) | 6 – 12 months | 12 – 18 months |
| Ground Beef | 3 – 4 months | 6 – 8 months |
| Chicken (Pieces) | 9 – 12 months | 12 – 18 months |
| Whole Chicken | 1 year+ | 2 years+ |
| Pork (Chops) | 4 – 6 months | 6 – 8 months |
| Pork (Roasts) | 4 – 12 months | 12 – 18 months |
| Lamb (Chops) | 6 – 9 months | 9 – 12 months |
| Fish (Lean) | ≈ 6 months | ≈ 12 months |
| Fish (Fatty) | 2 – 3 months | 4 – 6 months |
Inside the fridge, these timelines are shorter. Packaging and surface dryness make a big difference. A vacuum-sealed steak might last two weeks where an open one spoils in five days.
| Meat Type | Bagged in Fridge | Vacuum-Packed Fridge |
|---|---|---|
| Beef (Steaks) | 3 – 5 days | 1 – 3 weeks |
| Ground Beef | 1 – 2 days | 5 – 7 days |
| Pork (Chops or Roasts) | 2 – 5 days | 1 – 2 weeks |
| Chicken (Pieces) | 1 – 3 days | 4 – 7 days |
| Lamb | 3 – 5 days | 1 – 2 weeks |
| Fish | 1 – 2 days | 3 – 6 days |
When I dry-cure, I often vacuum-seal finished meats after drying. It locks in moisture balance and flavor. For the actual curing process, though, air movement is essential — you can’t vacuum-seal until the cure is done and the surface is firm.
Canning (Thermal Processing)
Canning uses heat to seal and stabilize food inside jars or tins. In the home context, meats are low-acid foods, so they require higher temperatures than boiling to become shelf-stable. That means pressure canning—not water bath—if you want to safely store cooked meat long term.
Pasteurization vs Sterilization
Pasteurization uses moderate heat to reduce microbes, which is fine for short storage under refrigeration. Sterilization goes further—sustained high pressure and heat that destroy heat-resistant spores so the food can sit at room temperature.
Home canning times and pressures depend on jar size, altitude, and contents. I always use tested reference charts from reputable sources. A reliable guide is Canning Meat at Home (Practical Self Reliance).
Combining Methods for Reliability
At home, layering preservation techniques is the most practical and consistent approach. Each layer adds insurance—salt for moisture control, acid or fermentation for pH, smoke or drying for texture and flavor, and temperature for stability.
Salt + Fermentation
I start with a measured salt cure, then let lactic bacteria do the pH work. That two-stage process gives me predictable salt levels and the complexity of a slow ferment. The details are in my complete guide to equilibrium curing.
Salt + Cold Smoking
After curing, I apply cool smoke below 30 °C / 86 °F. This adds surface drying and antimicrobial compounds without cooking. I treat smoke as a flavor and protective finish rather than the primary preservative.
Salt + Air-Drying
Once the cure has equalized, slow airflow at moderate humidity transforms the texture. For smaller cuts, this regular-fridge method works well if you monitor surface dryness and temperature closely.
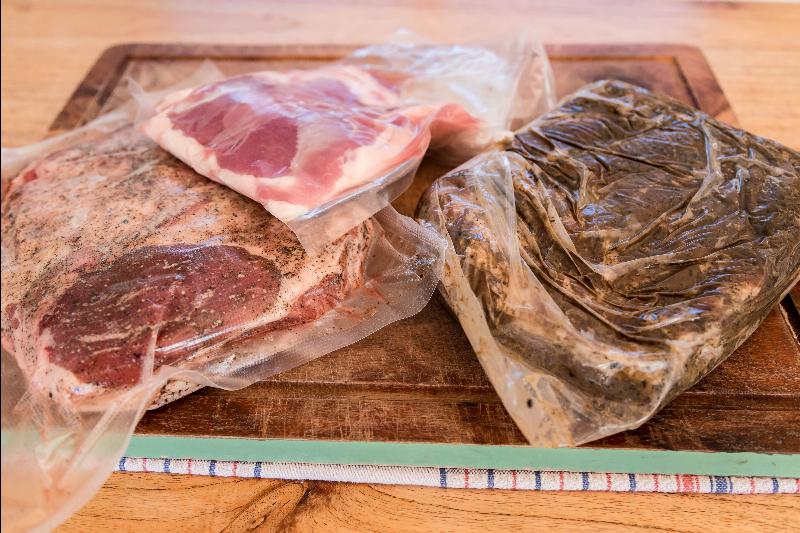
Salt + Acidity
Pairing salt with vinegar, wine, or citrus gives short- to medium-term safety. It’s perfect for corned cuts or pastrami styles that will be cooked. For long-term pantry preservation, I return to dry or saturation curing instead.
Salt + Hot Smoking (Cooked)
Hot smoking finishes the meat with heat while sealing in flavor. Think smoked bacon or cooked hams: they’re delicious and stable in the fridge for weeks. For longer storage, they can also be vacuum-sealed or frozen after cooling.
Practical Setups at Home
Regular Fridge Method
A standard refrigerator can double as a curing environment for small, lean cuts if you manage airflow. I often start beginners with this no-mod fridge method. It’s low-risk and inexpensive, yet teaches how salt, time, and air interact.
Simple Curing Chamber
For bigger projects like salami or whole muscles, a chamber gives precise humidity and temperature control. I use a fridge body with humidity and temperature controllers. Dialing these in prevents case-hardening and keeps color even. Guide: temperature & humidity for a meat-curing chamber.
Long-Term Pantry Option — Salt Pork
Excess-salt curing is still one of the most bulletproof methods. Fatty pork, sealed under salt, can last for months when stored cool and dry. My walkthrough is here: how to make salt pork at home.
Expert Tips
- Work clean — sanitize surfaces and keep raw and cured stages separate.
- Track weights and dates — consistency comes from recording salt %, start date, and weight loss.
- Balance airflow and humidity — too dry causes case-hardening; too humid causes spoilage.
- Use trusted ratios and references — don’t guess; rely on established curing percentages or official guides.
Alternatives & Modern Shortcuts
Modern tools like vacuum sealers, Inkbird controllers, and small dehydrators make preservation easier without changing fundamentals. For busy home setups, combining a good seal with cold storage gives professional-level results with minimal fuss.
What salt percentage works best for equilibrium curing?
It depends on the cut and style, but measuring by meat weight is key. For whole muscles I use 2.5–3% salt and track weight loss during drying for accuracy.
Can I preserve meat with smoke alone?
No. Always cure with salt first. Cold smoke adds protective compounds but is best as a secondary layer after salting or drying.
Can I dry-cure meat in a normal fridge?
Yes, for small and lean cuts. Maintain airflow and surface dryness, and monitor progress closely. It’s a great way to learn before building a full chamber.
Related In-Depth Guides
- Complete Guide to Equilibrium Curing
- How to Dry Cure Meat the Traditional Way
- How to Cure Meat in a Regular Fridge
- Temperature & Humidity for a Meat-Curing Chamber
- How to Make Salt Pork at Home (Recipe)
Got a question or result to share? Drop it in the comments — I read every one and love hearing how other home preservers approach their projects.

Tom Mueller
For decades, immersed in studying, working, learning, and teaching the craft of meat curing, sharing the passion and showcasing the world of charcuterie and smoked meat. Read More