This post is going to give you an overview of my online charcuterie course and aspects of what’s covered.
The methodology is summarized into one program with tools, recipes, and ‘cheatsheets’ for at-home charcuterie (including my secret ‘not so secret’ garlic & juniper bacon.
Combining traditional and modern techniques, there is nothing like this online, so it’s incredibly exciting to launch this!
It’s going to be easily accessible with dense videos and other materials to help a budding norcini beginner or charcuterier
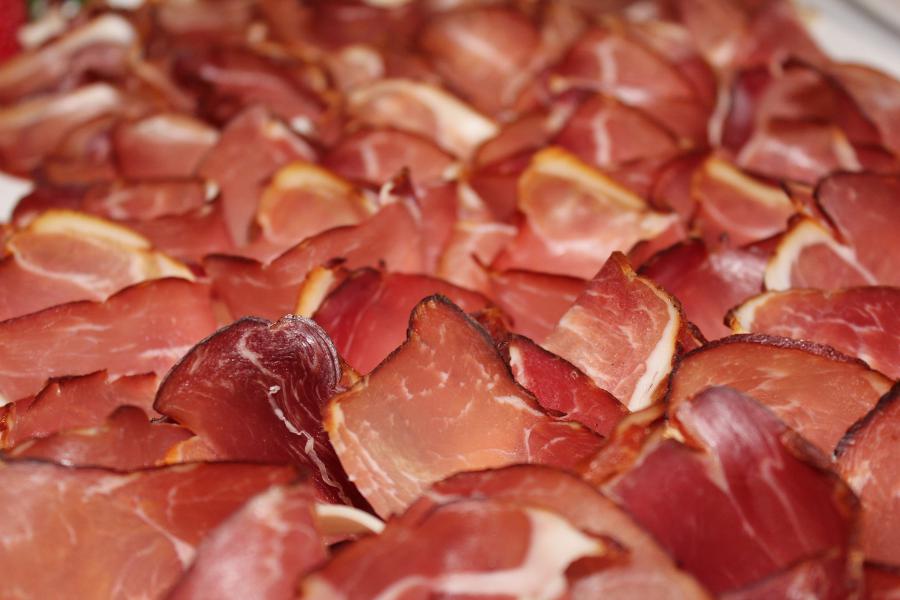
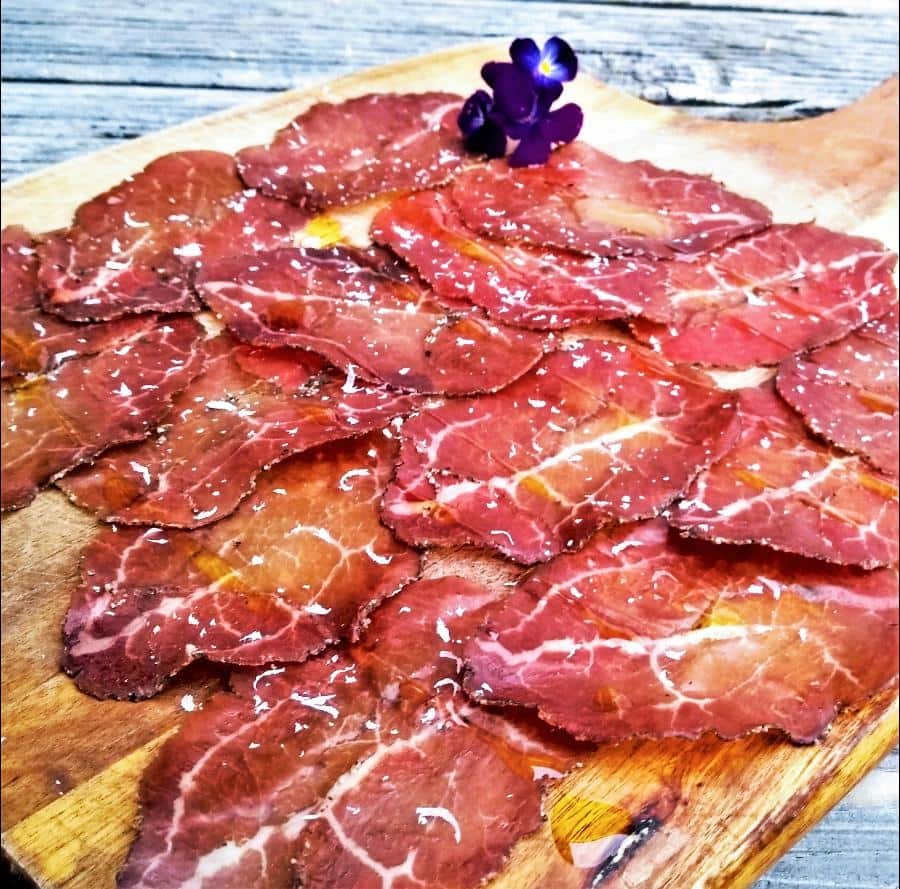
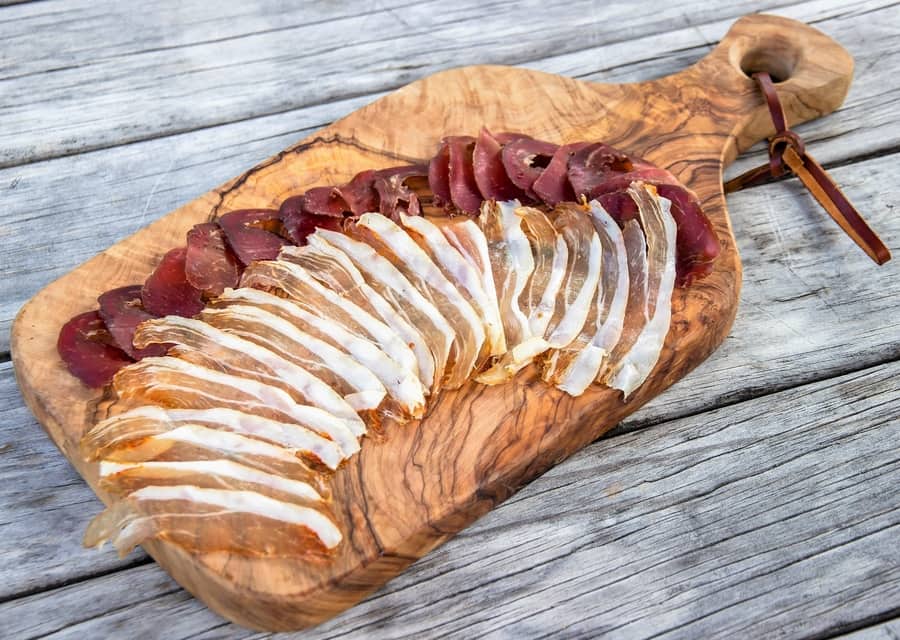
I have been dry-curing meat for about 15 years, studying it, and seeing how it’s done in professional kitchens and butchery establishments. Like anything, it’s just a process and once you get the theory right, you can start experimenting and exploring your flavors and styles.
However, it’s a ‘craft’ or some call it art. You can have everything as exact as you want, but you are still letting aspects of natural reactions like binding and diffusion play out to enhance and preserve the meat.
Cured meat is a fascinating ancient art, which I wish to bring to the modern world in a simple and easy-to-understand way.
So here is what the course will cover.
Online Charcuterie Course for Dry Curing Meat
- Preserving with Salt
- Charcuterie, Salami & Salumi – Italian Classic vs Modern
- Nitrates and Nitrites – Pink Curing Salt
- Combination of Salt, Time & the Craft
- Spices & the Subtleness
- Dry Curing Methods – Salt Box and Equilibrium Curing
- Quality of the Meat & What Meat to Use
- Meat Curing Equipment
- Classic Meat Cuts vs. Any Meat Cuts
- Temperature, Humidity & Dry Cured Charcuterie
- DIY Curing Chamber, Cellar or Kitchen Fridge
- Penicillin – White Mold – Your Friend
- Final Weight & Intensifying Flavor
- Importance of Wafer Thin Slicing
You’ll be able to see everything that will be included in detail, so this page is to ‘wet your appetite’ and see if it’s something you would want to find out more about.
1. Preserving with Salt
Importance of Salt
Salt is the cornerstone of preserving dry-cured meat.
It creates an environment where bad bacteria don’t like it, bad bacteria can’t survive, therefore meat won’t go off. Reducing moisture inside the meat is the key aspect of this. (And you’re intensifying flavor when it has dried as well).
This is the way meat is preserved before refrigeration, there are the coarse versions of dry curing, which give complete long-term preservation such as salt beef, salt fish, or salt pork (salt fish in all the fish markets with no cooling, just sitting on a table).
Many of these basic types of salt dry-cured meat were used on ship voyages across the world to discover and often conquer new lands.
The focus I have is on culinary enjoyment for the slowest and one of the magical forms of food preparation I think there is – dry curing meat.
Types of Salt
Sea salt with no additives has to be used for dry-curing meat.
Many salts, which are labeled table salts contain different forms of anticaking agents. These additives can have a negative effect on dry-curing meat and can ruin the whole project. If you have spent weeks or months on dry-curing meat. It’s incredibly important to get the ingredients right to start with, quality ingredients.
Sea salt is harvested with many different methods. There is also a plethora of brands on the market, what’s quite fascinating, is that the different brands and methods create different shapes of sea salt. These different shapes of sea salt also mean their volume may be the same, but the weight is different.
Ever wondered why the recipe you follow didn’t quite come out the way you wanted it to? Making curry, pasta, quiche or anything?
When the recipe includes teaspoons of tablespoons of salt, it may lead to inconsistent and unwanted results.
A light bulb went off in my head quite a few years ago when I realized that volume measuring in a recipe rather than weight was leading to inaccurate measurement and inconsistent results (using precise weight for meat curing is the way to go, more on this later).
But with meat curing there needs to be a high level of precision, especially with equilibrium curing – the precision at the start means you get more control over the outcomes, and you are ‘choosing your saltiness’ based on preference.
Certain types of salts are used widely in meat curing such as kosher salt, Trapani salt, etc.
2. Charcuterie, Salami & Salumi – Italian Classic vs Modern
This is where I have found there’s been quite a bit of confusion, especially with some of the generic information sites online targeting words like charcuterie but not having an understanding of it.
Charcuterie Boards are an evolution and marketing term that seems to have been developed from the lonely old meat and cheese platter.
A charcuterie board seems to have a very wide interpretation and it should I feel, since cooking is all about putting your own spin on things.
For me, my charcuterie boards are about having some form of dry-cured meat. If you can create your own dry-cured meat for the charcuterie board, I think it’s quite a special edition to the platter.
Here are a few of my homemade dry-cured creations.
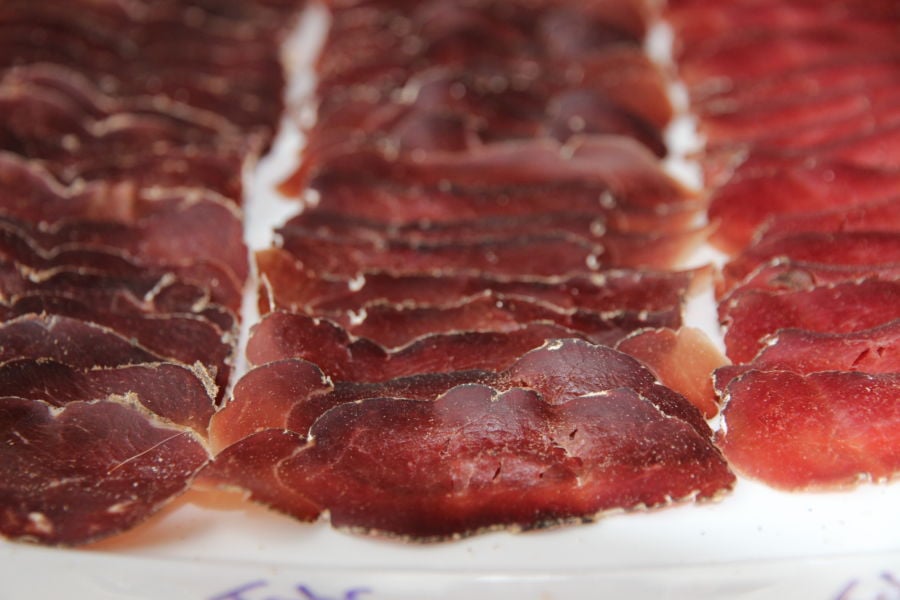
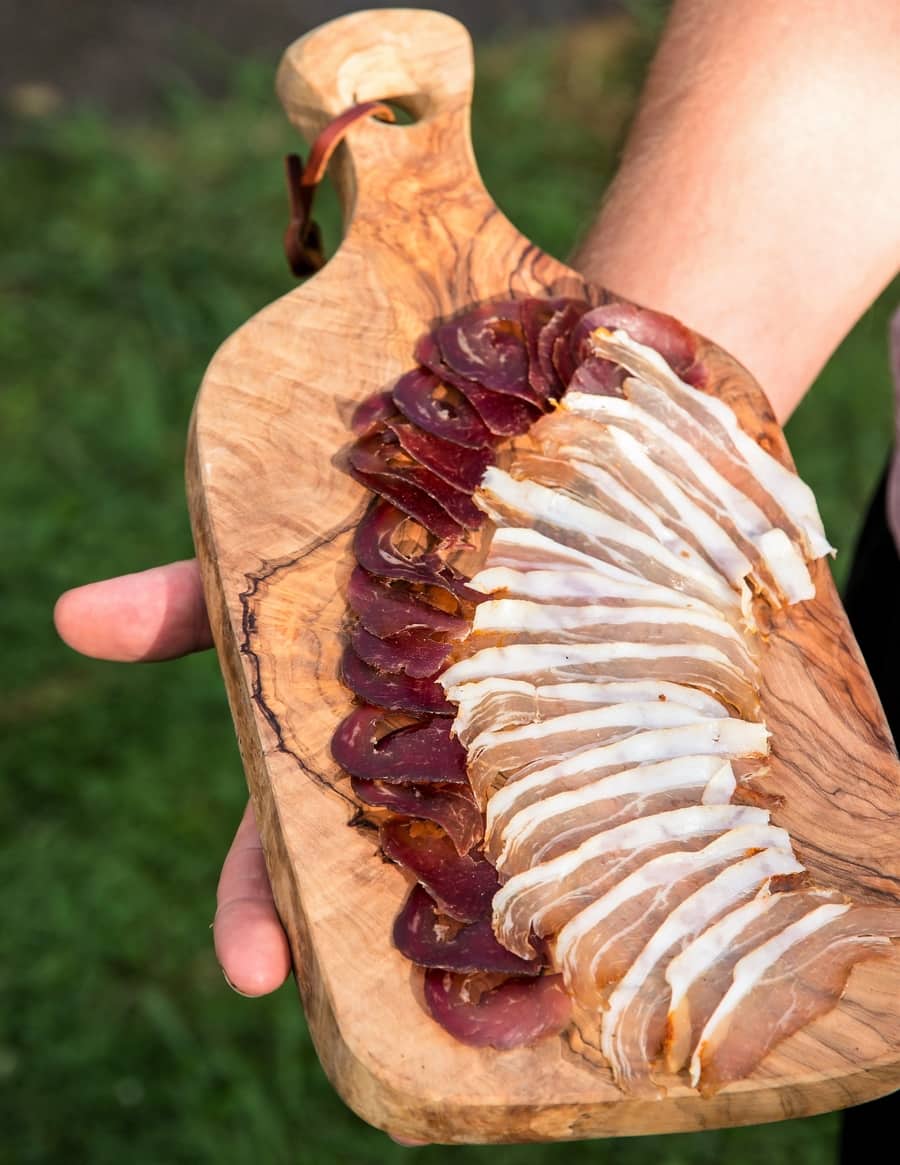
Salumi – Classic Italian Dry Cured Meat
Salumi is traditionally defined in Italian as the 7 major muscle groups that are used specifically for 7 dry-cured meat projects. Funnily enough, salami falls inside the salumi category, and bresaola which is a dry-cured beef cut falls inside salumi as well – easy!
Salumi is the craft of the Traditional Norcini – a traveling traditional Italian butcher, that would assist in creating dry-cured meats across the countryside. The best Norcini was from Norcia (I went there a few years ago, but it was after a recent major earthquake, and the town was still recovering).
Salami
There are two types of salami the dry-cured salami which is been fermented and then dried. This is probably the common one that you have seen with white powdery mold on the outside.
Then you have the different emulsified types of salami (cooked/uncooked salami I wrote about) like mortadella. Mortadella – I had in Sicily was encrusted with truffle and pistachios, hand-cut in the delicatessen with a 12-inch blade – just a normal part of life and Sicily – unreal and divine.
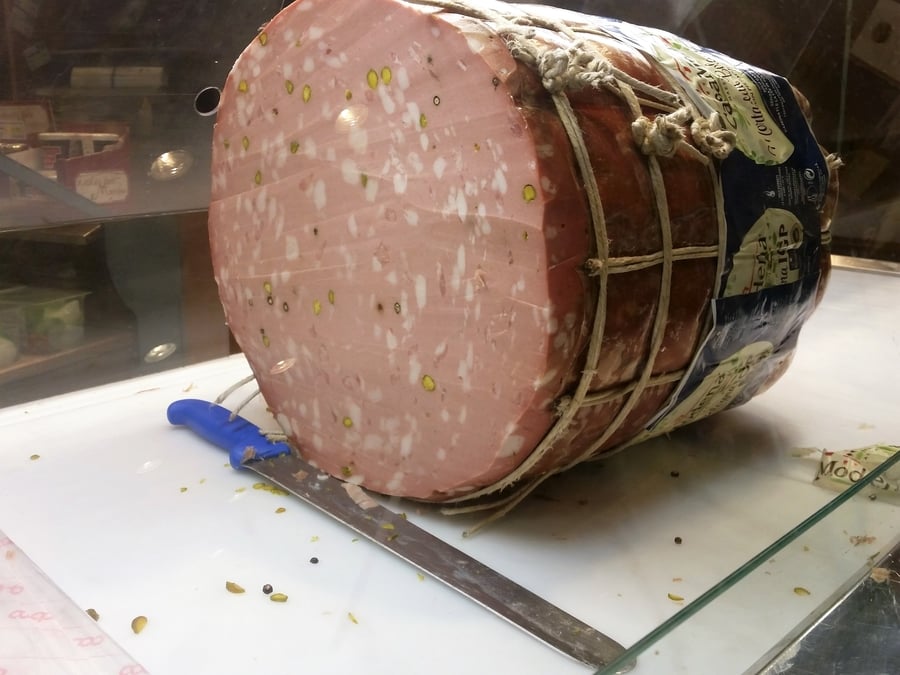
Salami is a little bit more tricky in terms of dry curing since you are trying to lower the acidity or pH level to create an inhospitable environment for bad bacteria.
When you’ve got minced meat, you have more surface area exposed which can lead to more chance of spoilage from bad bacteria (it can happen, though it’s never happened to me, knock on wood).
Fermentation isn’t necessary for all cultures when I have made cold-smoked Hungarian salami (translated recipe) for instance, there is no fermentation involved.
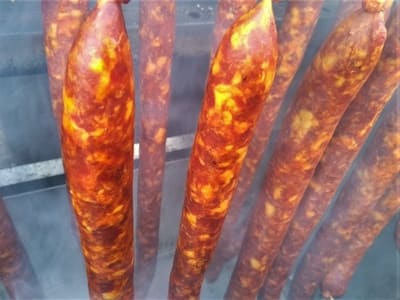
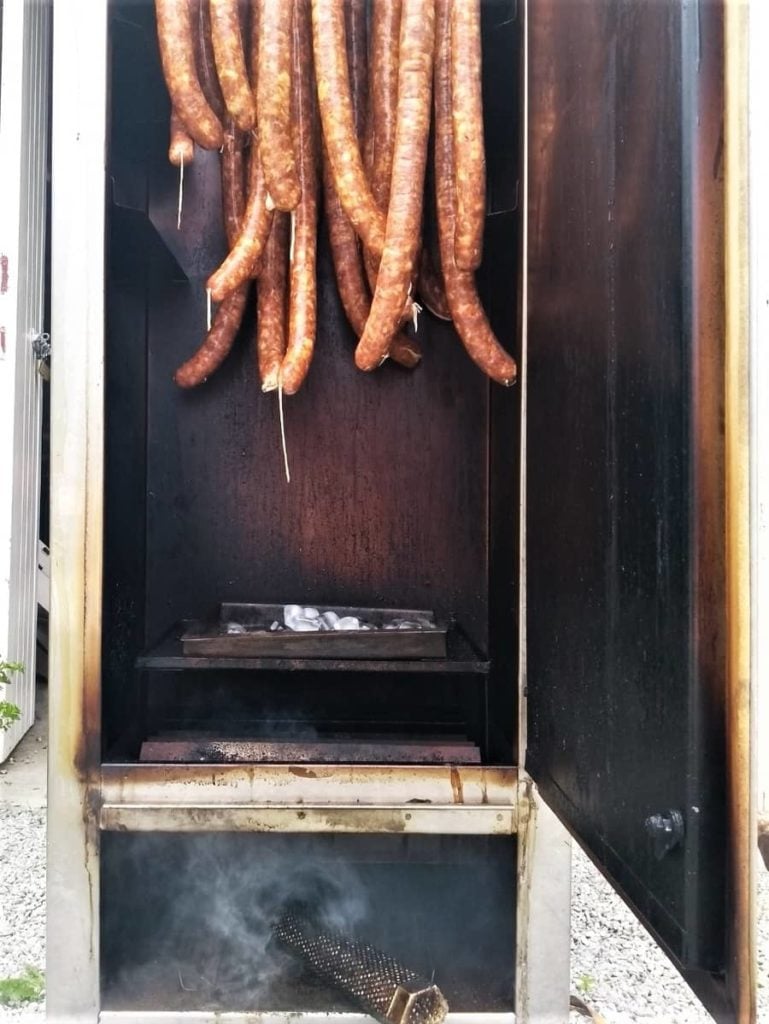
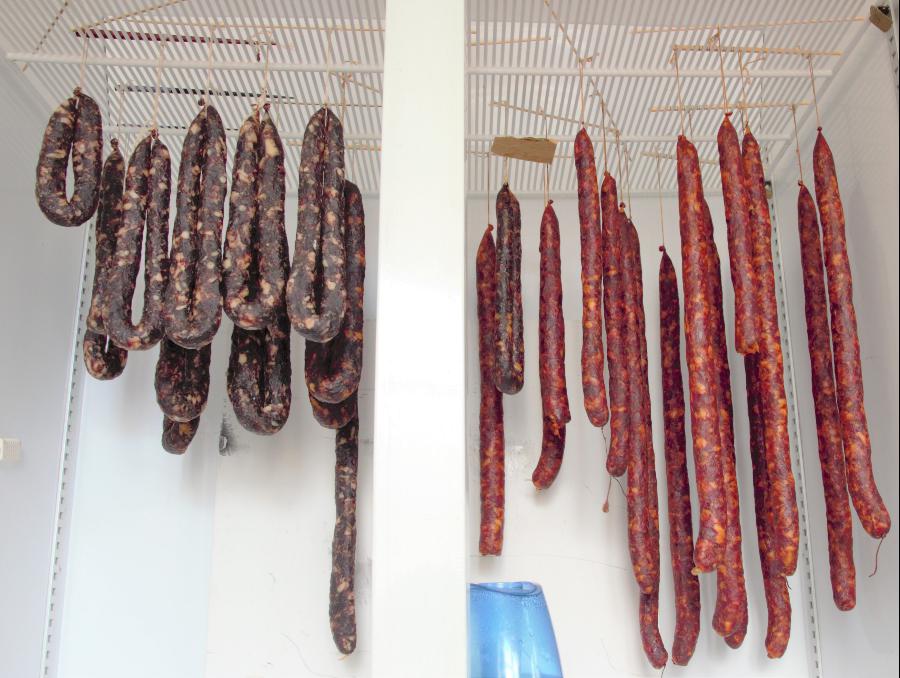
But it was 4 days of cold smoking- cold smoking works as an antibacterial agent, this has some added effect and makes sure bad bacteria don’t have a place on the salami.
Charcuterie
Funnily enough charcuterie in terms of the French word is to do with rillettes and pates and also some French offal sausages.
Nowadays it seems that the French word is interpreted very differently to the Encyclopedia style French cookbook interpretation in Larousse Gastronomique.
But it has morphed into dry-cured meats as well as cold and hot smoked meats.
I don’t mind, because I have a passion for all these types of creations whether it’s cold or hot smoking, dry-cured or low and slow smoking (low & slow is the easiest and it’s indirect hot smoking).
3. Nitrates and Nitrites – Pink Curing Salt
Adding a small amount of pink curing salt makes the curing process common to deal with botulism and look more pleasant with the pink hue color. It’s about 90% normal salt with the addition of nitrates/nitrites.
If you using the equilibrium curing method which I talk about later below, then you are using such a minimal amount of pink salt you need accurate precise measurements to 1 or 2 decimal places ideally.
Your body produces nitrates and you’re consuming more nitrates and spinach and other dark vegetables.
In these minimal amounts, I have no issues with this, it just makes the meat safe in my opinion.
Dry Curing Under 30 Days – Pink Curing Salt No.1
Sodium nitrite is the only type of additive as well as the salt in this short-term meat curing ingredient. Pink salt helps create an even more inhospitable environment for bad bacteria, some say it adds a certain type of porky flavor. So it does a similar job to salt.
It also changes the color complexion and prevents the meat, especially pork meat from going gray through oxidization. It’s why bacon is pink when you buy it – the nitrates.
Even though I have met Italian butchers and other Italians that don’t use pink curing salt. They also have a lot more confidence in the meat they are using (how fresh it is and how it has been cared for). But for me, I preferred to use it.
Examples of dry-cured meats which you would use pink curing salt no. 1 for would be, a type of dry-cured bacon or pancetta that you would be cooking and consuming within 30 days. Pastrami which is a pickled and hot smoked a.k.a. cooked and smoked at the same time.
Pickling is also a slightly confusing term, quite often this is a salt brine which is a different method of curing meat. My focus here is on dry-curing without a brine, but you will come across information that I’ve written covering wet brines or dry curing and guides to making bacon for instance.
A brine is a water solution, a dry cure – is obviously dry.
Dry Curing Over 30 Days – Pink Curing Salt No. 2
Pink curing salt no. 2 is the main pink curing salt additive to be used for dry curing projects over 30 days. It has the nitrites, but then it also has the nitrates, the nitrates break down over time to turn into nitrites to have the same protective effect on the meat.
Even for the most basic dry-cured Salumi such as pancetta, lonza, lardo, or braesola – it will take possibly one to six months before you reach the final weight, depending on starting size/weight, before it’s ready to be devoured.
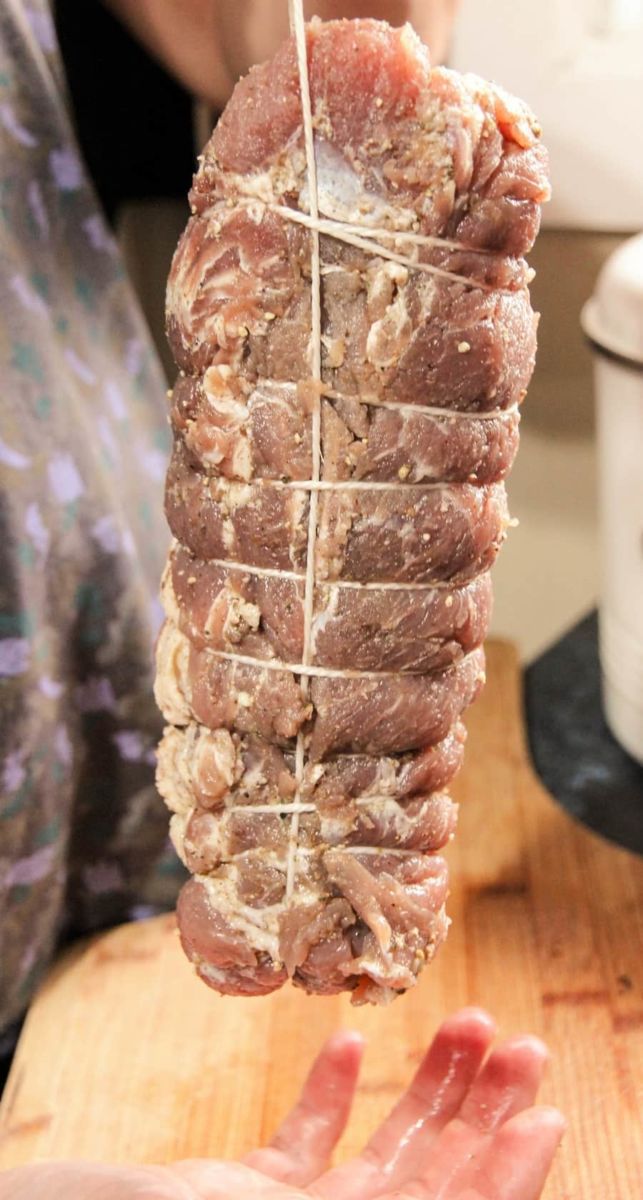
4. Combination of Salt, Time & the Craft
Salt & Time
I read somewhere that dry curing has a similar effect to roasting. In terms of intensifying flavor by reducing moisture, but with dry curing salt the removal of moisture, develops a much more intense flavor.
The more time that dry-cured meats have, even past the 30 to 35% weight reduction, the more flavor development can occur. The flavor develops and also becomes more easily digestible.
Parma Ham has been studied scientifically, please find a link with more information in regards to the study; it’s about digestible proteins and dry-cured meat/Parma Ham.
Why is Dry Curing a Craft, not a Recipe?
Dry curing meats involves a recipe, but quite a few elements are coming together including:
- the recipe (sometimes just quality meat, pink curing salt, sea salt)
- suitable environment
- beneficial bacteria
- patients and time
- thin slices that can be savored
I guess in short, dry curing does take a little bit of nurturing and keeping an eye on it as it moves through the stages – but the flavor outcomes are phenomenal!
5. Spices & the Subtleness
What I like to call ‘Spice Bombs” of Flavor
What you’ll find in a lot of dry-cured recipes – is they have a blend of herbs and spices that work together as one flavor, like a good Indian curry.
So you don’t have one spice that has a pronounced flavor unless you want it of course. Certain flavors like rosemary may want to be accentuated, to match juniper berries with rich wild venison meat for instance.
I like to experiment with spices whether with cooking whether it’s potatoes or vegetables – they get a spice bomb too! (for example smoked paprika, cumin, pepper, turmeric, and garlic flakes)
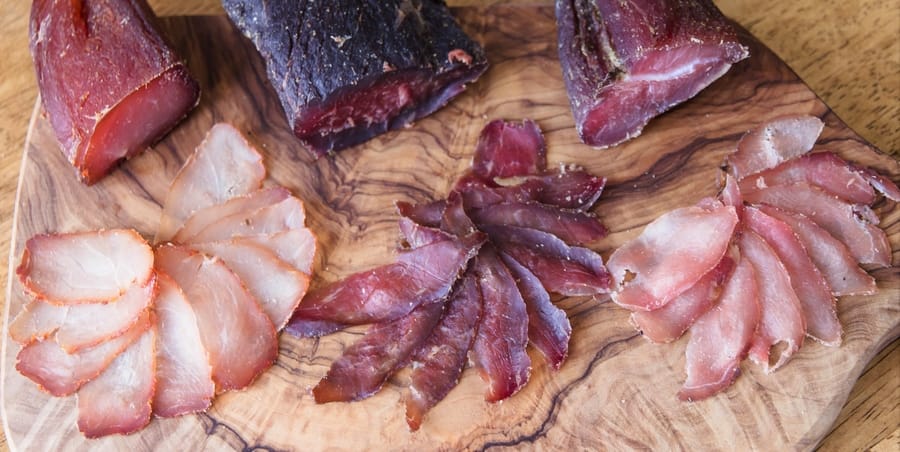
The opportunities are endless when it comes to what spices you want to put together for dry curing. I had some paprika purchased in Hungary to produce a dry-cured loin with Hungarian flavor (Quality paprika can be incredibly rich in flavor).
Instead of turning it into a salami or sausage I just play around with the idea. And it was a worthwhile experiment below.
6. Dry Curing Methods – Salt Box and Equilibrium Curing
Salt Box
When you completely cover the meat with salt for curing, you leave it for x amount of day. This is basically what is deemed the ‘saltbox’ or ‘saturation method’. I’ve used it, but more recently I have a preference for the modern curing method named equilibrium curing.
Both of these methods will be covered fully, in the online course.
In many recipe books, there is still the classic saltbox method, it can vary the final product considerably depending on the density of meat and also the types of salt that are used.
It is rather upsetting, putting all the work in, waiting months – and your dry-cured meat is too salty!
Equilibrium Curing
Basically,
percentage of salt to the weight of the meat
ie. 2% salt for 2,000 grams of meat
= 2 grams of sea salt (I know it doesn’t seem much, but that’s enough to dry cure 2kg – easier to work with the metric system)
That is the method, but there are a few important factors that need to be done to make sure that all the salt and cure mix is applied to the meat.
As you’ll see below precise digital scales are very important with equilibrium curing. The idea is that you should have a minimum of 0.x / 1 decimal place or 0.xx 2 decimal places ideally.
Just about every equilibrium curing recipe I’ve seen goes for between 1.7% to 4% salt whatever the weight of the meat is.
It comes down to taste preference which sometimes varies depending on what type of meat you are using as well.
Since ‘perceived saltiness’ varies from person to person, it may take a few attempts at a recipe to get that precise flavor that you’re after.
Mixing the salt cure inside a bowl and wiping the bowl with the meat as much as possible, is an important step to try and get as much cure onto the meat as possible.
Vacuum packing, Ziploc bags, or what I’m experimenting currently with using reusable silicone sous vide bags (to avoid single-use plastic). The idea is that you should try and get the most minimal amount of oxygen inside the bag with the meat. Then it goes into the fridge to cure.
7. Quality of the Meat & What Meat to Use
Farmed or Wild Meat
I’ve harvested a fair amount of wild game and curing meat has been an absolute joy to truly appreciate the quality of the meat that I’ve harvested.
Farmed meat can be the same if it is traceable and you know that the animal has had a good life and been looked after.
Using quality top-notch meat is the key to fine dry-cured meats- ie. look at Italian Salumi.
Fresh is Best, Freshly Frozen Acceptable
I’ve frozen fresh meat and used it successfully, many times for my meat curing projects. As long as you know it hasn’t been aged, then curing with it shouldn’t be an issue.
8. Meat Curing Equipment
Salt
I’ve covered some of this already, sometimes you can just buy rocksalt and use a spice grinder to grind it down to your preferred level.
For equilibrium, curing is generally best to create a powdered salt so that it can be spread and absorbed more easily into the meat.
Spice Grinder or Mortar & Pestle
A very important part of getting a nice spice blend or spice bomb for easier absorption into the meat with equilibrium curing. A mortar & pestle can work, it just takes some arm work. A spice grinder can be on for just sometimes a few seconds and it’s enough.
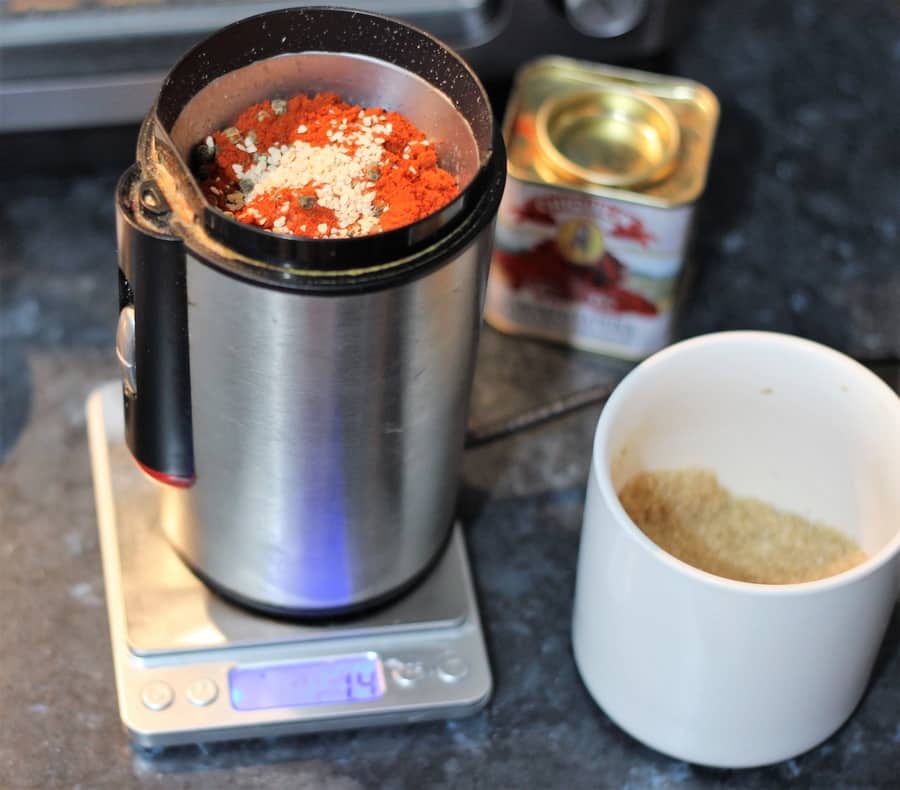
Accurate Digital Scales
As mentioned above it’s a very important factor when it comes to equilibrium curing. Once you have the precise amounts, and sometimes there are very minimal amounts, you can produce repeatable recipes with ease.
1000g of meat for Lonzo, will need 0.25% pink curing salt for example
1000 x 0.0025 = 2.5 grams of pink curing salt + (1.7-4% sea salt for curing)
Accurate scales make a huge difference and should be used.
There will be a simple shopping list as part of the course which will have a few suggestions on different products that I can recommend.
But if you want some recommendations, here is a page on spice grinders and digital scales.
Butcher Twine
Very useful for squeezing air/oxygen out of meat crevices or creating hanging loops for your cured meats. Dry-cured meats at best hung restricting the contact with anything that could contaminate the meat.
If you want to see what I use, here is the butcher twine I use on Amazon- much easier to apply when it’s on a roller.
The twine tutorial video techniques will be in the online course.
Muslin Cloth
It can be used to stop drying out the surface of the meat (especially with simple kitchen fridge curing). When hanging in a cellar it protects the meat from any bugs.
There are some techniques that the course will go into which involves inoculating the surface with beneficial bacteria to give everything a bit of a jump start.
Innoculation is a popular technique when it comes to salami making.
But with salami, there are different types of cultures for inoculation which also create different flavor profiles (another layer of flavor to play with) or if you like the ‘tangy’ ness variable, which is related to the acidity in the meat.
Hooks
S hooks are very useful since you end up taking the meat off the hook to check it and weigh it. Whether you’re using your cellar or a curing chamber suggest getting some S hooks.
Another DIY option I use is string through my fridge racks with a chopstick stuck through, not as easy as S hooks.
Here are the S hooks I mean, simple and cheap – depends on the size you are after and implementation.
9. Classic Meat Cuts vs Any Meat Cuts
Salumi Cuts & the Classic Italian Salumi
The classic Salumi cuts,
- Proscuitto – Pork Leg
- Pancetta – Pork Belly
- Coppa – Upper Neck Some Loin
- Guanciale – Jowl Jaw
- Spalla – Shoulder (bone in or out)
- Lardo – Fat
- Lonza – Loin
If you want more info on salami vs salumi – I wrote a bit more in-depth about these muscle groups here.
Any Meat Cuts
You don’t have to adhere to traditional Italian butchery and salumi cuts, I don’t but I get inspiration from them.
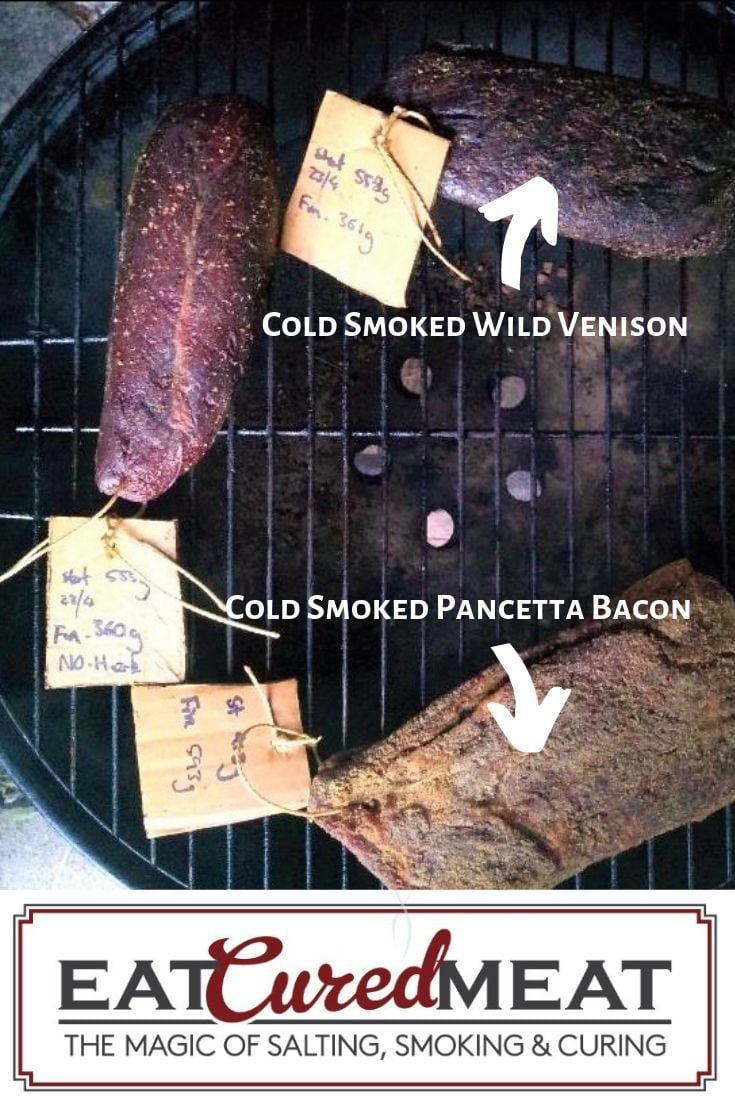
You can dry cure anything from a nice fresh ribeye through to sirloin steak and dry cure that with a ‘spice bomb’. (I had catfish salami in Hungary – –Never Try This – Tourist Novelty Salami I think)
Sometimes I’ll carve up certain venison hind legs and cure random chunks of meat in 6 different spicy ways – anythings possible.
Fat doesn’t dry out as much as main muscle meat does.
Why Minced Meat is for Advanced Meat Curing – Salami
When you mince meat it becomes more exposed to whatever the environment is. Air can get trapped inside too.
There are always some fungi or bacteria floating around outside. So when it comes to stuffing the salami into casings, it has to be tight, so that no oxygen gets trapped. Since the oxygen can combine with unwanted bacteria leading to spoilage.
This is one of the big reasons why salami is seen as advanced meat curing.
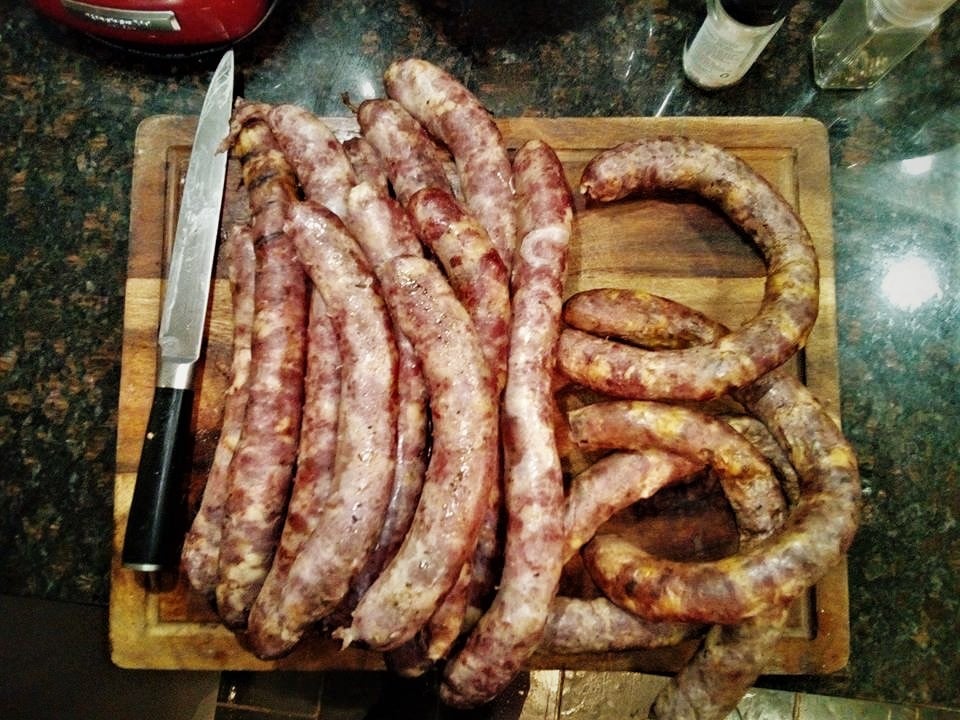
I will be putting together an online course about salami, but first I want to cover off on dry-curing whole muscle. This is how I learned all the basics (here is a page of all the guides on this site) to then progress to salami dry curing.
pH is a big factor.
If your keen on making salami, another option is to hot smoke a salami, it’s not dry-cured and will have a limited shelf life but still can produce some delicious results – I did a recipe for hot and cold smoked, kind of like a cooked sausage hybrid salami I guess – came out fantastic!
10. Temperature, Humidity & Dry Cured Charcuterie
Temperature – it’s role
When the temperature is around the preferred 52°/11°C mark, it’s not too cold to create issues with drying but it’s not too hot to be beneficial for the growth of bacteria & fungi. – but good bacteria can survive.
I have gone well over this markup to probably 65°F/18°C with no issues. But I wouldn’t want to be dry curing in much warmer climates than this. Of course, pretty much I’m always dry curing in my dry curing chamber with a controlled environment.
Humdity – it’s role
Humidity is all about avoiding the outside drying out before the inside.
Which is called case hardening.
As you can imagine, if the inside still has moisture in it before it has dried out fully, you going to have un-edible meat.
This is why I only suggest using small cuts of meat for normal kitchen fridge curing since the humidity is so much lower than ideal.

60 to 70% humidity is ideal in most situations to cure meat and reach the final weight. It will also be the aging humidity level. One of my curing chambers tended to dry out the air too much, due to the compressor design. It was a very large double-door fridge. So through just observing I realized that I had to start freshly cured meats off at a higher humidity to counter this.
The Environment
Of course in a curing chamber, bugs or insects shouldn’t be able to get in (mesh and filters should ideally be used – covered in the online course). You can use muslin as mentioned to also loosely put over dry-cured meats like pancetta that you want to hang around the house or in your cellar.
I have found that once the meat has progressed, many bugs and insects aren’t interested – and you can hang the meat around the kitchen area.
This is another reason why, cracked pepper or chili are sometimes rubbed onto dry-cured meats when they are still wet, as a natural repellent to bugs. I just saw that today in a little Tuscan Butchery – pancetta coated with pepper and chili!
11. DIY Curing Chamber, Cellar or Kitchen Fridge
DIY Curing Chamber – How to Build Your Own
A lot of the community online has got into building their own curing chamber which can be done in many different ways. The simplest way that I’ve come across is just using a wine fridge that has a suitable humidity level to start with.
Here is an overview, but I will be offering many different designs and plans as part of the online course coming out.
Sometimes the wine fridge even has the temperature adjustable and the red wine setting is getting very close to what you want for curing meat (45-65°F/7-18°C! Many wine fridges are designed to be above 50% humidity so the wine cork doesn’t dry out (so they are just about perfect for meat curing!).
I know of a commercial dry-curing lady, who used 6 wine fridges for her creations!
Getting an old secondhand fridge, like a bar fridge or kitchen fridge, and modifying it with a humidifier, controller for turning the fridge compressor on and off, then controller for the humidifier is probably the most common way, but you do need to plan it out and get the components (again of course will deep dive into this in the online course).
Depending on the design of the fridge sometimes a dehumidifier is needed as well. There are plug-and-play thermostat controllers that make it simple.
If you want some more information, please see below for an overview (that’s applewood cold smoked bacon/pancetta – that recipe is fantastic).
Cellar or Hanging Meat Around Home
Testing the temperature and humidity around the house can be a good way of just hanging something simple like pancetta and letting it dry out until it is ready. It really can be that easy with a big chunk of pork belly.
So bear this in mind if you want to just give dry-cured meats ago.
You can test your area out for moisture and temperature – you can use one of these thermometers – devices – link to Amazon.
Kitchen Fridge
The kitchen fridge can be used, and I wrote a whole post on this. What I found out through experimentation was that less than 200g or 7 ounces of meat should be used. This generally meant that within about 1 to 2 weeks the meat would lose 30 to 35% of the starting weight.
That’s how quick it is. This was to achieve a minimal amount of case hardening. A quick method to produce dry-cured meat for a beginner.
Buying a Curing Chamber
It’s an investment and mostly designed around the commercial application. But you can buy dry curing and also dry-aging (like aging steak until tender) chambers. Starting prices are around US $3000 if you want more information feel free to contact me I will put you in touch directly with some of my most preferred suppliers which look after referrals.
12. Penicillin – White Mold – Your Friend
What is That Funky White Mold?
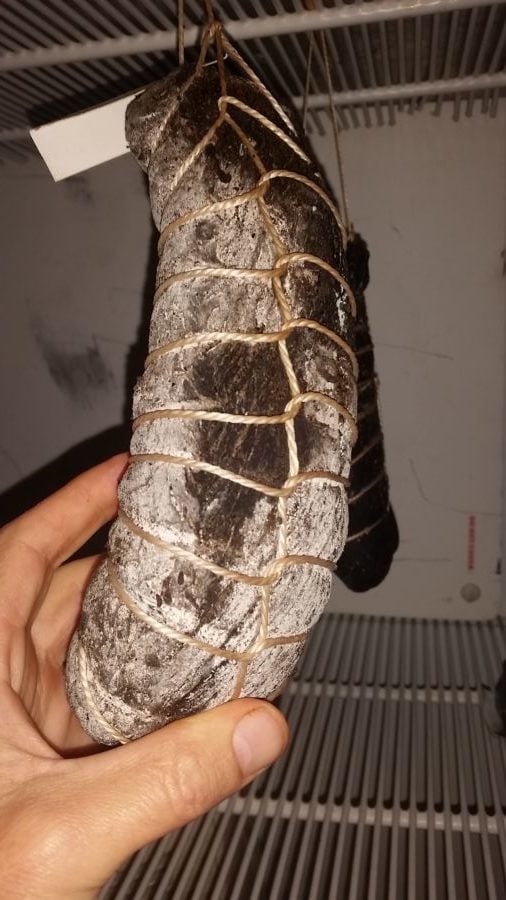
White powdery mold is natural penicillin, when you have this on your dry-cured meats it’s a good thing. Since it protects the meat from spoilage and bugs.
There can be a green culture that sometimes grows with the white powdery mold, there is a very distinctive smell to penicillin which once you recognize it, it’s easy to remember.
You can as mentioned, do some inoculation to get penicillin cultures happening rapidly as well.
Sometimes I like to wipe some of the penicillin off with malt vinegar or red wine vinegar, it does influence flavor as well.
Other Molds are Bad
Any other colors of mold that start growing on the meat need to be wiped off with vinegar. It’s not a complicated procedure, but it’s one of those things that you just have to keep an eye on it as it’s drying out to make sure you only have the good white stuff on there.
Trusting Your Senses
Using mainly your eyes and your nose you can work out quite easily what’s going on. If something doesn’t smell good, it probably isn’t good, thanks to our evolutionary biology we can work this out quite easily.
13. Final Weight & Intensifying Flavor
When dry-curing meat, you have to reach at least 30 to 35% weight loss from when you started for the meat to be ready for consumption without cooking.
You can dry out further than this, but this is seen as the minimum to be considered fully dry-cured and ready (it varies from batch to batch).
The easiest way this is done is to put a label on each bit of meat hanging -with the starting weight, starting date, and calculated, finished weight.
(A google recording sheet with calculations is provided in the online course to make this easy, the same system I use)
ie. The starting weight multiplied by 0.65
1000g x 0.65 = 650g finished weight
I make dry-cured meats for hunting trips that are one to two weeks since the meat has been preserved it can be taken on voyages.
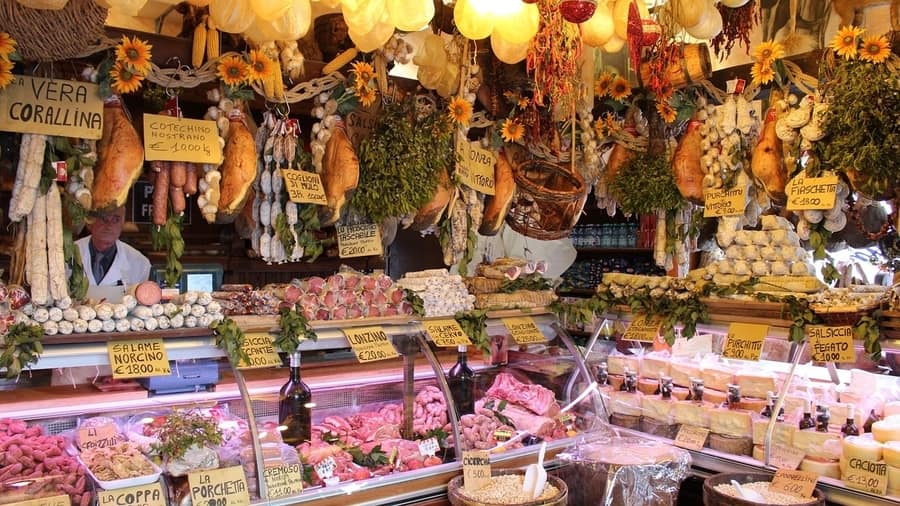
Of course, it’s a temperate or colder climate normally in the mountains, but when you’ve been around so many different Italian Norcini butchery’s you can see dry-cured meats hanging or through the shops, whether its winter or summer, in their shops – because this is the ancient art of preserving!
14. Importance of Wafer Thin Slicing
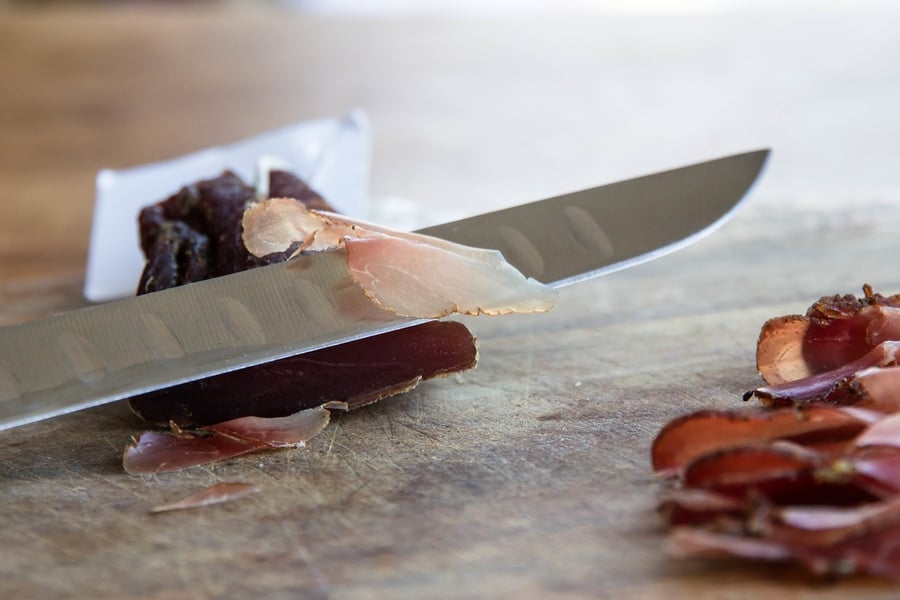
This makes quite a huge impact on the flavor of the meat. I had a real contrast recently when I was in Montenegro, they do smoked prosciutto (Njeguški pršut) – it’s probably around the same salt level as the classic Italian Parma Ham or Prosciutto but it was a minimum of 2 mm thick (which is very thick for dry-cured meat).
This doesn’t sound like much, but when it comes to consumption you do notice the salt.
And once you played around with a decent deli slicer and have seen what difference it makes on your own dry-cured meats you. You realize that it is a piece of very useful equipment if you get into meat curing.
Semi Freezing can Help
For certain types of dry-cured meats, especially ones with a higher level of fat content if you put the meat in the freezer, not until it’s frozen but just until of firms up.
I found this to be a useful way of thinly slicing dry-cured and cold-smoked bacon for instance.
Hand Slicing is Hard – But it Can be Done
Using certain types of knives, the prosciutto knives are developed for a leg of prosciutto that’s put onto a wooden holding stand and then you use the flexibility of the prosciutto knife to cut horizontally. But it also works quite effectively for thin slices once you get the hang of it.
But if you get into dry-cured meats, Quality Meat Slicer is the Only Way To Go.
I wrote an article about slicing meat wafter thin since some so many delis slicers do a poor job of wafer-thin slicing.

Tom Mueller
For decades, immersed in studying, working, learning, and teaching the craft of meat curing, sharing the passion and showcasing the world of charcuterie and smoked meat. Read More

I’m Bulgarian loving cured meats.
And I’m very glad I found this website.
Cheers.
Awesome glad to hear it! thanks for visiting!!! I’m always producing new content . Thanks, Tom
Tried to sign up on the list but it wouldn’t let me
Tells me “subscription can’t be saved “ try again
Hey Bruce, all sorted – it was a security thing needed updating, I have added you to the email list.
Cheers and all the best,
Tom
Thanks looking forward to the course
Dear Tom Mueller ,
Greetings from Ruban Moses ,
Informative and interesting reference .
Thanks a lot for your efforts.
Regards.
Appreciated thanks, course should be out in a few months. Glad to help! Tom
This looks like it will be tons of fun. I can’t wait.
Hey Gerry, thanks did you want me to put you on the email list to send out a notification when it’s live? Cheers Tom
Useful reference for the subject I am going to handle this school year. Keep up the good work, God bless and stay safe.
Thank you for putting me on your mailing list and I look forward to your on-line course coming on line soon. Kind regards, Hugh Laity
Thanks Hugh, appreciated!
Looks great! When do you expect the course to be available?
Cheers!
October 2020.
Please add me to the list, I could not sign up.
Do you know when will the course ve ready?
Will do no probs, October the online course will be available! Here is a link to the course page again also
Please add me to the list, I could not sign up.
Hey Norman,
Have done, strange how that doesn’t work?
Might be the security.
All the best,
Tom
Hey can you also add me to the list?
“Your subscription could not be saved. Please try again.” This is the response that I got. Thank you.
Heya, might be a security thing. Sure thing will add you in. All the best, Tom
I am from India and love cured meats.would like to know more and please add me to your mailing list. Can leaner meats like lamb or goat be cured.
Hey Chaitanya, yes lamb and goat are definitely dry cured! Pig on fat people are keen on, but I use wild meat like deer and tahr which are very lean!