Slicing cured meat paper-thin can make all the difference in taste, presentation, and texture. Whether you’re preparing salumi, prosciutto, or smoked salmon, thin slices allow fat to melt quickly on the palate, enhance flavor balance, and deliver that signature melt-in-your-mouth experience.
Over the years, I’ve sliced everything from delicate gravlax to dense dry-cured coppa. I’ve tested specialty knives, invested in a quality meat slicer, and even learned a few tricks from pros along the way. This guide shares the techniques that work best depending on the meat and the tools you have at home.
Whether you’re slicing by hand or considering a semi-professional slicer, this post covers the key methods I’ve used for consistently thin results across different types of cured meat.
Key Points:
- Slicing paper-thin requires precision and the right tools — either a sharp specialty knife or a quality deli slicer.
- Different meats present different slicing challenges depending on fat content, dryness, and texture.
- Key techniques include chilling or slightly freezing the meat, using the right blade, and applying steady, even pressure.
- Knives like the prosciutto knife, brisket knife, and chef’s knife each have specific advantages depending on the meat.
- A meat slicer is ideal for consistent, thin cuts — especially when working with large volumes or tougher meats.
Why Cut Cured Meat Thinly?
Cutting cured meat thinly isn’t just about looks — it changes the entire eating experience. When sliced properly, fat softens quickly on contact with your mouth, and the full flavor develops instantly. Thick slices can overwhelm the palate or feel too chewy, especially with aged meats that are firm or salty.
I’ve noticed that thin slicing even affects perceived saltiness. A properly sliced piece brings out the best in the meat, without dominating with salt or spice. This is especially true for strong-flavored salami or aged prosciutto.
Basic Technique for Thin Slicing
Whether I’m slicing with a knife or a deli machine, I always follow a few essential steps to get reliable results.
- Chill or par-freeze the meat. This firms it up and reduces fat smearing. I usually pop it in the fridge or freezer for 30 minutes — just enough to stiffen the texture without making it hard as a rock.
- Use the right blade for the job. A sharp knife is non-negotiable. Flexible blades like a prosciutto knife work for delicate meats. For denser cuts like salami or bacon, a brisket knife or slicer is better.
- Slice with control and patience. Let the blade do the work. Use smooth, steady strokes. Sawing motions or rushed cuts usually lead to uneven or torn slices — especially on drier meats.
- Adjust your grip and pressure. For softer meats, I keep the pressure light and use a shallow angle. With firm meats, I apply a bit more force — but still keep things smooth and consistent.
These fundamentals are universal, whether I’m preparing gravlax for a platter or trying to nail the perfect sliver of homemade pancetta. Every meat type behaves a little differently — so let’s dive into specifics for each one.
How to Slice Different Types of Cured Meats
Each style of cured meat behaves differently depending on how dry, fatty, or dense it is. Here’s how I slice them thinly and consistently at home — from salumi to salmon, and everything in between.
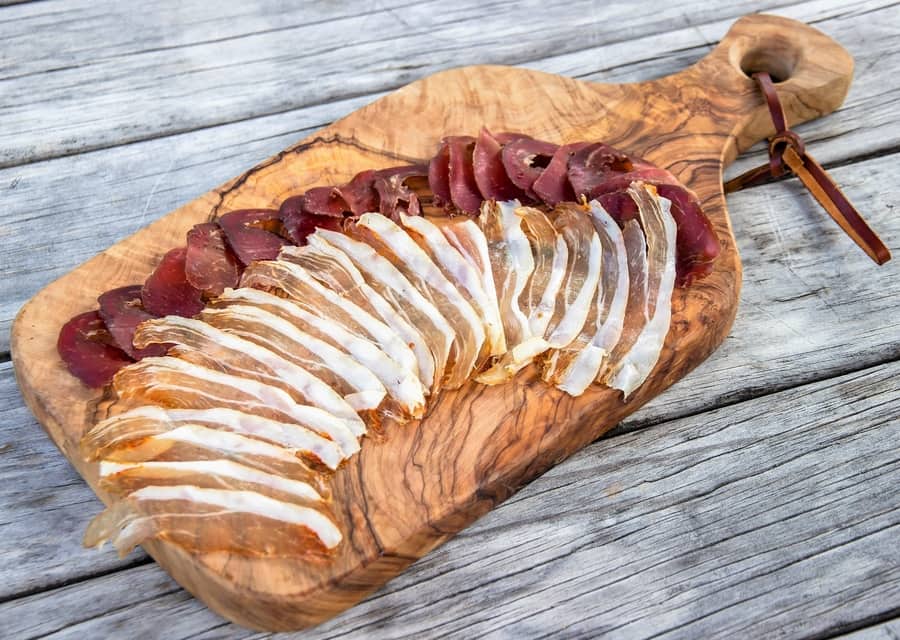
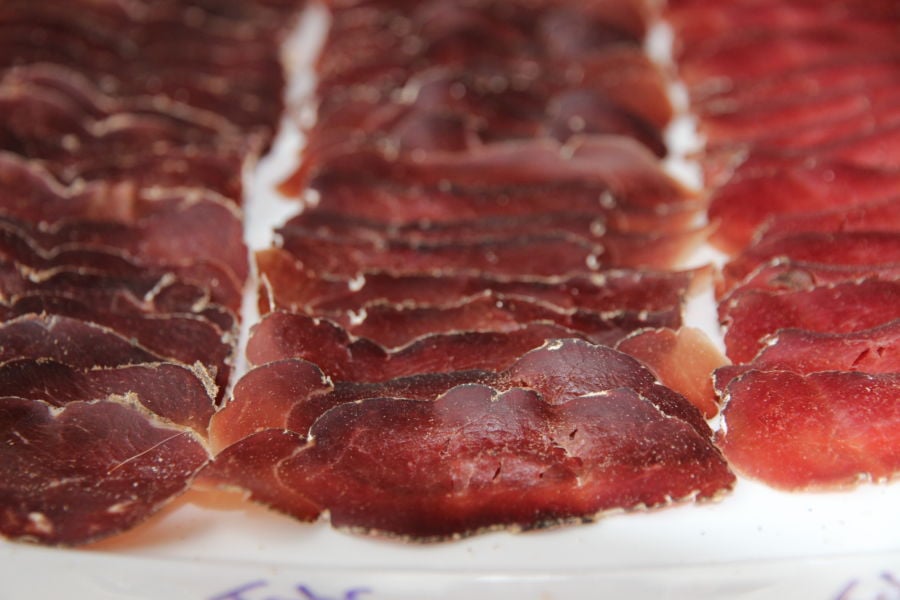
Salumi – Coppa, Lonza, Prosciutto
Dry-cured whole muscle salumi like coppa, lonza, or prosciutto can be tricky. These meats are often firm, marbled, and not always symmetrical, which means every slice takes some finesse.
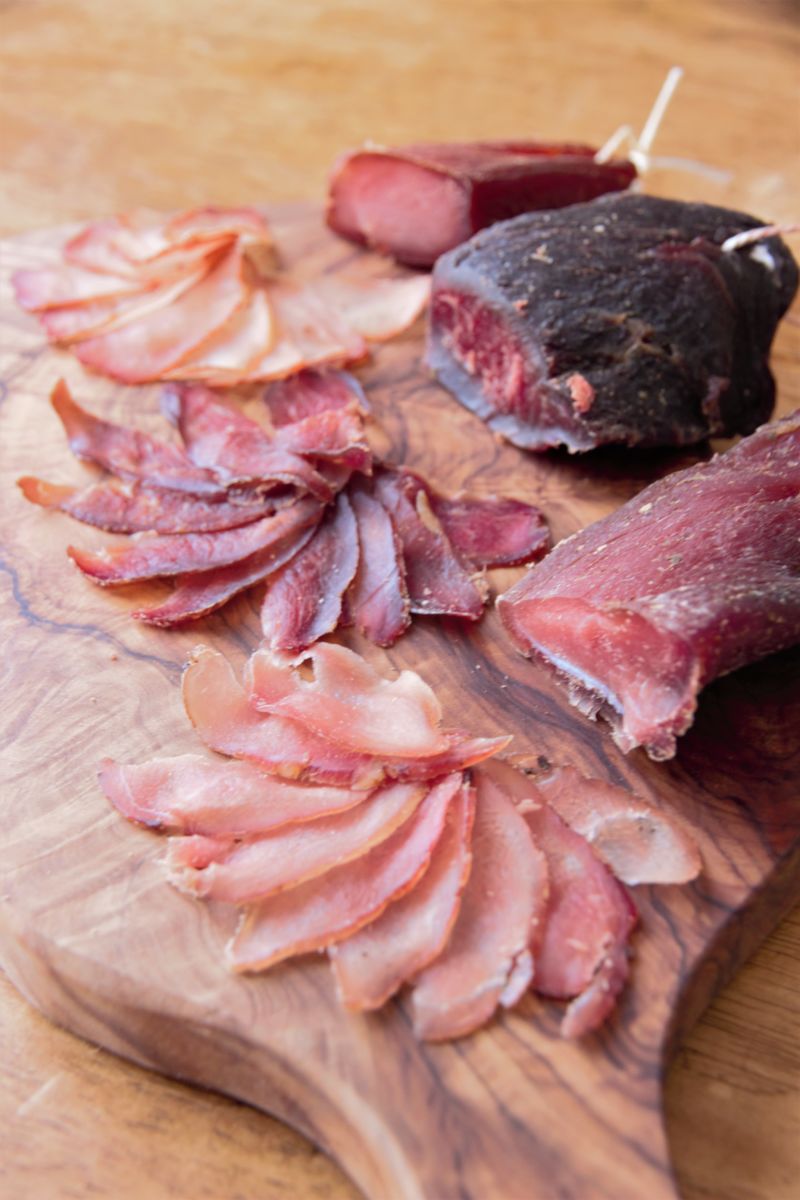
If the meat is very dry or from the fridge, I let it sit at room temperature for 10–15 minutes before slicing. This softens the outer edge just enough without making the fat smear. For vertical slicing (common with coppa or lonza), a flexible and sharp knife works well — the longer the blade, the better for maintaining straight, even slices.
For a traditional prosciutto leg, the slicing technique shifts. Italians often mount the ham at a 45° angle and slice horizontally toward the bone. At home, I use a flexible blade and push slightly while slicing across the grain. It’s a slow and precise process — but the results are worth it. Here’s a great breakdown of how pros do it.
Salami
Salami can range from soft and moist to dense and aged, and that makes a huge difference in slicing. If it’s too soft (like a young homemade stick), I let it dry a few more days in the fridge. Chilling always helps — I’ll often place it in the freezer for 20 minutes to firm it up just before slicing.
For slicing, I use a narrow-bladed brisket knife or prosciutto knife. Both have a Granton edge — those little dimples or “teardrops” that reduce sticking. A clean, full stroke is better than sawing, and I adjust the angle slightly based on the diameter and firmness of the salami.
Some high-salt or spicy salami (like Spanish-style chorizo) is better a little thinner, especially if the flavor is intense. I enjoy experimenting with thickness to achieve the ideal mouthfeel and salt balance. Too thick, and it can be chewy or overpowering.
Tip: If you buy a soft salami that feels under-dried, hang it in a cool, dry place or let it sit uncovered in the fridge for a few days. That often brings it to ideal slicing firmness.
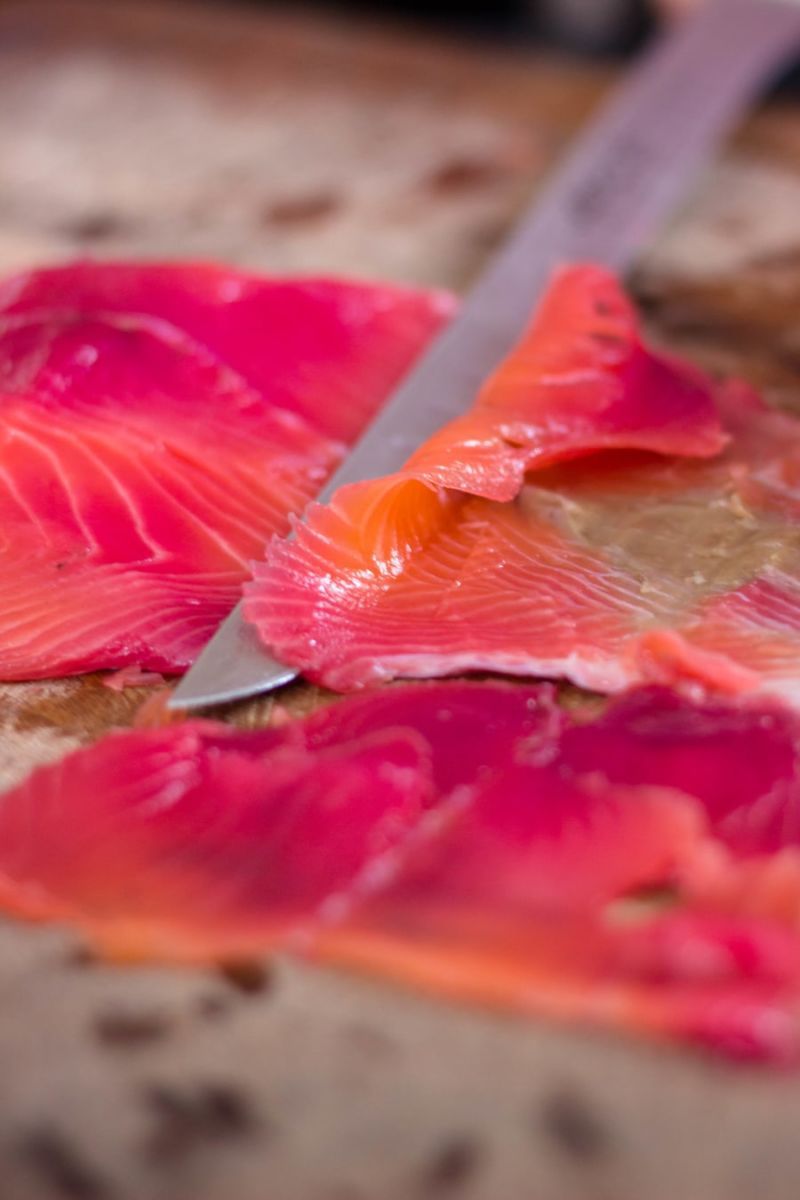
Cold Smoked Salmon or Gravlax
This is one of the more delicate cured proteins to slice. I’ve found the angle and sharpness of your knife matter more here than anything. A long, flexible blade (like a sashimi knife or prosciutto knife) is best. I use a 30–45° slicing angle and go across the grain — not with it — to keep each slice intact.
- Start at the tail end of the fillet for better control
- Use a horizontal slicing angle
- Cut across the white fat lines for smooth slices
- Slice in one fluid motion, no back-and-forth sawing
Because salmon is much softer than salumi, pressure isn’t needed. I focus on letting the knife do the work. When done right, the slices are translucent and fold effortlessly — perfect for a platter or bagel topping.
Up next: I’ll break down how I slice ham, bacon, and even dry-cured jerky for optimal texture .
Ham
When it comes to ham, I usually reach for either a brisket knife or my deli slicer. If I’ve cured a whole muscle ham at home, I’ll often use the knife when I just want a few slices — but if I’m portioning for storage or sharing, the slicer comes out.
How to Thinly Slice Ham
- Use a ham or brisket knife — long, narrow, and razor sharp
- Ensure your knife is freshly sharpened with a steel or whetstone
- Slice across the grain for better texture
- Apply light pressure and use a smooth back-and-forth stroke
- Angle your cut to control thickness and appearance
More often than not, I’ll use my deli slicer for ham. It gives me the precise, paper-thin slices I prefer — or thicker ones when I want that classic deli texture. If you regularly cure or buy large cuts of ham, a meat slicer is worth looking into.
If you’re curious about choosing a slicer that handles thin slicing well, I’ve compared a few of the best meat slicers for cured meats here.
Bacon
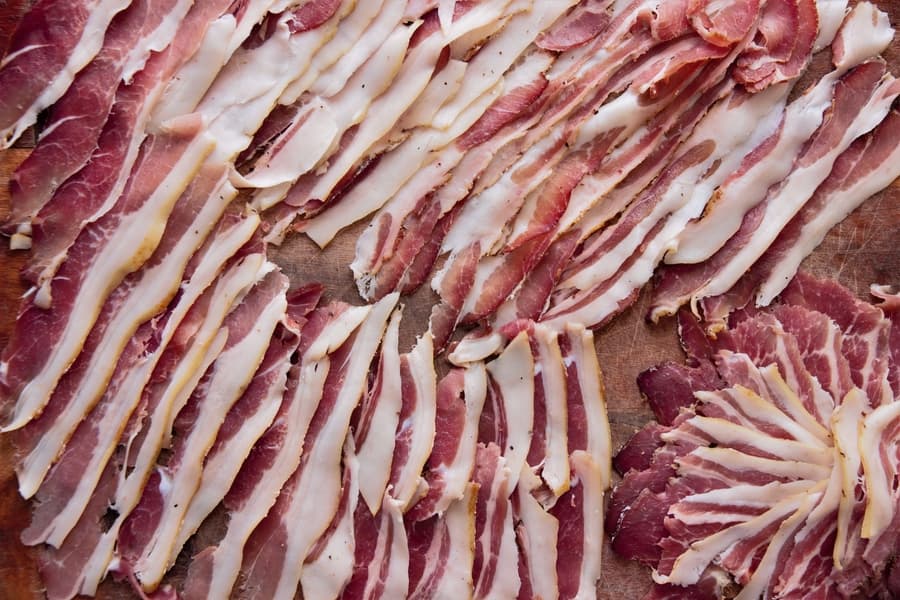
Bacon is one of the easiest meats to slice once you get the technique down. Still, the fat can smear if it gets too warm — so I always chill or semi-freeze before slicing. This keeps the shape intact and makes it easier to control thickness.
How to Thinly Slice Bacon
- Chill or semi-freeze the slab of bacon to firm it up
- Use a long-bladed knife like a brisket or ham slicer
- Cut straight down vertically with smooth, clean strokes
The deli slicer again does a fantastic job here, especially if you want uniform slices for frying or packaging. If you’re regularly making your own bacon, this machine quickly becomes indispensable.
Biltong / Jerky
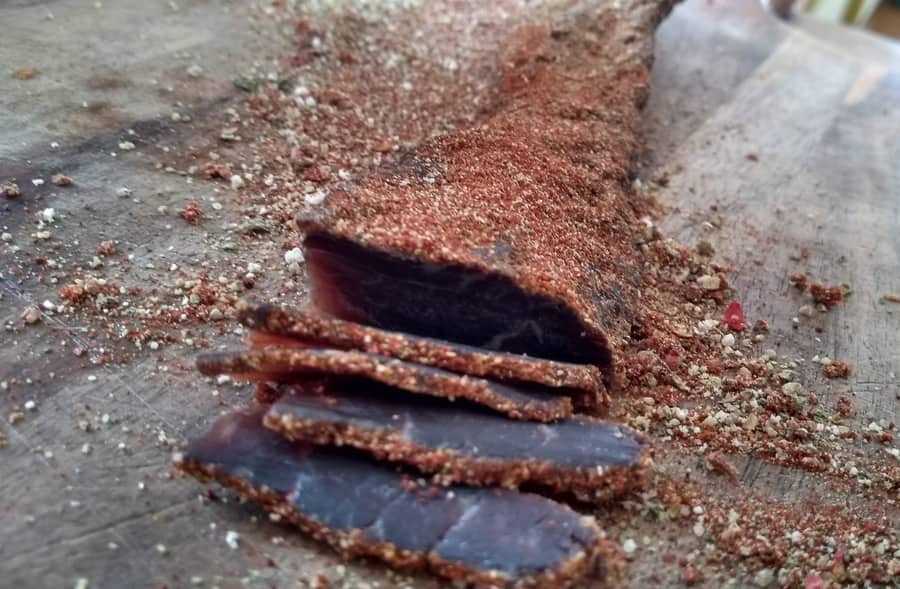
Slicing jerky or biltong depends on how dry it is. Wet-style biltong (with some internal moisture) is easier to slice thinly, while thoroughly dried jerky is better off cut thicker or torn apart. For thin slicing, I chill it first and use a firm, wide knife.
Some folks swear by the dedicated biltong slicer — I picked one up a while ago and it’s surprisingly handy. For quick batch slicing, it’s much faster than a knife, especially if the meat still has a bit of give.
Different Knives & How I Use Them
I’ve tried a lot of knives over the years — some traditional, some not. For cured meats, the right blade shape, sharpness, and stroke all play a role. I’ll break down the pros and cons of each style I’ve worked with next.
And like with slicing methods, what works best often comes down to the meat, how dry or soft it is, and the volume you’re cutting.
Prosciutto Knife – Flexible Long Blade
Best for:
- Salumi — bought or homemade
- Salami — thin or thick
- Gravlax or cold smoked salmon
I primarily use an Arcos Iberian Spanish 10″ flexible blade. It’s extremely sharp, holds an edge well, and works beautifully for thin slicing when I don’t want to pull out the meat slicer.
I maintain it with a sharpening steel and occasionally a whetstone. It’s sharp enough to shave with — and that edge makes a big difference when you’re aiming for translucent slices.
The Granton-style dimples on the blade are key here. They help reduce drag and stop the meat from sticking — especially important for fatty meats like coppa or salmon.
Brisket Knife
Best for:
- Brisket
- Salami
- Pastrami
- Boneless roasts
- Large cuts of ham
I use a Victorinox 12″ Fibrox brisket knife. It’s a beast — wide, stiff, and heavy enough to cut cleanly through firm meat. It also sharpens easily with a steel, which is handy when doing big slicing sessions.
This knife is my go-to for large salami sticks, pastrami slabs, and cold smoked bacon blocks. While not as flexible as the prosciutto knife, it gives me better control on denser meats that need more pressure.
All-Purpose Chef Knife
Best use: General purpose, light slicing, and backup when others are being sharpened. The results depend a lot on the blade thickness, angle, and how practiced your technique is.
My main chef knife is an old 8″ Henckels — the logo’s worn off, but it still sharpens beautifully. I often use it for slicing gravlax or jerky if I don’t want to switch knives mid-prep. It’s a versatile blade, but not as thin or specialized as the others.
With a grind angle under 20°, you can get nice thin slices, though it takes more practice and frequent touch-ups. If you use a teardrop/Granton blade version, it helps even more with stickiness control.
One trick I’ve learned: avoid sawing. Try to use one long stroke through the meat. This is especially true for softer cured meats or fish — let the knife glide rather than force it.
Santoku Knife
I haven’t fully tested a Santoku yet, but I’ve researched them a lot. These Japanese-style knives often have a narrow blade and a low-angle grind — sometimes under 15°. They seem like a good candidate for cured meat slicing, especially with a Granton-style edge.
It’s currently on my wishlist, so if you’ve used one for salumi or gravlax, I’d love to hear your feedback. The design has real potential for clean, thin cuts with minimal resistance.
Deli / Meat Slicer
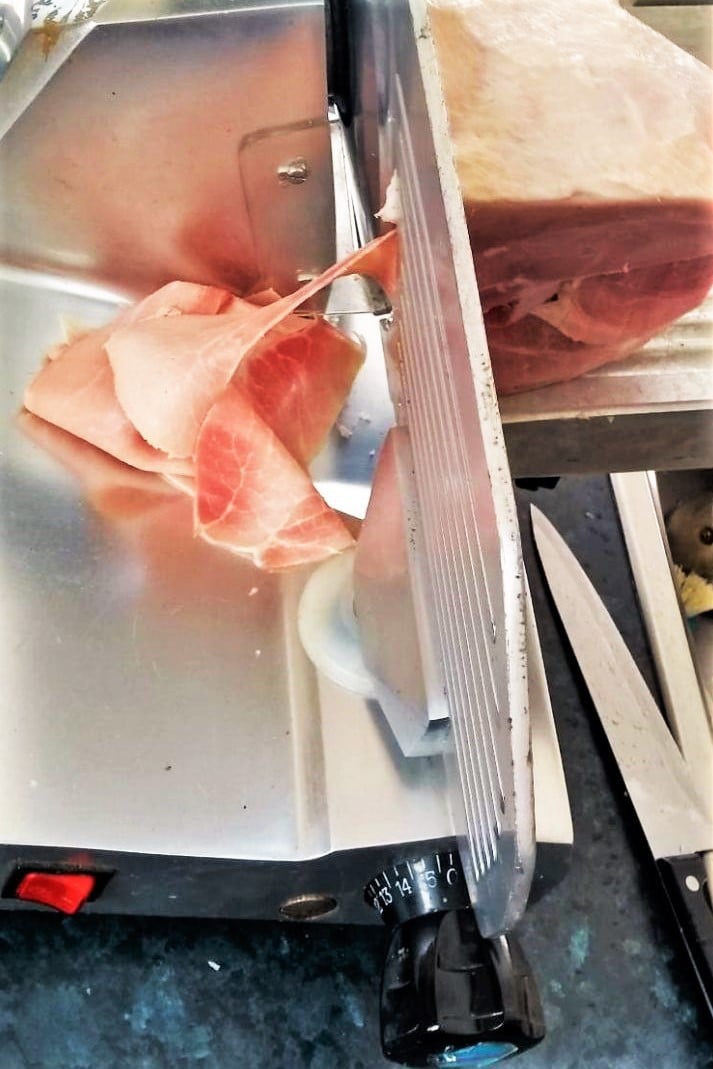
Getting a semi-professional meat slicer was a game-changer for me. It wasn’t cheap, but it made thin slicing much easier — and consistent. Most home slicers under $200 just can’t achieve true wafer-thin cuts, especially on tougher dry-cured meats.
With the right blade, even slices of prosciutto or pancetta come out smooth and translucent. It’s also fast — great for prepping platters or storing portions. If you’re curing at home regularly, it’s worth considering.
Some of the more affordable models can handle thicker cuts, such as ham or cheese, but for delicate slicing, I recommend reading my breakdown of the best meat slicers for cured meats that I’ve tested.1
Coming up next: I’ll finish this guide with some safety tips for slicer use, troubleshooting fat smearing, and how pressure affects results when using a machine.
How To Use a Deli or Meat Slicer at Home
- Leave the slicer unplugged until you’re ready to slice
- Check that the machine is clean and all screws are tight
- Use a protective glove if needed
- Set the blade to your desired slice thickness
- Secure the meat on the sliding guide plate
- Plug in the slicer
- Turn it on and begin slicing slowly and smoothly
- Reset the meat carriage to the start position each time
Pushing Hard or Soft
Firm meats often require steady pressure to get clean slices, but you don’t want to jam the meat into the blade. For softer meats, less pressure is better. I’ve sliced boneless roasts and softer cuts where a light touch actually gives better results.
Fat Can Smear – Refrigerate if Needed
If the meat is room temperature or the fat is soft, you may end up with smeared slices. Chilling or par-freezing the meat for 20–30 minutes solves this. I do it as a rule when working with bacon, salami, or pancetta.
Always unplug the slicer at the wall switch when not in use. It’s a simple habit that keeps you safe — and one I recommend getting used to from day one.
Got a favorite slicing trick or a go-to knife you swear by? Drop a comment below — I’d love to hear how others are slicing their cured creations!

Tom Mueller
For decades, immersed in studying, working, learning, and teaching the craft of meat curing, sharing the passion and showcasing the world of charcuterie and smoked meat. Read More