The equipment you need to make salami depends on the type of salami you’re aiming to make.
I have been making salami for 20 years, with many different techniques and using a whole bunch of different gear. There are some definite tips I want to share that will help you avoid some frustration around producing quality salami.
After doing some market research the thousands of people a day that come to this website have asked for the salami course, so watch this space. It will be in the online course tab eventually!
Salami is a sausage that has some variations so I will define it into 3 different types.
Since the different types of salami need different equipment I will go through all of this in detail. So the three types of salami:
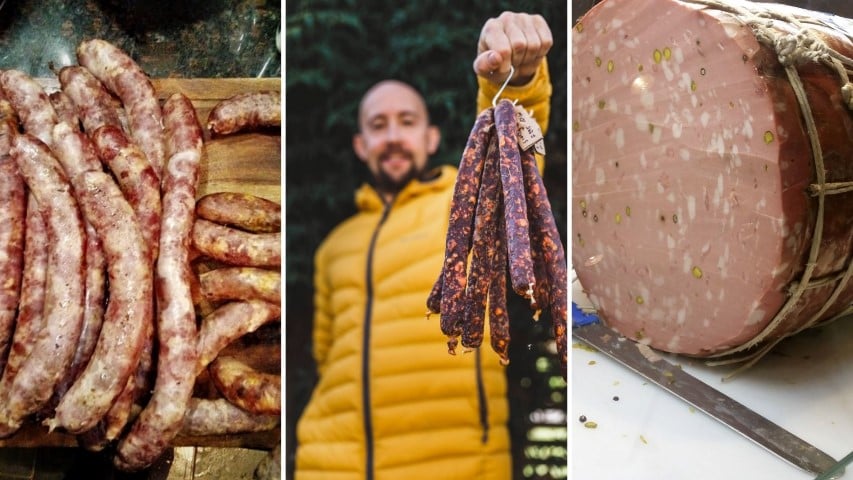
3 Types of Salami
- Hot Smoked / Cooked Salami
- Dry Cured Salami
- Cooked and Emulifised Salami
Equipment for Making Any Salami
The essential equipment for making salami is a meat mincer/grinder and a sausage stuffer. Some meat mincers/grinders come with a stuffing attachment. However, a manual sausage stuffer makes better salami because it generates less heat when stuffing salami.
Essential Salami Making Equipment
- Meat Mincer or Grinder
- Sausage Stuffer (unless Grinder has stuffing attachment)
Mincer/Grinder
Manual Grinders
If you are dealing with small batches of meat for salami, for example, less than 6 pounds or 3 kg. You could get away with using a manual meat grinder.
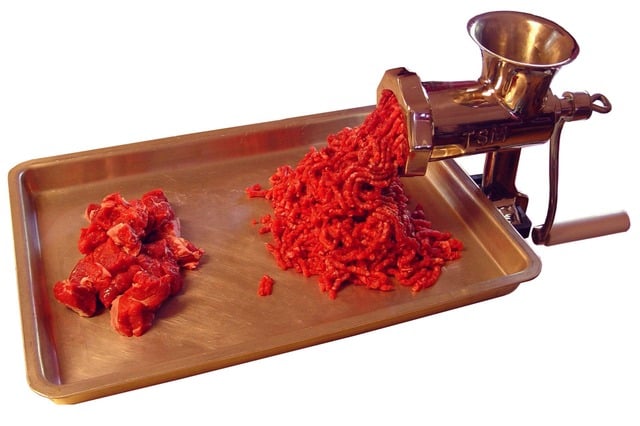
With a decent manual meat grinder, you can achieve exactly the same outcomes as an electric. Also, since you are not creating much heat due to the slow mechanical process, there is a slight advantage too. You have less chance of the meat melting or becoming a kind of emulsified salami meat.
I believe this is a release of myosin proteins in the meat, but don’t quote me on that. I would have to dig through one of my textbooks to confirm that.
Whenever you make sausage or salami, you want the meat to be barely above the freezing level for multiple reasons.
Firstly, it’s for minimizing bacteria making the meat as safe as possible (unwanted bacteria grows exponentially as meat temp goes up above fridge temperature level).
Secondly, you want the separation for salami between meat and fat visually, you want the grinding or slicing that the machine does to have a nice separation (also why you grind meat and fat one after the other).
This is also why some of the stuffing and meat-mincing grinding attachments you get for standing mixers such as KitchenAid smear together the meat that you don’t want, they work too fast and get too hot.
(especially when used for stuffing salami, I consider a standing mixer with a stuffing attachment a poor choice for making sausages or salami)
As I see it, you’re talking about some serious manual labor using a manual grinder on any reasonable batch of sausage or salami.
And this is the way, and was done for many many years before electricity for manual grinders!
Electric Grinders
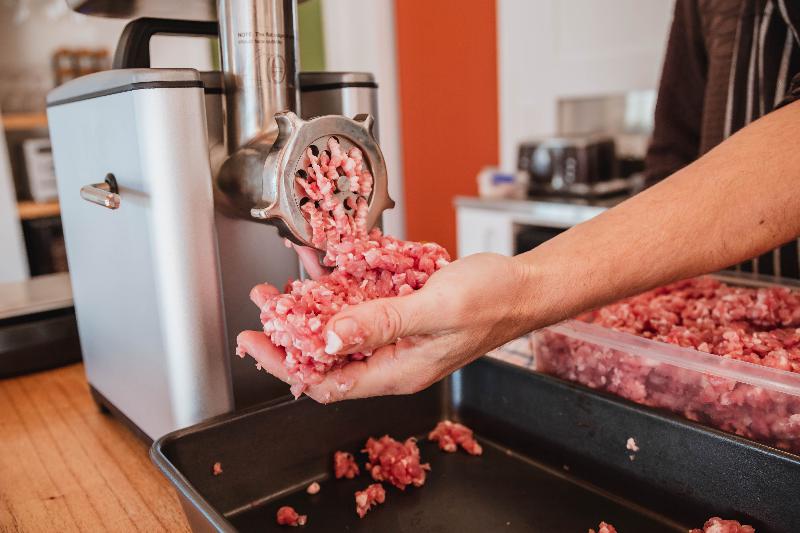
When I have helped people looking for electric meat grinders to make salami, online it is crazy is the number of models and brands available.
Caste metal is better (more $$$), rust free, and ideally dishwasher safe. A lot of the under $200 range of grinders do not tick any of these boxes.
There are certain aspects of grinding meat and the machine you want should firstly last longer than a few grinding sessions and secondly give you quality outcomes.
Some of the poor designs for meat grinders have a lot of plastic components including inside the motor, like plastic cogs. They lack the power to grind, so they will slowly cut the meat leading to what we call around here ‘schmoo’ meat, or emulsify. Heat up too quickly also.
The chute and auger are lightweight and aren’t designed to be put in the freezer prior to grinding (this is a good tip for mincing any meat, to delay the heating up of the moving parts whilst grinding).
In summary, you need to have enough power so the motor doesn’t get strained and struggles to cut through the meat.
And having an electric grinder that can run for 10 or 15 minutes without getting hot and potentially becoming faulty.
Attachment to Mixer Grinders (ie. KitchenAid)
There are a few brands out there that have an attachment to the standing mixer this means that you can slot on both the grinder as well as a stuffer for making salami.
In my experience, this equipment doesn’t normally do a very adequate job unless you are doing an incredibly small amount of salami.
Moves too fast, and heats up too quickly.
Don’t get me wrong, these are probably better than doing it with a manual crank handle grinder or cutting the meat with a knife [did this once don’t go there].
Stuffing Attachments on Mincers/Grinders
With some of the electric salami/sausage grinders, I have had, including the current Kitchener 1/2 HP.
Inside the meat part it pushes the meat down into the organ that then feeds it to the cutting discs. You can take off the cutting disc and put it in a stuffing tube. And if I didn’t have a crank handle manual vertical stuffer, I would be using it.
But as I’ve highlighted a few times, stuffing salami using an electric auger or motor. It always generates quite a bit of heat, and the golden rule with handling all salami or meat products is to keep the meat as cool as possible to avoid unwanted bacteria.
There are also issues potentially with air bubbles using attachments for stuffing, which is ideally definitely avoided. Air bubbles could breed nasty bacteria, so a dedicated stuffer, like the vertical/horizontal makes a lot of sense.
They have pressure valves, so as the meat is pushed/cranked through the pressure is released.
The only exception to this is if you were doing a fermented dry-cured salami – but this is only once you have added a mold culture to lower the pH and create an acidic environment. You will want to grind/minced salami meat with equipment that doesn’t heat the meat up too quickly, hence why slower augers are better.
Sausage Stuffer
I talk about the main types of sausage stuffers that I know, but be aware if you’re into a really basic DIY option I’ll list some hacks at the bottom if you are looking to play around with very small batches of salami.
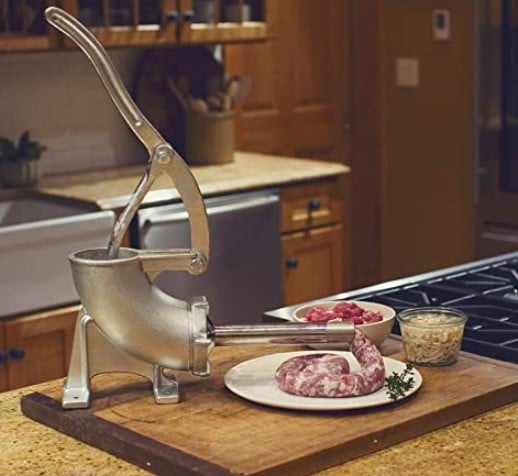
Tinned Sausage Stuffer (Hand Lever)
This is a very classic traditional style that has been the norm in the past many years ago. To be honest, I haven’t used one myself, and I would say you’d need quite a bit of pressure from your arm.
Vertical Sausage Stuffer
Probably the most common sausage stuffer people use for salami and fresh sausage. It has a crank handle you turn.
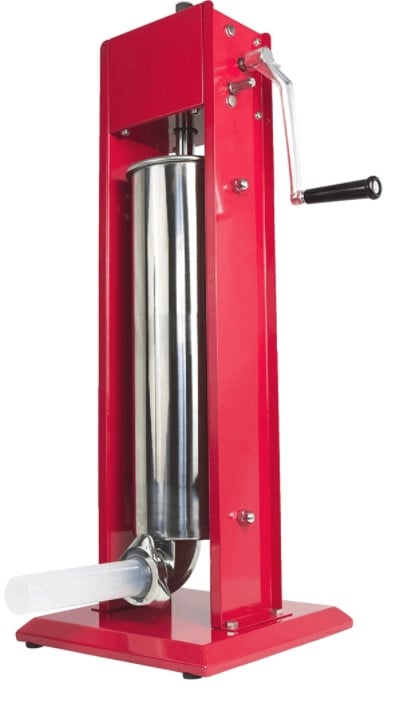
Basically, you are screwing the disk down and putting pressure to push it through the tube.
For one person to operate there are many various sizes and types of vertical sausage stuffers.
For one-person operations, generally, vertical stuffers tend to be the preferred option. But I have learned to enjoy one-person operation with horizontal stuffer if I have nobody around to help.
You get the home stuffers that can do 2 to 4 pounds or 1 to 2 kg. Right up to 16 to 20 pounds or 8 to 10 kg of salami or sausage and one canister.
One thing to note about a vertical sausage stuffer is the position of the handle that you use to turn clockwise or anticlockwise. You want to be thinking about the height that this is at when it sits on your bench all countertop.
If you have to crank a handle, and you do need to apply a reasonable amount of pressure and if it’s sitting at your shoulder height, it can be a pain.
So this will depend on the setup you have at home.
To highlight some of the main differences and horizontal and vertical sausage stuffers, you can check out the post I write here.
Horizontal Sausage Stuffer
A couple of key differences between the horizontal stuffer and the vertical stuffer.
A horizontal stuffer needs to be on the edge of your countertop, it is long so you need to have space along the countertop for the handle over the lip of your workspace.
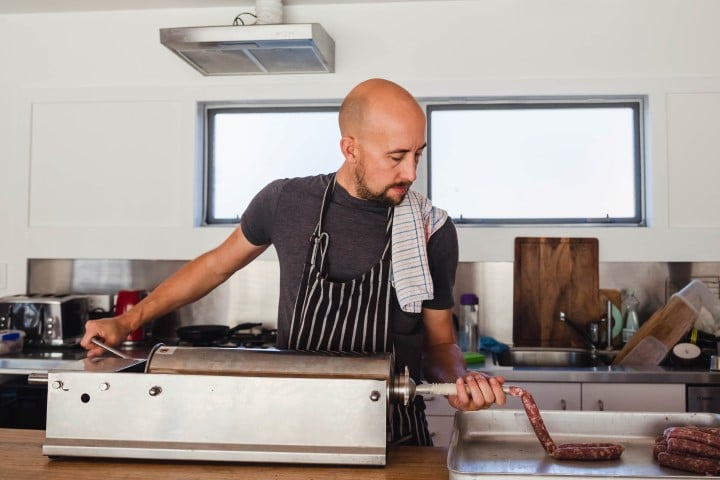
After many sessions at making salami, I can operate the stuffer by myself. But I do find it more fun with friends or family since one person can be keeping the casing type on the nozzle tight, whilst on the other end, somebody cranks the handle.
Communication is key! Basically, I like to use a go-stop command system which is always a bit of fun.
I think you end up often getting more leverage because the crank handle is at a lower position than most vertical stuff that you put in your home.
This is of course personal preference, but just be aware of how it will be positioned since you’ll be potentially spending a few hours on the machine during a good salami-making session.
Also heavy is best since you don’t want the device slipping around on the bench!
Other Equipment for Different Styles
Making a hot smoked or cooked salami is quite similar to making a fresh sausage that you would cook in a frying pan.
Because the hot smoked /cooked salami will be ready to eat when you finish the process it is much quicker and simpler than dry cured salami.
With the hot smoked salami (here is how to make salami in a smoker I wrote about) cooked salami, you grind your meat and fat. Mix the salt and spices and any other ingredients. You stuff the mixture into a natural or synthetic casing.
Then you can either simmer in water, bake, or hot smoke the salami until safe internal cooked meat temperature has been reached.
If you do this at a lower temperature such as 170 to 200°F or 80 to 100°C, you can maintain the pork fat structure without rendering or melting down. Similar to making hot smoked bacon.
Baloney is a commercially cheap version of a classic emulsified salami cold mortadella from Italy.
Much like the hot smoked cooked salami, emulsified salami has a much more uniform texture. This is due to the addition of ice for this cold water and binding the water with the proteins.
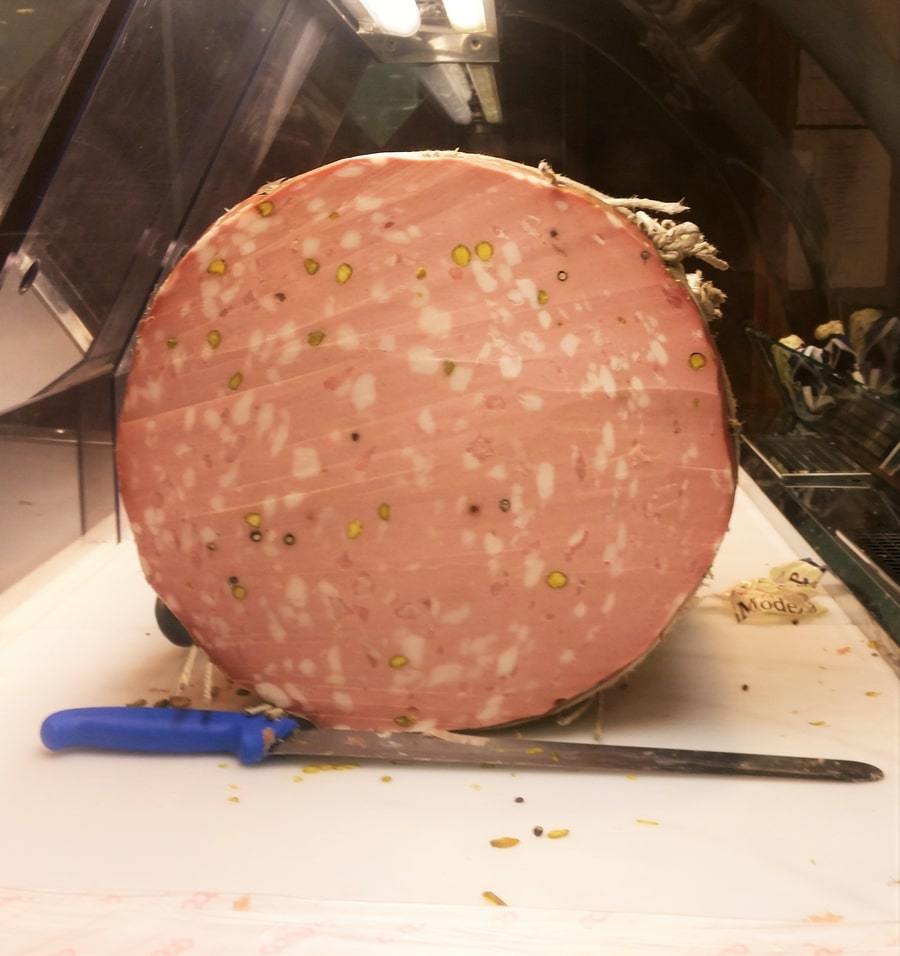
It’s kind of the same process of oil and egg to make mayonnaise it smooth texture.
Smoking Equipment for Hot Smoked Salami – Cooked/Cotto
Cooking/Smoking Salami
There are many types of backyard smoke that you can use, just remember that you want a temperature/smoking around 200 to 250 Fahrenheit or 80 to 120 Celsius.
Depending on the thickness of your cook salami this could take one to five hours.
Here is a bunch of backyard smokers who will get the job done, remembering ideally you want even heat but also the salami (here is a link to the category on this site about salami) to be hanging rather than sitting rack.
However it depends on how the hot smoke enters the smoker. You want it indirectly and even heat temperatures.
Here is some equipment I have written about:
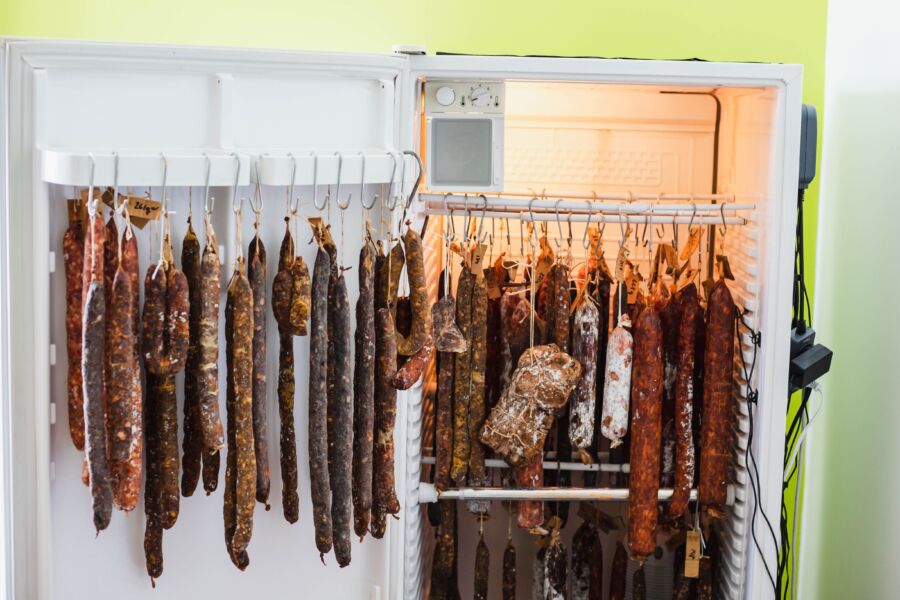
Smoking Equipment for Cold Smoked Salami – Dried
My two favorite cold smokers (I wrote an article on the easiest smokers to use here) for salami would be the smokai smoke generator for its variable control which can be attached eventually to any type of smoking chamber.
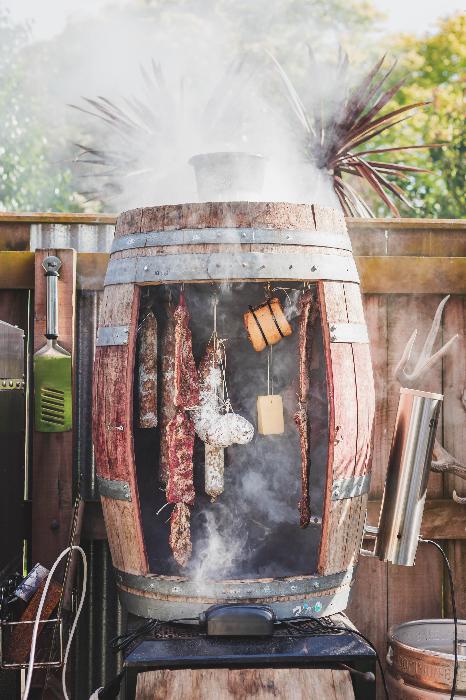
You can attach the cold smoker to:
- Old Fridge
- Old Wine Barrel
- Gas Grill
- Smokehouse
- Wooden Box
- Any area you want to hang or place racks in for smoking
A pellet tube smoker can also be placed inside many different types of cold smoking chambers.
A pellet tuber smoker is a basic little tube device, ideally all with angled sides so it doesn’t roll around. It has perforations all along with that for airflow.
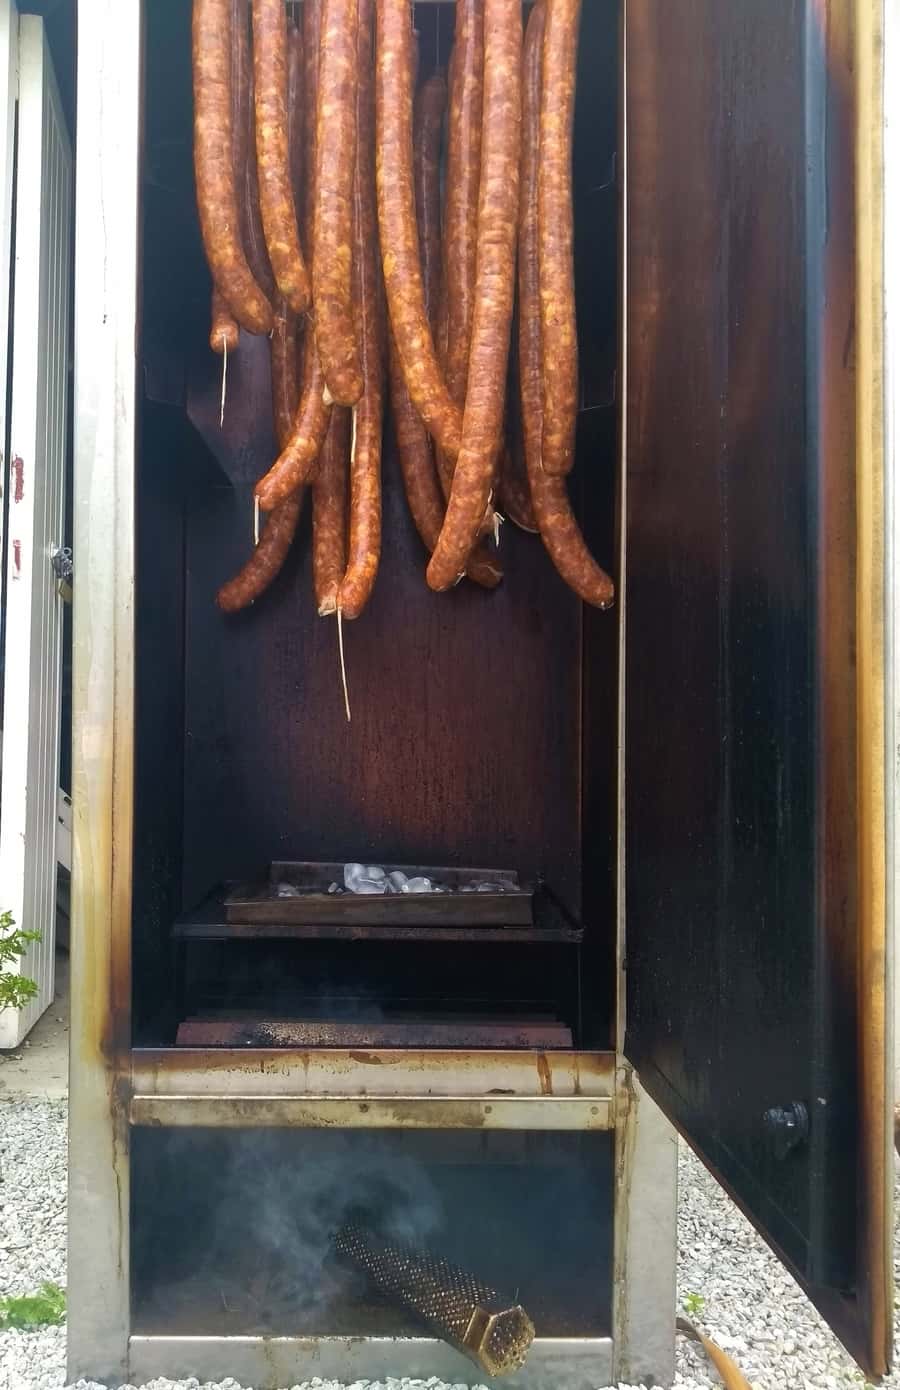
You get one end going with a flame until eventually, a flame is about four or 5 inches high. Then you blow it out, and it just makes smoke! Take 5 mins to get going for me.
For the 12-inch pellet tube smoker, you can expect about 3 to 5 hours of cold smoking.
One difference between the Smokai smoke generator and the pellet tuber smoker is that the Smokai smoke generator is outside the smoking chamber.
Therefore it is not adding or creating heat inside the chamber, cold smoking salami needs to be done under 86°F or 30°C ideally a lot less than that. If you want a full rundown on cold smoking, I wrote a detailed guide here.
Baking & Simmering Cooked Salami
For certain types of cooked salami, the Italians called this Cotto.
You can either do it in an oven or for more of the emulsified styles of salami like mortadella which are simmered in water or steam and another which is more of a commercial type of steam oven.
Other Salami Equipment & Consumables
Will this equipment depend on what type or style of salami you want to do.
Cold Smoker
I’ve found having a cold smoker, I smoked a lot more than just salami and meats. I cold smoke salt, spices, eggs, chocolate, vegetables, and of course dairy-based products.
I would be recommend going for either a Smokai smoke generator (full review here) pellet tube smoker (how-to here).
Butcher Twine (non-waxed)
If you go to be hanging the salami up, you’re going to be needing to do some knots. I have used simple twine that is more sort of for crafty projects.
But ideally, you want the butcher’s twine which has some sort of repot as well, this is important when you’re tightening up whole muscle charcuterie or larger salami small goods.
Casings
Natural Casings
From sheep, pigs, and cow – many different sizes for salami, from 20mm wide (very small), up to beef bungs which are 150mm.
They come preserved in salt, and you soak them for 30-60mins before use in freshwater.
They kind of shrink with drying and also have the best texture I think, but tend to be the easiest to tear when stuffing! Also being a natural product, there will be variations, and they aren’t always uniform.
Cellulose /Collagen
Again many types, you collagen skin/bone derivative – you get edible and non-edible varieties too!
Cellulose is strong and non-edible, often up to about 45mm wide.
Fibrous Casings
Non-edible, for the likes of summer sausage or pepperoni, they are permeable like the rest of the above.
Plastic Casings
Used often for storing minced meat, I try and minimize my plastic, so I prefer not to use these types.
pH Meter
For the type of dry-cured feremented salami, many of the home charcuterie makers prefer to invest in a pH meter, this would be the same thing used in the commercial setting as well.
The idea here is a lower pH level is a higher acidic environment, once created in your salami (here are an article on pH meter salami testing), its another tool for protecting the salami from unwanted bacteria, as well as giving some types of salami that tangy nearly citrusy kind of flavor.
The idea of dry cured fermented salami means that after the stuffing process the salami as in the case thing, a fermented salami goes through a fermentation stage for 24 hours to 3 days.
This involves inoculating the salami with a certain type of starter mold culture some are for slow fermentation and some are fast fermentation depending on the process.
But the golden rule is always you want the pH level to be below 5.3.
So for a pH meter, there are meters designed for meat probe testing.
Don’t even bother using any other types of pH testing paper, these are completely inaccurate for this type of application.
Salami Pricking Needle
I tend to just use a little tack or a small needle. The idea is that you get rid of all the air pockets that you can see in the salami, there are three-pronged needles that are sold in the commercial production of cured salami.
For home find just use a little pin prick device, after stuffing the salami. You don’t want a big hole, just a tiny prick!
Once you start getting into larger batches, pricking salami sausage needles are useful.
Baking Trays
It makes a lot easier if you’ve got decent-sized baking trays of course you can just use a kitchen bench but it’s nice to keep the salami in a certain area.
It also helps when you need to chill down the salami during the process because you’re always trying to keep it as cold as possible without freezing level to minimize the unwanted bacteria.
What we do is often put these trays in an upright freezer with a lid on the top. We can just put the tray of salamis in for 15 to 30 minutes to chill it down while we’re working on another batch.
Cleared-out vegetable drawers in the main fridge work well also for loading up salami batches!
Simple & Thrifty Approach to Making Salami
Knife for Making Minced Meat
I have had the displeasure of doing this for an inperson course, I wasn’t planning on showing them how to make dry cured salami but they requested it.
They didn’t have a meat grinder, so a few of the participants & I spent a couple of hours with incredibly sharp knives crisscrossing to create our hand-sliced mince.
This is a time-consuming process, but if you were keen to make a very small batch of a few pounds or 1 kg, you could initiate this challenging little task.
Funnel or Top of Plastic Bottle
If you want to be thrifty you can use an old plastic bottle to create maybe a funnel to stuff the sausage (link to the sausage category on this site) into the casing. If the casing is big enough like say 40 or 50 mm across or two or 3 inches.
Potentially you could stuff the casing by hand.
But in most “cases” (pun intended) you’ll be using to make salami, you do need some kind of stuffing device or equipment.
Some of the manual grinders you can get have a stuffing attachment to them as well for small batches this could work as well. But as mentioned you may get more airpocked than a horizontal or vertical stuffer.
Equipment for Salami Tip
Whether you make 20 pounds/10kg or 180 pounds / 90 kg – I’ve found if you are doing quite a few recipes, it can end up taking a similar amount of time! Including setup, spice calculations, and cleanup.
But well worth it…. below is one of my dry curing DIY fridges (*link to guide on building fridge) with 160 pounds/ 80 kg.

Tom Mueller
For decades, immersed in studying, working, learning, and teaching the craft of meat curing, sharing the passion and showcasing the world of charcuterie and smoked meat. Read More