I love my gas BBQ, and over the years, I have tried many methods to get the most out of my hot-smoking adventures. It’s easy, and I reckon once you get the basics, you are going to be hooked!
How to Smoke any Meat on a Gas Grill BBQ
- Salt cure or brine meat
- Refrigerate and form the pellicle
- Heat up indirect burners & reach the target temperature
- Place smoking (deciduous) wood into
smoking device - Place meat on the
unheated area of BBQ - Observe temperature or use a thermometer
- Meat is cooked when the
internal temperature is safe or verified through observation
Because you have a gas BBQ already setup it’s easy! You just need to smoke. However, I ‘ve learned a bunch of tips to hopefully make this smooth sailing (and smooth smoking!).
Low and slow ribs, beer-can smoked chicken, smoked turkey, glorious fish, smoked pastrami bbq – whatever you are trying to conjure up with some smoking flavor.
This guide should hopefully get you on the right track. It will cover all the essentials that I have used and learned about.
Tip: Finding out how the heat/air circulates in the BBQ is key. The first time I tried to do this, I used a smoke generator through the rotisserie hole on the side of the hood. I didn’t put the flat plate below it.
So it pushed the smoke straight out of the vented hood. It came out lightly smoked pork loin – I was happy but it could have done with more smoke infusion.
Gas Grill Smoking Guide
A guide to choosing the wood for smoking. If you want the shortest answer. Choose applewood it’s universal, it works with any meat; the idea is having some sweet and subtle flavored wood that you can smoke most meats with (or vegetable & cheeses).
1. Salt Cure or Brine Meat
To help retain moisture in the meat whilst the smoking is going on, I always use the power of salt. I have a really simple guide to making this work every time.
You can use equilibrium curing to get the right salt dry cure for the meat. I generally use 1-2% of the total weight of the meat. This means you won’t oversalt, which seems to happen to a lot of people.
For example, 2% of the weight (the metric system makes this easy).
1 kg / 1000 gram chunk of meat = 2% = 20 grams of salt (kosher or sea salt preferably – nothing that has iodine)
or
Salt brine means a salt mixture with water (and spices/herbs/wine, etc.) in which you submerge the meat. There is some info on brining here relating to brining fish before hot smoking.
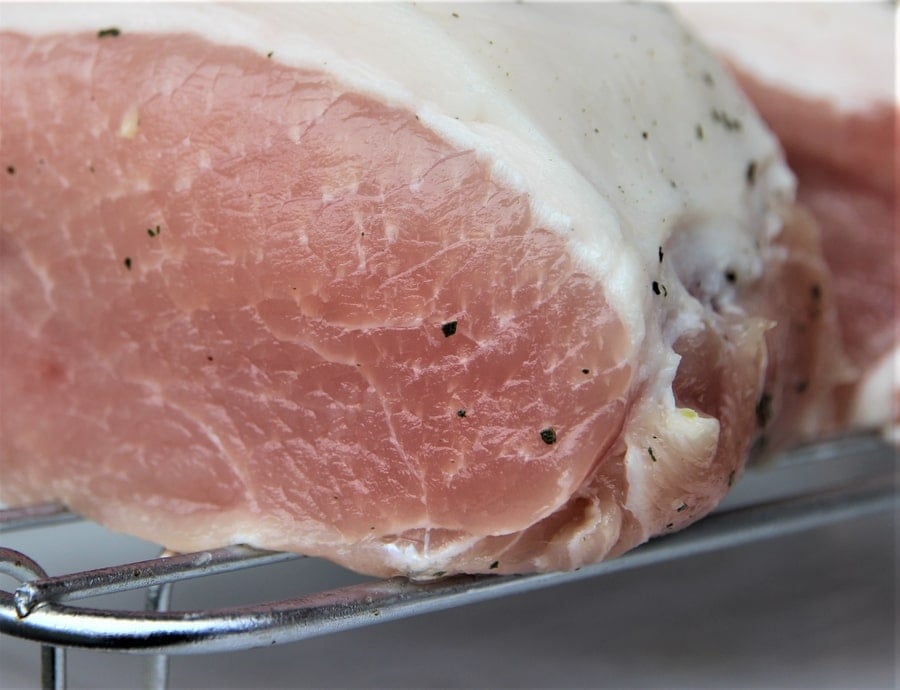
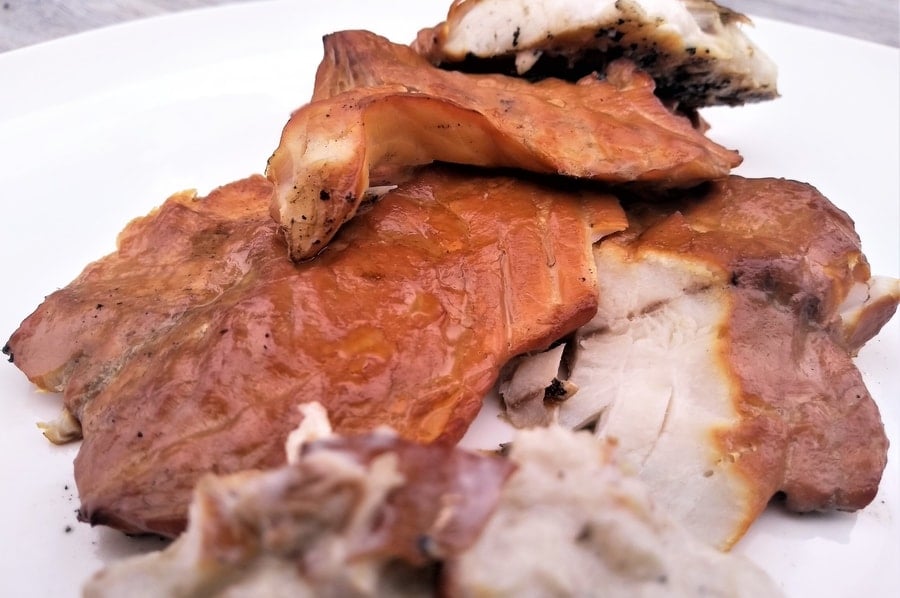
For instance, for this pork loin, I had it in 2.5% salt equilibrium cure and 1.5% raw sugar. A simple cure, and after five days, it was ready for a BBQ smoking session. Because it was Equilibrium cured, I could leave it in the fridge for longer and not worry about over-salting.
If you’re doing short term curing of meat such as smoked fish, jerky, hot smoked bacon, smoked ham, smoked pastrami or corned beef. I would recommend you have pink curing salt no. 1. Here is an in-depth post on curing salt for meat.
Pink curing salt should be @ 0.2% of the total weight of the meat, but of course, always follow the manufacturer’s instructions.
2. Refrigerate and Form the Pellicle
Pellicle will mean more smoke flavor attaches to the meat (here some tools for smoking/grilling), because the bbq isn’t as enclosed as a smoker – you really want to do this step to help get the most smokiness you can from the bbq.
In the fridge is the easiest, and I just use a metal rack or lay down bamboo sticks and put the meat on top. This allows some air circulation around the meat. So the pellicle can form. Here is a post on forming a pellicle.
It depends on the density of the meat, but a minimum I think of an hour ideally overnight works best, I did some tests recently with pork loin I smoked on the BBQ. After 2 hours it had the pellicle. I left it overnight and it was a bit sticky on the surface of the meat, which is what you want. That’s when you know it has a pellicle.
Here is a photo with a DSLR camera for more detail.
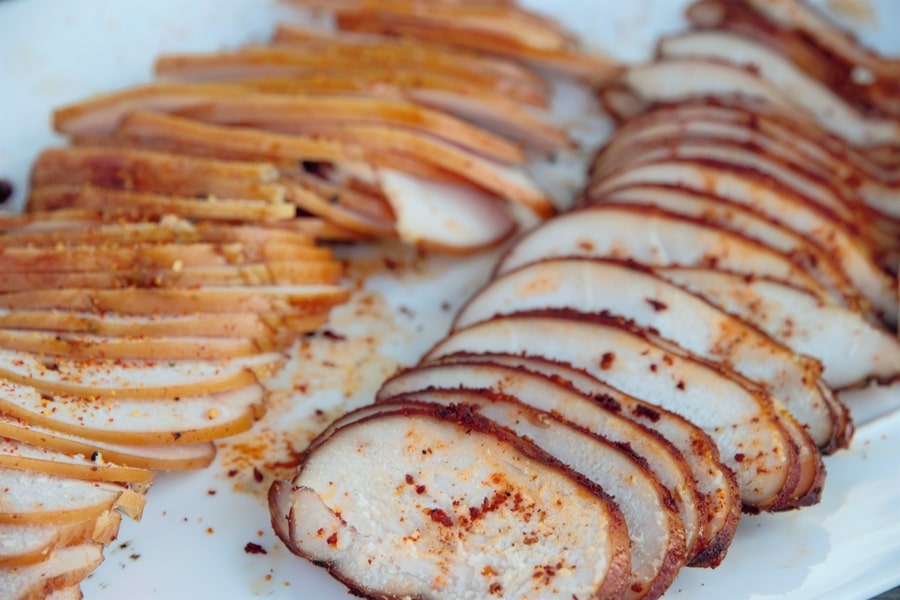
Also, after brining the chicken for 2 days, I left it in the fridge. The pellicle actually formed a skin, which was very noticeable after the low and slow smoking session.
The chicken was still excellent, but here it is with a pellicle ‘skin’.
3. Heat up Indirect Burners & Reach Target Temperature
The basics of success is really just maintaining the 220 – 260 F and having some smoke involved. The size of the meat becomes irrelevant, if its big it will take a longer time. If it is smaller it may take 1 to 3 hours.
I say just keep it simple.
Hot Smoking is the same as ‘low & slow‘. It is maintaining a consistent temperature whilst indirectly cooking (like baking) the meat. You are adding some smoke at the same time for flavor.
See below for the table on internal temperatures based on governing food safety authorities (with links) as a guide.
I have a 5 burner each burner is very hot, so 1 burner on 1/2 is enough.
However, with not-so-dense meat like trout, where the fillet is 1/2 inch thick. You may want to smoke/cook it for a shorter time. So 1 hour with a decent amount of smoke is enough for me. The complete opposite of the heavy long brisket or pork butt smoking for instance.
(Note the portable smoker can cook fast with direct heat into a small smoking area. I have used this for camping & in the backyard).
Now a smoker that is sealed tightly will always outperform a gas BBQ which allows heat to dissipate. But still – if you want to use a gas BBQ – it can work well, it just sometimes takes a bit of trial & error.
Tip – If it’s a new BBQ, you may want to refer to manufacturer instructions, seasoning the BBQ by heating it up for some time is always needed for a new smoker or grill.
The thermostats are generally built into the hood of your gas BBQ. What I have found when testing quite a few built-in gauges, is that they aren’t very accurate. I have done tests with this, and some gauges have been wrong up to 170°F/80°C.
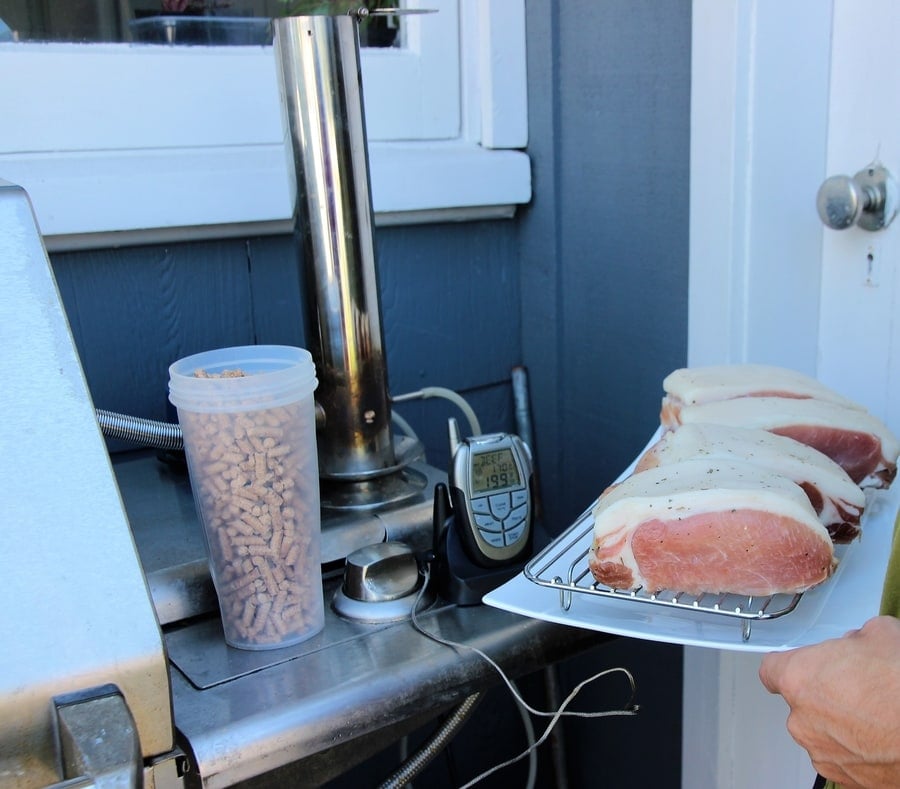
The heat can be different around the bbq. Testing with a thermometer probe can help, here’s a few I evaluated based on usefulness & functionality.
I would suggest getting a decent temperature probe; one will do. Two readings are useful to measure the internal meat temperature and the temperature in the BBQ. I like to test near the meat. Useful for the more extended smoking sessions.
4. Place Deciduous Wood into Smoking Device
Deciduous is a fancy word for not ‘even green’, so the trees that lose leaves in winter & autumn. Here is quick rundown on wood and smoking device options I have used.
Types of Smoking Wood
Wood Chunks, wood chips, wood pellets, wood sawdust – lots of variation so use the ideal sizing for the smoking device (lots of options below).
Here is a list of woods that can be used for a wide variety of smoking projects:
| Wood | Meat | Character |
| Apple | Any | Mild, sweet, subtle |
| Oak | Any | Mild, sweet, dark color |
| Cherry | Any | Mild, sweet, mahogany color |
| Hickory | Any | strong, sweet, use sparingly |
| Pecan | Any | strong, sweet, nutty |
Plenty of other options, just be careful it’s specific hardwood, not softwood. There is a lot of discussion about wood and all the subtly of the flavor. I have found a difference between mild and strong definitely noticeable. Like mesquite and apple. But it is made too complicated sometimes, to help you I will focus on just the major differences – mild, medium & strong.
Ones to avoid are pine, conifer, spruce, eucalyptus, cedar, elm, fir – there are of course more. Resin or sappy woods are definitely not suitable.
You can put wood chunks directly on the BBQ grill. This gets a bit messy but it works to a degree, it’s a rough & ready to way to add some smoke.
Tip You don’t want to soak wood pellets – they will turn to mush – they are dense and bound together ready for immediate use.
Don’t go crazy with the wood, once you get a bit of practice you will figure out how much or how little you want to use. Over-smoked food is bitter, better to go lighter on smoke flavor and make it edible. Remember, hot smoking is baking with smoke flavor.
Start with maybe a few handfuls and see how it burns too.
Fruit and nut wood is the way to go for most wood smokiness, however there are ALOT of options.
Heavy smoke for denser meats, red meat. For fish, I reckon you want lighter wood smoke generally. If you want to read more about universal smoking wood, here is another post.
Different Smoking Device Options
- Wood chunks directly onto Burner
- Foil /Aluminium Pouch
- Smoker Box
- Tube Smoking
- Smoker Box (external or built-in)
- Smoke Generator
Above are the indirect smoking options, below are the direct smoking options for ‘fast’ smoking from a direct heat source
- Portable Smoker
- Wok/Pot Tea Smoking
Indirect Heat Smoking
Indirect is basically the method for most electric, gas, pellet, barrel or charcoal smokers.
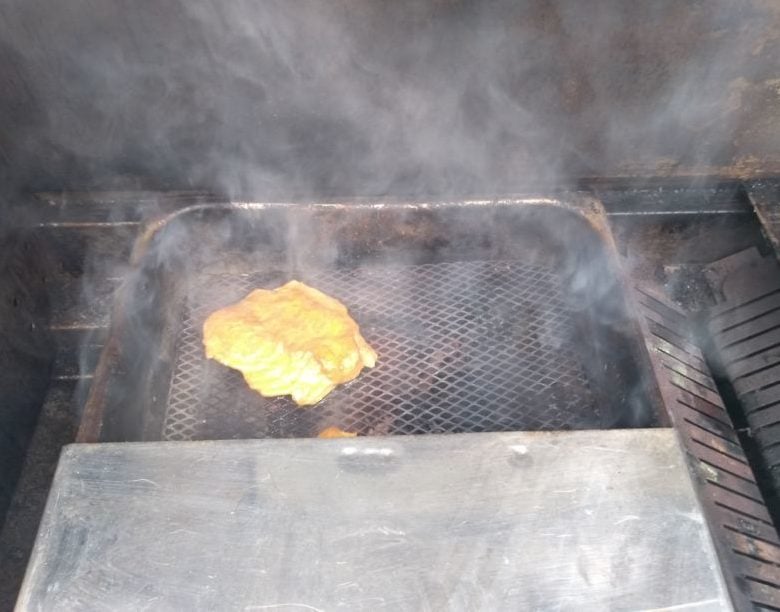
Wood Chunks on the Burner
With chunky wood placed directly on the grill. It does work but does take some management and observation (having a window in the hood helps here). As mentioned, it will give a more subtle smoke flavor, because the smoke will escape due to
You can put these between the vaporizers/flame tamer (if you have them above the burners) or directly on a grill section of the BBQ (if your BBQ produces a lot of heat) above burners to produce some smoke.
I have found a bit of experimentation is needed to find the best place.
As mentioned this can turn into a high maintenance option, but it does work.
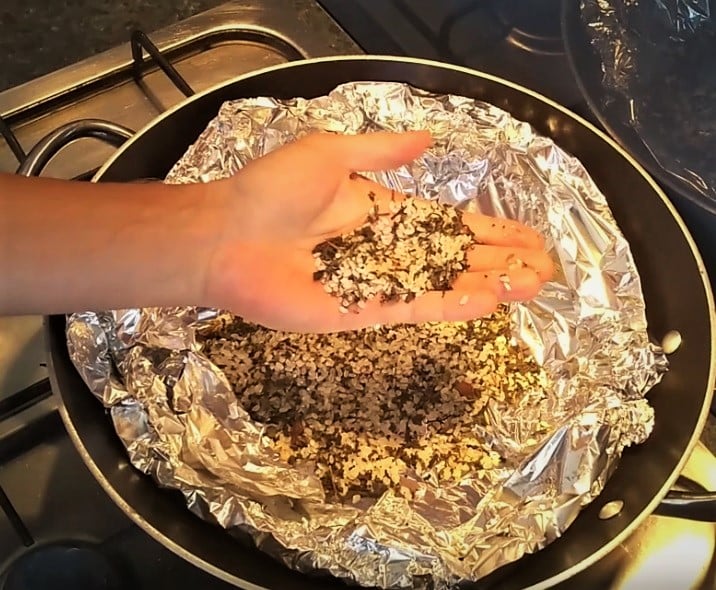
Foil Pouch
I have used it, but you might want to not use it, been reading how it potentially could be bad for you. The high heat and the aluminium isn’t a good combination.
Smoker Box
Cast iron or metal, if you are going to use one of these. Would highly recommend a hinged one, then you can flip it open with a tool. Rather than doing a circus act to try and lift off a piping hot lid (this can be done easily using a long spatula)
Either if it’s built into the BBQ or if you have your own metal box, y
Tube Pellet Smoking
An interesting and useful smoker for the gas
Once they are going you will have plenty of smoke, I like my 12 inch tube, but it depends on what you want to smoke.
Seems you can get
Here is page with more details on pellet tubes.
Smoke Generator
This is a cheeky useful way if you want to be able to adjust the amount of smoke a bit more precisely.
For me, this is generally the gas grill or the kettle grill.
If you want more info on smoke generators, here is a full breakdown.
Direct Heat Smoking
I tend to use this method for ‘fast’ smoking sessions, so that like under 25 minutes. Like sausages, fish fillets or pork chops – for more easy smoking ideas I wrote a post here.
Plank Smoking (Light Smoking Option)
Not sure if this is effective with smoking meat properly, I think in terms of presentation this is more about serving food on a smouldering wood board.
15 min soak of hard wood (generally stick to oak, fruit or nut). Will write on wood in detail at some point. It’s direct heat because you need to get that plank smoking!
Portable Smoker
Direct heat smoking/cooking for fast smoking is what this is really good for. It is also compact, so you can take it fishing. But for on the gas
Great for camping or if you want to use an outdoor heat source, doesn’t have to be a BBQ. Wood sawdust works best, because of the short time to get smoking and also generally short cooking time. Trout fillets can be done in 10-15 minutes.
Wood pellets are also really good with this form of fast direct heat smoking.
Great for trout & salmo, using a portable smoker is good for less dense meat like trout or salmon – it’s sealed so the smoke is rather intense.
It’s direct so it’s the opposite to the low & slow! In my experience, this is definitely the way to go with seafood and crustaceans like scallops, mussels etc…
Wok/Pot Tea Smoking
I have used this method on the gas grill side burner or even in the kitchen. It’s a Chinese traditional style, but can be adapted to many different meat or other foods to get it some smoke flavor.
The traditional blend with tea leaves, spices & sugar does make a very distinct flavor. Completely different to wood smoking. But, you can definitely use wood for this direct heat style also.
Please find a full post here on wok/pot smoking.
To Soak or Not to Soak Wood
Having some moisture in the wood by soaking can regulate the heat as well. 30 – 60 mins of soaking works for me with most wood chunks of the larger size variety.
Should I use a Water Pan for Smoking?
Some people like to keep a (heatproof) pan of water in the BBQ, this is important for the long hot smoking not so much if it’s a short smoking session. Add some moisture to the cooking is a common technique for roasting in a conventional oven also (the same principle but with smoke!).
5. Place Meat on Unheated Area of BBQ
So if you are using a smoke device, chunks or foil pouch – just put the meat on
I think it can be over complicated, but as long as you in the heat range below and cook until done –
That’s why so many are keen on the ‘low & slow‘ style hot smoking. Because it gives the meat all the time to absorb the smoke gases where the flavor actually comes from.
Put the food on the unlit area of the BBQ– you will need a hood or lid which is pretty standard nowadays on BBQ. Put the meat on the grill section, not the hot plate/teppanyaki plate.
Gas grill bbq’s vary a lot in temperature so you will need to use a bit of practice to find the right setting. If it’s a three burner, you may only need one burner or one on high & one on low. Just give it a go.
Tip – Using a pan of water can help make sure the heat doesn’t get too high. Whilst also adding some moisture during the smoking process, for the longer smoking session.
The guide below is more about knowing when the internal temperature is reached the USDA standard for safety.
You mat find that your preference is below this, but I just want to give some safe guidelines.
| Meat | Safe Internal Temp – USDA regulations |
| Beef, Lamb, Veal | 145°F |
| Pork | 145°F |
| Poultry | 165°F |
| Seafood | 145°F |
USDA Cook Temperature Link – Food Safety & Inspection Service
Foodsafety.gov – Federal Food Safety Information
6. Observe Temperature or Use a Thermometer
Like any budding chef or cook, pitmaster or BBQer you just want to use the usual methods of checking to see if your meat/food is cooked.
You can get accurate if you want and use a thermometer/probe, I have used one in the past for various projects: wild turkey, porky pig and smoked chicken goodness.
The jury is out about soaking the wood with wine, beer or other concoctions, it does sound impressive to guests, I haven’t done testing. It does give me a great reason to pop open some hooch/moonshine or
The temperature probe for the meat will be useful here; you can use good old fashion common sense and observation. Remember, you this is the same as baking with smoke involved. So you are cooking the meat at a low temperature. I have a couple of suggestions about
For fish its a bit easier, because cooked fish will come off the meat in a flake when it isn’t raw.
Tip – Don’t open the hood often, you will lose a lot of heat because you are cooking at lower temperatures generally. Unless using direct heat options like a
7. Cooked – Internal Temperature or Through Observation
Just like when you are cooking a roast or pulled pork, the same attention to detail is needed, so you know when it’s done. Temperature probes help of course here too.
I have had the charcoal, 2 burner, 3 burner, and the 5 burner currently. Found that it takes some tweaking, so working out how many burners and at what setting you need to maintain a steady cooking/smoking session will just take practice.
Currently on my 5 burner = 1 knob at full = 200°F / 93°C
Tip – Under smoking better than over Smoking, it tastes bitter when over smoked.
Once you get the Basics More Ideas
So as above, you can try throwing some fresh herbs to complement the food on the smoking wood, maybe even a few spices. That is what the tea wok Chinese style is about, a mixture of aromatic flavors.
What is the Easiest Meat to Smoke?
The more delicate or less dense the meat the quick and easier it will be to smoke and cook. Fish and seafood tends to smoke quickly, it also means a lighter smoke flavor overall.
Tenderloins, ribeye and smaller size pieces of meat will cook faster – less time in the smoke hence less smoke taste.
Here are some ideas on what I think is the easiest meat to smoke.
Related Questions
How do I Use Charcoal BBQ for Hot Smoking?
Putting the charcoal to one side of the bbq and having a hood in place, it is possible to hot smoke food. Due to the lack of heat control, this method will take fine tuning to achieve a result.

Tom Mueller
For decades, immersed in studying, working, learning, and teaching the craft of meat curing, sharing the passion and showcasing the world of charcuterie and smoked meat. Read More