After making homemade salami numerous times over the years, we’ve learned a lot from our mistakes, which I’d like to share. It’s not as straightforward as whole-muscle meat curing, and a lot more complicated than hot-smoking meats.
Specifically, I’m talking about the salami that is fermented and dried, the traditional approach, which, in my opinion, yields the best flavor development.
Smaller diameter salami is easier to produce using the dry-cured process than larger diameter.
It’s tough to encapsulate everything that needs to be done in the craft of salami making, since many other nuances and subtle skills can only be acquired through experience or training.
Here is a list of the salami mistakes/errors I’ve learnt from that I wish to elaborate on and highlight the lessons learned:
- Level of Binding in Meat
- Acidity Fermentation
- Ratio of Fat
- Salami Casings
- Compression Netting Over and Under Filling Casing
- Old Starter Cultures
Salami – Mistakes and Lessons
Level of Binding ‘Working’ the Meat
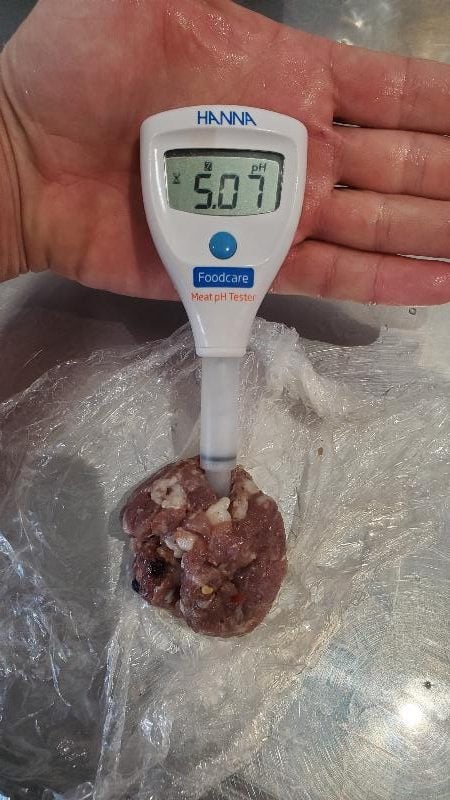
The best picture I could provide showed the lack of binding, and the salami is visible above, while I was testing the pH for the fermentation stage.
We have often found that when you think the meat salami (salami category link) mixture has been mixed enough, whether you do it by hand or with a mixer.
You often need to spend 5 or 10 minutes longer kneading, squashing, and squeezing the meat (we have begun using a meat mixer for this purpose). The larger grinding plate diameters also mean you must mix the meat mixture more. Using 5- to 6-mm cutting plates will mean the bind is not as fast to create.
The picture tries to show a salami mixture with an adequate bind. I have tried to visualize the tackiness by splitting some meat mixture, which leaves strands and a stringy texture.
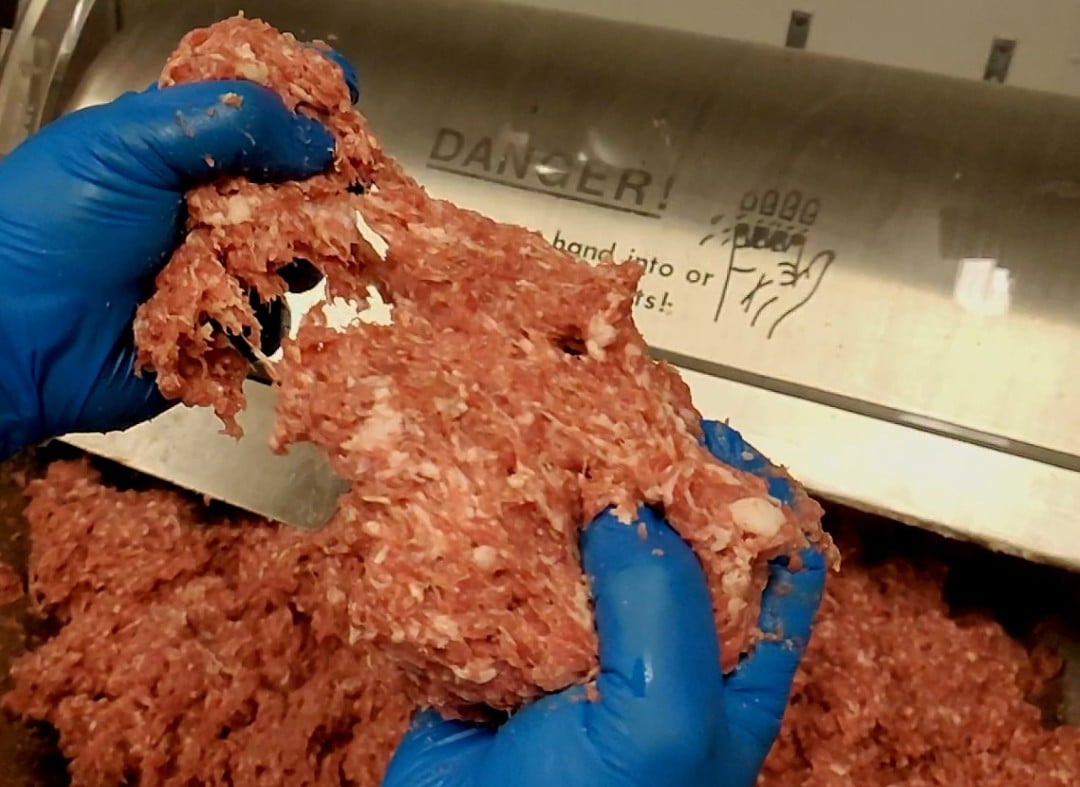
Myosin is extracted from lean muscle meat; the salt also helps in the process.
Solution
Continue mixing the meat until it’s tacky and sticks to the palm of your hand when you invert it. Overworking the meat mixture is better than underworking it I’ve found when making salami.
Ratio of Fat
We only made this mistake once when making homemade salami (here are some easier salami making options I wrote about). Still, if you have excessive fat, you have less myosin to extract from the lean meat.
Also, it may take longer to achieve the desired tackiness in the bind with large amounts of fat.
Solution
It’s easier to take a lean cut, like a pork hind leg trimmed of fat, and use the pork back fat in the mixture.
The pork shoulder of a farm-raised, well-fed pig needs to be examined closely; often, it contains enough fat for both making salami and sausage, without the need for additional pork fat.
Pork belly can also be up to 70% fat. 20-30% Fat in the meat mixture is often targeted for dry-cured salami. I appreciate 30% as a minimum for fresh sausages that are to be grilled.
Intramuscular fat can be harder to see, sometimes known as ‘marbling‘ on meat (i.e., Beef Wagyu). This can be seen in many pigs that have also developed fat.
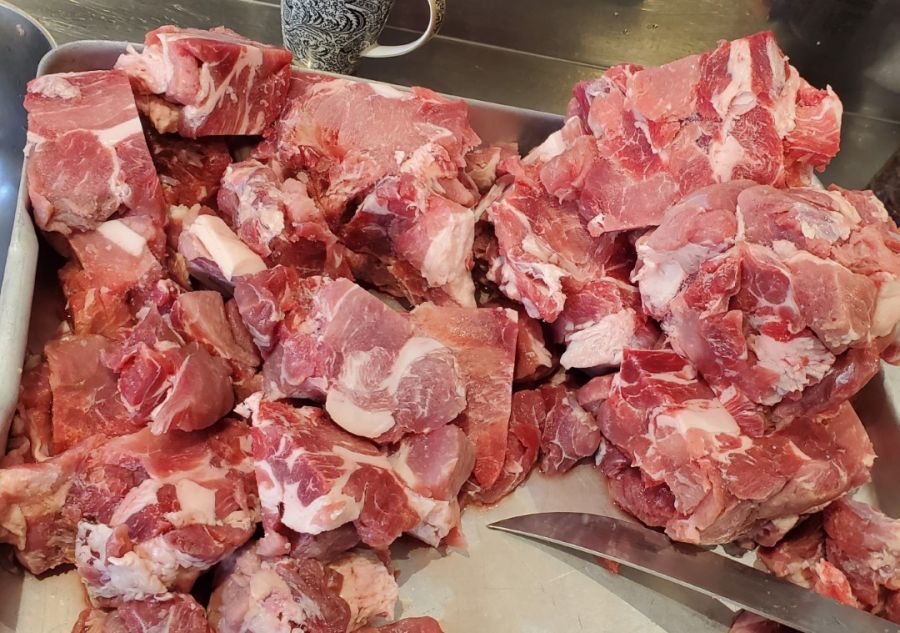
Below is an example of frozen cubed shoulder meat we were thawing for salami. This is only pork shoulder with no additional fat.
The finished product is the final image at the end of this article, which highlights the visible fat level.
Salami Casings
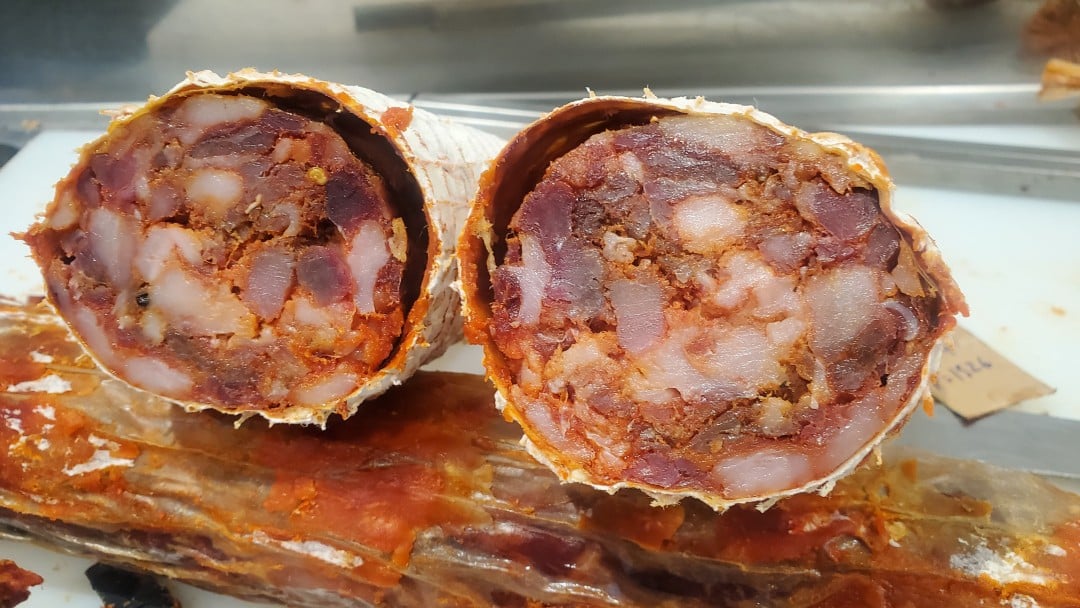
I believe you will have more consistency with natural casings. They are harder to work with and more inconvenient, but I’ve had fewer issues over the years using them. They are more breathable and also bind to the meat on the inside.
The theory was that the excessive mold on the casing had dried the synthetic casing and made it unable to adhere to it. However, the problem was likely multifaceted; we were using a commercial Stagionella dry fridge from Italy that we still didn’t quite know how to use.
The salami casing for dry-cured meats should be attached and shrink as the meat dries.
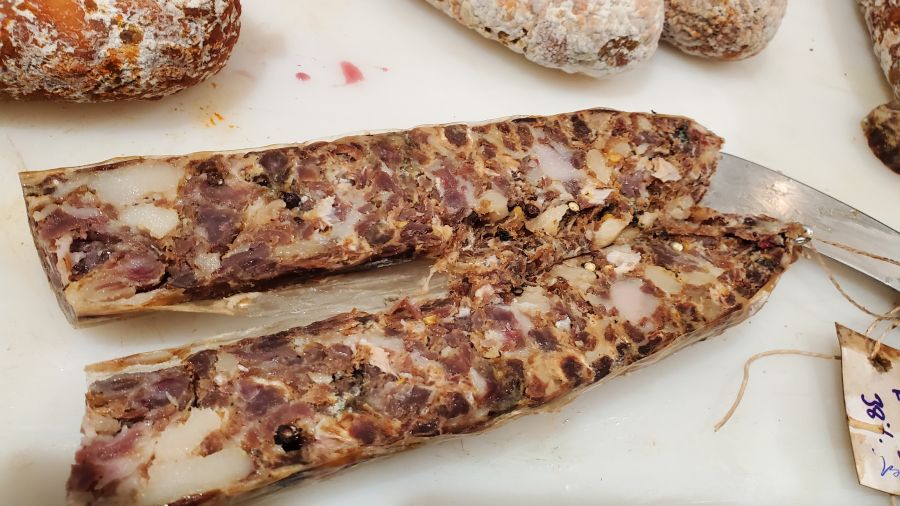
You can see other mistakes in the picture above, such as excessive fat and lack of binding, as well. Below, I’ve also highlighted the netting that can be used to apply pressure to the meat, which helps reduce moisture.
Solution
Develop binding properly, and make sure you don’t get excessive mold on the outside that dries onto the casing. Most types of plain vinegar can be used to wipe away excessive mold growth on the casing.
Compression Netting for Larger Diameter Salami
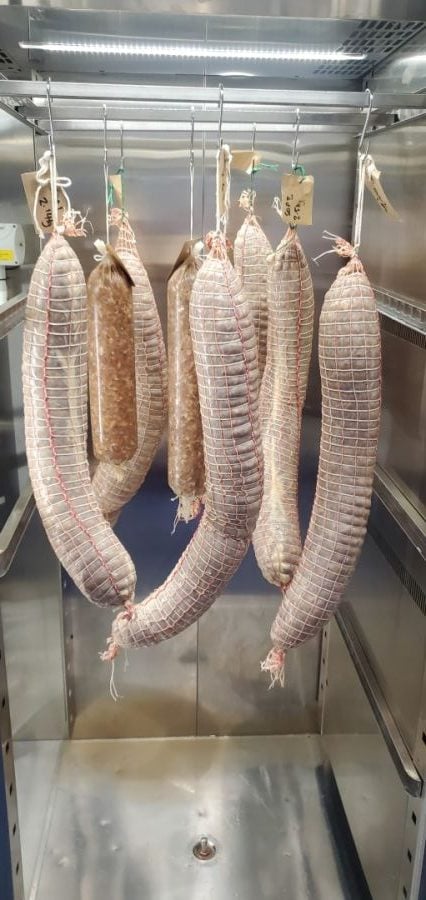
The picture above also shows that the meat is very close to rupturing through the casing. It ruptured in one area, which is not shown in this picture.
Overfilling and Underfilling: In the case of the large-diameter salami using bung casings, underfilling is better than overfilling.
As mentioned in the description, weight can be used on the salami during fermentation, especially since this salami is called “soppressata,” which translates to ‘pressed salami. And as a usually oval shape. We forgot to do the pressing, though the results were solid; here is the finished product below:
Starter Culture
Most of the bought laboratory-grown-type frozen starter cultures, such as T-SPX, have an expiry date of 12 months, and one batch of salami we made the culture was probably 18 months, about six months past the use-by date.
It should be noticeable during the fermentation stage. In one instance, after 12 to 24 hours, there was no sour or tangy smell (I wrote in detail about the unique taste of salami here), typically produced by these starter cultures.
Another way to check how activated the starter culture is when removing it from the freezer. Shake the packet. It should be lumpy in any way. This package wasn’t lumpy, but it also did not ferment the salami.
Solution
Keep starter cultures always in the freezer and use within 12 months, or follow the date provided on the packaging.
Shaking the packet to see if the culture is still loose inside can give an indication that it’s still alive and usable. When it starts to clump together, then it generally means that the culture is ‘dead’.
Salami Tips
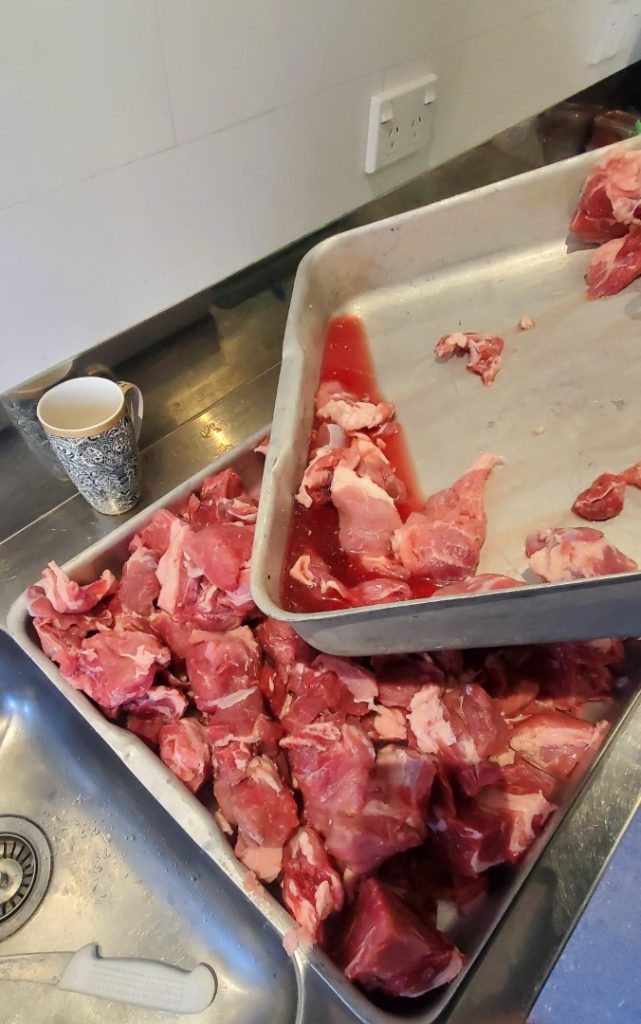
Defrosting Meat for Salami
This isn’t so much a mistake as an observation that might alter outcomes when making salami at home (other reasons why people don’t try to make salami).
We thawed 40 pounds (approx. 20 kg) of pork shoulder for salami. Below is a picture of the water that leeched out of the meat during thawing.
You don’t need fermentation for every salami to work, however. It’s another tool and layer of protection.
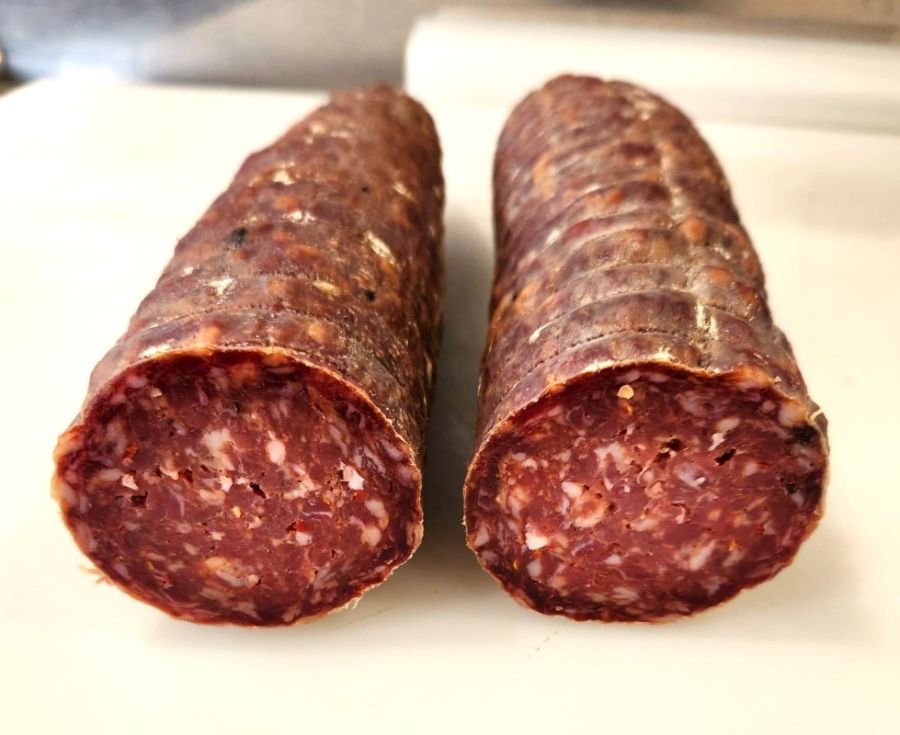
When it all comes together, after learning from many mistakes, here is one of the better batches of spicy salami we created below.
Spicy, successful, and delicious!
Why is Salami Hard to Make?
Salami involves both craft and science for accuracy. Many traditional approaches are not as accurate in outcomes, but can produce decent results. Learning the science behind salami making can make it more consistent.
Do I Need to Add a Starter Culture for Salami?
From tests, naturally,, salami can ferment if held at fermentation temperature,and and red wine can assist in the pr, also to some degree. From tests, salami without starter cultures or red wine has naturally lowered pH, although more tests are needed.
Feel free to leave a comment.

Tom Mueller
For decades, immersed in studying, working, learning, and teaching the craft of meat curing, sharing the passion and showcasing the world of charcuterie and smoked meat. Read More