I’ve been learning how to cold smoke for decades. I thought it would be hard to understand initially, but one must see it as a craft rather than a recipe. I mean that it takes experience, observation, and attention.
Below, I hope to explain cold smoking and slightly demystify the subject. With some essential equipment and knowledge, cold smoking can be incredibly satisfying. I’ve got the how-to, different ways to make the cold smoke, areas to smoke in, and a step-by-step guide below.
Plenty of nuances when it comes to cold smoking, and that is where I can add more than their general knowledge approach, the inner workings of the craft.
Having airflow and ‘cold smoke’ creating a complex flavor from passing around the meat, which will assist in drying and taste. Humidity at higher levels also helps in the process, which is the theory.
Why Cold Smoke Meat
Here are some examples of various cold-smoking I’ve used and learned about.


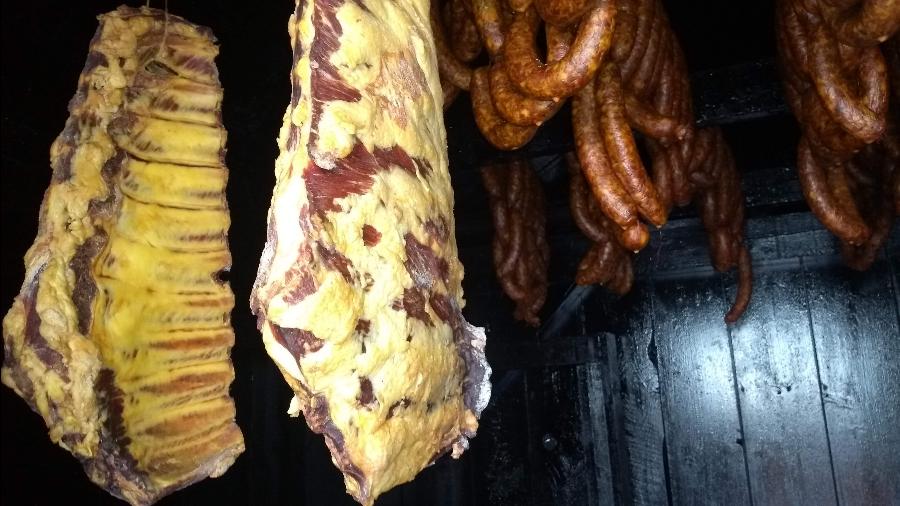
Cold smoking is traditionally used for preservation but also for another complex angle of flavor.
Some, like Traditional Cold-Smoked Bacon, are often considered irresistible because of the salt, the sweetness of the meat (or the addition of sweetness), smoke, and fat!
To clarify, Hot Smoking, whether with direct or indirect heat, always involves cooking the meat to a finished internal temperature. Cold Smoking involves drying the meat with cool smoke around it for flavor and protection.
Covering many aspects of cold-smoking, I made this video below also.
The non-cured options for cold-smoked foods will be elaborated on another page here. Cold-smoking foods that aren’t cured meat are an excellent way to learn and develop a feel for the craft of cold-smoking food.
Ingredients
Salt without additives is the only base ingredient for cold-smoking cured meat, here is an article on what salt I wrote explaining more.
Optional ingredients like sodium nitrate/nitrite can also be used, I’ll link to a comprehensive article I wrote here.
Quality of the Meat
Fresh meat handled properly should harbor less unwanted spoiling bacteria.
You do not want dry/wet aged meat; fresh meat is always best. That has been handled with care and refrigerated.
I have used frozen pork belly for bacon, which turned out great. Other aspects of quality, traceability and care are what I seek in my meat.
Equipment
Cold smoking equipment has two aspects: a device for generating the cold smoke and an area/chamber for capturing it.
You have an area like a hooded grill that you could retrofit with a device. I’ll go over many of the options below.
Devices for Cold Smoke
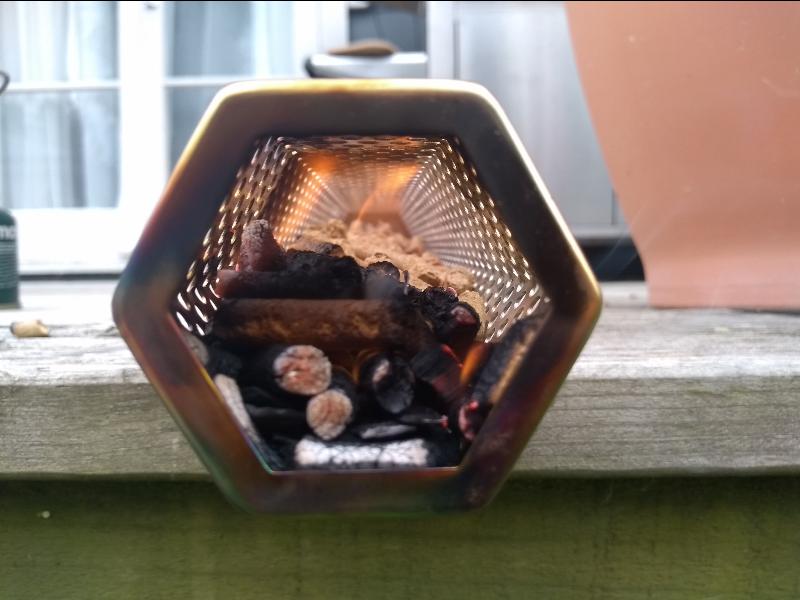
There is a simple approach: You can use minimalistic materials, like a lump of charcoal or two sprinkled with woodchips.
Pellet Tube & Maze Style Smoke Devices
Pellet tube smokers work very similarly to each other. You light one end, and it starts smoking—pretty simple. However, because it isn’t a controlled form of burning, it can be a little hit-and-miss. For example, sometimes I find the pellets stop burning.
Simply use pellets or woodchips and let the flame get to 3″ or about 70mm for 3 minutes, then blow it out and place horizontally in smoking area.
I use a pellet tube smoker on my hooded grill, I’ll write some more about retrofitting a area for cold smoking below.
A pellet tube or maze might not generate enough smoke to fill a smokehouse or larger cabinet, depending on its size and design.
I made this video below with some tips on using a pellet tube smoker.
Smoke Generator
Using the Venturi effect, the air pump blows into the smoking chamber, and the air pipe sucks the smoke from the burning area.
It has a variable controller, so you can control how much smoke is generated and how it burns.
Depending on the wood you use, this means you have more control over the cold smoking project.
These can come in a range of sizes. I find they can create a good amount of smoke. I’ve extensively used them in my gas grill, vertical smoker, wine barrel,and kettle smoker.

Some smoke generators can handle larger chips and chunks of wood, while others are more suited to pellet wood fuels. I’ve tried using the unrecommended wood sizes a few times, but it becomes annoying because you must relight or clean out the tubes often. If I were you, I would avoid this experimental behavior.
This is a ‘cool’ (cold smoke) invention. I have been using it for many years. My smoke generator came with a drill bit. You can then make a hole and use a nut and thread to mount the smoker in many locations.
The smoke generator has an adjustable air pump to adjust the smoke level being pumped in.
Here is a review of the Smokai I did; it’s a solid, consistent, clean smoker. It’s a cold smoker, but it can also boost smoke for a hot smoker or low and slow smoker.
A small air
The key to smoke generators working effectively is to use good, dry wood that’s right-sized for the device. Some generators prefer chunkier-sized wood, while others prefer some dimensions or pellets.
Retrofitting a Device
With one of the above devices, you can potentially retrofit to a chamber/area you already have. The heat generated by the cold smoking device has to be far enough from the chamber so the temperature does not exceed 76°F/30°C – ideally under 68°F/20°C.
Here are some recommendations for what device could be retrofitted onto something you already have.
| Existing Device | Recommended Retrofit |
|---|
| Hooded Grills | Smoker Generator, Pellet Tube Smoker/Maze |
| Ceramic Egg Grill, Smoker | Smoker Generator |
| Fridge | Smoker Generator |
| Untreated Wood – Beehive | Smoker Generator |
| Kettle, Drum, Barrel Smoker | Smoker Generator, Pellet Tube Smoker/Maze |
| Pellet Grill Smoker | Smoker Generator |
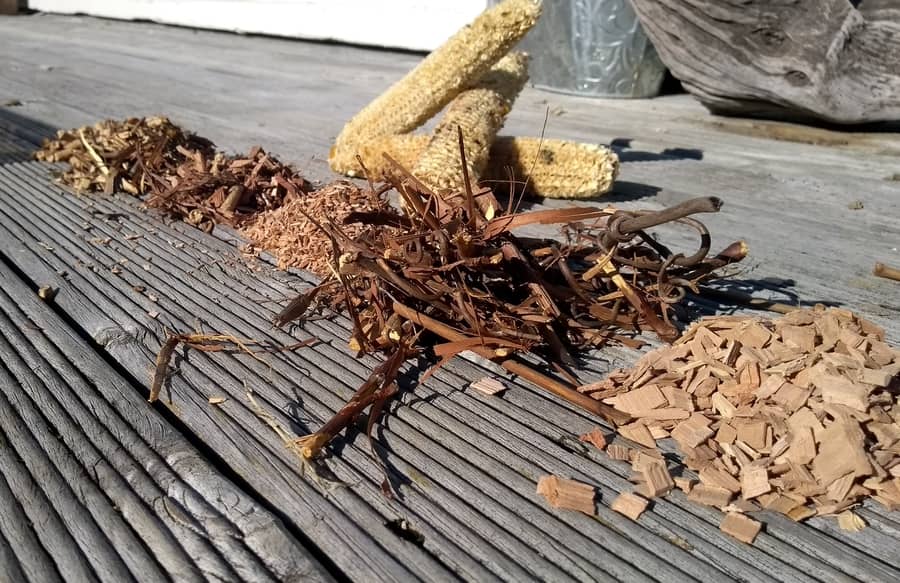
Smoking Wood
Certain woods are suitable for cold smoking (or hot); often, these are not evergreen and deciduous (simply trees that lose leaves in winter).
The wood shape may vary depending on your cold-smoking device.
Compared to oak or pecan, Hickory has completely different smoke flavor profiles.
I wrote another article about what smoking wood to use here.
This is relevant for different devices since some will need specific sizes, and you can not source the wood yourself.
Lighter hardwoods like apple and cherry are my preference for cold smoking. Heavier or stronger woods like mesquite will create a deeper, more robust flavor. Ideally, I like to mix them. Sometimes, I use an 80:20 ratio of light to stronger wood.
For more wood selection, I wrote easy universal woods in this post.
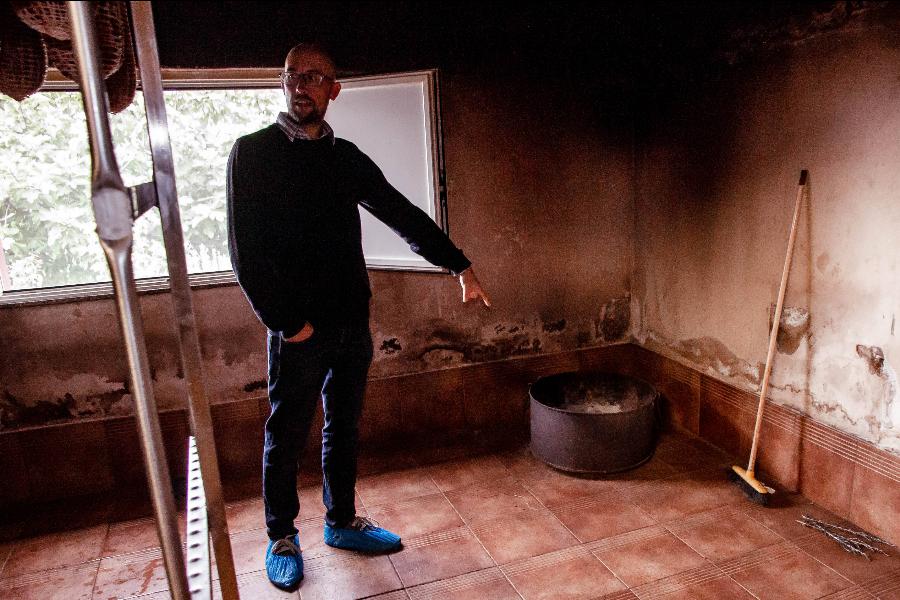
Areas/Chambers for Device
As mentioned above, retrofitting is often an option, or you can build something out of brick, earth masonry, or wood.
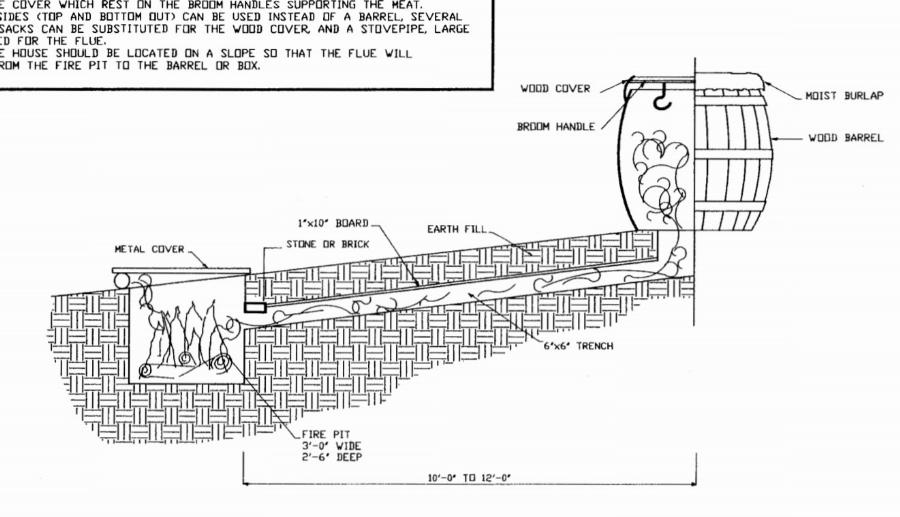
Most designs I have seen have two chambers.
- An area where wood is smoking & smoldering
- food or meat area where meat can be hung or on racks
A pipe or some connection is made so the smoke can travel to the smoking food area. Because the fire/wood is in a different area, this keeps the temperature below the all-important 30°C or 86°F, generally speaking.
Another design I’ve seen was based on the size of the chamber; he used it in the cooler months.
A Dutch butcher who taught me many years ago. He had a huge metal storage tank with double doors. He would make a pile of sawdust/shavings below the meat and light it with a blow torch (wood was untreated hardwoods like mahogany from a furniture maker). The temperature was consistently low because it was 4 feet/1.5 meters below where the meat was hung, temperature always around 10°C/50°F.
I wrote another article about DIY Cold Smokers here that goes into options.
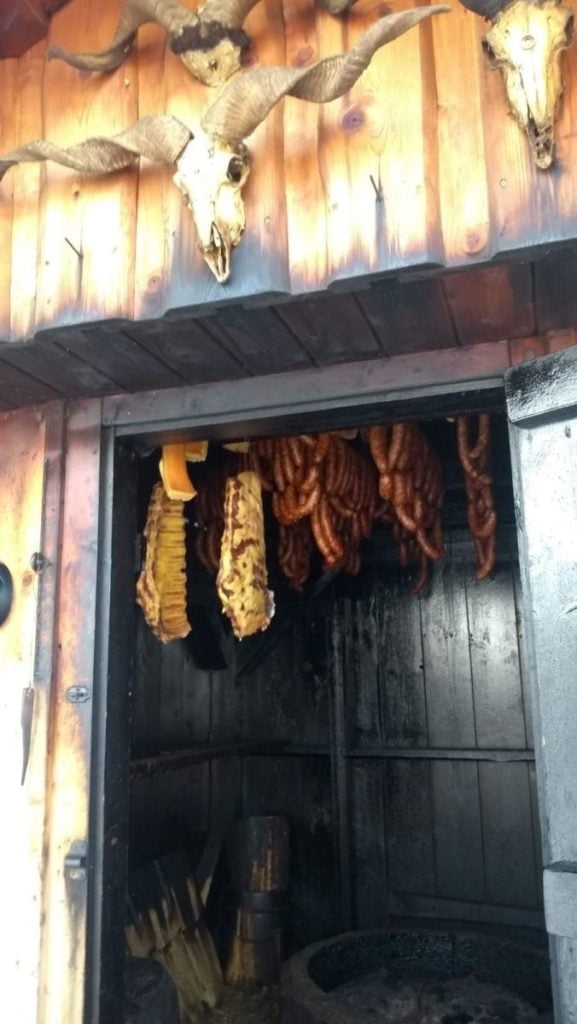
Wooden Cabinet Smoker/Smokehouse—Although a cabinet or box can be designed in many ways, it is important to incorporate a hanging system into the structure; smoking causes more exposure.
Masonry Bricks are a much more permanent fixture, but they can also make a great, long-lasting smoker.
Bricks can also be used for a tunnel style with a burning/smoke area – tunneling through to the smoking chamber.
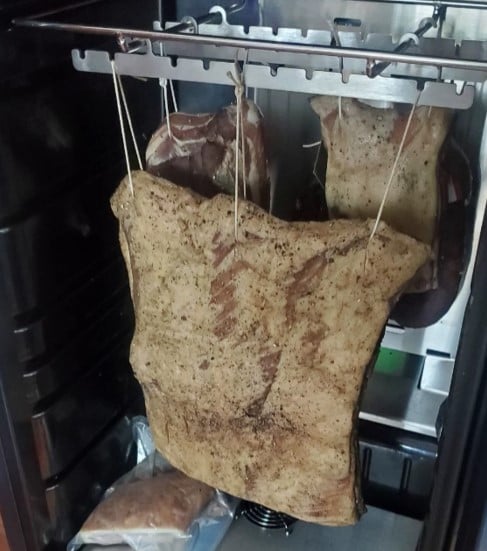
Hanging & Racks
It does come down to the design. Traditionally, fish fillets and salami are hung. But if you have racks in the smoker, it can also work. However, gravity does assist the drying more effectively I’ve discovered.
Fish is a little more complicated since it can slip off if not hung with some thought (I’ve learned from any fish falling in the chamber off hooks, for instance).
Rods, S hooks, twine, and racks can all be used somehow. Below are some examples of hanging.
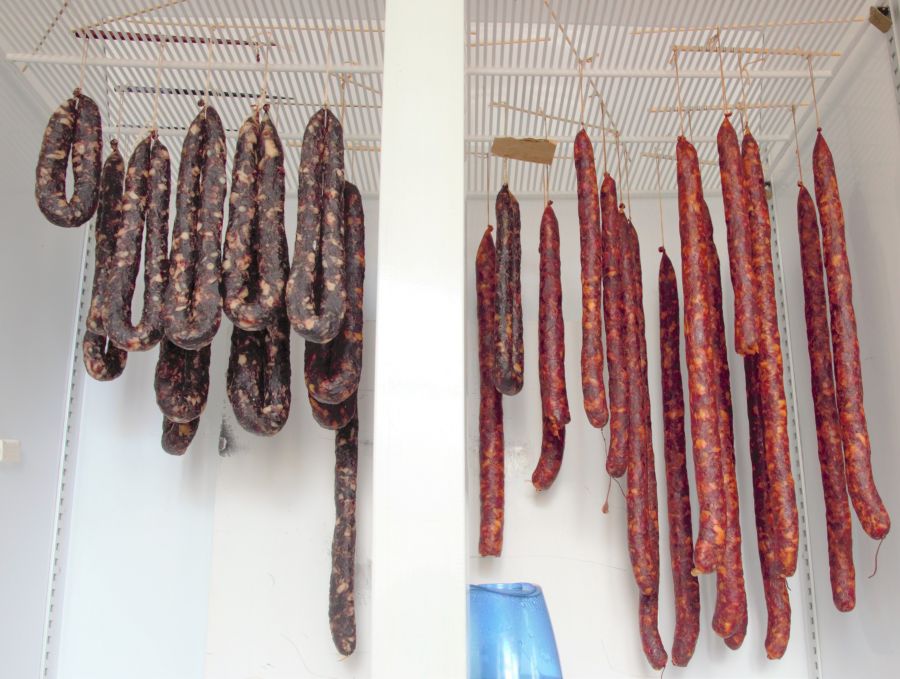

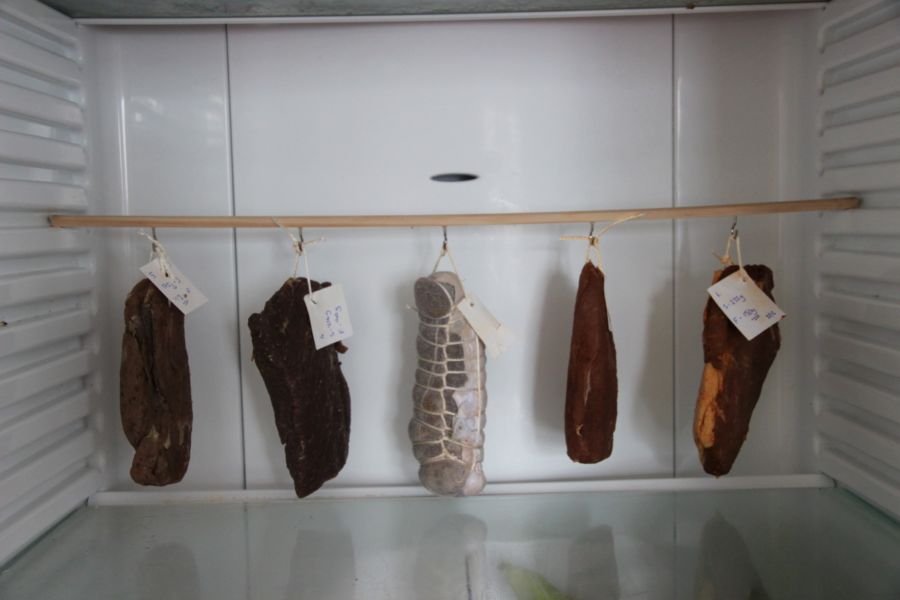
One advantage of being hung is that smoke can more easily surround the meat.
When it comes to smokehouses with offset smoking areas or smoke generators, I find myself checking every hour or two to make sure the smoke is still being generated. Sometimes, a smoke generator will go out and need igniting again.
How to Cold Smoke Meat
For a consistent result, there are subtleties and nuances. I’ll elaborate on each of these steps:
- Salt Curing
- Form pellicle on exterior
- Setup a cold smoker
- Hang, Cold smoke, and Monitor
- Cover, Res,t and Refrigerate
1. Salt Curing – Dry or Wet curing
Dry salt curing involves holding moisture inside, slowing water activity to discourage unwanted bacteria, and drawing moisture out (with saturation/excess salt curing).
Equilibrium curing involves placing meat to be salt-cured in the bag; the weight of the meat measures the salt. The salt ‘equalizes’ inside the bag, the salt penetration is consistent throughout the meat.
Saturation/Excess Salt Curing
Cover meat liberally with salt and rub into crevices.
Time to Excess Salt Cure – 1 Day per 1/2 Pound to 1 Pound of Meat
Factors such as meat-to-fat ratio and density of the meat (red meat is denser than fish, for instance) – will vary the salt penetration speed.
It is the simplest way, but results can vary; I prefer to use equilibrium curing
Wet Brining Excess Salt Curing
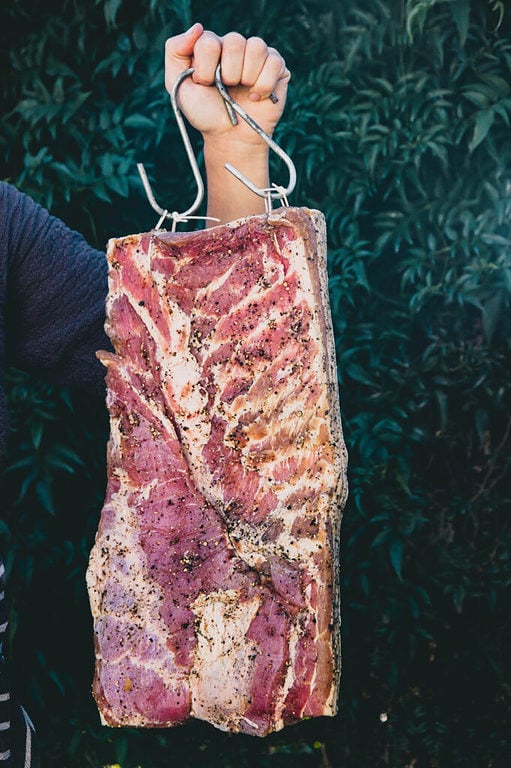
For example, Wet Cured Cold Smoked Bacon– pork belly slab of 11 pounds /5kg (can be scaled to suit)
- 1 Gallon or 4 Liters of Water
- 250 grams of sea salt
- 125 grams (max of sugar)
- (optional) 80 grams Pink Curing Salt No. 1
Heat to dissolve ingredients in a pan and leave to cool to room temperature before brining.
Time in Brine to Cure:
- 7 to 10 days in the fridge, fully submerged in the brine.
- Some form of non-reactive weight, like clean stone, could be used to keep the meat fully submerged; you do not want it floating on top.
- For thicker cuts (over 2 inches/5 cm), lean toward 10 days.
Dry Curing – Equilibrium
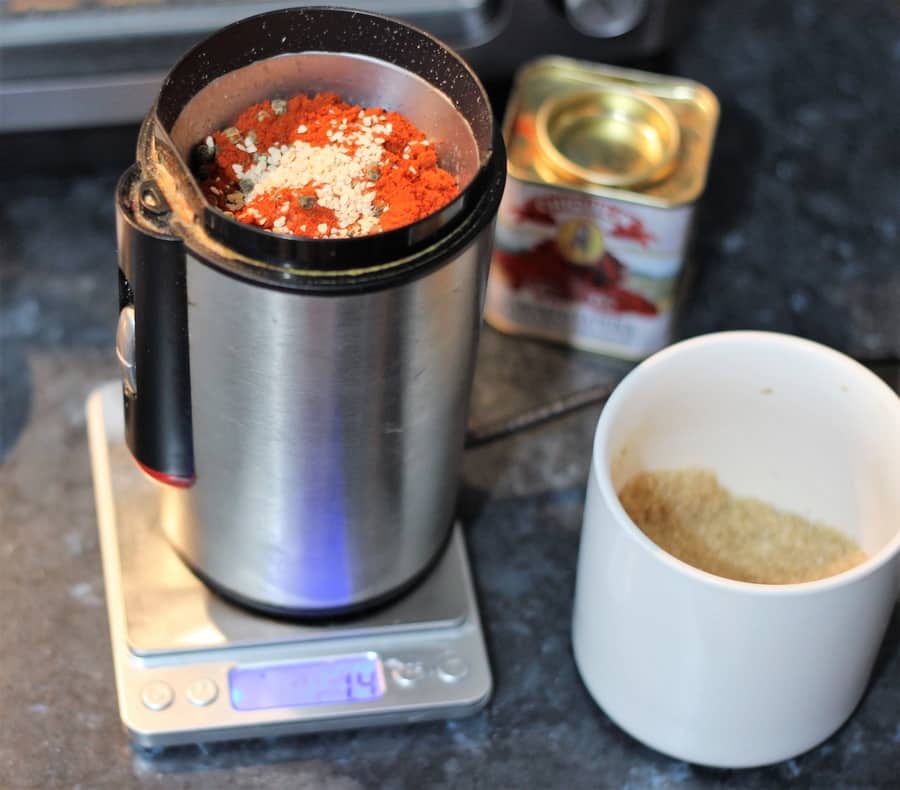
2-2.5% salt to for the total weight of meat – using the dry salt equilibrium curing method; here is a guide I wrote. The total percentage includes if pink curing salt is used.
- 2.25% salt
- 1% sugar
- (optional) 0.25% pink curing salt No. 1
Time to Dry Cure = 3 days per 1″ of 2.5 cm thickness of meat.
Place meat in a bag in the fridge for the allotted time.
2. Form Pellicle on Exterior
Binding the proteins on the outside of the meat will allow the smoke vapor to attach to the meat more easily.
For some reason, many online guides do not cover this. The pellicle is essential to developing a good smoke flavor. This also relates to the environment inside and outside the smoker, which I’ll discuss.
Leaving the cured meat uncovered and hanging overnight in a relatively cool area achieves this; no insects or some protection (under 15°C/60°F) may be needed.
This can also be done on an uncovered, non-reactive rack inside the fridge.
Pellicle formation or drying the meat out before cold smoking can be done, I often do it. Since you are going to be cold smoking for long sessions, it isn’t vital so much. The meat should also start drying out in the cold smoker.
However, my preference is still to do it the same way as hot smoking pellicle formation. After curing, place in the fridge uncovered overnight.
3. Setup Cold Smoker
My target is always – Under 20°C & 65-80% Humidity
Having a thermometer showing the temperature in this smoking chamber is always useful.
The actual smoke process is much more straightforward with cold smoking compared to hot smoking in some ways. I think it’s straightforward if you have your basic factors, which are:
- Reliable cold smoker – pellet tube, smoker generator, maze smoker etc.
- An enclosed area where the meat or food is, adjustable vents ideally
4. Hang, Cold smoke and Monitor
Once the smoke enters the area, it’s pretty straightforward. A thermometer can ensure the temperature is under 25°C or 86°F. If I’m using an electric cold smoker attachment or smoke generator, I don’t usually bother. I wait until the temperature outside is under 25°C / 77°F.
You shouldn’t have any issues if you have fully cured the meat and it’s cool, winter, or maybe nighttime.
5. Cover, Rest and Refrigerate
It’s an extended process, but if you want to take breaks, you can wrap the meat up and put it in the fridge for the next session. Cold smoking requires rest every 4-8 hours, especially for pork and red meat.
When cold or hot smoked food is refrigerated, the smoke flavor intensifies once it is completed. This is even true when you cook/smoke a sausage and leave it in the fridge overnight.
I find it sometimes hard to put it in the fridge; it gets devoured too quickly!
Expert Tips
For cure meat to be cold smoked, these are the most important points I can give you from what I have learned:
- Make sure you have fresh, good, high-quality meat
- Weighing before curing and working out the finished weight
- Make use of adequate refrigeration when processing meat
- Accurately salt cure or salt wet brine the meat
- Choose wood that won’t be too strong
- Have a smoke generator or cold smoking device for consistency
Keep Your Cold Smoking Out of the Sun—The sun can heat a chamber up, so I always try to find a shady spot to smoke cold on the porch. The sun will swing across the sky, so consider this when positioning your cold smoking session.
What I learned about cold smoking is that ‘less smoke is better than too much.’ Over the decades of making cold-smoked bacon, I’ve reduced the cold smoking hours, with 6-8 hours for many styles of salami or bacon.
I’ve experimented with long 30-50-hour cold-smoked meats and visited/tried Montenegrian-style cold-smoked dry-cured hams, which are 30 days plus of cold smoking. These are very well preserved, though there is a point where the smoke overpowers the meat flavor completely.
Weight Loss with Cold Smoking
It seems to vary between meats, especially fish like trout and salmon. As soon as fish are out of the water, they start losing weight, so the weight loss you want to achieve varies.
Since cold smoking is just another form of drying.
I aim for at least 15% less than before curing for fish. Many commercial smokehouses target 30% weight loss.
For Cold Smoked Bacon (I wrote an article about that here), I aim for at least 25% weight loss. I have generally seen 20-30% in books as a guideline.
When the humidity is high, the cold smoking will take a lot longer, but unless you’re using commercial equipment, weighing the meat is the next best thing to work out how effective and how long the cold smoking should be for.
This book covers all the aspects of cold and hot smoking, so I got the idea to think more about humidity from it.
What Does Cold Smoking Mean?
Cold Smoking preserves and flavors food. It is achieved through airflow and a temperature below 30° C/86°F. Humidity is also vital for cold-smoking meat. If meat is being cold-smoked, it must be fully salt-cured before cold-smoking.

Tom Mueller
For decades, immersed in studying, working, learning, and teaching the craft of meat curing, sharing the passion and showcasing the world of charcuterie and smoked meat. Read More