I’ve been curing meat at home for decades, and this is one of the easiest methods I’ve used — especially when I don’t have access to my full curing chamber setup.
It’s a great way to learn and build confidence with small projects before you move on to longer dry-cured meats like prosciutto or bresaola. It’s also how I introduce fridge curing in my online charcuterie course.
What You’ll Learn:
- How to dry cure meat in a regular kitchen fridge (no special equipment required)
- How to calculate salt accurately using the equilibrium method
- How to monitor progress by weight loss (preservation = 30% loss)
If you love dry-cured meats like pancetta, lonza, or coppa, this is an ideal way to explore the process. While traditional charcuterie takes months, this method gives you great results in as little as 2–3 weeks — using the same principles.
This guide walks you through the process I personally use when working with pork or red meat cuts in a standard fridge — without temperature or humidity control.
In fact, there are times when I prefer using this fridge method over my dedicated curing chamber. It’s simpler, faster, and perfect for smaller batches.
The secret is in the size and weight of the meat. Since the drying happens quickly, you can complete the whole process in 1–3 weeks — as long as you hit the target weight loss of around 30%.
This is short-term preservation — not fermentation. We’re not trying to develop complex microbial cultures here. We’re simply applying salt, drying the meat carefully, and reaching a stable end weight that prevents spoilage.
Once you hit that target weight (about 65–70% of the original), you’ve got homemade fridge-cured salumi — a delicious, shelf-friendly charcuterie addition.
Curing meat is the slowest food — and the one with the deepest flavor payoff.
Quote from me
In this guide, I’ll take you through each step and explain the essential principles behind them. This isn’t like baking — precision and environment really matter.
Process to Dry Cure in a Regular Fridge
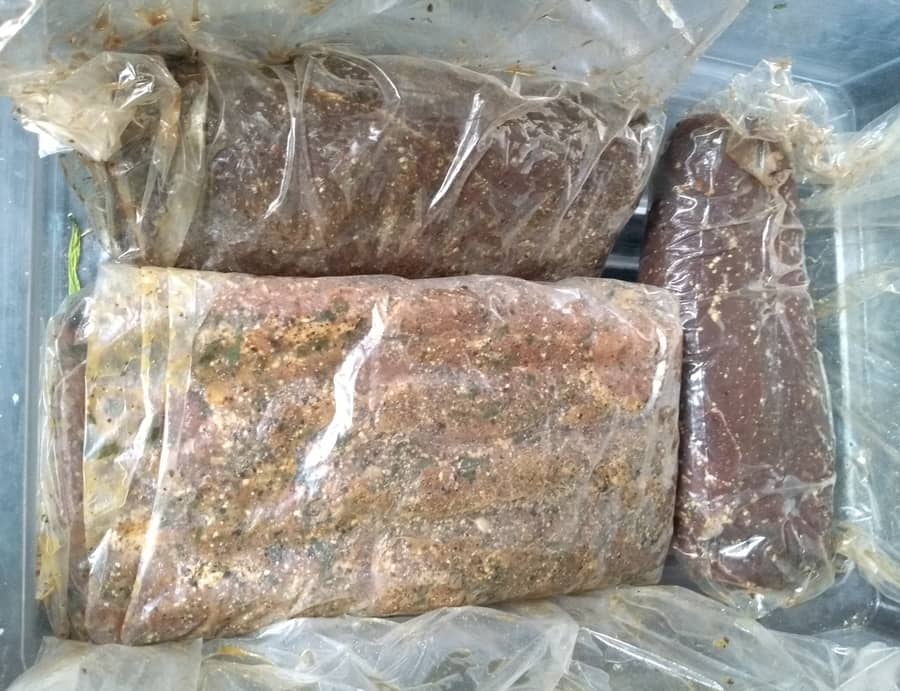
- Cure the Meat
- Place Bag in Fridge – Let Cure Take Effect
- Hang in Fridge to Dry
- Monitor Weight Loss Until Stable
- Slice Thinly and Enjoy
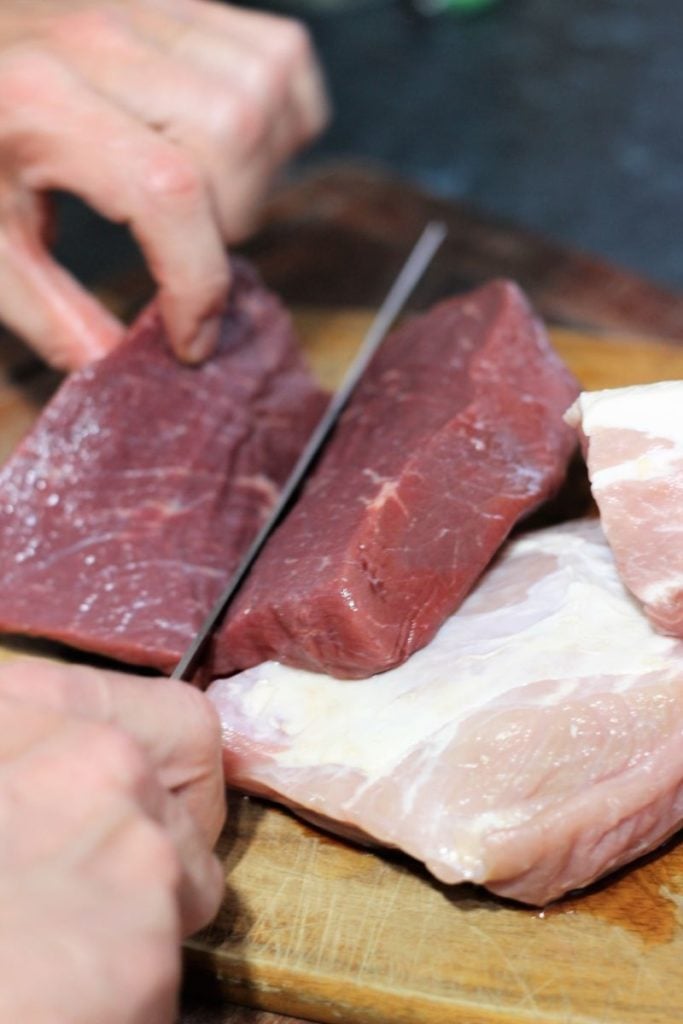
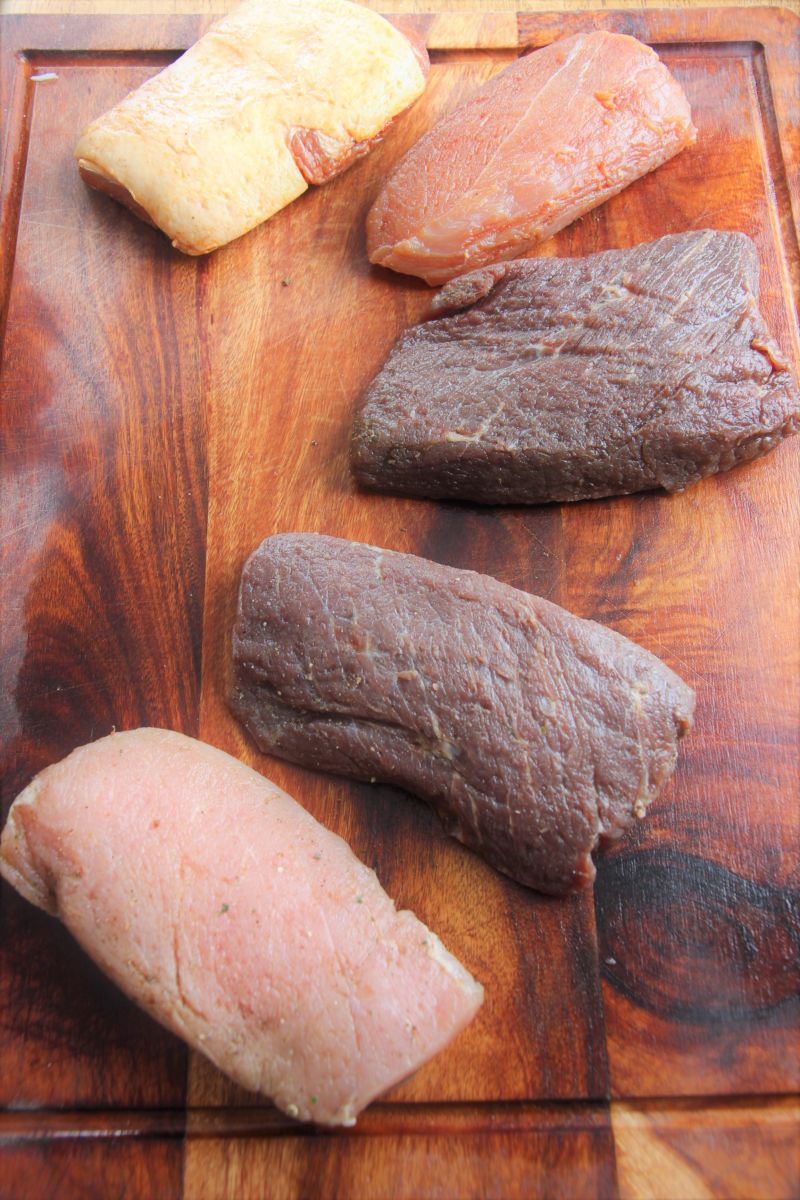
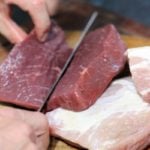
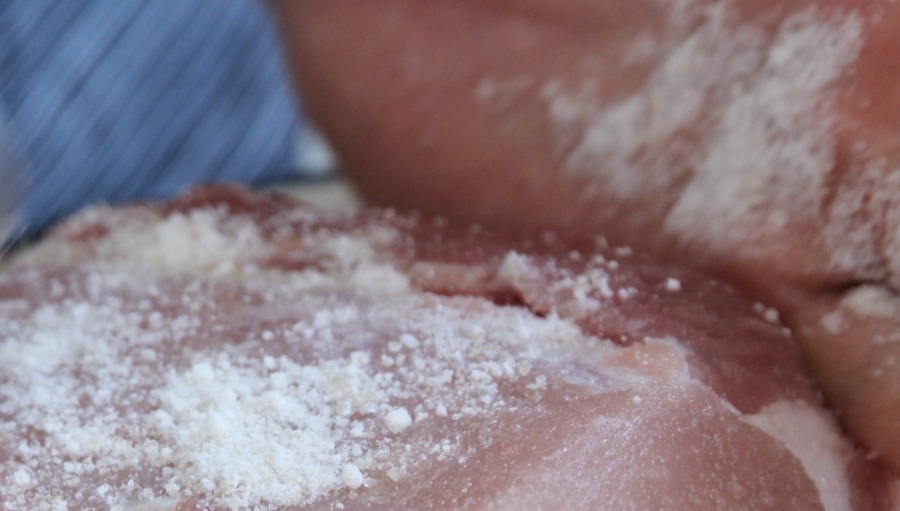
1. Cut to Size and Cure the Meat
Start with a piece of pork or red meat that’s less than 250g (about 8 oz). Smaller cuts cure and dry faster — which is ideal in a fridge environment.
I use the equilibrium curing method for precision and predictability. It’s easy once you get the hang of calculating salt by percentage.
Example: For a 250g piece of pork, I use 2.5% salt = 6.25g of sea salt. This gives a balanced cure with just enough salt for flavor and preservation.
You can also add spices or optionally 0.25% of pink curing salt #1 (for short-term projects under 30 days).
At this stage, I also write down the starting weight and calculate the target — about 30–35% less — which tells me when it’s fully cured.
Target example: 250g starting weight × 0.7 = 175g final weight
Once the mix is measured, I rub it into the meat thoroughly, making sure it gets into every crevice. I do this in a bowl so I don’t lose any of the curing mix.

I sometimes place a small weight on top of the meat while it cures in the fridge — it helps push the cure in more efficiently during those first 4–5 days.
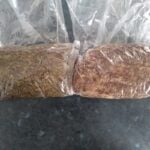
2. Place the Bag in the Fridge to Cure
Once the cure mix is applied, I place the meat in a ziplock or vacuum-sealed bag. It’s important to press out as much air as possible so the cure is in full contact with the meat.
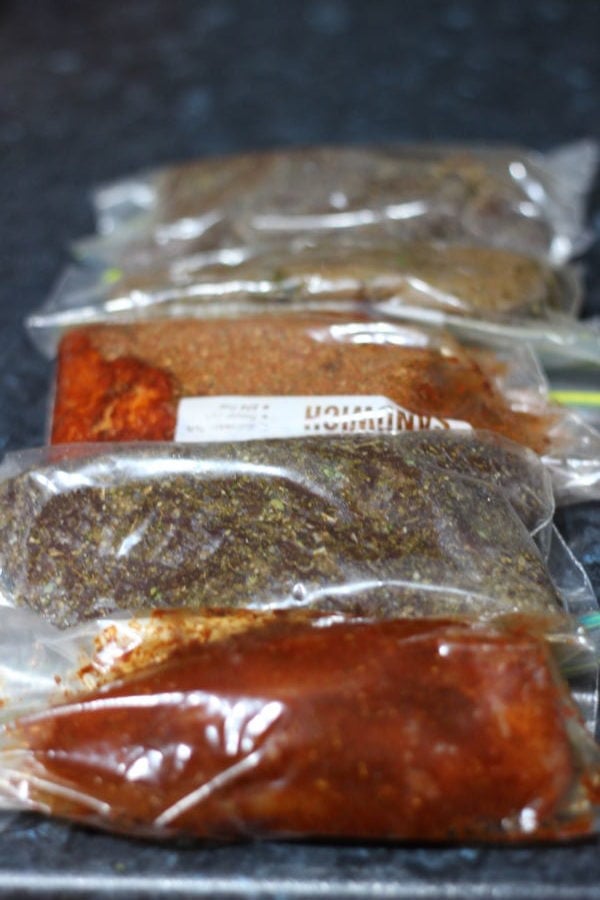
Now’s the time to layer in flavor. I grind up spices and gently rub them into the meat while the exterior is still moist. For beef and venison, toasted pepper, rosemary, and a few crushed juniper berries work great.
To help shape the meat and avoid case hardening during drying, I sometimes tie the piece tightly with butcher’s twine. This also helps it hang more evenly later.
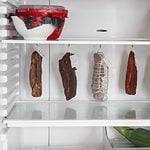
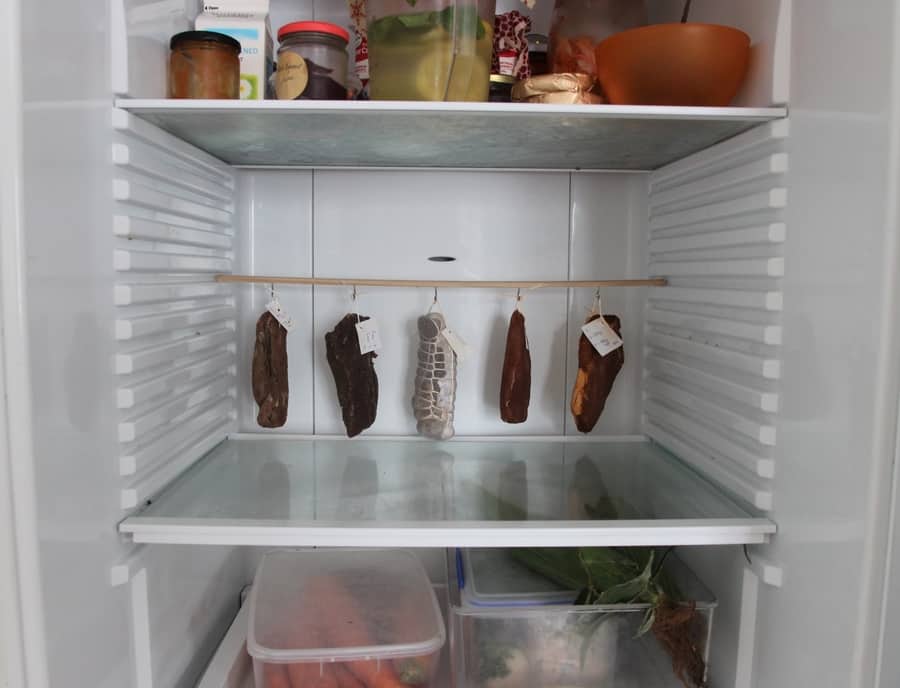
3. Hang the Meat in the Fridge to Dry
Once the curing phase is done (typically 4–5 days), I remove the meat and hang it in the fridge. This is where you need to get creative.
In my setup, I use a wooden or steel rod placed across the back of the fridge shelf. You can also tie string or use a wire to create a small hanging line. Just make sure the meat isn’t touching any surfaces and has airflow on all sides.
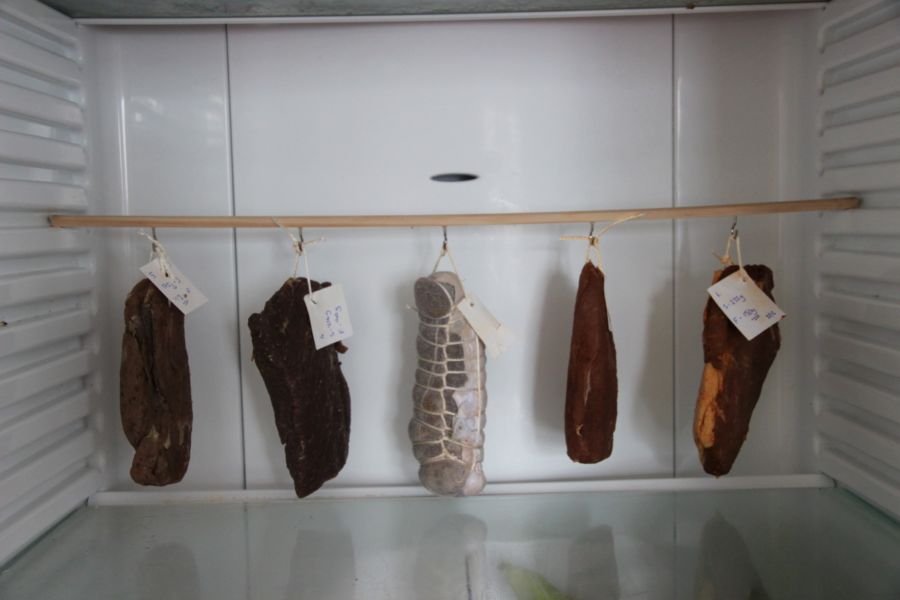
Tip: Use paperclips or S-hooks to make checking weight easier without untying everything.
Wrapping the meat in muslin cloth helps prevent the exterior from over-drying too quickly — especially in a fridge with low humidity.
Temperature in a typical fridge is around 3–5°C (37–41°F), which is cooler than ideal for curing. However, for small cuts and short drying times, it works. The air circulation in most fridges helps with moisture evaporation.
For those who want to scale up to bigger projects or work with whole muscle cuts, I’ve written about the DIY meat curing chamber setup I’ve used successfully. It allows for precise control of humidity and temperature — essential for long-term aging.
You can also get deeper insights into ideal curing temperatures and humidity if you want to adapt this process or understand how the environment affects drying.
To make all this easier, I strongly recommend checking out the equipment I use for meat curing — especially accurate digital scales and spice grinders. These make the difference between guessing and getting great results.
If you’re wondering about adding pink curing salt for food safety or color, I’ve broken it all down in this full guide on which salt to use for curing meat.
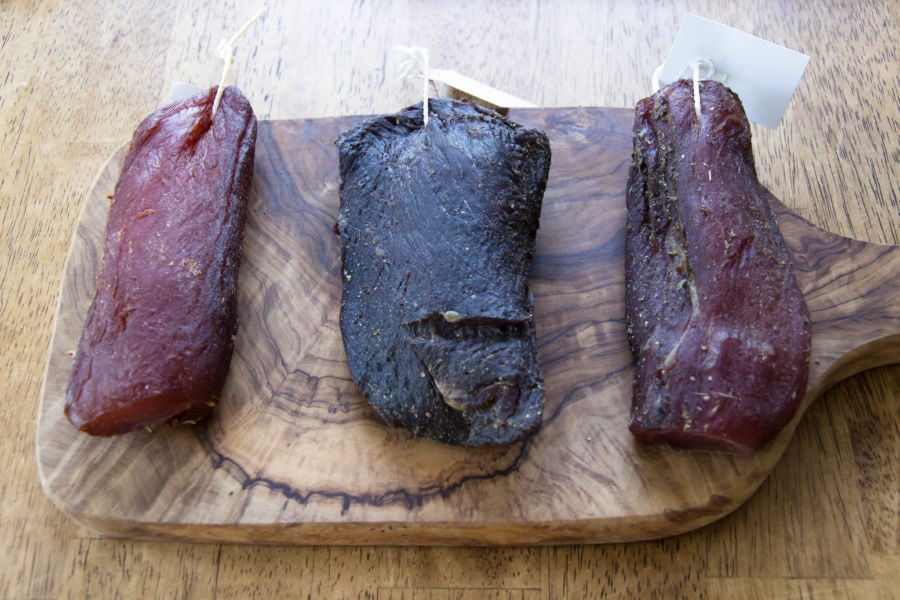
4. Check the Weight — Is It Ready?
I weigh the meat before hanging and record it on a small card — then do the math to determine the target weight. Once the meat reaches about 30–35% weight loss, it’s considered dry-cured and safe to store or eat.
Example: If your meat starts at 250g, your goal is 250 × 0.7 = 175g. Once it drops to that weight, it’s preserved.
Once cured and dried, the meat can last another 1–3 weeks in the fridge. Just keep it loosely wrapped in paper or muslin to let it breathe.
If you’re storing it for travel or camping, wrap it in paper and store it in a cool, dark spot. It’ll continue drying slowly — but that’s fine. The meat becomes chewier but won’t spoil if it’s been dried properly.
One sign that it’s properly cured: it becomes dense, dry, and smells rich, not sour. You won’t usually see white mold like long-term salami, but that’s normal in a fridge setup.
Expert Tip: Cracked or powdered pepper on the outside can act as a natural barrier against unwanted microbes during and after drying.
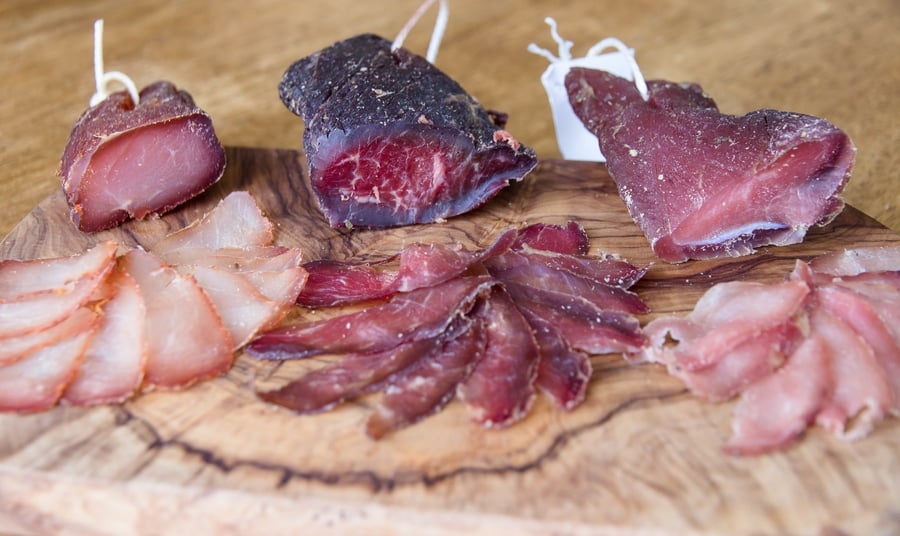
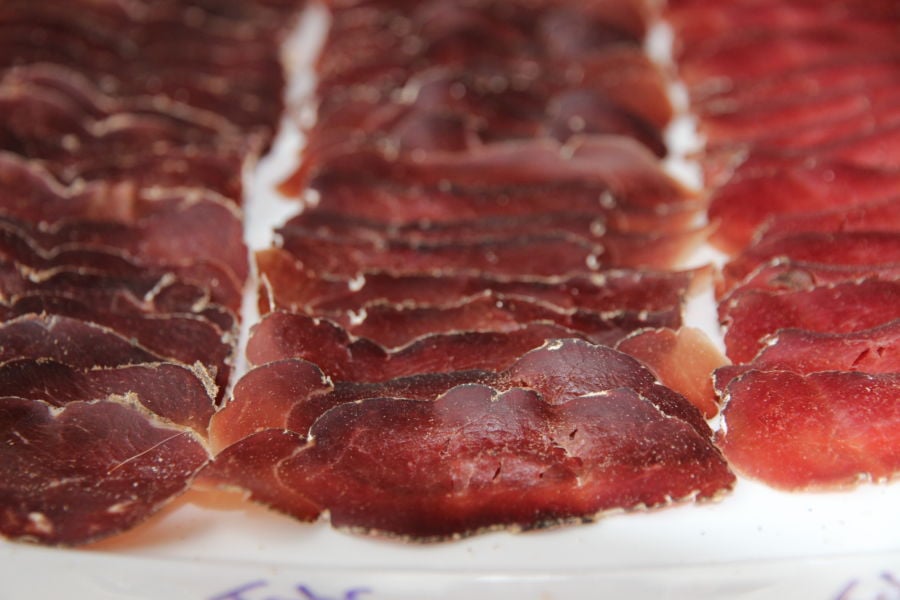
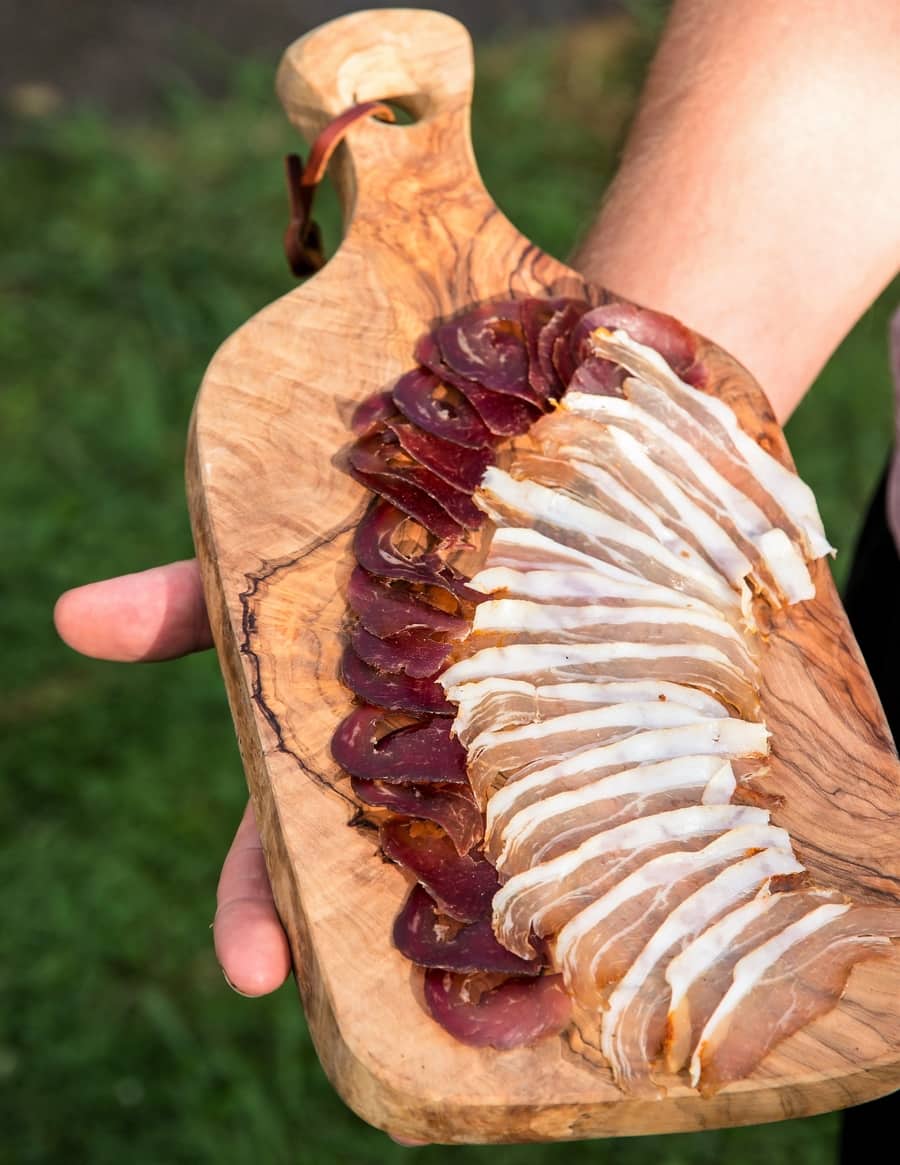
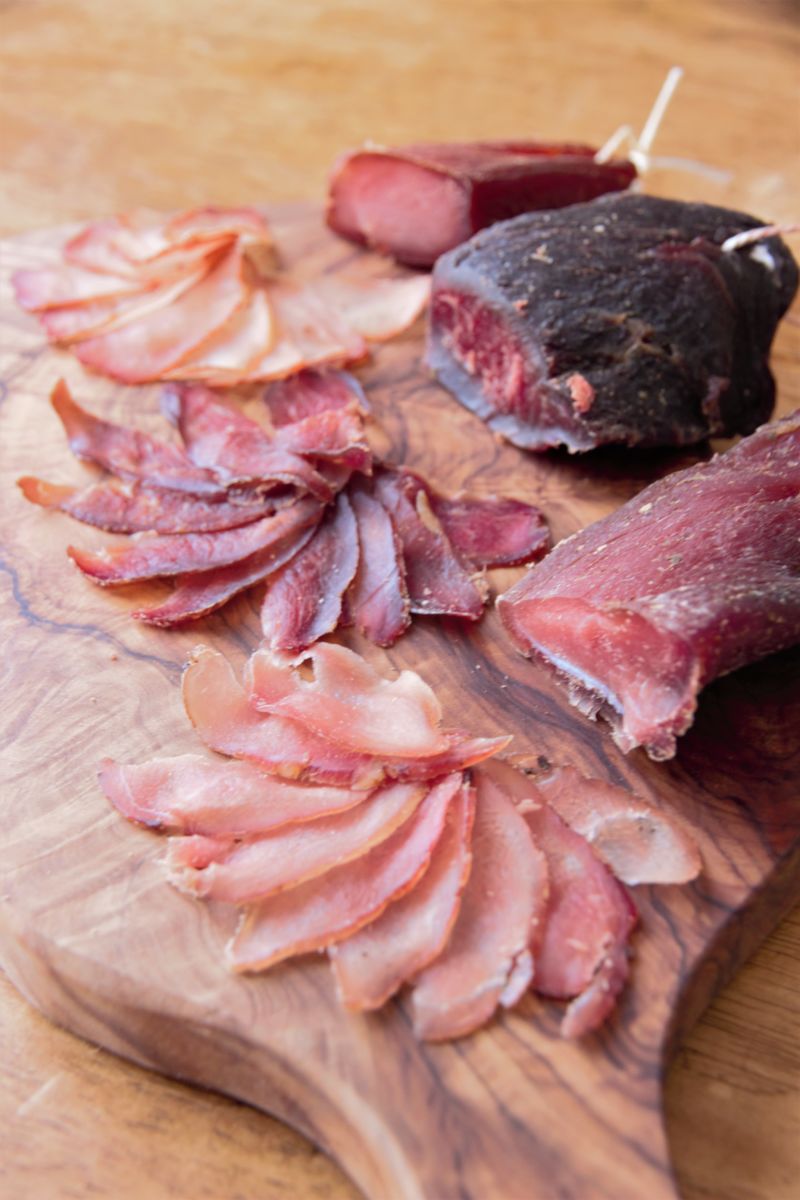
5. Slice Finely and Serve
Here’s where it all comes together. Once dried, the way you slice the meat makes a big difference in taste, texture, and perceived saltiness.
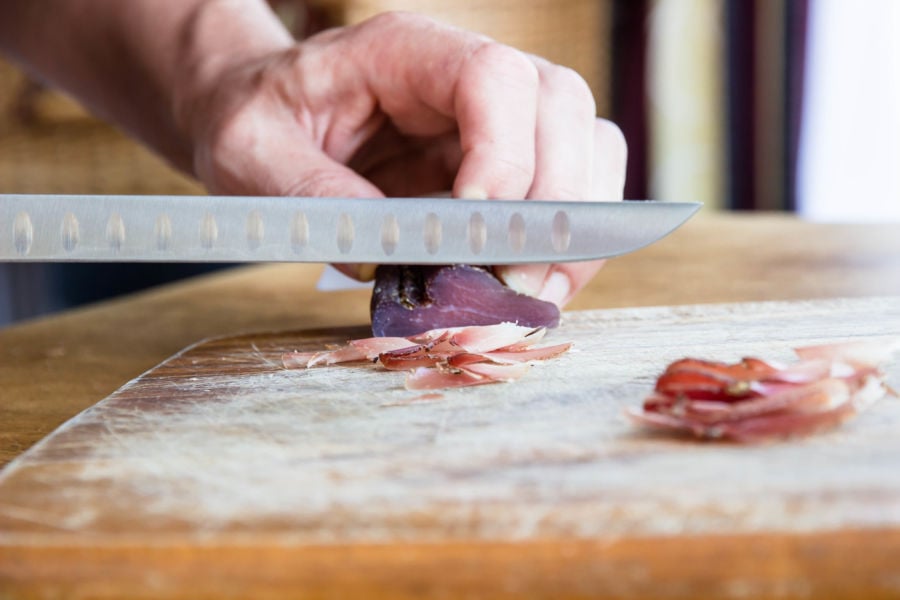
Wafer-thin slices melt on the tongue and enhance the flavor — that’s why prosciutto is always sliced paper-thin at the deli. Thick slices tend to taste overly salty or chewy.
For home slicing, I’ve tested everything from knives to mandolins to meat slicers. You can read more about the best methods I’ve used in this slicing guide for cured meat.
A sharp chef’s knife or santoku can work — just be patient and deliberate. Practice improves the quality of every slice.
Got questions or want to share your fridge-curing project? Drop a comment below — I’d love to hear what you’re making!
Traditional Salt Curing Technique
Also known as the Saturation or Saltbox Method, this is the more traditional approach to curing. It involves covering the entire piece of meat in salt and letting it rest for a set number of days based on weight.
For example, a ham might rest for 3–4 days per 500g (1 lb). But when working with small cuts under 250g, 12 to 24 hours can be enough — though longer can lead to overly salty results.
Since salt absorbs at different rates depending on meat thickness and fat content, this method is less predictable. That’s why I prefer equilibrium curing for repeatable results.
Still, this method works — and it’s useful to know about. Just be careful not to overdo the salt or curing time.
Tip: For Saltbox curing, cut the meat to under 1 inch thick (or under 250g) to avoid curing inconsistencies.

How to Cure Meat in a Regular Kitchen Fridge
Salt Dry Curing can be done in a Regular Kitchen Fridge
Ingredients
- 250 g Red or Pork Meat Calculation Shows 1000 grams initally. USE Less Then approx. 250 grams and semi-lean with some fat good.
- 5 g Sea Salt (2% of meat weight) The salt cure
- 0.625 g Pink Curing Salt No. 1 (optiona) (0.25% of meat weight) For under 30 day salt dry cring
Instructions


Recipe Video
Recipe Notes
-
- Remember, in the fridge, you don’t want to go over about 1-inch thick & 250g to avoid excessive case hardening (tough on the outside).
-
- When curing the meat, I like to use a right-sized mixing bowl. This means you can ensure the salt (and spice) that you have carefully measured out with the equilibrium curing method will be infused.
-
- The best is Vacuum Packed, but Ziplock bags are what I use; it’s an easy option (but I kinda prefer containers) -single-use plastic, I feel, is a waste. But it works well (if you can get compostable Ziploc bags, that would work well)
-
- Make sure the cure is inside every crevice or of meat.
-
- Accurate scales of 0.1 decimal place do help a lot with measuring precisely.
-
- Kosher salt / Trapani sea salt is my go-to salt. There are others, and remember, salt does vary considerably in weight, so grinding to a fine powder and weighing accurately is the best practice.
Important Aspects
Now that you understand the curing process, here are the cuts of meat I like to use for fridge projects — and how I flavor them.
These options work beautifully in small batches and lend themselves well to fridge drying because of their shape and fat content.
- Beef Eye Round – very lean, great for bresaola-style curing
1. Quality & Size of Meat

The meat you choose matters — both in quality and in size. For fridge curing, I’ve had the best results with cuts under 1 inch thick and weighing less than 200–250g (7–8 oz).
Tip: Leaner cuts dry more consistently. Fat dries more slowly and can affect timing, so if you’re new to this, start with lean cuts like eye of round or pork loin.
Use the best quality meat you can find — ideally fresh before freezing. Passion behind the product always leads to better outcomes in the curing process.
2. Equilibrium Curing
Traditional salt-curing (Saltbox method) works but isn’t always reliable. That’s why I use the equilibrium curing method almost exclusively — especially in small-batch fridge projects.
The only real equipment you need is a precise digital scale. Most kitchen scales don’t measure to 0.1g, which is critical when working with small amounts of curing salt or pink salt.
When I’ve taught this to friends, they’ve tried to measure salt with spoons. It never works. Just get a decent scale — you’ll use it for every curing project as we advance.
Remember: Different salts vary in weight even if they look the same by volume. That’s why measuring by weight is non-negotiable.
Here’s a simple ratio you’ll see across recipes and books:
2.0–3.0% salt to the weight of the meat is the standard range. I typically land around 2.0% — just enough to preserve and taste balanced.
Example: 1,000g meat × 2.0% = 20g salt
Bag the meat (ziplock, vac-pack, or reusable silicon pouch) and keep it cool while it cures. Less air in the bag = more consistent curing.
When I visited Montenegro, I saw traditional Balkan salt-cured meats that used up to 6% salt. That’s a lot — and it reflects the different taste preferences and methods across regions. I prefer to go lower unless I’m aiming for something really robust and salty.
Note: Salt taste also depends on how you slice the meat. Thinner = less salt per bite.
I’m currently testing silicone bags for curing instead of single-use plastics — better for the planet, and they seem to perform just as well.
Spice grinders also make a big difference. They help get a fine blend that adheres well to the meat surface — leading to even flavor and better preservation.
3. Nitrates (Optional)
Do you need pink curing salt (Prague Powder #1) for these short fridge projects? Not necessarily — it’s a personal choice. I often skip it when using trusted, high-quality whole muscle cuts for quick drying.
That said, pink curing salt adds food safety for uncooked meat, gives cured pork its rosy hue, and is commonly used in bacon, pastrami, and salami.
For clarity:
- Curing Salt #1 – for short-term cures under 30 days (e.g., bacon, fridge projects)
- Curing Salt #2 – for long-term dry cures over 30 days (e.g., lonza, prosciutto, salami)
Important: Himalayan salt is not the same as pink curing salt — it doesn’t contain nitrates or nitrites. The pink color comes from minerals, not preservatives.
You’ll only need a tiny amount per batch (0.25% of meat weight). A small bag can last years.
Here’s a typical fridge project ratio:
- 2.0% Sea Salt
- 0.25% Curing Salt #1 (optional)
- 0–1.5% Raw sugar (optional)
If you’re using a digital scale, 0.6g is the right amount of Prague Powder #1 for a 250g cut — just a tiny pinch.
“Prague Powder #1 (Pink Curing Salt No.1)”
One of the most common curing salts. It contains 6.25% sodium nitrite and 93.75% salt. It’s recommended for meats that require short cures and will be cooked or eaten quickly.
Wikipedia – Curing Salt
Reminder: Pink curing salt is dyed for safety — never confuse it with regular salt. Store it out of reach of pets and children.
In the next section, I’ll cover the fridge environment, timeframes, and weighing — along with how to monitor progress.
4. The Curing Environment
Your average kitchen fridge is around 4–7°C (40–45°F), which is colder than the ideal 11°C (52°F) used in curing chambers. But for short projects with small meat cuts, it still works surprisingly well.
Fridge humidity tends to be low — often around 20–30%. This means meats dry quickly, which is why size matters. You’re not drying a ham for months — you’re drying 200–250g cuts for a couple of weeks.
Modern fridges have some airflow, which helps with surface drying. If you want to do longer-term curing, you’ll need a dedicated setup with 65–75% humidity — a proper curing chamber. But for 1–3 week projects, your fridge is enough.
Some folks even use garages, basements, or under the house where the climate is cool. Historically, many dry-curing traditions evolved near rivers or lakes where cool, stable airflow was available.
Note: If you’re in a humid tropical climate, avoid outdoor curing — the fridge is your safest bet.
5. Time & Weighing Before/After
Here’s a typical fridge-curing schedule that works for most of my small-batch projects:
Curing (in bag): 3–5 days
Drying (hanging in fridge): 3–9 days
The exact timing depends on meat size, fat content, and how aggressively the fridge dries. But I never go by time alone — I go by weight loss.
Once it hits 30–40% loss, it’s preserved and ready for slicing.
6. Happy Mold (Optional for Long-Term Projects)
In short fridge curing projects, you probably won’t see white powdery mold — and that’s perfectly normal. That usually forms in controlled chambers over weeks or months.
However, if you do spot a thin, white, floury coating, it’s often Penicillium nalgiovense — a beneficial mold that protects and flavors cured meat.
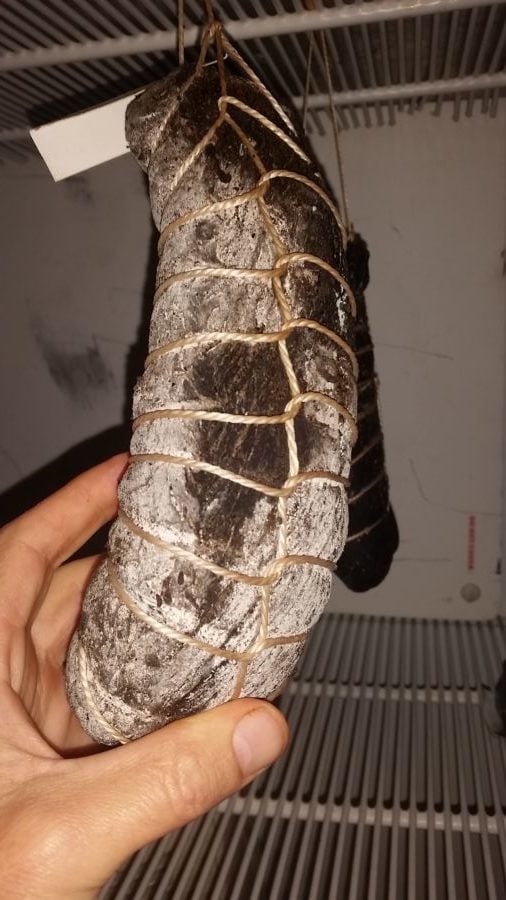
When I first saw it years ago, I thought it was flour or seasoning. It’s not — it’s nature doing its job. But again, don’t expect mold to form in a regular fridge.
7. Equipment
You don’t need much to get started. I began with just salt, spices, and a regular fridge. Over time, I upgraded some tools that made a big difference in precision and workflow.
- Fridge – or a cool area below 15°C (59°F)
- Butcher twine – to hang and shape the meat
- S-hooks, paperclips, or pegs – for easy weighing and hanging
- Rod or dowel – to create a hanging bar inside the fridge
- Mixing bowl – to rub in the salt cure evenly
- Ziplock, vac-pack, or silicone bag – for the curing phase
- Accurate digital scale – essential for salt precision
- Spice grinder or mortar & pestle – to prepare rubs and blends

Start with what you have, then invest in tools as you grow. The basics are more than enough to cure meat properly at home.
8. Simple Dry Curing Recipes
Now that you’ve seen the method and essential principles, here are some starter projects I often recommend for fridge curing. All of these use the same approach: equilibrium curing + fridge drying + careful weighing.
- Pancetta – cured pork belly, with or without smoking
- Duck Prosciutto – fat-rich breast, cured and dried
- Pork Lonza / Coppa / Guanciale – shoulder, neck, or jowl cuts
- Beef Bresaola – cured eye of round or lean venison
Use the same method covered above for all of these: 2–3% salt, optional pink curing salt, tight bag for curing, and monitor weight loss in the fridge until 30–40% is reached.
Flavor Pairing Ideas by Meat Type
You can go classic or creative. Here are some combinations I’ve tried and enjoyed — just remember to scale spices by weight (0.1–0.5%) for accuracy and balance.
Duck (Prosciutto-style)
Citrus zest (orange or lemon), black pepper, 0.2% star anise, 0.1% clove (go easy on these strong aromatics)
Beef / Venison
0.2% rosemary, 0.1% juniper, 0.2% thyme or oregano, 0.2% black pepper
Bresaola-Style (Lean Red Meat)
Try adding 0.2% cinnamon or nutmeg for a warm spice twist
Pork Cuts
Cracked peppercorns (black, green, or red), paprika, garlic, and chili all work beautifully. Sweet Hungarian paprika is one of my favorites.
Goat / Rabbit / Hare
Still experimenting — but garlic and rosemary are a great starting point, especially for rustic Italian-inspired cures like the violin leg.
As always, let your own taste and regional inspiration guide your experiments. There’s room for play within the boundaries of salt, time, and careful observation.
How long does dry cured meat last in the fridge?
Once the meat is fully cured and dried (at least 30–35% weight loss), it can last another 2–5 weeks in the fridge. Store it loosely wrapped in paper or muslin. The outside may continue drying and become tougher, but it remains safe to eat.
Can I cure meat without pink curing salt?
Yes, especially for short-term whole muscle projects like fridge curing. Using high-quality fresh meat, applying proper salt percentages, and monitoring weight loss are key. Pink curing salt adds an extra layer of safety and helps retain a pink color, but it’s optional in many cases.
What temperature should my fridge be for curing meat?
Between 3–7°C (37–45°F) is typical for a kitchen fridge. While cooler than ideal (11°C / 52°F), it works for small cuts and short-term drying. Make sure the meat hangs freely and is not touching surfaces.
What’s the best meat to start curing in a fridge?
Lean cuts under 250g are easiest for fridge projects. Pork belly (pancetta), duck breast (prosciutto), pork loin (lonza), and eye of round (bresaola) all work well. Avoid thick or large pieces until you upgrade to a curing chamber.

Tom Mueller
For decades, immersed in studying, working, learning, and teaching the craft of meat curing, sharing the passion and showcasing the world of charcuterie and smoked meat. Read More
After the meat is cured,can you slice it an vac seal in small packages?
Hi Rick, yes- that’s something I have done and it can last many months, vac sealed and put in the fridge (or cool wintery place).
“2 grams salt per 1000 grams or if you prefer
2 grams salt per 35.3 oz ”
For 2%, that should be 20 grams, not 2 grams.
Hey Paul, thanks for spotting that.
Cheers
Tom
I have read different recipes online and some say to use pink salt and others (like yours) do not
Is there any reason why or why not to use it?
im planning on doing relatively quick curing like Thanks!
Hey Tim, thanks for visiting.
I use nitrates in the guided amounts, in this post I do recommend it too.
Of course, it depends on the recipe. The quality of the meat and knowing it has had a hygienic journey since slaughtering and before slaughtering and nice cool temperature lessens the risk. But why take a risk in the first place?
For under 30 days for curing and consumption, I use Curing Salt No.1.
All the best,
Tom
Hi Tom, thanks — this is very helpful. I’ve done flat pancetta in a mini fridge and it worked great, and I’m now doing guanciale in my general-use fridge in NYC apartment.
I don’t have enough room to give the guanciale its own shelf in the fridge… Is there a risk to having the hanging guanciale (wrapped in cheesecloth) on the same shelf as, say, a plastic container of blueberries that has holes in it?
Any tips you have to avoid transfer of odors or prevent cross-contamination between the hanging meat and other foods in the fridge would be appreciated! Although guanciale will be a short-term project, I’d like to be cautious.
Thanks!
Hey Jeff, thanks for the comment.
Can’t give professional advice about risks, but just say what I think & do from experience.
It’s cured meat, so the salt has taken care of most of the bacteria if done correctly. Which it sounds like your doing.
Personally, I never had smells, tastes or any issues. I make sure there isn’t any direct contact with the hanging cured meats.
Wild cold smoked things in the fridge it can definitely create some smell, but dry cured unsmoked – never had issues.
Hi Tom, Thank you for the article – very helpful. Could you please help verify a question I have, it says Pink#1 is for meats being cured for under 30 days and will be cooked after. But the Salami you did (as well as many others i have found online) are just sliced and ate – could you verify this please. Thank you so much
Hey Chris,
Traditional salami I make takes 6 weeks to 3 months to cure and dry (this post isn’t about that). This is not salami, this is dry cured whole muscle meat.
For a short term project under 200 grams I use none or pink curing salt no. 1. Since it will be cured and be consumed in under 1 month. It breaks down faster. Pink Curing Salt No. 2 is for long term dry curing not using a normal kitchen fridge.
If you need more info, check out this postheck out this post – its loonnngg!
Hope this helps,
Tom
Hey Tom, thanks for the great post. I tried this equilibrium method recently but noticed a slightly off smell on both pieces of pork after 5 days curing in salt in the fridge. The type of smell i would expect to detect in i had left raw meat in a fridge for 5 days 🙂 Am i correct in thinking that any smell of this type is not a good sign and the meat should be discarded? As a newbie its a little difficult to be sure on what to expect smell-wise. I used saran wrap instead of ziploc bags and had the meat tightly wrapped. The fridge is approximately 43 F and i was using a pre-made curing salt (1% nitrates) bought from a curing company.
Hey,
Lots of unknowns sorry hard to answer.
Trusting your nose is definitely the way, if it was me I would wait another 5-10 days.
Using ziploc or vacpac is key to removing all oxygen or as much as poss during the cure. Not sure if clingwrap or saran would do the job.
Pre-made curing salts…another unknown. Was the percentage high enough? 2.5-3% salt to weight?
what are your thoughts of curing on wire racks instead of hanging
you could give it a go, hanging reduces contact and potential ‘bad’ bacteria
Some cold smoke will help I would think
But hanging is best!
Tom,
I enjoy reading and learning from your site.
I make my own sausage and was wanting to try making Dried Sausage.
I use pink curing salt in my sausage recipe so what would you suggest I do
to proceed to drying the sausage in a fridge or other method. I have a grill and usually
cold smoke the sausage before freezing in vacuum bags.
Thanks in advance.
Hey there, so you are using pink salt but not salt curing the sausage? Not enough detail to presume what your up to sorry.
There are a ton of ways of making salami, here is a dry cured salami rundown I wrote –
Its not a guide, just to highlight the process if someone hasn’t come across it.
Hi Tom. This may be a silly question, but what do you consider the “starting weight” of the meat in relation to when it will be complete?
You mention weighing the meat both before and after the curing process. You will obviously lose some weight as liquid is extracted by the salt cure.
Am I looking for 65% of the weight AFTER curing or before? Before or after rinsing?
I’m just trying to be as accurate as possible.
Thanks in advance.
Heya,
If your Equilibrium curing you are kind of creating a ‘brine’ in the bag, so you don’t end up losing weight vs using a saturation method as mentioned.
Regardless the start weight is after curing before drying ! 🙂
Hi Tom.
Wounderful site, I’m getting some great tips.
I was wondering if beef shin is OK to dry cure or will it make it impossible due
to the abundance of
sinew/connective tissue.
Thanks Wayne, Yep I would say too much connective tissue inside….
Cheers
T
Do you think we can cure salami in the refrigerator in cheese cloth or just uncovered? After we ferment then cool it, it is stiff enough to form into a roll. Do you think that this will cool properly?
tiny salami sticks sure, the risk is drying out on the outside too fast because normal fridge runs at 20-30% I have found.
real thin with no fermentation via starter culture is what I would do. Thinking this year I will add to the whole muscle course and do a salami course! (still in planning stages, it takes many months to film/edit)
Cheers
T
Hey there. This is such a good guide. I’ve got into curing my own lunch meat when I lived in China and craved a good sandwich but cold cuts were either impossible to find or super expensive. All the other curing guides I’ve seen online or on YouTube seem to miss the mark in one way or another, but yours is fantastic.
I’ve always done a “ham” or Canadian Bacon using pork loin with good results. But I’ve only just cured it for 1-2 weeks depending on my patience, and then gone straight to smoking it.
Just to be clear, after you rinse the meat and then hang it until it reaches temp, there’s no need to actually cook it, right? I’m going to give this a go soon, and I’m pretty stoked.
Thanks again for this great guide.
Awesome thanks for the comment! This is a craft I find very rewarding.
Hanging is what I do for drying meat for = dry cured meat
Or I cure, hang to form a pellicle then hot smoke/cook – these are 2 fundamentally different processes! This article is about dry curing meat (or dry cured bacon). Here is a link to how I make my bacon, cheers Tom
Looking to make several cuts and give as gifts. After the meat is cured I intended to vac seal them. How many months will they last in the fridge? Or can you freeze the vac bags…
I’m concerned thawing the frozen meats will affect the texture or something..
hey there!
Vac Sealed, I’ve had for 12 months in the back of fridge. I’ve heard in the crafting curing community a 4 year stint at the back of someone’s fridge, and it was delicous, a little extreme for me though! It will also even out any hardness/dryness issues from the outside surface and inside if you vac pac 🙂
Cheers
T
Hey ! I’m currently curing my own meats and noticed that a little water has dropped onto the meats that are covered in cheese cloth. Do you have any advice on this?
Greeetings, I would just wipe with vinegar and see what happens, trust your senses!. Smell, touch, visual 😉
Hi Tom.
Just starting to get into dry curing meats and I find your article very very helpful for a newbie like myself. However, my handicap is that I cannot get hold of curing salts .e.g., Instacure or pink salt, etc.
Any suggestions what I should do? Any substitutes or alternatives? Can I disregard them?
George
Hey, for whole muscle meats, personally, I don’t use them. After many many years of research and looking at the main reason for using it – botulism. There aren’t many cases at all realting to charcuterie – often it’s people not following canning procedures properly or indigerious fermented seals products.
here is some other info –
If meat is fresh and the right method of curing is used, with equilibrium curing and at least 2%, it seems to work for me for 15 years.
But of course it’s your call, some people think the curing is the nitrates/nitrites when it’s the salt that cures – nitrates/nitrites are just to target botulism.
(ps fridge curing/drying is often done in less then 4 weeks due, as long as there is not a lot of fat on the meat).
Cheers
Tom
Hey Tom,
Just getting started into this. I followed your 2% Salt .25% 1 cure for a piece of beef 207g. So 4.1g of Kosher Salt and .5g of #1. My scale only does whole grams so I did 5g of salt and 1g of #1. It did seem like enough salt to completely cover the meat on all sides. Did I do something wrong?
Thanks
Hey Casey, yeah it always seems a bit sparse, but you need to just get it around most of the meat, since the bag will force the salt throughout the meat hopefully you used 250g or less. Highly recommended a scale to at least 1 decimal place for equilibrium curing. All the best, Tom
G’day Tom, I have been making pork salami for a number of years now and its been great. Using salt, chilli and occasionally some black pepper and packing it in 65mm synthetic skins. They are then hanging it in the shed for 6 weeks before vacuum sealing in bags.
This year they have been hanging for 8 weeks now and they don’t seem to be curing or hardening up. They have reduced in size and have firmed a little but they still seem a little soft. The meat was a little more fatty this year. Do you have any tips on how the make them cure and harden up at this late stage? Would putting them in the fridge in the skins help the process?
Happy to hear your thoughts.
Cheers
Joihn
howdy,
really super hard to tell without checking them out, and i probably would still be guessing 🙂
was the bind tacky enough?
was fat to chunky?
maybe it’s ready, and the fat hasn’t shrunk? (I would sacrifice a salami to the mythical creatures and slice a look and smell!)
fat also has lower water percentage, so it doesn’t shrink as much as muscle meat.
Since you are using an uncontrolled environment, this could be a factor, a low frost free environment might help?!
I would use my senses and carefully assess after slicing open, then make a call. Firming in a frost free fridge definitely has helped a few mates firm things up!
Cheers, all the best,
Tom
Hi Tom,
Just starting on this fascinating ideas..
If I want to try cold smoking, you also rinse the salt before cold smoking?
I didn’t understand if you cure with all the spices (first 3-5 days), then you rinse spices as well?
can you dry cure without rinsing?
Can I cure with all the spices and cold smoke without rinsing?
Hey there, you dont need to rinse, if using the eq curing method – if its cured it just means less spice/salt on the outside.
Some guys like to add a spice coating after curing and during drying – but most of the spice will come off unless it’s a finer grind/type.
Yes you can cold smoke without rinsing, but remember to hang it for at least 6+ hours, so a dry pellicle forms on outside (binding of protein on outside of meat), this will mean deeper cold smoke penetration!
Cheers
Tom
Tom,
Could this same method be used to cure sausage links. For example, if I made some fresh chorizo with 2% Kosher salt and .25% Pink Curing Salt #1 and stuffed them in hog casings, they would be about an inch in diameter. At this point I would usually hot smoke them, but could I instead hang them in my fridge and end up with a dried version. I was thinking without a cold smoke first. Thanks in advance.
depending on the fridge, it may dry fast or not. only one way to find out. many don’t use a fridge , but temp should be not too much above 60F 15C – cheers T
Hey Tom, I’m looking at trying my first dry cure meat.
Would a rump steak be an ok cut to use?
I would love any advice! Cheers
yes I would for sure, if its fresh! not aged! Cheers T
Great article .
I started after https://www.youtube.com/watch?v=IY1XgsTtbOo
I wait to see the taste of 5%!!! in Coppa
your 2 % makes sense.
Greetings from.Melbourne
Each one to there own! Cheers Tom. I will most definitely have enough salt!!! Been there, way to salty for me!
Can I cure a ham in just salt ?
yes, i have. salt dry cure or salt wet brine cure.
Is that in your course
I’ve got a cheat sheet pdf for this in course yes, cheers T
hello, thank you for this guide. i followed the instructions and equilibrium percentages on some beef round steaks and boneless pork ribs. i took an old thermal-electric wine fridge, added some hooks and a humidity meter and set the temperature to 52F. the humidity when empty was at 65-70% and is now 80% (i just put them in).
i also scraped some white mold from a commercially-produced dry-cured ham and let it sit in 65F water mixed with a little sugar for a few days. the jar it’s in smelled slightly of salami mold (i think) after a few days. i brushed a bit of it inside the fridge and on its internal fan, then brushed a little bit on a few of the round steaks after rinsing them and patting them dry.
does what i’ve done sound like it’ll work? i’ve never dry-cured anything before and hopefully haven’t made an obvious mistake. i don’t know if my white mold harvesting and culturing was a bad idea, but i read on other websites that it can be done, and i’ve made mushroom liquid cultures before so it seemed to make sense.
wish me luck! if this works i might find some more cheap wine fridges and make a stack of them.
Haha! Nice, sounds like you’re heading in the right direction, the smell is what would give me indications for a good white mold.
Pork ribs? I probably would go boneless, bones can add unwanted complications.
Those thermal electric, from what I know always run ‘moist’, probably dehumidifier will be needed.
Good luck sounds good.
Tom
Hi Tom,I’m drying some whole meats right now in my wine celler.I’m ok with the Temp 50-54 but can’t get humitidy where I would like it sticking around 58-60% what’s your thoughts?
Heya, have a look at this article
Its got some ideas, its rather long.
Humidifiers and Plug in Controllers are the way.
Good for wine corks too!
All the best,
Tom