I’ve been learning and practicing cold smoking for decades. What started as curiosity turned into one of the most satisfying food crafts I know.
It takes observation, experience, and attention to detail, but once you understand the basics, you can produce incredible results at home.
Below, I’ll walk through everything you need to cold smoke meat: the equipment, the wood, the curing process, and a full step-by-step guide. I’ll also share practical tips I’ve picked up from years of experimentation and from visiting traditional smokehouses across Europe.
What Is Cold Smoking?
Cold smoking is the process of exposing salt-cured meat to cool smoke, typically below 20°C (68°F), for flavor development and preservation.
Unlike hot smoking, which cooks the meat to a finished internal temperature using direct or indirect heat, cold smoking slowly dries the meat while depositing complex smoke flavors onto its surface.
The key factors are airflow, temperature, and humidity. You want smoke moving around the meat consistently, temperatures staying well below cooking range, and moderate humidity (around 65-80%) to support the drying process. When these elements work together, the result is a depth of flavor that hot smoking alone cannot achieve.
Why Cold Smoke Meat?
Cold smoking has been used for centuries as a method of preservation, but today most people pursue it for the flavor. The combination of salt, smoke, and slow drying produces a complexity that’s hard to replicate any other way.
Traditional cold-smoked bacon, for instance, is often considered irresistible because of the interplay between salt, the natural sweetness of the pork, smoke, and fat.
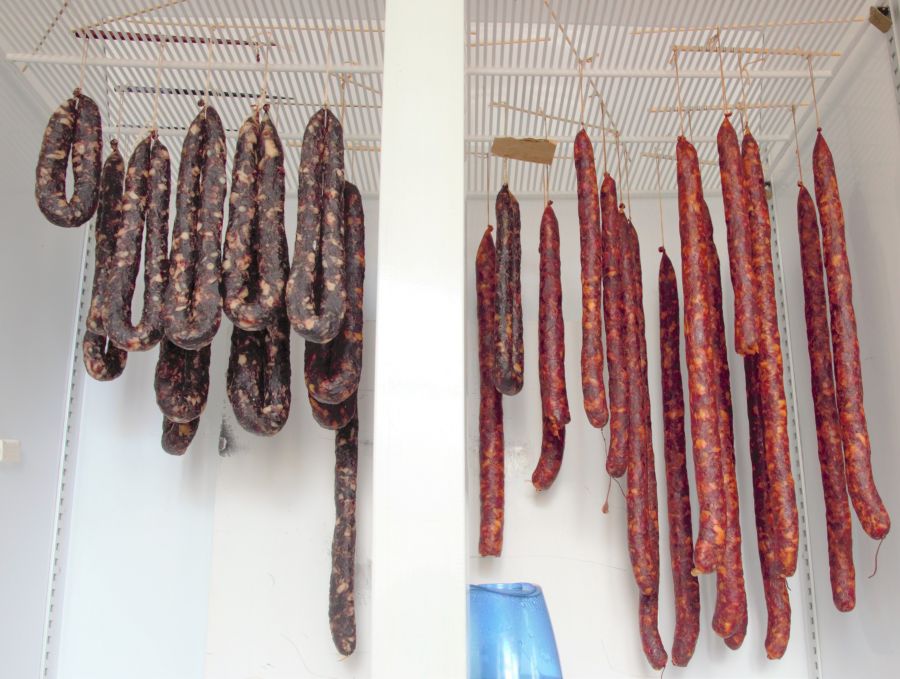
I’ve cold smoked everything from Hungarian salami and bacon to whole fish fillets. Each project teaches you something new about how smoke interacts with different meats, fats, and curing methods. It’s a craft that rewards patience and attention.
What You Need for Cold Smoking
Cold smoking equipment breaks down into two categories: a device for generating the smoke and an area or chamber for capturing it around the meat. Beyond that, you need the right ingredients and quality meat to start with.
Ingredients
Salt without additives is the only base ingredient required for cold-smoking cured meat. You can also optionally use sodium nitrate or nitrite (pink curing salt), which adds an extra layer of preservation and gives the meat its characteristic cured color.
Meat Quality
Fresh meat that has been handled properly and kept refrigerated is always the best starting point. You do not want dry-aged or wet-aged cuts for cold smoking; fresh is ideal. I’ve used frozen pork belly for bacon with great results, but the key is traceability and quality from the source.
Cold Smoking Devices
There are two main categories of cold smoking devices: pellet tube or maze-style smokers, and smoke generators with air pumps. You can also take a minimalist approach using a lump or two of charcoal sprinkled with wood chips, though this offers less control.
Pellet Tube and Maze Smokers
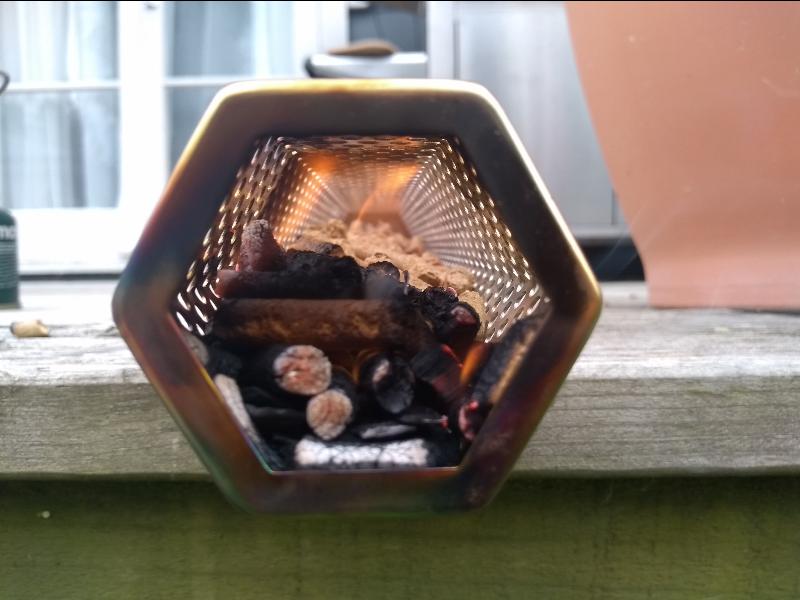
Pellet tube smokers are straightforward. You light one end, let the flame establish for about 3 minutes (around 70mm or 3 inches of flame), blow it out, and place the tube horizontally in your smoking area. They work well for smaller setups like hooded grills or kettle smokers, though they may not generate enough smoke for a full-size smokehouse.
The downside is that they can be a bit hit-and-miss. I’ve had sessions where the pellets stop burning partway through, so it’s worth checking periodically. If you want to understand how a pellet smoker tube works in more detail, I’ve covered that separately.
Smoke Generators
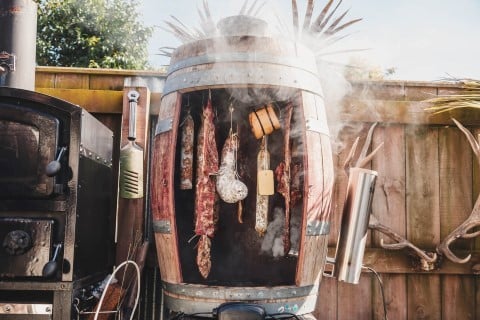
Smoke generators use the Venturi effect to pull smoke from a burning chamber via an air pump. A variable controller lets you adjust how much smoke is produced, giving you far more consistency than a pellet tube. I’ve extensively used smoke generators in my gas grill, vertical smoker, wine barrel, and kettle smoker over the years.

The key to getting the best results from a smoke generator is using good, dry wood in the correct size for your device. Some generators handle larger chips and chunks, while others work best with pellet-sized fuel.
I made the mistake early on of using the wrong wood size, and it meant constant relighting and cleaning.
I’d recommend avoiding that experiment and sticking to what the manufacturer suggests. I wrote a detailed Smokai smoke generator review that covers performance and setup.
Smoking Wood Selection
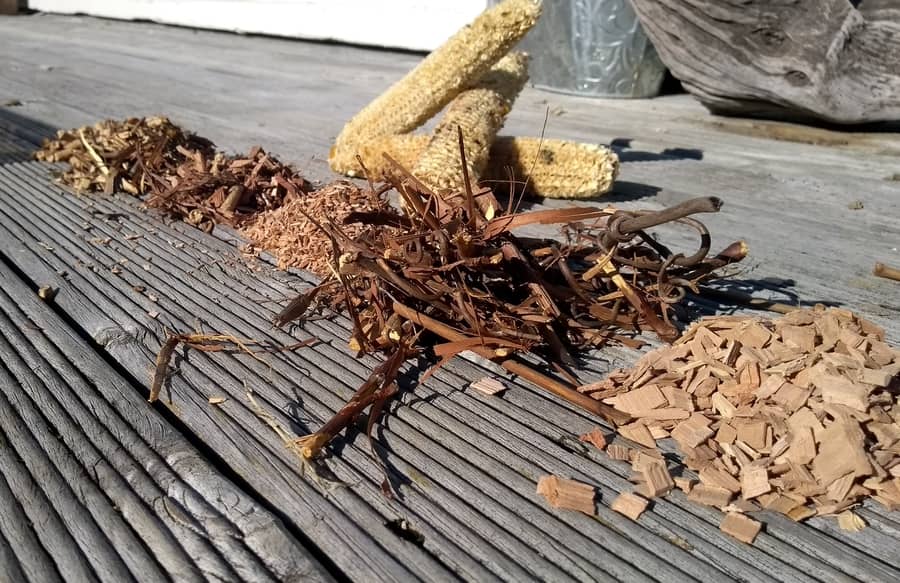
The type of wood you use has a major impact on the final flavor. As a general rule, you want deciduous hardwoods (trees that lose their leaves in winter) rather than evergreens. Lighter hardwoods like apple and cherry are my preference for cold smoking, as they produce a subtle, sweet smoke. Heavier woods like hickory or mesquite create a deeper, more robust profile.
I often mix woods, typically using an 80:20 ratio of lighter to stronger wood. This gives complexity without overwhelming the meat. For a full breakdown of smoking wood types and sizes, I’ve written a separate guide.
Smoking Chambers and Retrofitting
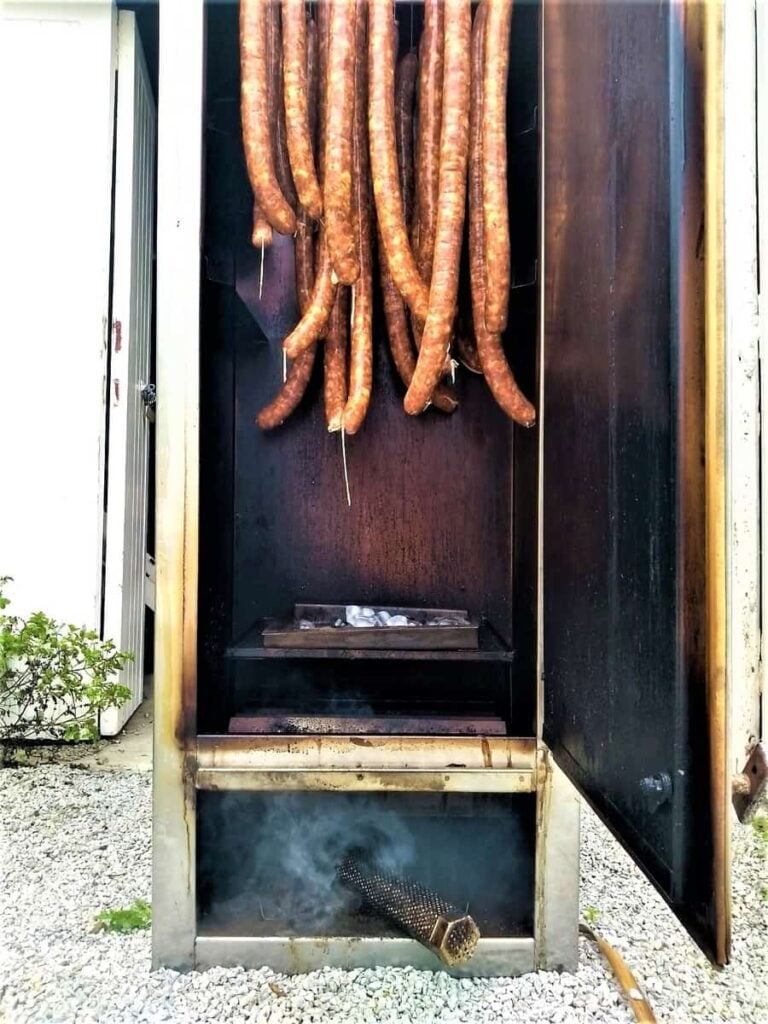
You don’t necessarily need a purpose-built smokehouse. Many existing setups can be retrofitted with a cold smoking device. The important thing is that the heat source stays far enough from the chamber to keep the temperature below 20°C (68°F), and ideally the design has adjustable vents for airflow control.
| Existing Device | Recommended Retrofit |
|---|---|
| Hooded Grills | Smoke Generator, Pellet Tube Smoker/Maze |
| Ceramic Egg Grill/Smoker | Smoke Generator |
| Fridge | Smoke Generator |
| Kettle, Drum, or Barrel Smoker | Smoke Generator, Pellet Tube Smoker/Maze |
| Pellet Grill Smoker | Smoke Generator |
| Untreated Wood (Beehive style) | Smoke Generator |
Most traditional smokehouses use a two-chamber design: one area where the wood smolders and a separate chamber where the meat hangs. A pipe or tunnel connects the two, keeping the smoking chamber cool. If you’d rather build your own setup, I’ve covered several DIY cold smoker ideas and options in another article.
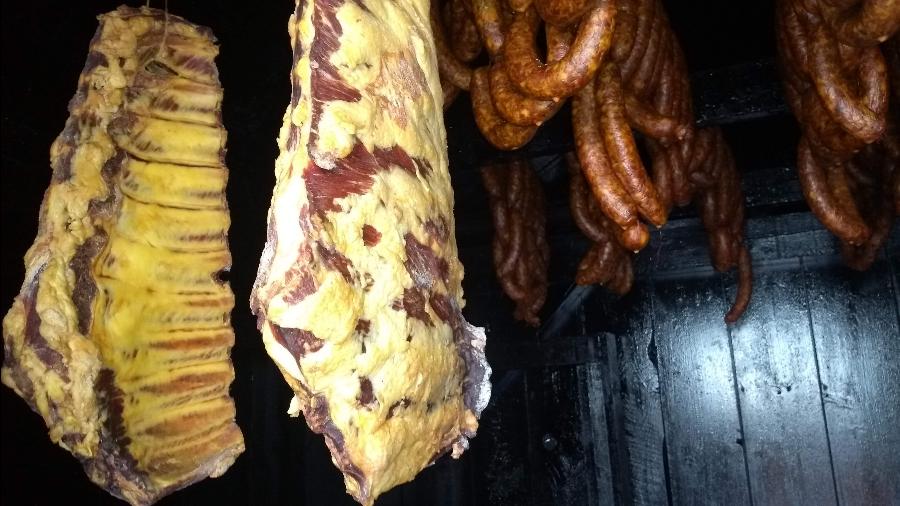
When it comes to hanging meat versus using racks, hanging is generally better for cold smoking. Gravity helps with drying, and smoke can circulate more evenly around the meat. Rods, S-hooks, and twine all work depending on what you’re smoking. Fish can be tricky on hooks (I’ve lost a few fillets that slid off), so consider twine loops for whole fish or fillets.
How to Cold Smoke Meat Step by Step
For a consistent result, there are subtleties and nuances at each stage. The process follows five main steps: salt curing, forming a pellicle, setting up the smoker, smoking and monitoring, then resting and refrigerating.
Step 1: Salt Cure the Meat
Before any smoke touches the meat, it must be fully salt cured. There are three main approaches, and each has its place depending on the cut and what you’re making.
Dry Equilibrium Curing
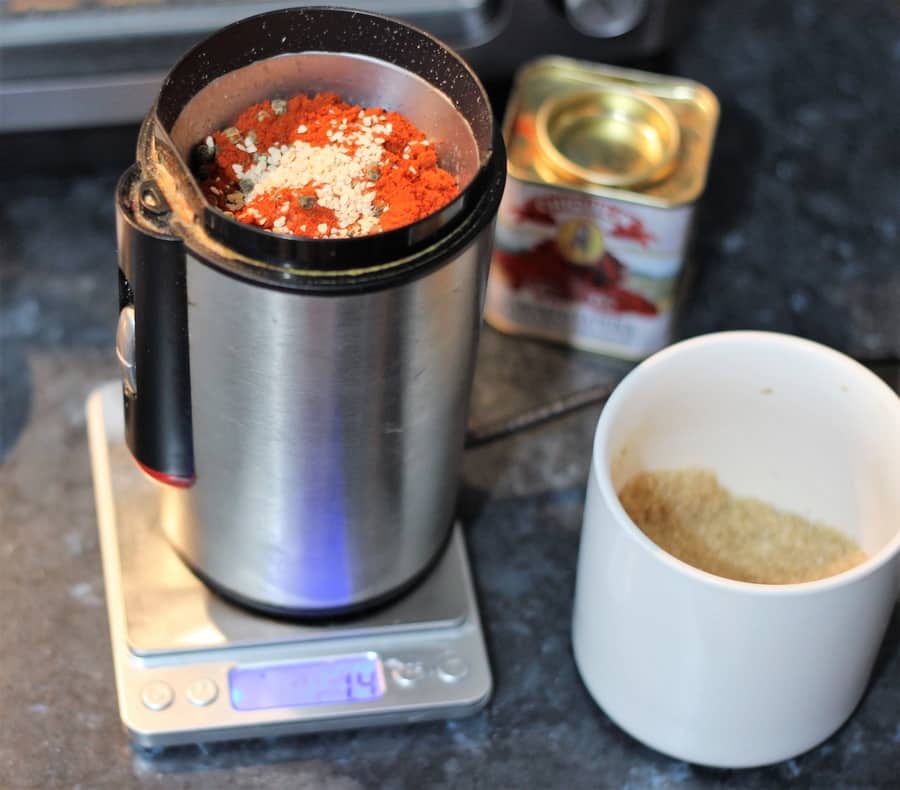
This is my preferred method. You weigh the meat and calculate 2-2.5% salt for curing based on total weight, plus 1% sugar and optionally 0.25% pink curing salt No. 1. Place the meat in a sealed bag in the fridge and allow 3 days per inch (2.5 cm) of thickness. The salt equalizes throughout the meat, giving you a consistent cure every time. I wrote a full guide to equilibrium curing that covers the process in depth.
Saturation Salt Curing
This is the simpler, more traditional method. You cover the meat liberally with salt and rub it into all the crevices. Allow roughly 1 day per half-pound to 1 pound of meat. It works, but the results can be less consistent than equilibrium curing because factors like fat ratio and meat density affect how quickly salt penetrates.
Wet Brine Curing
For wet-cured cold smoked bacon, for example, you would dissolve 250g of sea salt and up to 125g of sugar in 4 liters (1 gallon) of water, optionally adding 80g of pink curing salt No. 1. Heat the mixture to dissolve, cool it to room temperature, then submerge the pork belly fully in the brine (using a non-reactive weight to keep it down) for 7-10 days in the fridge. Thicker cuts over 5 cm (2 inches) should lean toward 10 days.
Step 2: Form the Pellicle
After curing, the next step is forming a pellicle on the meat’s surface. This is a tacky, dried layer of proteins that allows smoke to adhere much more effectively. Many online guides skip this step, but in my experience it makes a noticeable difference in the final smoke flavor.
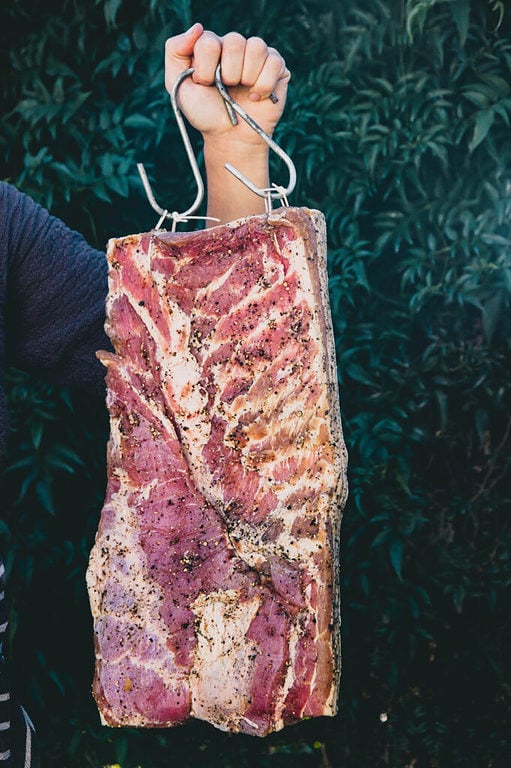
The easiest approach is to place the cured meat uncovered on a rack in the fridge overnight. You can also hang it in a cool area (below 15°C/60°F) with some insect protection. The meat should feel dry and slightly sticky to the touch before it goes into the smoker.
Step 3: Set Up the Cold Smoker
My target for every cold smoking session is under 20°C (68°F) and 65-80% humidity inside the chamber. Having a thermometer in the smoking area is important so you can confirm the temperature stays in range. If you want detailed guidance on temperatures for different foods, I’ve put together a cold smoking temperature guide with tables and tips.
I always try to position the smoker in the shade, since direct sunlight can heat a chamber significantly over the course of a session. The sun moves across the sky, so think ahead when choosing your spot.
Step 4: Hang, Smoke, and Monitor
Once the smoke is flowing, the process is fairly straightforward. If you wait until the ambient temperature outside is under 20°C (68°F), whether that’s a cool day, winter, or nighttime, you generally won’t have temperature problems in the chamber.
I typically check my smoke generator every hour or two to make sure it’s still producing. Generators can go out occasionally and need relighting.
Over the decades, I’ve learned that less smoke is better than too much. I used to run long 30-50 hour sessions, but I’ve since scaled back.
For most styles of salami or bacon, 6-8 hours of cold smoking produces excellent results without overpowering the meat.
Step 5: Rest and Refrigerate
Cold smoking is an extended process, and you can break it into sessions. Wrap the meat and refrigerate it between 4-8 hour smoking intervals, especially for pork and red meat.
One thing I always notice is that the smoke flavor actually intensifies once the meat rests in the fridge overnight. This is true even for hot-smoked sausages, so give your cold-smoked products at least a night of rest before slicing into them.
Expert Cold Smoking Tips
After decades of cold smoking, these are the most important things I can share. Start with fresh, high-quality meat and weigh it before curing so you can track weight loss throughout the process.
Accurately salt cure or wet brine the meat, choose a wood that won’t overpower the flavor, and use a reliable cold smoking device for consistency.
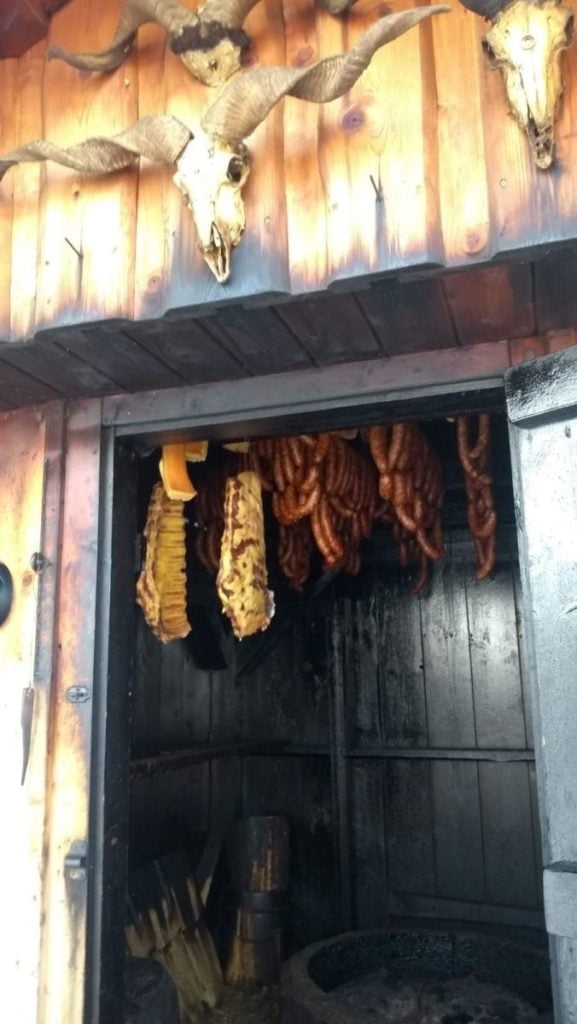
I’ve visited traditional smokehouses across Eastern Europe, including a Montenegrin facility that cold smokes dry-cured hams for 30 days or more.
Those products are deeply preserved, but there comes a point where smoke completely overpowers the natural meat flavor. For home projects, restraint is your best tool.
Weight Loss Targets
Since cold smoking is essentially another form of drying, tracking weight loss helps you gauge progress.
For fish, I aim for at least 15% weight loss from the pre-cure weight; many commercial smokehouses target closer to 30%.
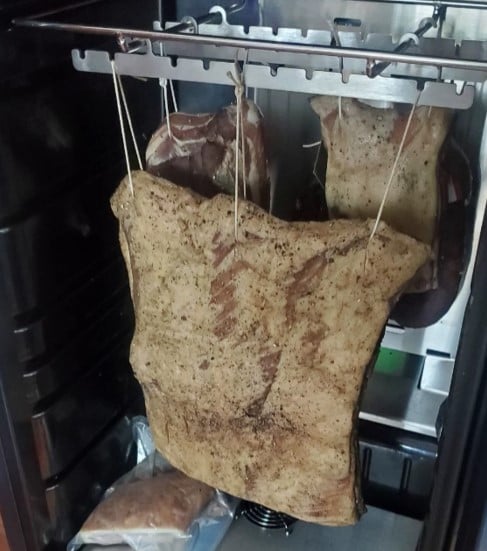
For cold smoked bacon, I target at least 25% weight loss, which aligns with the 20-30% range recommended in most professional references.
When humidity is high, drying takes longer. Unless you have commercial equipment with humidity controls, weighing your meat regularly is the most practical way to know when the cold smoking is done. If you’re interested in exploring all the ways to make bacon at home, that guide covers both hot and cold approaches.
FAQ
What Does Cold Smoking Mean?
Cold smoking can preserve and flavor food using airflow and temperatures below 20°C (68°F). Humidity also plays a role in the process.
What Is the Difference Between Hot Smoking and Cold Smoking?
Hot smoking uses direct or indirect heat to cook meat to a finished internal temperature, while cold smoking keeps the temperature well below the cooking range for preservation or flavor, sometimes both. Cold smoking is focused on drying and flavoring rather than cooking.
How Long Should You Cold Smoke Meat?
For most styles of bacon and salami, 6 to 8 hours of cold smoking produces excellent results. Some traditional methods use 30 days or more for dry-cured hams, but for home projects, shorter sessions with rest periods in between tend to produce the best balance of smoke and meat flavor.
Have you tried cold smoking at home? I’d love to hear about your setup, your favorite wood, or any questions you have. Drop a comment below.
Tom Mueller
For decades, immersed in studying, working, learning, and teaching the craft of meat curing, sharing the passion and showcasing the world of charcuterie and smoked meat. Read More



I’d love to know more about Venturi vs maze/tube
Hey Julia, it’s a super broad question!
The biggest thing is the pump from smoke generator means control over how much smoke with the variable pump. I see from you email you’re in Australia?. Google https://smokai.com/ – to read about a venturi smoke generator
If you haven’t read, I wrote this about pellet tubes – https://eatcuredmeat.com/how-does-a-smoker-tube-work-cold-or-hot-smoking-guide/
Hi Tom,
I made a smoke generator out of an old 1 gallon propane tank and use an old CPAP machine as a pump to pipe in the cold smoke into my vertical propane smoker (without gas). The CPAP’s air pressure is much more proficient than a portable aquarium pump. I place the briquettes in a minion method and add the wood chunks. I get at least 8 hours of smoke before I need to add more briquettes and wood chunks. It works really well for cold smoking salmon.
Awesome! DIY invention. Sounds very smokey!
I don’t generally smoke over 5-6 hours in one session, so a longer cold smoke isn’t needed.
I love your site I built a new smoke house and plan to use a lot of your records thanks Steve B from Missouri. Have you ever cold smoked a chicken?
Heya,
Nope – but as long as the meat is fresh (chicken seems to develop unwanted bacteria faster than red meats. As part of the charcuterie whole muscle online video course I’m doing, I’, going to be included a cold smoking ebook (currently writing it). Trying to go in-depth as much as possible. I’ll also make the cold smoke ebook available separately, I’ll be emailing out when its done to all emails on this page.
Cheers
Tom
Would it be possible to build a smoker or cold smoker using the exhaust vent from the pellet wood stove in my basement to pump smoke into an enclosed smoker box? any ideas would be greatly appreciated
Definitely! I would think so! Basically, cold smoking is pumping smoke from 1 area to another, or just keeping the smoke under 30C or 86F , but I prefer under about 15C or 40F. Moisture and Airflow helps too!
I’ve seen cold smokers made from fridges, barrels, any wooden box, beehives, gas grills, kettle grills, pellet smoker grills – really it’s just a chamber with airflow through it! 🙂
All th ebest,
Tom
Hello Tom!
I,ve made my own Venturi type smoker. For generating a lot of smoke it´s very effective and the smoke is also cold and that is good because I want to cold smoke. However the smoke is thick and white and the food I´ve smoked so far tastes terribly bitter. The Wood I´ve used is Cherry and it makes the food taste great in my hot smoker. What is your experience of Venturi type smokers, can you get them generating any other smoke than thick White? I´ve looked at a lot of clips when people use them and they all seem to make only thick White smoke.
All the best Patrick.
Nice Patrick! Yeah the theory behind cold smoking is ‘light’ with good airflow and high humidity. So fo me, I always just have a whisper of smoke.
My venturi smoker has a variable airflow pump (fish tank air pump basically). This allows me to choose the smoke amount!
I learned many years ago less smoke is better than. Open up the chamber/area more and go slow on that smoke! I’m going to have a cold smoking ebook as part of the online dry cured course coming out in a few months, here that link. Cheers Tom
Thanks Tom! I have smoking chamber with minimal airflow and a lot of smoke from my smoker. So now I have some things to start fixing. Graet tips, looking forward trying them out!
I´ll look into the course and ebook to, sounds great!
No problemo! cheers Tom
nice article Tom im going to cold smoke a twice smoked ham for xmas my 1st go at cold smoking if i cold smoke cheese or peppers at the same time does it affect the flavor or should they be done separate thanks keith
nope, not in my experience, here’s to the silly season!
Hi Tom, a lot ofGood information here. I am planning on getting your book it is sure to help me has just this article long did. I do have a question: I want to cold smoke Loma, I wish for it to hang for approximately 14 days give or take. It will have a dry rub with curing salt and regular salt to create equilibrium. My question is, how many days should I put this in a cold smoker to smoke and then remove it, to finish the drying process in a 70% humid 50 degree Environment inside the house, that will not be smoking? I want to get some good smoke flavoring but I live in Michigan and it’s pretty cold out so I think cold smoking for a few days?? And then hang inside? Not sure if you’ve had any experience with this but you may have with your years of knowledge please share. Thank you the time you took to write extensively to be honest.
I share my cold smoked bacon recipe in the online course, I like 6-8 hours for a lighter smoke. You could try 4-6 hours, let it rest overnight. Of course, it depends on the thickness of the smoke vapor, airflow etc… it just takes experience with this craft! 😉 Many of bought the ebook and are happy with the content, Cheers T – Like dry curing, there is much more then just a recipe to follow!
Hi, loved the article and the site, congratulations! I’m making homemade pastrami (it’s curing in my fridge right now) and I plan to finish it off in the slow cooker and cold smoke it to add flavor (I live indoors, so I’m using a smoke gun). Should I do it while it’s cooking or only afterwards? Or maybe both?
Hey there, to be honest I haven’t used a smoke gun. I’m using other methods involved with combustion!
If it was me, using this infusion method – I would be doing it after cooking. Seems the infusion of smoke is lost if done before cooking. After smoking, you should ‘rest’ in a container/bag/cookware overnight. This may enhance the smoke flavor and let it permeate. Cheers Tom
Hello, do you think I can use the same cold smoker for Fish and Meat? Do I risk getting the fish taste or flavors pass onto the meat?
Regards
Of course that’s ok! Been doing that for like 20 years!
I converted an old fridge into a smoker box and used a water heater with 2 electric plates dropped in it where i place buckets of chips , a 12 foot 6″ galvanized pipe joins the two so I can get smoke at 75f. I’ve made a salt heavy teriyaki brine to soak my moose meat for 12 + hours in an attempt to make moose jerky. My question is since jerky is drying the meat and smoke is just a flavour enhancer / preserver should I try to place a fan in the fridge to promote air movement
If it was me, I would want some airflow also for jerky, some form of acidity can also be used to preserve, like the ‘biltong’, which south Africans are known for. Acidity has a denaturing effect like cooking.
Also, if it was me thickness of the meat will be a big factor in drying (something like 3 days per inch?), also what salinity the salt brine is of course! hope it works out! Cheers Tom ps. after a 10-20 hr of smoking max, I would be just letting it dry. The hard part of wet brining is knowing that you have fully salt-cured it evening through the meat. More recently I have been injecting meat with equilibrium brine to speed things up (just makes lots of holes!)
Hi Tom
I still can’t find an answer to my question. I had the pork belly for bacon in salt brine for ten days. That’s my father’s advice. But now, I don’t know how long, how many sessions to keep cold smoking and what are steps between and after smoking. Where and how to dry the bacon? Thank you.
Hey, too many variables, it’s not quite that straightforward, for ‘saturation curing’ 1-2 days per 2 lbs/1kg, it depends on the temperature you’re curing, and also the fat/meat ratio (less water in fat).
This is the reason why I am producing a video bacon course right now, should be done by xmas I hope.
I cold smoke for 4-8 hours my house bacon, dry bacon before cold smoking. Also, hope you have exp cold smoking, its quite a few tips. Get my free ebook on cold smoking if you haven’t from the menu.
All the best,
Tom
Like some of the other commenters, I’m curious about doing this in an apartment without a proper smoker. Do you think it would work to cure fish/meat/whatever in a vacuum sealed bag under weights for a week, then pump smoke from a smoke gun into the bag and close it off for a day or so to really infuse the flavors?
Or is the point to let it smoke + oxidize/dry a bit at the same time?
Thanks!!
I think I wrote on smoke guns, the ‘vapor’ doesnt really stick at all to the meat. It’s used in some restaurants as the finally stage. But its really nothing like using ‘real’ smoke. My suggestion, which I have been testing with my new 5 ways to do bacon masterclass – using liquid smoke, buying good stuff means its the condensation from a smoker basically. Putting this on during the curing process is definitely what I would be doing!
You mentioned earlier in the article about humidity with cold smoking. Can you throw a good humidity level to keep if your smoking for like 3 weeks (suho meso). Also is there a low temperature to be aware of? Keep it above freezing? Read something about a dew point once. Thanks
I had to google suho meso! it sounds a lot like pastirma or basturma I’ve made.
Ideally depending on where in the world you are at nighttime is often when humidity is more like 70% – and better for cold smoking. (basically you want conditions similar to dry curing…)
I’ve cold smoked from above freezing to about 15C/60F. For longer cold smoking, I guess you could add a humidifier. Remember cold smoking is really just drying the meat with smoke around it!
3 weeks, is often more like once per day for 3 weeks, not 3 weeks 24 hours from what I’ve learned. Cheers
Is it ok to smoke cheese and steak at the same time?
cold smoke? I do! that wonderful smoke is anti bacterial/fungal etc… Cheers T
Thanks for this article! Just discovered your you tube channel as well. I’m new to cold smoking but have made some delicious cold smoked salmon with WSM and a maze smoker, now want to do white meat fish i.e. herring. When I see videos and articles on herring or cod, they indicate after finishing cold smoke, you still have to cook, poach, pan fry? With salmon, I cured 24 hrs, rinsed (soaked actually) then cold smoked 80 F about 18 hrs then chilled, sliced and ate, nobody got sick. Just brined some pollack, rinsed, then smoked 18 hrs, looked great but I did additional hours at 200 F to be safe, now I have jerky. Is there something about salmon that’s unique? Would appreciate any help. All the best, Cheers!
interesting, I haven’t done herrings or smaller oily fish! but i am waiting for the weather to clear up to get some! its been one my list for a long time
salmon is often salted and dried
herring, anchovies, etc is often salted, cold smoked and oil preserved (probably a reason for that)
salt and drying these small fish could make them too intense in flavor! (i have had that with some wild game, like certain ducks or geese)
If its salt cured properly then it just comes down to drying for preservation, but with salmon gravlax or lox – often its not dried, just consumed inhibited with salt form my exp
All the best,
T
pollack is lean, salmon is fat, this will produce diff outcomes too, fattier fish better for smoking!
I am trying to start cold smoking. Need a lot of knowledge so I start right.
Great, hope what I write helps, All the best, Tom Mueller –
Check out the free pdf cold smoking guide too
What about cold smoking in contrys that the whether is between 28c to 38c? Is it dangerous that the meet can go bad? I hard sam guys that did a cold smoking in temperature of 40c. Is it possible?
Hi, Difficult- non-meat – maybe. Meat no way. Fish starts cooking around 30c. I had a guy comment a few years ago that used a fridge. And pump cold air through the fridge. Or if you ordered a plug in controller, you could cycle the fridge on and off to be around 10-15C. With cold smoker pumping smoke in, and some airflow out of fridge also.
You environment is just not for it. In South Africa, Vinegar and Salt is used to cure/denature meat then dried in heat. Acidity can help alot for preservation. All the best, Tom
Hi. Great article it was a pleasure to read it.
2 thins I’d like to know please.
1. What about places that the whether there is 28c up to 38c? Do you recommend not doing cold smoking?
2. I heard from someone that he cold smoke at 35c and even 45c. Is it dangerous?
1. Answered already
2. Yes dangerous, bacteria growth is rapid between 35c and cooked meat temps!
We have a field stone smoke house 5 foot wide 8 feet deep 6 foot side wall that i need to reroof it . i was thinkn of using smokey joe smoker once i fix it up we live in Grafton Wi . the old barn is 1882 thinking it has to be around same year
Sounds like a great setup, the traditionalists in Europe like to have adjustable vents in some way. Smokey Joe is like a bullet or drum style from memory.
I use Summer Sausage seasoning with cure. I’ve got a 55 gallon barrel that I build a fire in and I ‘ve got a 4″ pipe in top of the barrel 2 foot long running to the 55 gallon barrel on top for the smoke to go in, and I have a hole for the smoke to come out.in front of top barrel and I smoke it for 6 hours and the top barrel never gets to hot you can put your hand on it. And I set and watch it and make sure it doesn’t stop smoking. Then I let it hang for 3 or 4 weeks til it gets the hardness that I want on the sausage is this safe?
Guess it depends on temp control and curing accuracy. Hygiene, meat quality – freshness and how it was handled. Environmental conditions also.
Tom
We plan to host a 4H ham project on our farm our smokehouse needed replacing which we plan to do initially we will have 50 participants each trimming and salting a fresh ham we anticipate more participation with this in mind any information with a simple smokehouse design and a Venturi smoker you could pass along would be appreciated. We’re confident this will be an annual event that said without breaking the bank any ideas you may have would be greatly appreciated.
Thanks in advance
what style of ham? whats the recipe? – depending on the style is influences all the thoughts I have for you – all the best, Tom
I have been told that my freshwater trout and salmon from Lake Superior and Lake Michigan should not be cold smoked. I have very frequently hot smoked both with excellent results. However, I really want to try Chinook salmon and steelhead lox or cold smoked. I generally wet brine in salt and sugar for 12 to 20 hours. Then, I rinse and dry until pellicle forms. I have a Bradley smoker which allows me to unplug the heating element. Should the salmon and trout be safe if I cold smoke it for eight hours?
I can’t comment on the quality of trout or salmon in a lake.
But for cold smoking, its not about how much cold smoking, the cold is a just one aspect of the preservation. Its the salt penetration and drying. The salt inhibits the meat and slow the bacteria moving in it, drying also has a function similar to this, less water in meat – less chance of spoilage. All the best, Tom