Building a DIY meat curing chamber is one of the most rewarding setups for anyone serious about dry curing. One of the key components you’ll need is a reliable humidity controller to keep your chamber in that perfect range between moist and dry air.
Over the years, I’ve used many systems to manage moisture for salami fermentation and dry curing projects, but none have been as consistent and easy to set up as the InkBird controllers. These plug-and-play units have made humidity control far simpler for home and small-scale setups.
The InkBird Humidity Controller can automatically switch a humidifier and dehumidifier on and off based on the humidity reading in your curing chamber. For a piece of gear that costs less than a day’s worth of good charcuterie, it delivers professional-level stability and precision.
Why Humidity Control Matters for Meat Curing
Dry-curing relies on consistent humidity levels to draw out moisture slowly while preventing case hardening or unwanted spoilage. If humidity drops too low, the outside of the meat can dry too fast. Too high, and you risk mold growth or bacterial issues. A controller like the InkBird gives you the ability to fine-tune this balance automatically.
Most curing chambers will perform best when maintained around 70–75% relative humidity for long-term drying and up to 90–95% for fermentation when starter cultures are involved. That’s exactly where a humidity controller becomes essential.
InkBird Humidity Controller Overview
InkBird has become one of the most popular brands for home food curing and environmental control. Their humidity controllers are simple to use, well built, and available in versions that handle both humidifying and dehumidifying duties at the same time. You just plug in your appliances, set your target humidity, and let it run.
As of now, the key models include the IHC-200, the IHC-200 Wi-Fi, and the ITC-608T (links below in table) temperature and humidity combo controller.
Each model is rated for 100-240 V AC input and a 10 A relay output, giving more than enough capacity for small humidifiers or dehumidifiers. Accuracy is quoted at ±3% RH, which is well within the range required for dry curing or fermentation. The controllers are available with regional plug types for Europe, the United States, the UK, and Australia/New Zealand.
| Model | Wi-Fi | Key Use | Notes |
|---|---|---|---|
| IHC-200 | No | Humidity-only control (humidifier + dehumidifier) | Simple plug-and-play setup; ±3 % RH accuracy |
| IHC-200 Wi-Fi | Yes | Humidity control with mobile app monitoring | Uses InkBird Smart app via home Wi-Fi |
| ITC-608T | Optional | Combined temperature + humidity control | Dual-input design for chambers needing both sensors |
I first began curing meats nearly 15 years ago using a custom hard-wired system built with help from an engineer friend. Back then, plug-and-play controllers like these didn’t exist, and every calibration was manual. Today, the InkBird units make it almost effortless to maintain ideal conditions for salami, prosciutto, or bresaola.
My latest fridge conversion was a reminder of why planning sensor placement matters — I accidentally drilled through a coolant line once trying to route wiring. Lesson learned: keep things simple, mount externally when possible, and use equipment designed for home use like the InkBird range.
Before we look at setup and how the controller actually performs inside a curing chamber, here’s what each function does and how I use them across my projects.
What the InkBird Humidity Controller Does
At its core, the InkBird humidity controller is designed to maintain a stable humidity range by switching your humidifier and dehumidifier on or off automatically. This simple feedback loop keeps your chamber balanced without you constantly checking gauges or adjusting dials.
Inside the unit is a small sensor probe that measures relative humidity and sends readings back to the controller. When humidity drops below your set value, the humidifier switches on. When it rises above your upper limit, the dehumidifier takes over. The result is consistent moisture levels—ideal for meat curing, mushroom cultivation, or even plant propagation.
The IHC-200 is a two-relay model that allows both humidification and dehumidification. The Wi-Fi version uses the InkBird Smart app to track readings and make changes remotely—a convenient upgrade if you like monitoring your chamber on the go.

InkBird also produces the ITC-608T, a dual-input unit that manages both temperature and humidity. While it’s more advanced, for most meat curing setups I still prefer the IHC-200 because it provides precise, dedicated humidity control.
All current InkBird models are available with region-specific plugs for Europe, North America, the UK, and Australia/New Zealand—something to double-check before ordering to avoid adapter hassles.
Setting Up the InkBird Humidity Controller
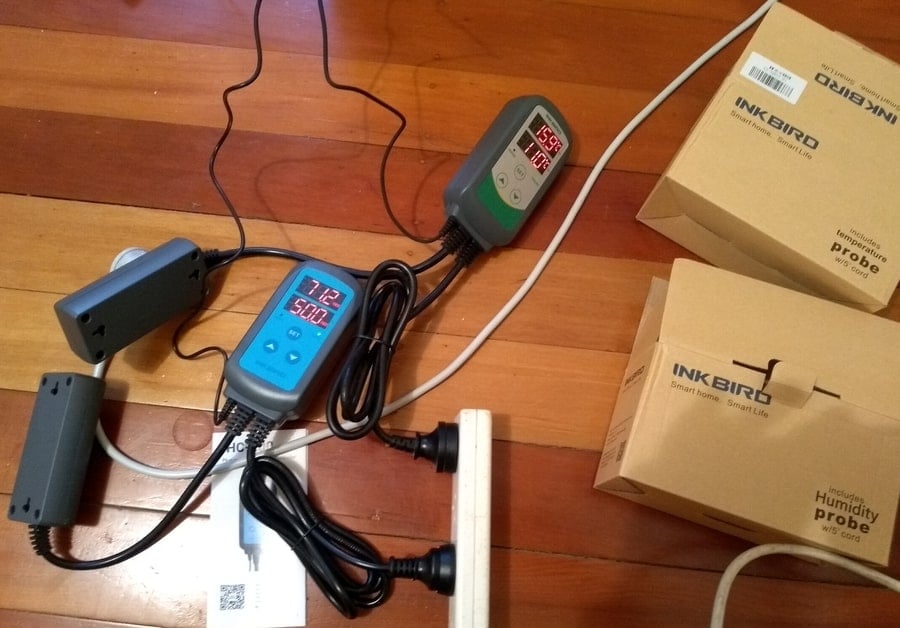
Setup takes less than five minutes. Plug your humidifier into the “Humidification” outlet and your dehumidifier or fan into the “Dehumidification” outlet. Then place the sensor probe in the center of the chamber, away from direct airflow or dripping moisture.
Using the front buttons, hold down “Set” to enter the menu, then use the arrows to adjust the target humidity and tolerance range. Once stored, the controller cycles automatically to maintain those conditions. The calibration feature lets you fine-tune readings if you have another reference hygrometer, though I’ve rarely needed to use it.
I typically aim for 72–75 % RH during drying and up to 90–95 % RH when fermenting salami with starter cultures. The InkBird keeps things remarkably steady without me needing to babysit the chamber.
Here’s what makes it especially versatile—it’s not just for cured meat. Many readers use these controllers for:
- Growing mushrooms or microgreens
- Mini greenhouses or terrariums
- Crawl-space ventilation systems
- Turtle or snake enclosures
- Fermentation or aging chambers
The InkBird series has enough flexibility to suit all these uses, but it truly shines for the delicate balance required in dry curing meat. Once you’ve dialed it in, the chamber maintains its environment with only minor seasonal adjustments.
When I first started, everything was hardwired and required manual switches and testing. With InkBird’s plug-and-play design, you can now get reliable performance without needing electrical expertise.
Next, I’ll get into real-world performance and what I’ve found after running these controllers for long-term projects inside different fridge conversions.
InkBird Humidity Controller Performance
Performance-wise, the InkBird humidity controller has proven extremely reliable in my curing setups. Once calibrated, it maintains steady readings with minimal fluctuation, switching smoothly between humidifying and dehumidifying cycles. The accuracy specification of ±3% relative humidity has matched closely with my independent hygrometers, which is all you really need for long-term curing projects.
The sensor probe delivers consistent readings, and the relay clicks are distinct but quiet. I did notice a slight buzzing sound from one of my earlier units, but it was subtle and didn’t affect performance. For this reason, I keep my curing chamber setup away from the workspace where I write or edit photos—it’s more about peace of mind than functionality.
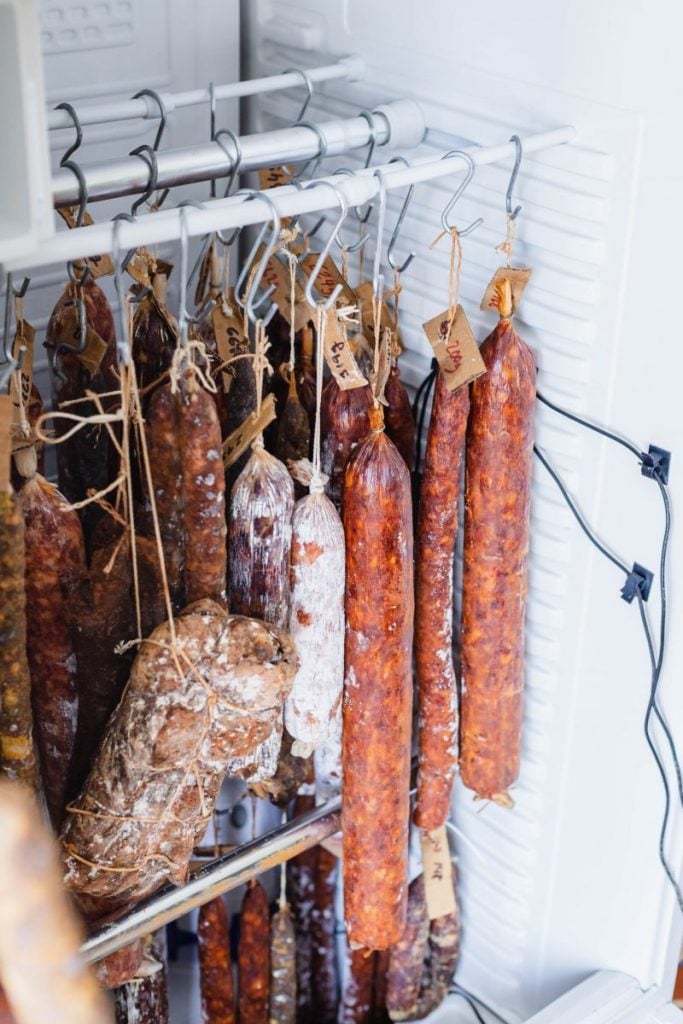
Overall, the IHC-200 maintains humidity levels within a tight 5–8% swing, ideal for salami, coppa, or pancetta. During the early fermentation phase, it ramps up moisture perfectly to encourage starter cultures. As the drying phase progresses, it keeps conditions stable to prevent the dreaded “case hardening.”
The controller includes a calibration function if you want to fine-tune the readings. I’ve never needed to use it, as my results have always been spot-on. Plugging it into my humidifier and small Peltier dehumidifier, the system handles a 150–200 L fridge chamber comfortably without overworking the components.
User Friendliness
Compared to the hardwired controllers I used years ago, the InkBird is incredibly user-friendly. The interface is simple—hold down the main button to open the menu, scroll through parameters with arrows, and set your humidity targets. You don’t need wiring skills or special tools to get professional results.
They’ve kept the interface intentionally simple for home setups, but it’s accurate enough for semi-commercial projects, too. If you plan on running larger or multiple chambers simultaneously, you might also consider Auber Instruments controllers, which offer PID control for precision tuning.
Placement and Mounting
Mounting the controller is straightforward. Each unit has small holes on the top for screws, but I usually attach mine to the fridge exterior using high-strength double-sided tape. It keeps things neat and avoids drilling into the fridge body, which can risk puncturing coolant lines—something I unfortunately learned the hard way during an early conversion.
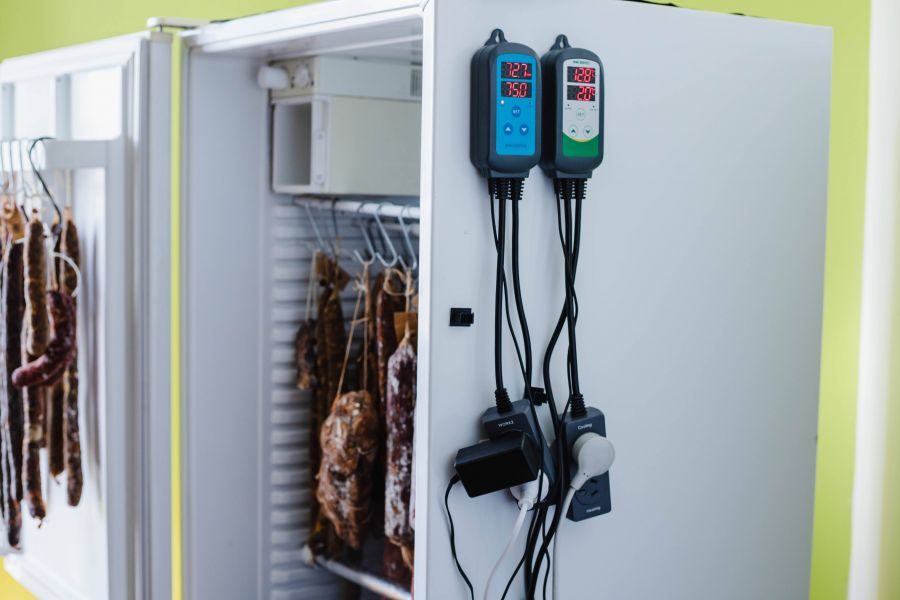
When placing the humidity probe, position it around the middle of the chamber and away from direct airflow from the humidifier or fan. This gives you a more accurate representation of the chamber’s average environment rather than one extreme spot. It’s a small detail but makes a noticeable difference in consistency.
Overall Review and My Recommendation
For hobbyists and experienced curers alike, the InkBird humidity controller is a dependable and affordable way to manage moisture control in a DIY curing chamber. The build quality is solid, the interface is intuitive, and the accuracy is more than adequate for salami or whole-muscle dry curing.
It’s also great that InkBird offers region-specific plug versions, including options for Australia and New Zealand—no messy adapters needed. These details make it accessible for anyone setting up a chamber locally or internationally.
In my experience, it’s one of those tools that simply works. Once you’ve set it, it just does its job in the background while you focus on the real craft—curing incredible meat.
Where to Get InkBird Controllers
InkBird products are widely available online, but Amazon consistently offers the best pricing and availability. Both the standard and Wi-Fi versions are stocked and shipped worldwide. Below are direct links with my affiliate tag for the versions I recommend.
• IHC-200 Wi-Fi Humidity Controller
For other curing and environmental control gear, see my recommended controllers page where I’ve listed hardwired and Wi-Fi options I’ve tested over the years.
Tip
If you’re building your first curing chamber, choose a compact humidifier and dehumidifier that fit easily within your fridge volume and test them with your InkBird controller for a full week before hanging any meat. It’s the best way to confirm everything holds steady and prevent early curing mishaps.
Wet paper towels can mimic freshly hung cured meats in a bowl as a test. Try and minimise temperature and humidity swings as the system cycles on and off.
Do you need to calibrate the InkBird humidity controller?
Usually no. The IHC-200 and Wi-Fi models are accurate within ±3 % RH out of the box. You can adjust readings using the calibration feature if your hygrometer shows a consistent offset.
Can I use the InkBird controller inside a fridge?
Yes. Mount the sensor probe inside the fridge chamber but keep the main controller body outside to avoid condensation damage.
What else can you use the InkBird humidity controller for?
Besides dry curing, it’s great for mushroom growing, mini greenhouses, reptile habitats, and other projects that require consistent humidity.
What’s your experience using InkBird or other controllers for curing? Leave a comment below — I’d love to hear how your setup’s performing.

Tom Mueller
For decades, immersed in studying, working, learning, and teaching the craft of meat curing, sharing the passion and showcasing the world of charcuterie and smoked meat. Read More
Tom,
Nice site and great tips. You might check out Omega engineering if you need a more flexible industrial type PID loop control. Basically these are the type of control where you can interface sensors of your choice with some output – like a fan or heating element; whatever you want really. FYI I am not connected with them in any way.
Hey Jay, cheers for the tip off -if I was going big that’s maybe the way I’d go! I have a friend who went ‘big’ ordered a Italian double door beast…. 6 months to arrive though!