I was thinking the other day about the best tips I could give for meat curing to a beginner. Dry-cured meats and cold smoking have been my passion for a few decades, it’s quite the obsession!
Quick Meat Curing Tips
- Hygiene and cool temperatures are really important during curing
- Use Equilibrium Curing or Brining is efficient
- Use an accurate digital scale to work out a cure based on the weight of the meat(here is some other useful equipment) for equilibrium curing
- Start off with well-proven reliable recipes/methods
- Test your drying area for humidity and temperature
- Hanging Meat leads to better outcomes when dry curing (I wrote about benefits of having salami here)
- Start off with smaller pieces of whole-muscle meat like pork belly for pancetta or beef cuts for bresaola
- Use sea salt with no additives
- Finer salt that is blitzed or crushed is more accessible to apply for Equilibrium Curing.
Off the top of my head, I can whack up some dry-cured, cold-smoked bacon. This info will be around the method of equilibrium cured bacon (like is bacon cured I wrote in detail) with a bit of cold smoke – no worries.
Below are tips and hacks – I was thinking of while making this batch(cure, dry, smoke, basically), As well as the simplest method to create something delicious and hopefully appreciated.
The goal is to give anyone who is getting into meat curing a few shortcuts.
Tips for Meat Curing
I kind of want to start with just the process overview and then cover each of these steps and things that I can think of that might be helpful to you.
My favorite process is equilibrium curing or brining; by using accurate scales, you can ‘choose’ the salt level of the cure and take the guesswork out.
Other traditional methods are excess, salt-box, and saturation curing (an article highlighting this method). This is either rubbing or placing the meat in salt directly or submerging it in a salt brine.
It goes without saying that if you are going to cure meat, you need to be clean and tidy and ideally keep everything at fridge temperature or up to, say, 60°F or 16°C approximately. Curing at fridge temperature is 37-41°F/3-5°C, and hanging is for drying around 52°F/11°C.
The reason is that you are doing the best job of controlling bacterial activity.
Meat Curing Steps
Using quality sustainable meat is the first step, whether decent wild meat or locally farmed – these factors are essential for me anyway (a decision we make now creates the future -yes, that’s pretty deep).
I am using accurate calculations for salt, spices, and nitrates basics.
For these consistent and accurate results of Equilibrium Curing, you need to have scales that are accurate to a minimum of 1 decimal place, ideally 2.
If you want more info, check this page on scales and spice grinders I wrote.
Having a decent, accurate recipe is, of course, crucial. But the essence of meat curing, in terms of dry curing (full guide and steps in this article)
The Marianski brothers do an excellent book that gives essential recipes for various dry-cured and smoked products. I’ll put a link to buy this down the bottom. They have a ton of books out.
Many guys in the community have a suitable location around the house for hanging and drying the meat. This depends on temperature and humidity. I’ll get into that more later on testing locations.
Having a Curing chamber does create better outcomes, and these are ideal since you make the right environment for your dry curing = humidity, a controlled environment for good bacteria (penicillin, the white powdery stuff you see on salami), and temperature.
I will include a detailed booklet on designs, setups, easy/minimalist options, and all the ins and outs. See below; no spam, just quality info:
Meat Curing Tips in a Normal Fridge
I sometimes have a sneaky spot underneath the vegetable compartment inside my kitchen fridge. This works great for specific projects where you want a little bit of weight on top to flatten it out, like pancetta.
This entirely depends on your fridge.
I recently used an antique clothes iron for the extra weight when you apply it. It helps the salt and cures penetrate the meat. This is, of course, using the equilibrium curing method.
But also, you can have a go at curing meat in your regular kitchen fridge; the size of the meat is critical – figured this out. I wrote a complete guide here.
If you haven’t checked it out, here is a link to the equilibrium curing calculator I created.
Single-Use Plastic vs. Reusable Silicon Tip
For many years, I felt kind of guilty using single-use plastic. , You often squeeze the air out with the Ziploc bags and then zip it up at the end. Or a vacuum-packed bag for curing the meat.
But the key is to have a large type of vacuum-packed bag on the outside. And the silicon reusable bag on the inside.
Here is a concise YouTube video that shows you how it’s done.
Tips About Removing the Cure
I don’t worry about washing off the cure if I use essential sea salt and maybe sugar for something like bacon. Most of the time, I use between 2.25% and 3.5% total salt. I don’t think there’s a need to wash off anything.
You may need to wash it off if you use more salt or pack it heavily with spices.
One big tip to get fancy is to use some wine.
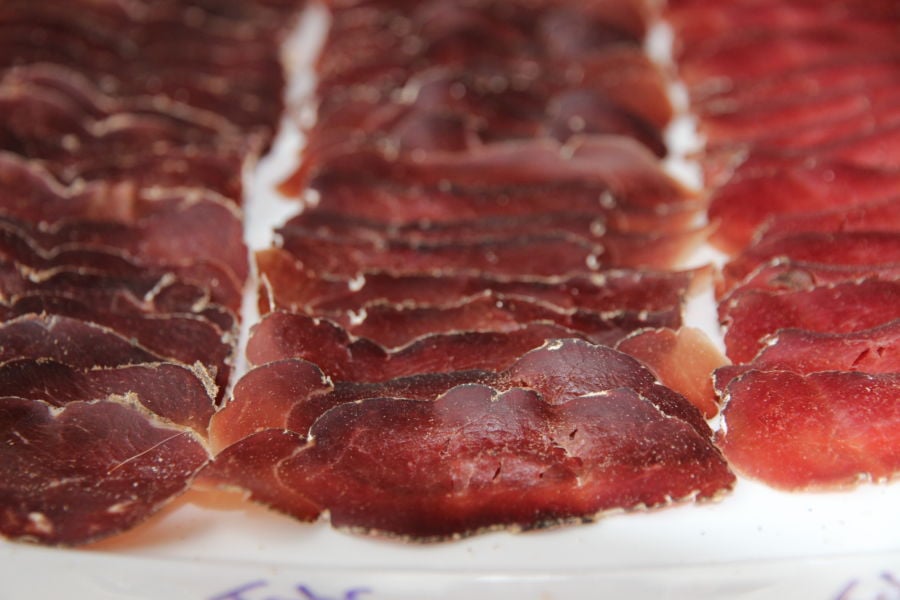
It’s widespread in the classic Italian for bresaola to wash off the beef dry-cured bresaola with certain red wines. It subtly comes through in the flavor.
Hanging / Drying Tips
The little S hooks are great for hanging meat in your shed, garage, or curing chamber because you can take off the meat to check and weigh it easily.
But I also often use pieces of strings through the top of the meat and then go through the grill of a shelf (in my curing chamber). Then, a chopstick on top holds it in place like this.
With dry curing, you’ll constantly be weighing the meat quite often. Hopefully, I will also inspect it to ensure it has good, healthy white penicillin (or good green-on-white; more on this later). Because of this, you need to take the meat out quickly and put it back in.
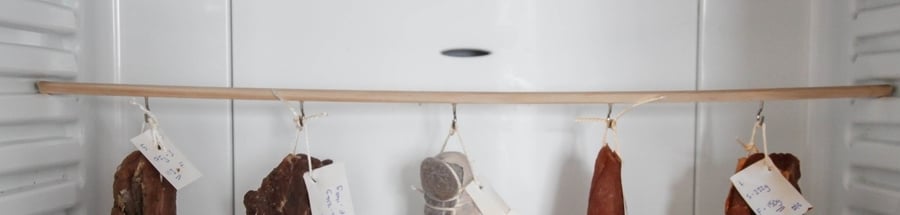
Here is a picture of the piece of wood with some picture hooks screwed in. This works great for small charcuterie dry-cured projects that only take a few weeks. I have this at the back of my regular kitchen fridge.
Equipment Tips for Dry Curing
Curing Chamber Tips
A frost-free fridge is the best to use; wine fridges have specific temperatures that can also be conducive to meat curing.
I mentioned that the size of the meat is essential for the drying area.
Checking Temperature & Humidity Tips
Getting the proper humidity and temperature is essential in the earliest stages of meat curing.
When I recently made a long trip through Italy, I visited many Parma factories across the Emilio Reggiano area.
Interestingly, only the first three months of hanging/drying were done in various controlled environments. For the minimum remaining nine months, the tens of thousands of Parma prosciutto were turned into a bare room (http://www.slega.it/).
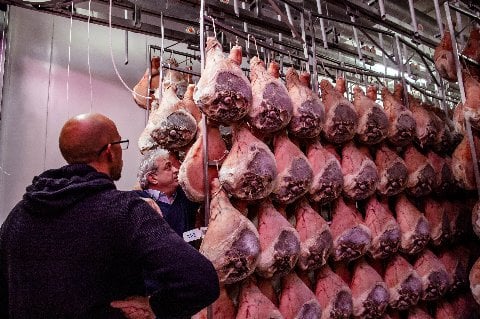
The process was – if it was raining, they kept the windows shut. If it wasn’t raining, you left them open.
Around this area, there are large bodies of water, so the rivers may also help in having a 60 to 80% humidity more often than not.
Good Mold Tips
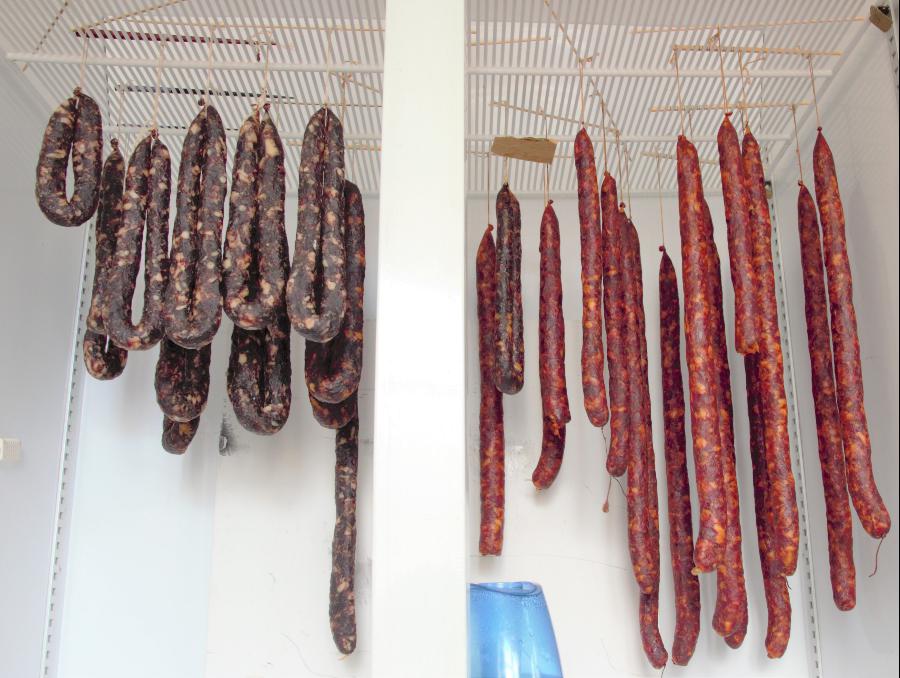
Here is a picture of some Njuda, classic Calabrian Italian dry-cured meat. At a place called Livasi, which a friend talked highly of, another small commercial operator in the Southern end of Italy.
It’s a spreadable salami: Italian Calabrian chili, pork fat, and pork meat.
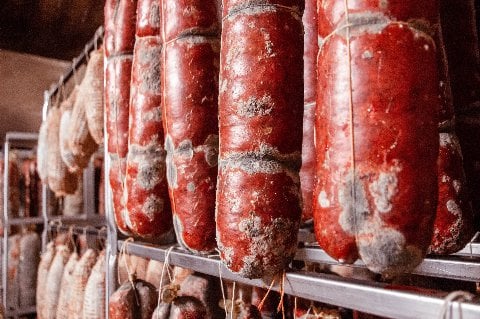
You can see a green mold growing on these natural casings. Many people think the excellent powdery white mold is the only good one. But this green type of mold grows on the white penicillin mold culture.
I was surprised this mold grew since the Njuda was cold-smoked at the start. Quite often, with cold smoking (here, I wrote about different cold smokers you could use), you find there is a minimal amount of mold growth. It’s all good because the cold smoke (smoker/curing gift ideas for yourself or someone else) also has a form of antibacterial and antifungal effect.
Equipment Tips for Cold Smoking
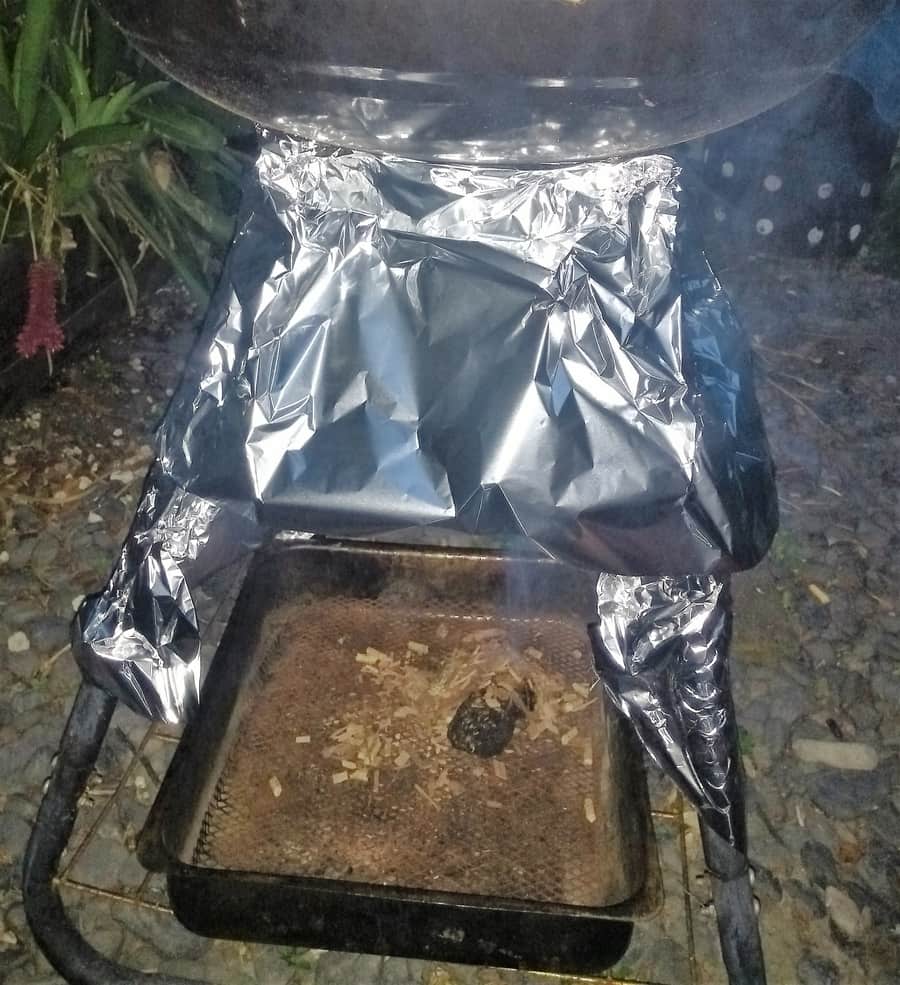
I got down to some pretty redneck basics the other day; I ended up just using a piece of pork belly which was nicely cured with simple salt and sugar (Equilibrium Dry Cured to the weight of the meat); I dropped some grapevine cuttings, and apple wood chips around the portable smoker I used on the ground.
I put it underneath my cheap kettle grill and wrapped tinfoil around the outside.
I got the chips going and smoking with one piece of charcoal and used a butane torch to light it.
I was preparing a small batch of pork belly for a friend as a thank you. So I only really wanted six hours of cold smoking; he prefers subtle bacon.
Of course, I had to do some sampling with just 2.5% sea salt and 1.25% sugar. It was completely and utterly delicious!
So you can see the point I’m trying to make is cold smoking (link to cold smoking article category list on this site) can be done so quickly. Nuances do exist, and they’re a craft that can be continually refined like any craft.
If you want some equipment, a hot tip would be getting a pellet tube smoker, an upgrade from a piece of charcoal.
Pellet Tube Smokers – can be used for many different projects, and it offers a 4 to 6-hour smoking with a 12″ tube – reliable and effective. (But mine is in storage right now).
Here is a complete rundown I wrote on using a pellet tube smoker.
Cold Smoking Tips
Humidity is often forgotten when it comes to cold smoking. For the environment I live in, I do my cold smoking at nighttime, which allows me to get 70% humidity or thereabouts. And generally between 15 to 25°C or 66-77°F.
I just let it smoke and die out overnight. I put it in a container or wrap it up the following day. Store it in the fridge for the next session if I want to do another one smoking the next night.
As long as the meat is fully cured and cold, smoking is relatively straightforward and an ancient and effective way of preserving and enhancing the flavor.
If you want more information on cold smoking, I write a complete guide on it; check it out here.
Links – buying through these links doesn’t cost you anymore; it does support the website. It’s appreciated, Tom.
Pellet Tube Smoker – My Fav Here
(Flat edge so it sites firm, good value, easy to use)
Excellent Complete Guide to Meat Curing and Smoking

Tom Mueller
For decades, immersed in studying, working, learning, and teaching the craft of meat curing, sharing the passion and showcasing the world of charcuterie and smoked meat. Read More