Here are the suggestions from decades of converted and trying different controllers, this will go through all the detail to be as helpful as possible.
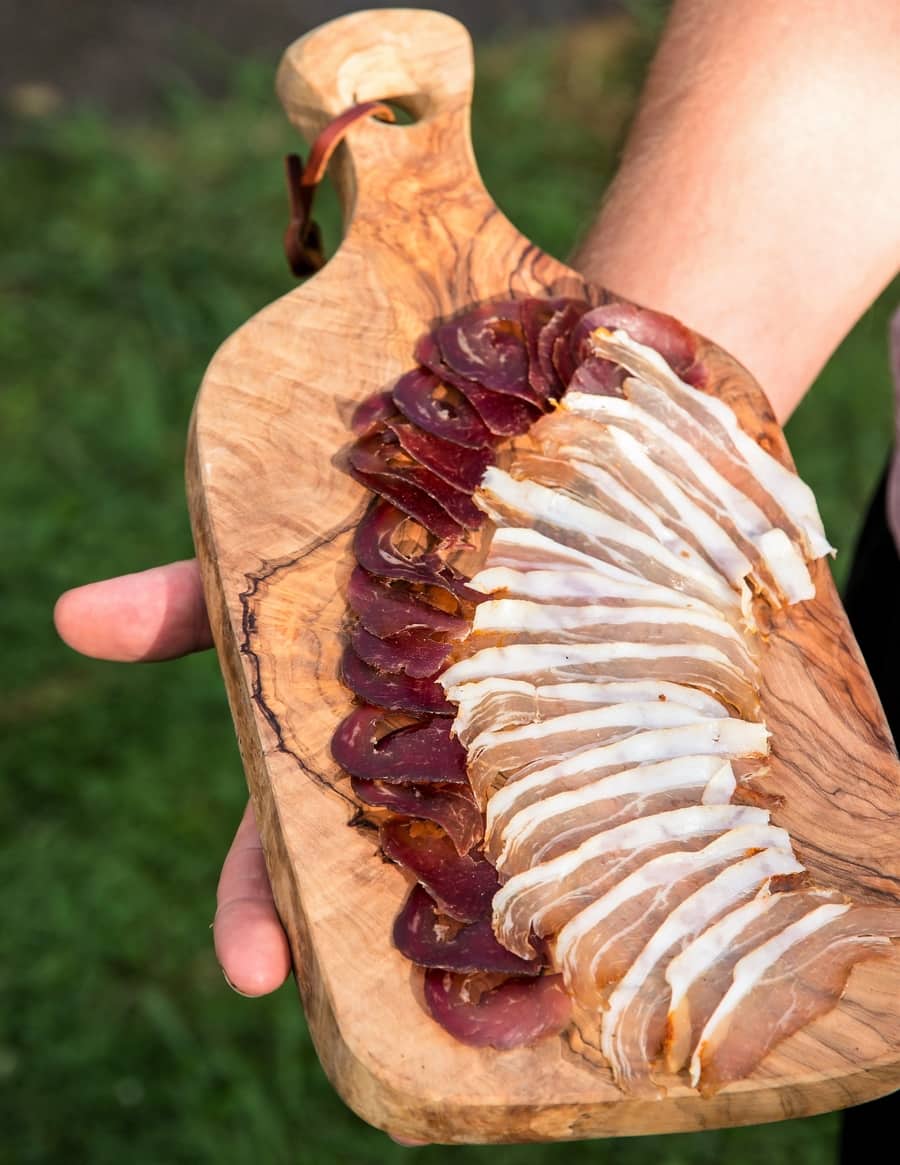
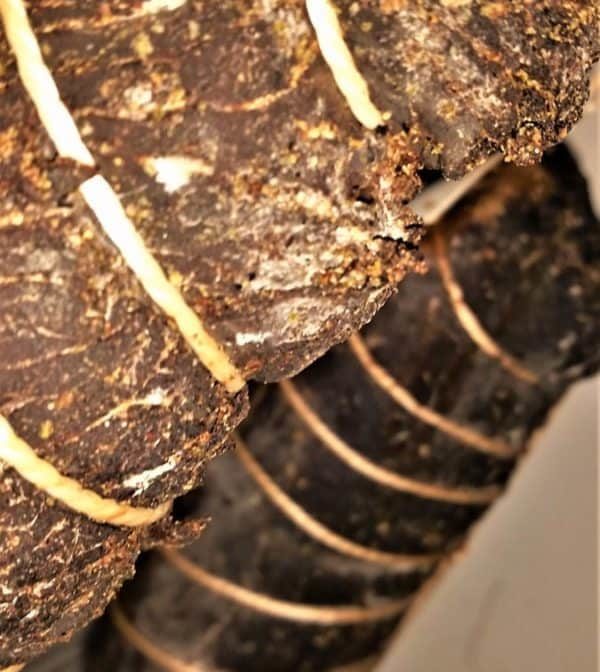
It’s about hitting around 52°F / 11°C and around 70% humidity. If you can get roughly around this, you can smash out pancetta, dry-cured bacon bresaola, or anything you can conjure up – like this stuff I am mighty proud of.
DIY Controllers For Meat Curing Fridge Conversion
There are 2 options I have found putting together a curing chamber, easy plug and play or hardwired (if you are electrically minded).
Plug & Play Controllers (No wiring needed)
These ‘plug & play’ controllers don’t need wiring to connect to your fridge or heat source. You plug in the power cord from either component into the output points on the controller.
Both heating/cooling or drier/moister are automatically switched on and off; you choose the setting.
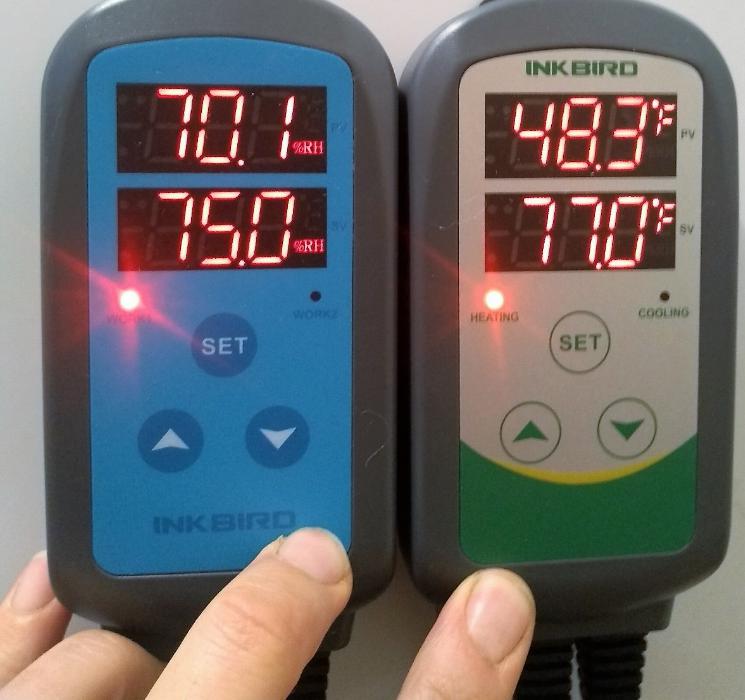
Humidity – Plug & Play
It is by far the best all-around controller on the market for meat curing (and controlling the climate for many other things, like growing delicious oyster mushrooms).
When I first used an Inkbird controller, being me – I just plugged it and started logically pushing buttons. I had it controlling the fridge temperature in 1 minute of setup. Then I delved into the instructions; I was impressed by how easy and logical it was – I’m a techie down to earth kind of guy.

It’s not super advanced like Auber instruments (which required an electrical engineer to help set up a hardwood controller system). At the end of the day, you turn something on and off with a sensor.
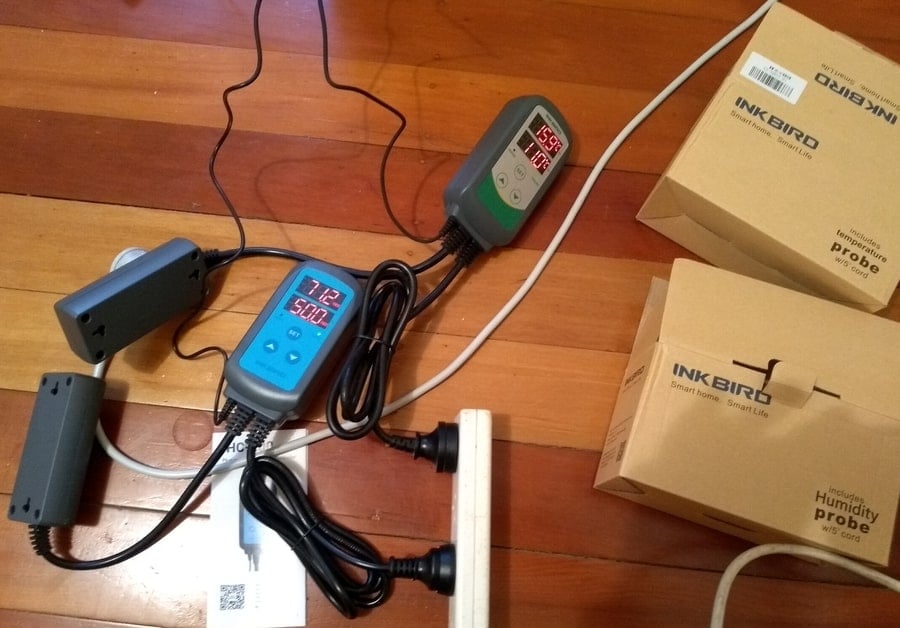
The Inkbird IHC-200 Dual Output Humidity Controller is perfect; just plug it in and set it up.
It’s accurate to about 3% humidity + or—and can be hooked up to a humidifier and dehumidifier.
Simple and practical, this is the product I have advised many people to buy; it does the trick perfectly – and has been around for years.
Check out the IHC-200 Inkbird on Amazon. You can see from the reviews that it’s the business.
Temperature – Plug & Play
Now, I guess it also depends on whether you might be fermenting dry-cured salami or have another reason to raise the chamber’s temperature.
One temperature control output could be enough if you aren’t going to or don’t plan on it. I have always had salamis in mind, so two output controllers for temperature were the way to go; this Inkbird ITC-308 Temperature Controller does a cooling and heating input.
Another great Inkbird product designed for homebrewing but now gets used all the time for meat curing is & a play temp controller that is easy to use; find it here on Amazon.
If you want both temperature and humidity, Inkbird sells both as a package. Check it out here on Amazon.
Wifi Option – Plug & Play
If
They
Here is a quick 2-minute video showing the setup.
You have two outlets, so you can control, say, the cooling of a fridge and the moisture rising with a humidifier. But if you want complete control of cooling with a refrigerator (no. 1 plug) and heating with, say, a ceramic bulb (no. 2 plug). Humidifier (no.3 plug) & dehumidifier (no.4 plug).
You will need 2 of these.
Many guys get away with just controlling the fridge and a humidifier, but it depends on how it runs. You can always add on the dehumidifier later as well.
Here is the wifi Auber TH-220 @ around $150; the wifi is excellent – check it out on Amazon.

Hardwired Controller
**Please make sure you have the electrical knowledge or know someone who can do this for you**
Humidity – Hardwired
It’s a universal component for many different applications. It is used for pet incubation and breeding purposes. This same design is actually for my temperature control. But I recommend this one since it is WAY easier to program and set your desired levels and variations.
Humidity controller – controller & sensor included. Remember, you want the sensor to be around the middle of the chamber when installing.
It’s pretty cheap, too; check it out on Amazon here.
Temperature – Hardwired
As mentioned, a very reliable temp controller is straightforward to program. INKBIRD has rebranded it.
It’s a simple on-and-off switch with a sensor used for a plethora of applications. I’ve seen these in commercial walk-in curing environments, which gives you an idea of the reliability. It has great reviews. Check it out on Amazon here.
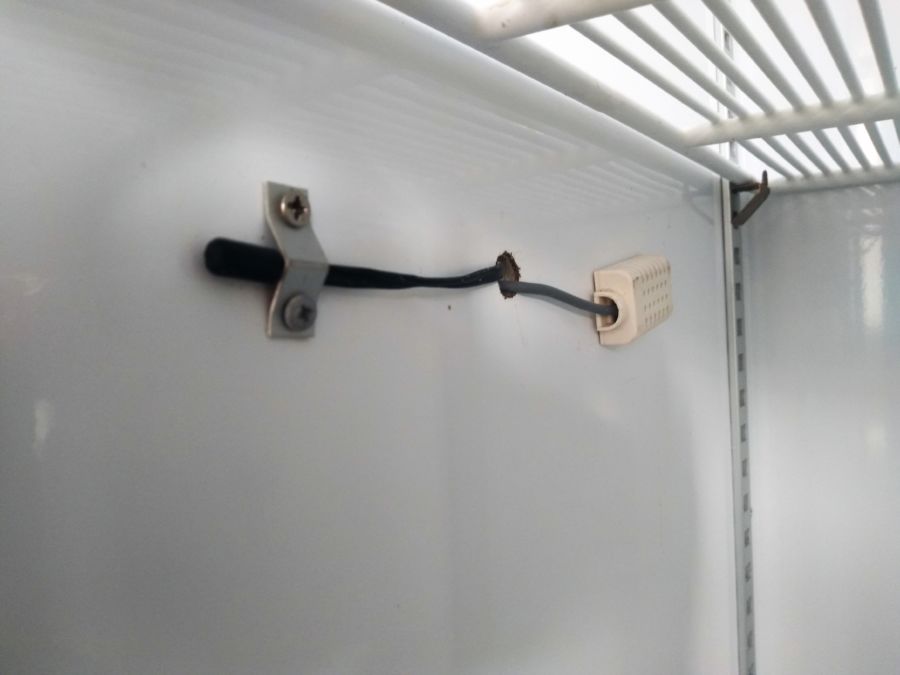
Sensor Setup
You can just put the wires through the door. I drilled a little hole for the temperature and humidity sensor around the middle of the chamber; it looks like this on the latest chamber.