I’ve been practicing and teaching meat curing for decades, sharing the slowest food in the world with people who want to experience its incredible depth of flavor. Over the years, I’ve refined a salt-curing method that is precise, reliable, and repeatable — one I’ve used for hundreds of successful projects at home.
Dry curing meat isn’t about standing over the kitchen counter for hours — it’s about setting up the right conditions and letting time, salt, and natural processes do the work. It’s a blend of craft and science, where the reward is an intensely flavorful, long-lasting product that connects you to centuries of food preservation tradition.
In this guide, I’ll walk through the fundamentals of salt dry curing, focusing on equilibrium curing, my preferred method for precision and consistency. I’ll cover ingredients, equipment, and step-by-step techniques, so you can confidently make dry-cured meats at home.
Introduction to Salt Dry Curing
Dry curing is one of the oldest and most dependable ways to preserve meat. Using salt, and often spices or natural fermentation, the process reduces water content to a point where spoilage bacteria can’t thrive. What’s left is a preserved piece of meat with intensified flavor, a firmer texture, and often a delicate aroma shaped by the process.
What Makes Dry Curing Unique
Unlike cooking, which transforms meat in hours or minutes, dry curing works slowly over weeks or months. The gradual moisture loss concentrates natural flavors, while chemical changes from salt and beneficial bacteria create the complex savory taste that defines traditional charcuterie.
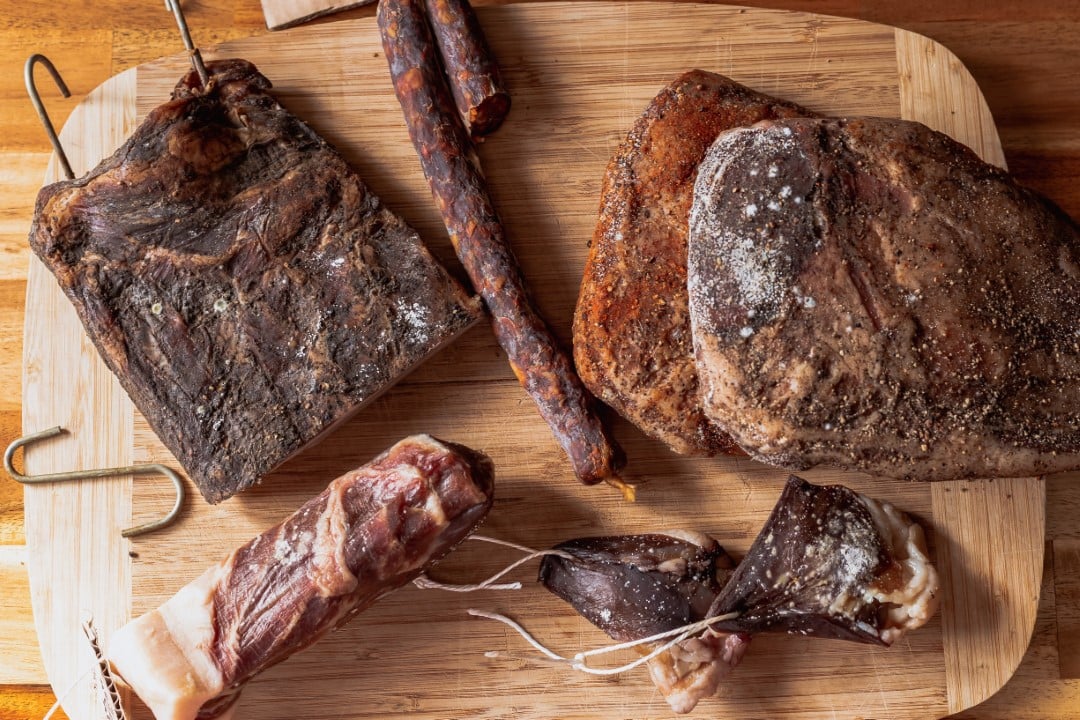
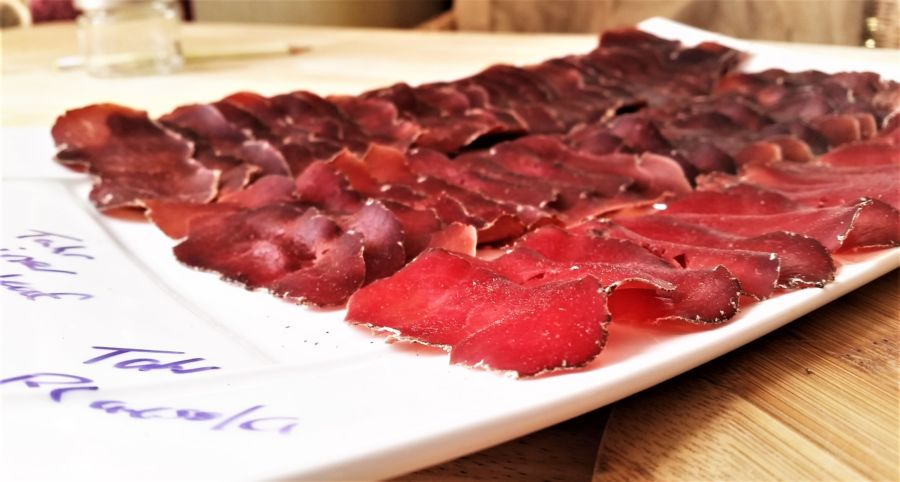
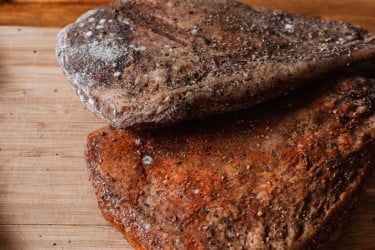
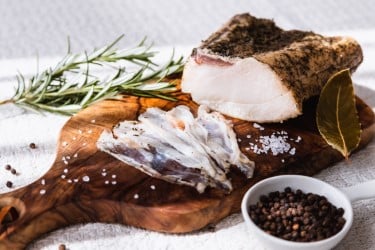
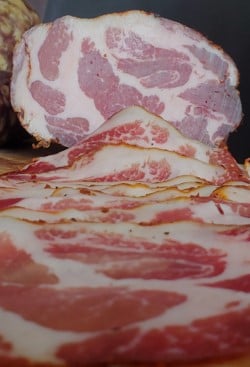
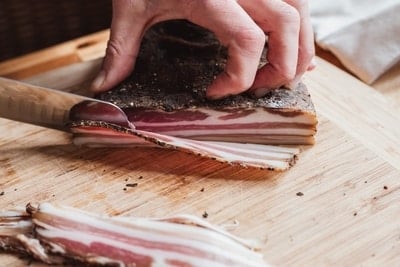
Examples like Prosciutto di Parma, Speck, Bresaola, and Pancetta show the variety of textures and flavors possible with this approach, all achievable at home with the right knowledge and setup.
Why Equilibrium Curing is My Preferred Method
There are two main ways to salt dry-cure meat: the traditional saturation or “salt box” method and the more precise equilibrium curing method. I prefer equilibrium curing because it allows exact control over salt levels, making it almost impossible to over- or under-salt the meat when measurements are correct.
With equilibrium curing, you calculate the salt and curing ingredients as a percentage of the meat’s weight. This ensures even seasoning throughout the muscle and gives flexibility with curing time — an extra week or two won’t affect the final saltiness.
For home curing, especially with smaller batches, it’s the most reliable approach I’ve found.
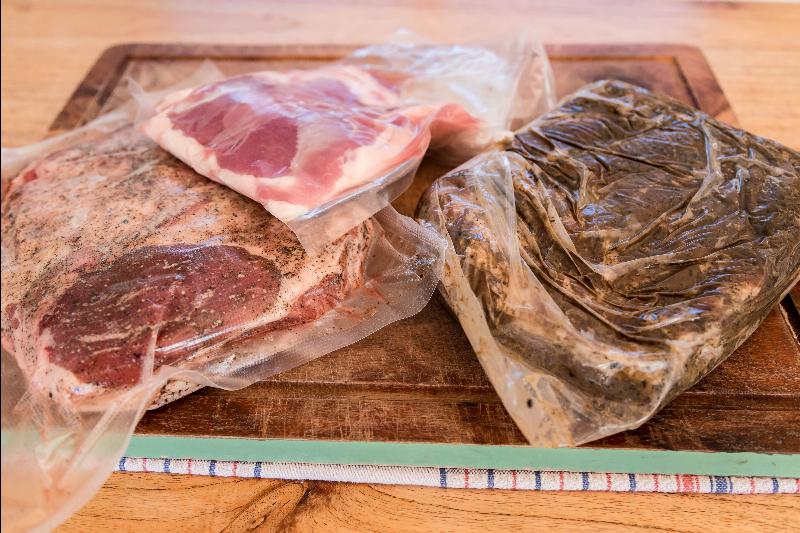
Understanding the Dry Curing Process
Salt preservation works through three main actions that happen during curing:
- Osmosis – Salt draws moisture out and equalizes the concentration through the meat in the bag.
- Diffusion – Over time, salt moves into the meat until its concentration is even throughout. This ensures the cure reaches the center of the muscle for complete curing.
- Binding – Salt interacts with proteins, particularly myosin, to change texture. Salt is also binding inside the meat, unwanted bacteria that could spoil the meat do not like this.
Each of these processes happens slowly, and they work together to make meat safe for long-term storage, while also changing its taste and mouthfeel in ways cooking can’t replicate.
Flavor Development in Dry Curing
The magic of dry curing is in how it develops flavor. As moisture leaves, natural meat flavors become more concentrated. Fermentation from naturally occurring or introduced bacteria can add gentle acidity and savory depth. Spices, herbs, and smoke — if used — layer in additional aromas.
The result is a flavor profile that’s both intense and balanced, with the complexity coming from a combination of seasoning, controlled drying, and time. Every step of the process, from the choice of salt to the environment where the meat hangs, leaves its mark on the final product.
Key Ingredients for Dry Curing
Salt – Size & Type
Salt is the foundation of all meat curing. It’s the primary agent that removes moisture, prevents the growth of harmful bacteria, and concentrates the natural flavors of the meat.
The biggest mistake beginners make is thinking that any salt will do. Many table salts contain additives like iodine or anti-caking agents, which can affect flavor and even cause discoloration during curing. For best results, I always recommend pure sea salt or kosher salt without additives.
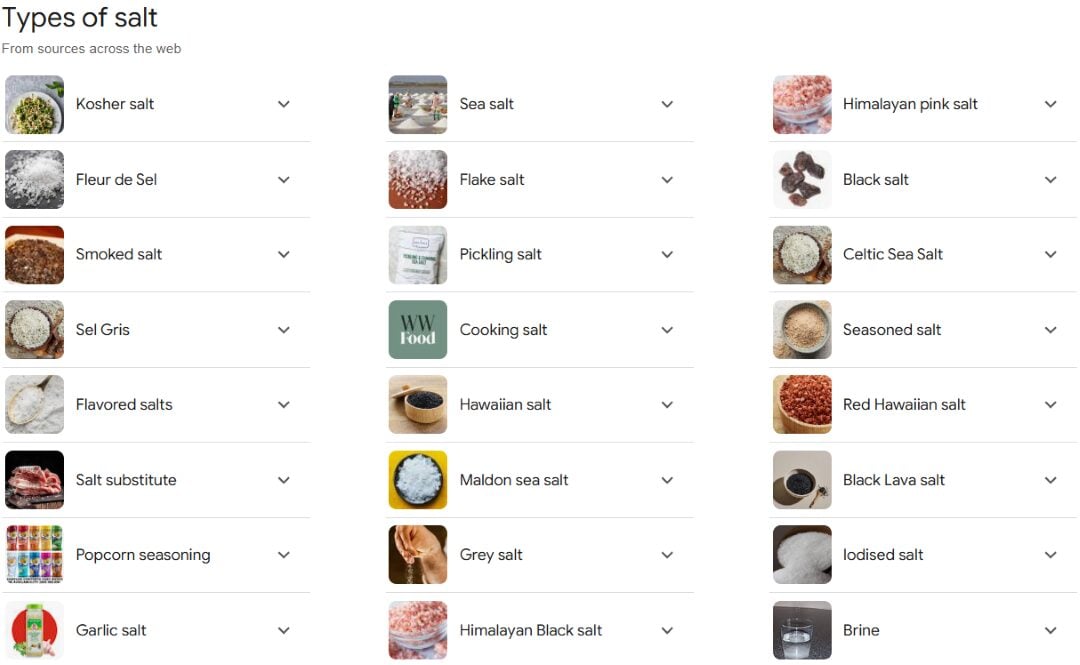
One tablespoon of one salt brand may weigh quite differently from another brand due to grain size and density. This is why I measure salt by weight, not volume — it’s far more accurate for consistent results.
Nitrates & Nitrites (Pink Curing Salt)
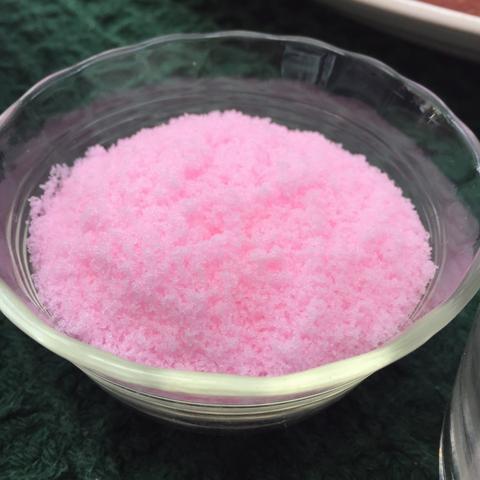
Many home curers and commercial producers choose to use pink curing salt alongside regular salt. This product is roughly 90% salt and 6.25% sodium nitrite (for No. 1) or a mix of sodium nitrite and sodium nitrate (for No. 2).
No. 1 is for curing projects under 30 days. No. 2 is for long-term projects over 30 days, such as whole muscle hams or certain salamis. These compounds inhibit botulism, slow spoilage, and help develop the distinctive pink hue in cured pork products.
It’s important to use precise measurements when working with curing agent salts. When using equilibrium curing, I add pink curing salt at 0.25% of the meat’s total weight, with the rest made up of pure sea salt to achieve the target percentage.
For a deeper breakdown on safe usage, ratios, and the science behind these compounds, see my guide on cured meat & nitrates.
If you want a technical, science-backed overview of how nitrites and nitrates act as preservatives, the USDA nitrite/nitrate guidelines are an excellent resource.
Choosing the Right Meat
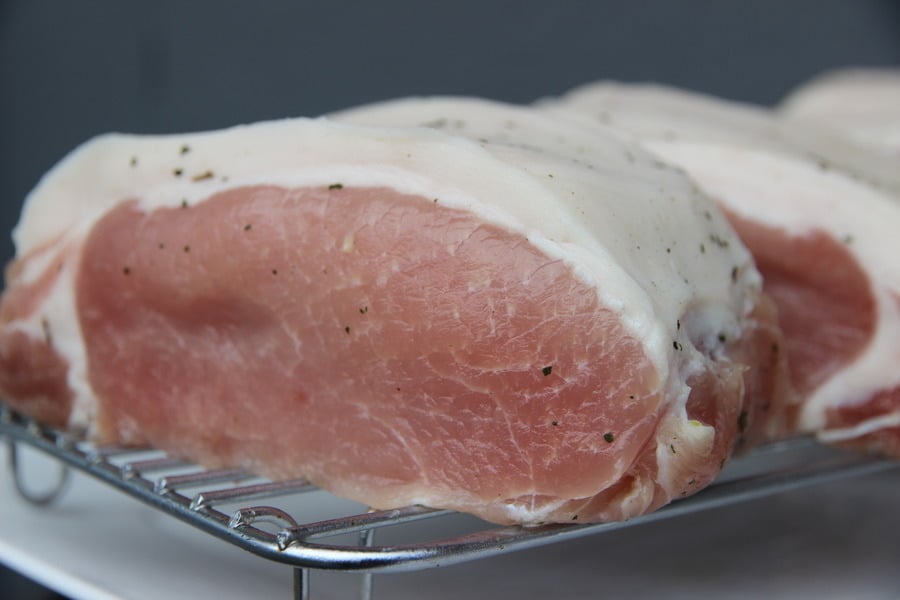
The quality of the final product is directly tied to the quality of the meat you start with. Fresh, well-raised animals produce superior dry-cured meats because curing intensifies every aspect of flavor, good or bad.
My go-to choices for pork include the hind leg, belly, loin, jowl, and shoulder. For beef, I often use top round, eye of round, or brisket for certain styles. Boneless cuts make the process easier for beginners because salt penetration is more uniform.
Lean cuts will dry faster, while fattier cuts tend to remain more supple and rich after curing. Pork belly, for example, retains luscious texture even after significant moisture loss. Fat also acts as a natural barrier against over-drying.
If you’re still deciding which approach to take for your first project, my detailed tutorial on how to dry cure meat at home (equilibrium method) walks through the whole process from start to finish.
Essential Equipment & Materials
Having the right tools not only makes dry curing easier, it ensures more consistent results. Some equipment is non-negotiable — like accurate scales — while others are optional upgrades that can improve precision and workflow.
- Accurate Kitchen Scales
- Mortar & Pestle or Spice Grinder
- Bags or Containers for Curing
- Butcher Twine or Hooks
- Casings or Muslin Cloth
- Meat Drying Area or Chamber
Accurate Kitchen Scales
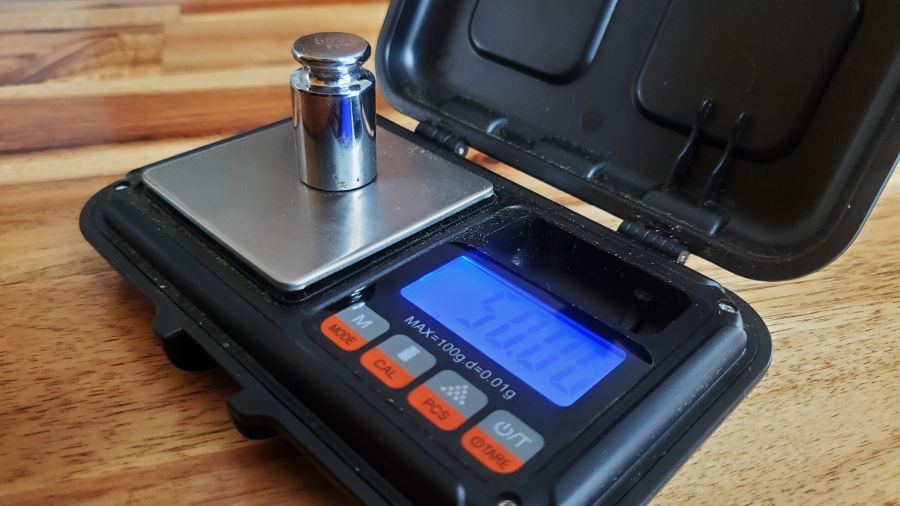
Salt percentages in equilibrium curing are small but critical. A scale that measures accurately to 1–2 decimal places (0.01–0.1 grams) is ideal. Pocket-sized digital scales are perfect for weighing curing salts, while a larger digital scale can handle the full weight of meat cuts.
For specifics on the scales I’ve tested and used for years, I’ve listed recommendations in my meat curing equipment guide.
Mortar & Pestle or Spice Grinder
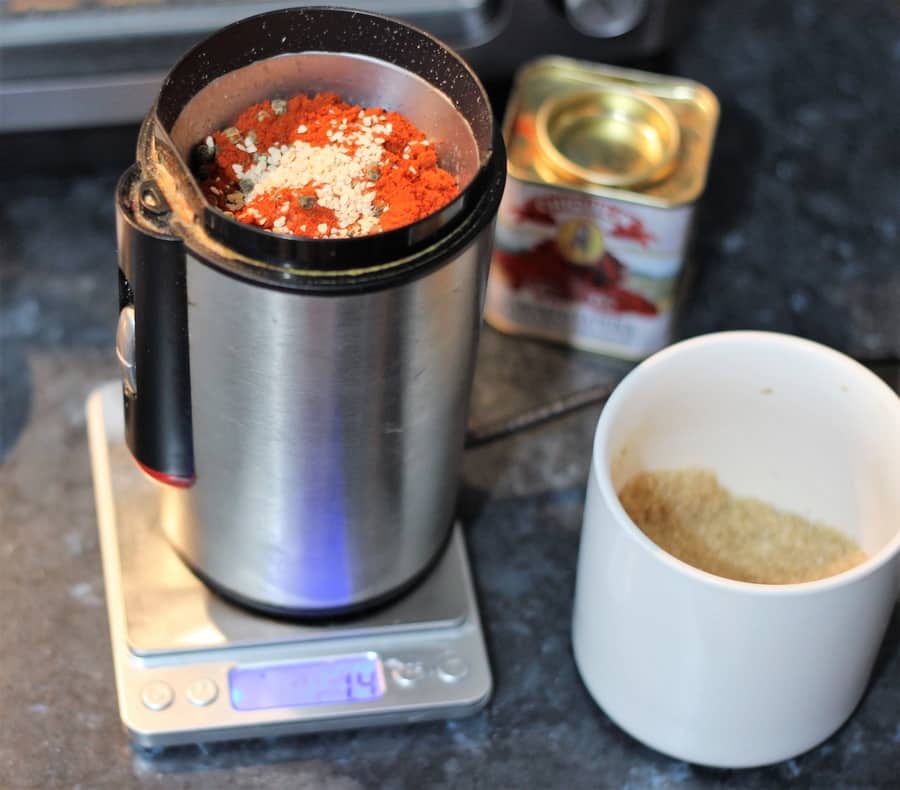
A uniform cure mixture is essential for consistent salt penetration. I often use an electric spice grinder for efficiency, but a mortar and pestle offers more control and keeps you connected to the process. Both work well; it’s about what you prefer in your workflow.
Bags or Containers for Curing

The container or bag holds the meat and cure together, allowing binding and diffusion to work. I prefer vacuum sealing, but have used the normal bag hundreds of times. Ziplock bags can also work if you press out as much air as possible.
Butcher Twine or Hooks
Once the curing stage is complete, the meat is hung to dry. Butcher’s twine makes a secure loop for hanging, while S-hooks can be useful for quick removal and repositioning. Always choose food-safe, non-reactive materials to avoid metallic taints.
Casings or Muslin Cloth
Wrapping meat can help control the drying rate and protect against contaminants. Options include natural casings, collagen sheets, or simple muslin cloth. While I often cure without a wrap, beginners may find it helpful to monitor surface changes through a breathable material.
Meat Drying Area or Chamber
This is where the magic happens. Ideal drying conditions for most whole-muscle curing projects are around 75% humidity and 10–15°C (50–60°F). Too dry and the exterior will harden before the interior finishes; too humid and spoilage can occur.
You can build your own chamber from a converted fridge, use a cellar or shed with the right climate, or invest in a purpose-built unit. I’ve broken down the pros, cons, and costs of each in my guide to drying options for cured meat and charcuterie at home.
Step-by-Step Guide to Equilibrium Dry Curing
This is the exact process I use for every equilibrium curing project, whether it’s pancetta, bresaola, or wild game. The method is consistent and adaptable to any whole muscle cut.
Step 1 – Weigh Meat and Record
Begin by weighing the meat or muscle group. Record the starting weight, as you’ll need this figure to calculate the cure and to track weight loss during drying.
Dry-cured meat is considered ready when it has lost at least 30% of its starting weight. Personally, I prefer 35% or more for a concentrated flavor and firm texture.

Step 2 – Calculate Salt and Cure Ingredients
Equilibrium curing uses a percentage of the meat’s weight for all cure ingredients. This ensures consistent results and avoids the risk of over-salting.
For example: 2.5% total salt means 2.25% sea salt + 0.25% pink curing salt for a project under 30 days. For over 30 days, pink curing salt No. 2 replaces No. 1.
Weighing is always more accurate than volume measurement. A tablespoon of one brand of salt can weigh differently from another due to grain size and density.
To make this simpler, I have a calculator to do the math.

Step 3 – Combine Cure for Even Coating
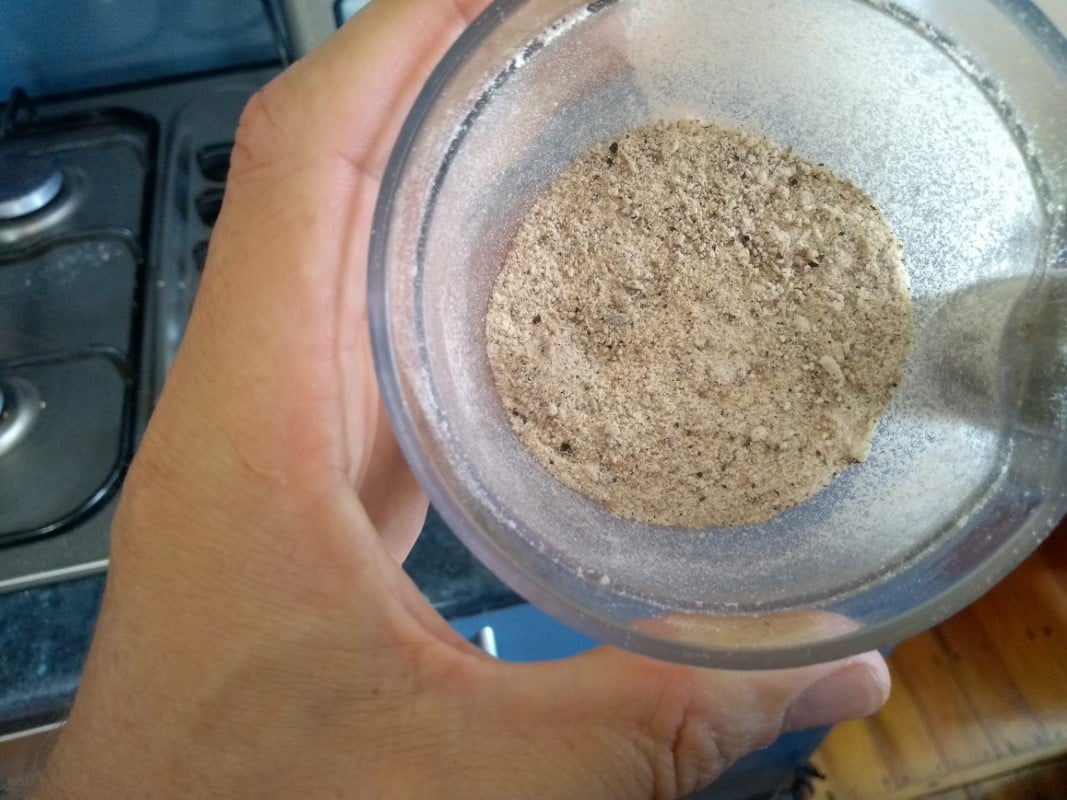
Grind the salt, curing salt, and spices into a uniform, fine texture using a spice grinder or mortar and pestle. A powder-like consistency ensures even coverage and efficient absorption.
Step 4 – Apply Cure to Meat
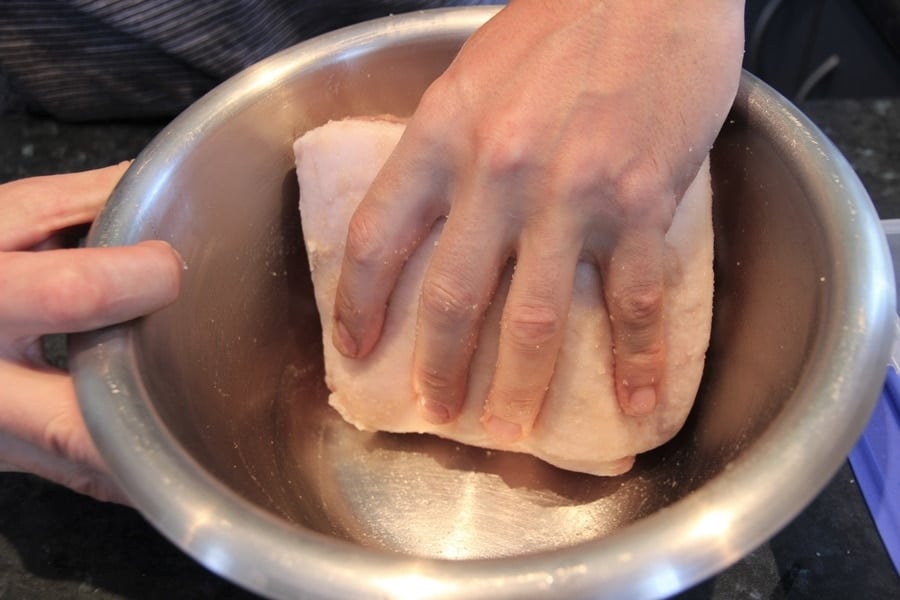
Place the meat in a large bowl or tray and apply the cure mixture evenly, pressing it into every surface. Use the meat itself to wipe up any remaining cure in the container — it may look like there’s not enough, but with equilibrium curing, the calculated amount is always sufficient.
Step 5 – Bag or Vacuum Seal the Meat
Transfer the meat and all remaining cure into a bag. Vacuum sealing is my preferred method for eliminating air and ensuring even salt contact, but ziplock bags work if you squeeze out as much air as possible.
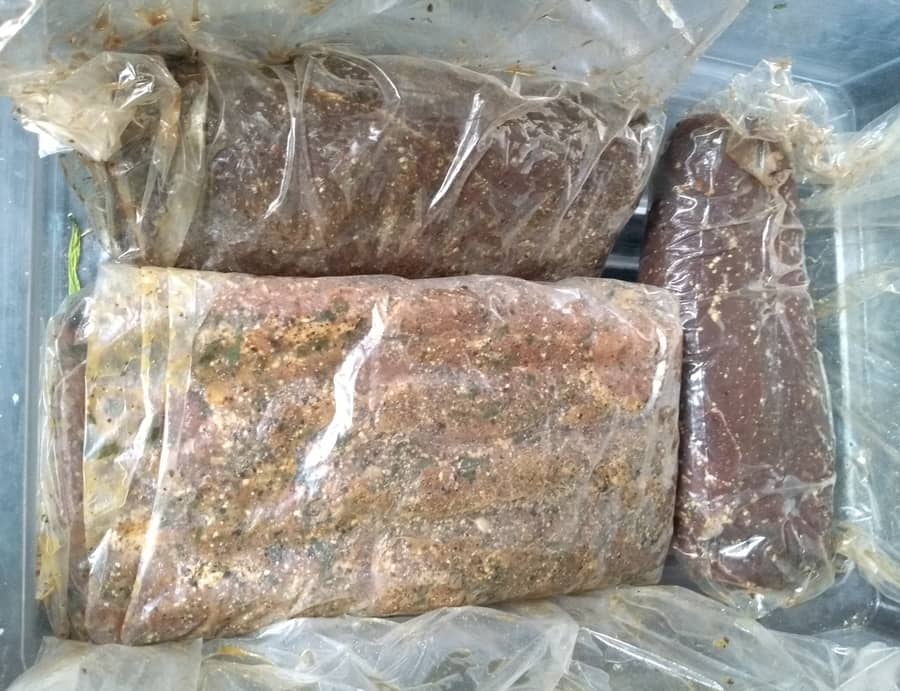
Step 6 – Cure in Fridge
Place the bagged meat in the fridge for the calculated curing period. I use a rule of thumb of 4 days per inch (25 mm) of meat thickness, though longer curing won’t affect saltiness due to the equilibrium method.
Step 7 – Hang and Dry Meat
Once curing is complete, the meat is ready for drying. Hang it in your drying chamber, cellar, or other suitable space with a loop of butcher’s twine or a hook. Aim for 65–80% humidity and a temperature between 10–15°C (50–60°F).

Step 8 – Monitor Weight Loss Until Ready
Track the weight regularly until the target loss is reached. I use a small card attached to the string with the starting weight, target weight, and date of hanging. Your senses — sight, touch, and smell — will also guide you. A powdery, mushroom-like aroma is a sign of beneficial mold.
Step-by-Step Guide to Equilibrium Dry Curing
This is the exact process I use for every equilibrium curing project, whether it’s pancetta, bresaola, or wild game. The method is consistent and adaptable to any whole muscle cut.
Step 1 – Weigh Meat and Record
Begin by weighing the meat or muscle group. Record the starting weight, as you’ll need this figure to calculate the cure and to track weight loss during drying.
Dry-cured meat is considered ready when it has lost at least 30% of its starting weight. Personally, I prefer 35% or more for a concentrated flavor and firm texture.

Step 2 – Calculate Salt and Cure Ingredients
Equilibrium curing uses a percentage of the meat’s weight for all cure ingredients. This ensures consistent results and avoids the risk of over-salting.
For example: 2.5% total salt means 2.25% sea salt + 0.25% pink curing salt for a project under 30 days. For over 30 days, pink curing salt No. 2 replaces No. 1.
Weighing is always more accurate than volume measurement. A tablespoon of one brand of salt can weigh differently from another due to grain size and density.

Step 3 – Combine Cure for Even Coating
Grind the salt, curing salt, and spices into a uniform, fine texture using a spice grinder or mortar and pestle. A powder-like consistency ensures even coverage and efficient absorption.

Step 4 – Apply Cure to Meat
Place the meat in a large bowl or tray and apply the cure mixture evenly, pressing it into every surface. Use the meat itself to wipe up any remaining cure in the container — it may look like there’s not enough, but with equilibrium curing, the calculated amount is always sufficient.

Step 5 – Bag or Vacuum Seal the Meat
Transfer the meat and all remaining cure into a bag. Vacuum sealing is my preferred method for eliminating air and ensuring even salt contact, but ziplock bags work if you squeeze out as much air as possible.

Step 6 – Cure in Fridge
Place the bagged meat in the fridge for the calculated curing period. I use a rule of thumb of 4 days per inch (25 mm) of meat thickness, though longer curing won’t affect saltiness due to the equilibrium method.
Step 7 – Hang and Dry Meat
Once curing is complete, the meat is ready for drying. Hang it in your drying chamber, cellar, or other suitable space with a loop of butcher’s twine or a hook. Aim for 65–80% humidity and a temperature between 10–15°C (50–60°F).

Step 8 – Monitor Weight Loss Until Ready
Track the weight regularly until the target loss is reached. I use a small card attached to the string with the starting weight, target weight, and date of hanging. Your senses — sight, touch, and smell — will also guide you. A powdery, mushroom-like aroma is a sign of beneficial mold.
Recipe Variations & Flavor Ideas
Once you’ve mastered the core method, experimenting with spices and herbs can produce distinctive results. I keep seasoning levels modest so the natural character of the meat remains the star, but even subtle spice additions can create regional flavor profiles.
Salt and Spices for Different Meats
- 2–2.5% sea salt for equilibrium curing
- 0.25% pink curing salt No. 1 (optional)
- Farmed Duck – 1 clove, ⅓ cinnamon stick, orange zest, 0.5% pepper
- Beef – 1% garlic, 1% bay leaf, 0.5% juniper berry
- Pork – 0.5% pepper, 0.5% juniper, 0.5% nutmeg
- Wild Red Game – 0.5% rosemary, 0.25% juniper
Serving Ideas for Salt Dry Cured Meat
Charcuterie boards are a natural way to enjoy these meats. A crisp baguette, good cheese, and marinated vegetables create a balanced spread. I also use pancetta as a base for sauces and pasta dishes, adding rich umami to everyday recipes.
Storing Dry-Cured Meat
Vacuum packing is my preferred storage method. It maintains texture, limits oxidation, and can extend storage for months in a standard kitchen fridge. In Italy and Spain, it’s common to see whole legs hanging at deli counters for months at ambient temperatures — a reminder that these meats are inherently preserved.
FAQs
How Long Does the Dry Cured Meat Last?
If appropriately stored — ideally vacuum-packed after mold removal — dry-cured meat can last for many months in the fridge. Under optimal conditions (11°C/50°F and 70–80% humidity), certain cuts can store well for a year or more.
How Should You Slice the Dry Cured Meat?
Very thin, less than 1 mm. A sharp knife works, but for precision, I recommend a deli slicer capable of wafer-thin slices.
What About the Mold on Meat When Drying?
A powdery white mold with a pleasant, mushroom-like aroma is beneficial and protective. It helps maintain the right surface conditions. For more detail, see my guide on understanding molds on cured meat.
Beyond traditional Italian and Spanish recipes, you can adapt these methods to regional styles — from Scandinavian cured lamb to spiced North African beef. The principles stay the same: control salt, temperature, humidity, and time.
Feel free to leave any comments or questions below — I reply to all and enjoy helping others succeed in their curing projects.

Tom Mueller
For decades, immersed in studying, working, learning, and teaching the craft of meat curing, sharing the passion and showcasing the world of charcuterie and smoked meat. Read More


Hi Tom
Very interesting page and also helpful links too, I can certainly say that having read all about pancetta I feel confident enough to embark on making a small piece as a starter into the world of dry curing using Cure 2#. I already dry cure my own bacon successfully but having discovered a recipe in my late mothers cookery notes for pancetta I needed to know a little more as there is no mention of cure 2#. Additionally after the first curing process it says to wash the pancetta with half a glass of beer, and allow to dry naturally before adding the second ingredients, hence my interest in reading your take on the procedure. My only thought that is not mentioned in your article is the use of dry curing bags for the second period of curing, in my mum’s notes she just says to pierce the meat in one corner, thread string through the hole and hang the pancetta in the cellar.
Thank you again for a very well written explanation of the dry curing process. Regards
Mike
Hey Michael,
It’s hard sometimes to compare old recipes with equilibrium curing.
If it says to wash with beer and re-apply ingredients if its salt then its a salt box or saturation salt curing- so Im not sure about measuring curing salt#2 if that method is being used.
Dry Curing bag? Do you mean Animal Casings? Netting? It can be used to prevent drying on the surface. The charcuterie course will be out later this year, so it’s going to cover all this! Link should be at the top of the page.
All the best,
Tom
Hi Tom
thanks for your reply, I referred to the dry curing bag, I should have said dry ageing bag. This is a method by which after the first cure, you reapply a further seasoning mixture and then place it into the dry ageing bag, and with a special vacuum strip you use a vacuum sealer to draw the air from the bag, which is actually breathable. Once you have sealed the bag it recommends that the bag is placed in the refrigerator on a wire rack to allow air to circulate and leave it until the pancetta has lost 25 to 30% of its weight, having been weighed after the first cure. I am in fact at that stage now having washed the pork belly in beer, patted it dry, added the second seasoning mix and it is now in its dry ageing bag in the refrigerator, I now await progress and will let you know what the result looks and tastes like, but for now it is a case of being patient.
Regards,
Michael
Hey there, cool haven’t tried it. Yes, indeed the permeable bag lets air flow out! Like a super animal casing kind of! Protecting the meat but allow the cured meat to dry
Hi Tom,
In step 5, after curing, the cure mix is to be rinsed off along with the spices. Why is this necessary? Wouldn’t you want to leave the spices on during the drying process for it to impart more flavour to the meat?
Optional! Depends on the spices too! Washing off with wine can be quite pleasant for the cure!
It’s all about experimenting with this craft!
HI Tom,
Thanks for your reply.
BTW I find your article quite comprehensive with lots of detail so well done thank you for posting.
I did have a go with a piece of meat but had no curing salt on hand at the time. I salted it and after refrigeration took it out and hang to dry in the garage without washing the salt and spices off. It unfortunately turned mouldy.
I’ve got the curing salt now so will have another go, hopefully I’ll be successful.
Cheers,
Beverley
Hey,
Cheers! Bugger, whole muscle meat for me, I often just use sea salt no pink curing salt. If I know the meat is from a quality source. Some airflow helps in random places around the home. Mold is a funny think, like blue or green cheeses?! Black mold is the nemesis. Trust your nose and eyes – they evolved to detect danger! 🙂
Will be providing heaps if images/videos with the course, course link at the top.
Hi,
I’m new to this, I have my first project under way. I am curing in my fridge. Once the curing is complete. What ways can I store the finished product?
I’m thinking about space saving and practicality. This is assuming it doesn’t all get eaten immediately! I just haven’t really seen any pointers on this.
Thanks
Heya,
I found reuseable vac pac bags, but not sure how easy they are to get around the world. So I use a manual pump to suck the air put. This holds the finished product for a lloooonnnng time.
Like years if you want (just take off the white mold beforehand with vinegar and dry the surface a little – dry to the touch ideal).
You could use vac sealer too, but I don’t like using single use plastic
Then just stick these charcuterie packages in your fridge (this also helps when you want to even the case hardening)
Im guessing maybe your in the UK – so here is a link to Amazon UK for these bags – these arent quite what I’ve got, my ones are up to 2 gallon, freezeable and have a open/close valve.
Without vac packing, it will slowly dry out, ideally don’t keep in kitchen fridge because its super dry. Inside a Tupperware box is ok for a few weeks, but again it will dry and can also because not so palatable.
Cheers
Tom
Hey Tom,
I am in the USA (Texas) quite hot and humid. I am trying to make traditional South African Biltong that I remember as a child. Basically it starts out with 6-inch or longer by approx. 1-inch thick piece of Top Round. In the US we are supposed to cure our meat, then heat our meat to 160 F and then smoke, dehydrate or oven dry. In other places people simply soak the meat in vinegar for 30 minutes to an hour, then spice with cracked pepper, salt, sugar and toasted cracked coriander. The meat is then immediately hung in a cool dry place with decent airflow for 3-7 days depending on preference. My questions are, 1. how do I repeat this method keeping in mind the USA guidelines, 2. what cure should I use, #1 or #2,…3. should I wet brine or dry cure and for how long, and 4. after curing do I need to heat my meat to 160 F prior to drying. I made numerous attempts by following the USA guidelines including cure #1 and have never had good results. I own an excalibur dehydrator but I believe the fan is too fast and case hardens the outside. I can build a box and also have a spare standard fridge but no airflow inside which is essential to get a consistent product. Hoping I could get your expert opinion.
Best,
Jackson
how do I repeat this method keeping in mind the USA guidelines? I don’t use USA guidelines – Salt, Smoke and Denaturing Vinegar makes decent anti-fungal and anti-viral barriers. The US regulations are broad, and due to the risk of limitation often very conservative. I sometimes think they look at salt / cold smoke/vinegar/acidic denaturing separately rather than having a combined effect.
what cure should I use, #1 or #2,…3. should I wet brine or dry cure and for how long? I Use salt 45mins, malt vinegar 1hr, add spices to outside and hang (oven with fan with light on works for me around 20C/70CC) 2-3 days
after curing do I need to heat my meat to 160 F prior to drying?. I don’t heat my meat, personal preference I reckon, after much research I don’t use Cure 1 on biltong or cure 2, but as long as you can trust the meat. Also the cases of botulism per year is mainly due to fermented traditional indigenous food or canning.
https://eatcuredmeat.com/can-i-cured-meat-without-sodium-nitrates-nitrites-pink-curing-salt/
All the best,
Tom
how do i store it after its is cured? can i add more herbs, put in a zip lock bag and continue to leave it in fridge?
Do you mean after it’s dried? Yeah I use reuseable sous vide vac pac bags – once they are dried and you don’t have excess mold on them (wipe with vinegar) then I suck air out and stick in my regular fridge. Firstly is equalizes in uneven dryness, secondly it can last years in this state without drying further. Cheer Tom
what is the formula or percentage of spices to add to the salt dty cure mix
How is the amount of spices to add is calculated ?
Depends on the spice, stronger spices more. subtle spices less. cloves per 1000g -0.1% or black peppercorn powderized – up to 1.5% or less or more!
After curing my meat in the fridge I put the meat in my smoker for several hours then back into the fridge until ready.
Ok, how did it work out?
Hi, have read some of the articles in your website, and I congratulate you for your interest and commitment in promoting processes to prepare and preserve meat that not only extend “shelf life”, but also enhance their organoleptic properties. Most interested in safe processes that do not include Pink Curing Salts.
I am fairly new to the endeavor and started doing saturation salt curing not long ago, I now share you comment that equilibrium-based salt and spice curing seems to be the way to go at it. You mention that it lends itself to “smaller batches”, could you expand. Are you referring to cuts of meat in the 5–7-pound range, or do you include higher weights, how much higher. Right now, I am purchasing pork-loins in the 9-10 lb range and cutting in 2 blocks of meat, and saturation processing it that way. I do both at the same time, and use the weight of each cut of meat to calculate the values for hrs of salting, based on 10 hours per pound of cut, and both cuts go into the same container which I cover with a 50/50 mixture of salt and sugar. Thereon, I season them and dry them separately. However, you have planted the seed of equilibrium-based processing and I am making the switch to see and taste the difference. Obviously, the size of the vacuum bag limits the size of cut that may be used. In case of larger whole pieces of meat, no bone, in the 10 lb range, can larger regular bags be used safely? How do you effectively and safely remove the air from the bag?
Hi Dan, thanks for taking the time to write. I use the eq curing for anything up to whole hing leg 25+ pounds prosciutto – with the bone the prosciutto has yielded some issues, after about 6 legs we are going to saturation cure for 1-2 weeks to draw out more around the bone, then eq cure, we use large clothing vacuum bags for storage. Vacuum cleaner sucks all the air out.All the best, Tom – I’ve used eq cure for 20 pound slabs of pork belly for bacon, pancetta – no issues.
Thanks for your reply. Will use that info in my procedures. One more clarification, if I may… I have been digging more into the subject of salt penetration and in some articles the person refers to the relation of quantity (weight) of salt in relation to the weight of meat, and curing time as in relation to the thickness of the cut. In some instances, the thickness is suggested to be the width, in others, the height. Curing time will vary depending on which value you use. Round or roundish pieces pose no issue as it pertains to max diameter. But on a pork-loin or any other piece which tends to flatten (unless placed inside an elastic net which will shape it round(ish), if the piece lays flat (like a brick) and it is wider than higher. What should be used, the width or the height. I recently saw a YouTube video of someone using an online brining calculator, and even though i saw no reference to the terminology it uses Max Diameter or Thickness, and the person referring to it in the video measured the width of a flattened piece of meat rather than the height! I asked the question in a number of forums and I got mixed answers! Thanks for your time! Good luck on your projects, they are quite educational.
Hey Dan, I don’t get to mathematical, my guide is an inch height 3-4 days eq curing, nearly everything I eq cure is for a week minimum. The fat content also plays a part, since it has low water content. A pork belly could have 80% fat, and would take a lot longer to evenly equalise the salt cure throughout. The salt can only move slowly through fat. Remember also the benefit of eq curing, is that 1-2 weeks extra is fine also. All the best, Tom
Hi Tom,
Great page but what if you can’t use the Nitrates & Nitrites (Pink Curing Salt) due to allergies to Nitrite (it gives heavy muscle cramps, and it is a heavy cancer starter).
What would the alternative be, to cure the meat?
Thanks,
Bart
Like most salt curing I do, just sea salt. Here is something else I wrote about this – https://eatcuredmeat.com/dry-curing/can-i-cure-meat-without-sodium-nitrates-nitrites-pink-curing-salt/