Dry curing meat is the process of using salt, time, airflow, and controlled drying to transform fresh meat into cured meat with a firmer texture and deeper flavor. For beginners, it is best suited to smaller whole muscle cuts before moving into advanced projects like whole prosciutto or traditional salami.
The basic method is to weigh the meat accurately, apply the correct amount of salt or cure, allow the salt to distribute through the meat, then dry it slowly in suitable conditions. Once I understood those steps clearly, dry curing became much less mysterious and much easier to repeat consistently.
I’ve been practicing and teaching meat curing for decades, sharing what I call the slowest food in the world with people who want to experience its depth of flavor. Over the years, I’ve refined a salt-curing method that’s precise, reliable, and repeatable — one I’ve used for hundreds of successful projects at home.
Dry-curing meat isn’t about standing over the kitchen counter for hours. It’s about setting up the right conditions and letting salt, time, and controlled drying do the work. When you keep the process simple, dry curing becomes approachable — even for a first project.
In this beginner guide, I’ll walk through the fundamentals of salt dry curing using equilibrium curing, my preferred method for consistency. You’ll learn what dry curing is, what you need, and the basic workflow I follow so you can start confidently at home.
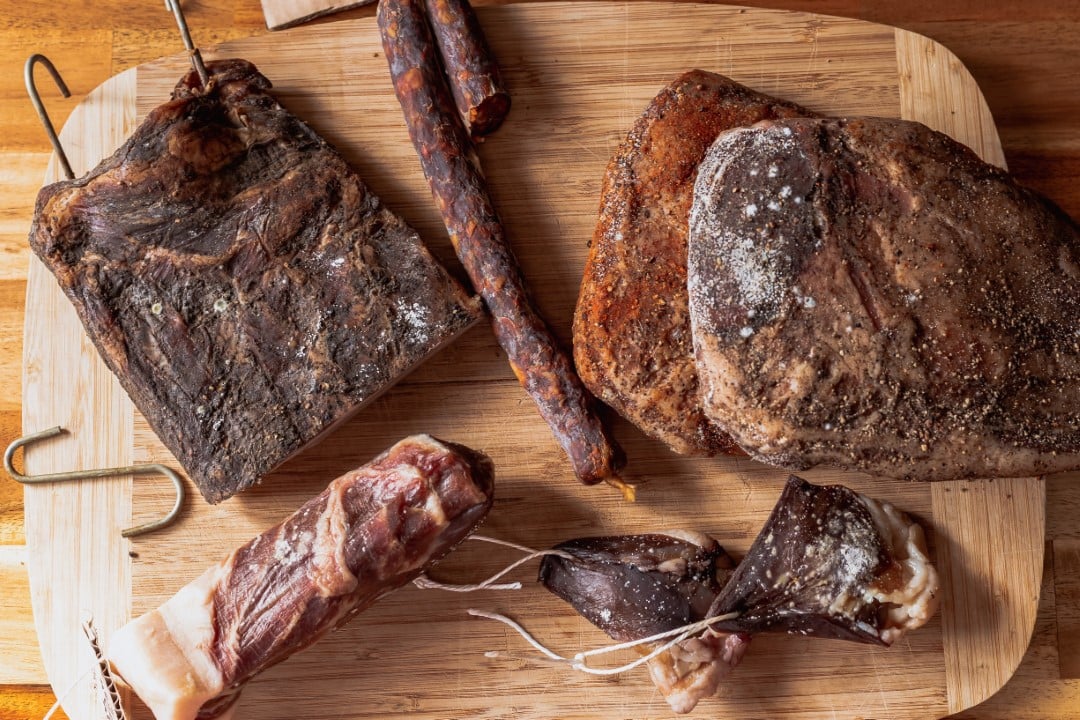 Selection of dry cured meats, pancetta – left, guanciale (pork jowl) – right, Hungarian Kohlbasa salami middle.
 My Homemade Speck (Fatty Pork Hind Leg Cut) -Cold Smoked Also
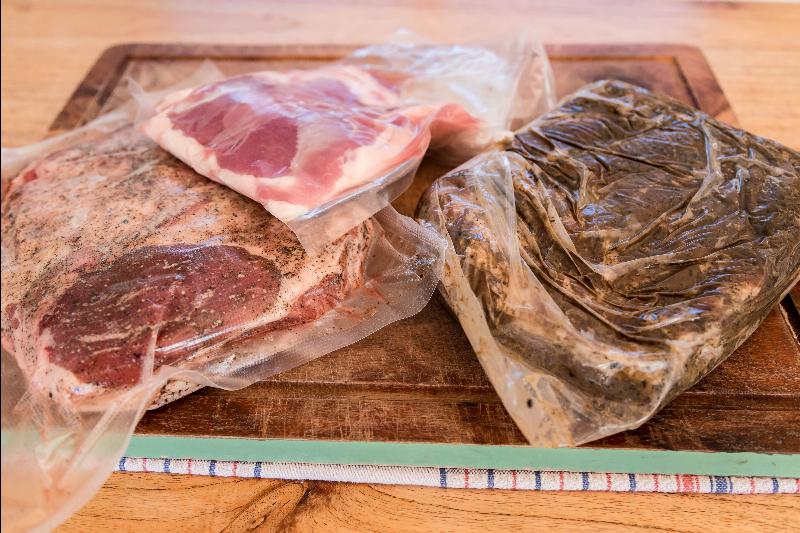 3x Pork Jowls salt curing
 Wild Red Deer/Venison and Himalayan Tahr Loin Braesola Style
Introduction to Salt Dry Curing
Dry curing is one of the oldest ways to preserve meat with nothing more than salt and patience. The process works by reducing moisture over time so the meat becomes firmer, more concentrated in flavor, and far more stable than fresh meat.
| Step | What Happens | Why It Matters |
|---|---|---|
| Weigh | Meat is weighed accurately | Salt is calculated by weight |
| Salt | Cure/salt is applied | Starts preservation/flavor process |
| Cure | Meat rests under cure | Salt moves through the meat |
| Equalize | Salt balances inside the cut | Reduces harsh outer saltiness |
| Dry | Meat loses moisture slowly | Flavor and texture develop |
The above is for the whole muscle salt dry curing, salami involves fermentation and some other steps, it takes more practice to master.
At home, dry curing usually falls into two styles:
- Whole-muscle curing (single cuts like pork loin, belly, beef rounds, venison backstrap).
- Salami-style curing (ground meat in casings, often fermented and dried).
This guide focuses on beginner-friendly whole-muscle dry curing using equilibrium curing. It’s the cleanest way to learn the fundamentals before you branch into more advanced projects.
What Makes Dry Curing Different From Cooking
Cooking changes meat quickly with heat. Dry curing changes it slowly through salt, controlled moisture loss, and time. You’re not trying to “cook” anything. You’re guiding a controlled drying process until the texture and flavor become concentrated and sliceable.
This slow transformation is why classic cured meats like prosciutto, speck, pancetta, and bresaola have a depth of flavor that’s hard to replicate with shortcuts.
Dry Curing vs Brining vs Cold Smoking
Dry curing, brining, and cold smoking are often talked about together, but they are not the same process. Dry curing and brining both use salt to cure meat, while cold smoking mainly adds smoke flavor and aroma (traditionally to aid preservation with antimicrobial benefits).
For beginners, this distinction is important. I see cold smoking as a finishing or flavoring step.
| Method | How It Works | Best For | Beginner Notes |
|---|---|---|---|
| Dry Curing | Salt is dissolved in water, and then the meat is submerged so the cure can move through the meat evenly. | Whole muscle cuts, pancetta, bresaola, coppa, lonzino, and some traditional cured meats. | This is usually the best place to start if you want to understand traditional meat curing. |
| Brining | Salt is dissolved in water, and then the meat is submerged so the cure can penetrate evenly. | Bacon, ham-style projects, poultry, fish, and wet-cured meats. | It can be easier for even coverage, but you need to calculate the meat and water weight correctly. |
| Cold Smoking | After salt curing/bringing (or not), cool smoke and airflow is applied food. | Bacon, cured fish, cheese, cured sausages, and smoked whole muscle meats. | After salt curing/bringing (or not), cool smoke and airflow are applied to the food. |
The simplest way to think about it is this: dry curing removes moisture slowly with salt and time, brining cures meat in a saltwater solution, and cold smoking adds smoke character without cooking the food (and can be a preservation tool).
If I was starting again, I would learn dry curing first with a small whole muscle cut, then move into brines for bacon or ham-style projects, and only then add cold smoking once the curing stage made sense.
Key Dry Curing Terms
Key Dry Curing Terms for Beginners
Before getting into the dry curing steps, it helps to understand a few basic terms. These are words I use often when explaining curing, and they can sound more complicated than they really are.
| Term | Simple Meaning | Why It Matters |
|---|---|---|
| Salt Curing | Using salt to draw moisture from meat, slowing water activity, which unwanted bacteria don’t like | Salt is the foundation of most traditional meat curing methods. |
| Equilibrium Curing | Weighing the meat and adding a precise percentage of salt, so the cure balances through the meat. | It helps avoid over-salting because the salt amount is calculated from the meat weight. |
| Dry Aging | The amount of moisture the meat loses during drying is usually measured as a percentage of the original weight. | Dry aging and dry curing are often confused, but they are different processes. |
| Water Loss | The amount of moisture the meat loses during drying, usually measured as a percentage of the original weight. | Water loss helps show how much the meat has dried and how the texture is changing. |
| Humidity | The amount of moisture in the air around the meat. | Too much or too little humidity can affect drying speed, texture, and surface drying. |
The main idea is simple: salt curing starts the process, equilibrium curing helps control salt levels, water loss indicates drying progress, and humidity affects how evenly the meat dries. Dry aging is related to meat aging, but it is not the same thing as dry curing.
Equilibrium Curing (My Beginner Method)
There are different ways to salt-cure meat, but equilibrium curing is the method I recommend for beginners because it’s predictable. You measure salt as a percentage of the meat’s weight, seal it up, and let the cure equalize through the cut.
Once you learn this approach, it becomes very repeatable. You can run the same salt percentage on different cuts and get consistent results without guessing.
The Simple Rule (Percent of Meat Weight)
Equilibrium curing is simple in concept: weigh the meat, choose your target salt %, and use that exact amount of salt. The cure can’t “over-salt” the meat if your measurements are correct — it can only reach equilibrium.
For most beginners, the biggest shift is this: measure by weight, not by tablespoons. Different salts have different densities, so volume measurements are unreliable for curing.
The Beginner Dry Curing Workflow
If you only remember one thing from this page, make it this: dry curing is a two-stage process. First, you cure with salt in the fridge. Then you dry the meat in a controlled environment until it reaches the desired texture.
Stage 1: Cure (Salt in a Bag, in the Fridge)
You weigh the meat, calculate the salt, coat the surface, and seal it in a bag (or vacuum pack). In the fridge, the salt slowly moves through the muscle and seasons it evenly. This is the low-effort stage — the fridge does the holding.
Stage 2: Dry (Hang Until It Firms Up)
Once curing is complete, you hang the meat to dry. This is where most beginners get stuck, because drying needs a reasonably stable environment. You’re aiming for slow, steady moisture loss rather than fast drying on the outside.
Beginner Equipment (What You Actually Need)
You don’t need a professional setup to start dry-curing meat at home. In fact, beginners tend to do better when they keep equipment to a minimum and focus on consistency rather than complexity.
These are the core tools I recommend for a first project — nothing more, nothing less.
Accurate Digital Scales (Non-Negotiable)
Equilibrium curing only works if you measure accurately. A digital scale that reads to at least 1 gram is essential, and a small pocket scale that reads to 0.1 g is useful if you plan to use curing salts.
This is where most beginners go wrong: using tablespoons or guessing. Salt density varies wildly between brands and grain sizes. Measuring by weight removes all guesswork.
Bags or Vacuum Sealer
The curing stage happens in a sealed environment. Vacuum sealing is ideal because it ensures even contact between salt and meat, but it’s not mandatory. Heavy-duty zip bags work fine if you press out as much air as possible.
I’ve cured hundreds of pieces using both methods. The key is keeping the cure in contact with the meat — not the brand of bag.
Butcher’s Twine or Hooks
Once curing is finished, the meat needs to hang freely so air can circulate around it. Plain cotton butcher’s twine is perfect. Stainless hooks are also fine if they’re food-safe.
Avoid anything coated or reactive. Simple, inert materials are best.
A Cool, Controlled Drying Space
This is the one area beginners tend to overthink. You don’t need a perfect curing chamber (here is an article on options) on day one — you need a space that’s cool, reasonably humid, and stable.
Many first projects succeed in converting fridges, spare refrigerators, or naturally cool spaces that stay within roughly 10–15°C (50–60°F). I break down chamber options in detail in my separate guide on curing chamber options and costs.
Choosing the Right Cut for Your First Dry Cure
Your first project should be forgiving. That means a cut that cures evenly, dries predictably, and doesn’t punish small mistakes.
I recommend starting with one of these:
- Pork loin
- Pork belly (pancetta-style)
- Eye of round or top round (beef or venison)
- Pork Butt (or hunk of it)
Without bone and skin.
These cuts are uniform in shape, easy to weigh, and dry at a steady pace. Very large legs, bone-in cuts, or heavily marbled pieces are better left until you’ve built confidence.
Lean meat dries faster and gives clearer feedback. Fattier cuts stay supple longer, which is great later on, but can confuse beginners who are learning what “ready” feels like.
A Simple Salt Target for Beginners
For whole-muscle dry curing, I suggest beginners stick to a narrow, proven range rather than experimenting early.
- 2.25–2.75% total salt (by meat weight)
This range produces a well-seasoned result without being overly salty. Once you’ve completed a few projects, you can adjust to taste.
If you choose to use pink curing salt (article on this subject), it’s added in very small, controlled amounts. I explain when and why to use it in a dedicated guide on curing salts, nitrates, and nitrites. For beginners, the key point is accuracy — never guess with curing agents.
Common Beginner Mistakes to Avoid
Measuring by Volume
This is the most common mistake I see. Tablespoons, cups, and “handfuls” have no place in dry curing. Always weigh your ingredients.
Drying Too Fast
Fast airflow and low humidity can harden the outside before the inside dries properly. Slow, even drying always produces better results.
Starting Too Big
Huge cuts feel impressive, but smaller pieces teach you more, faster. A 1–2 kg cut is ideal for learning.
Constantly Checking the Meat
Opening the chamber too often destabilizes humidity and temperature. Once the meat is hanging, trust the setup and check on a schedule.
What Comes Next
At this point, you understand the tools, the cuts, and the basic workflow. In Part 3, I’ll walk through the full beginner step-by-step process — from weighing and curing to hanging, monitoring weight loss, and knowing when your first dry-cured meat is ready.
I’ll also explain where storage fits in once the meat is finished, and when it makes sense to vacuum-pack or refrigerate cured meat for longer storage.
Beginner Step-by-Step: Equilibrium Dry Curing
This is the exact beginner workflow I use when teaching dry curing for the first time. It avoids shortcuts, avoids guesswork, and gives you clear checkpoints so you know whether things are on track.
The process looks long on paper, but in practice it’s slow food — most of the work is measuring once, then letting time do the rest.
Step 1 – Weigh the Meat and Record It
Start by weighing your meat accurately and write the number down. This single figure drives everything that follows: salt calculation, curing time estimates, and final weight-loss targets.
I always label the meat or hang a small tag with the starting weight and date. It removes guesswork later when you’re tracking progress.
Step 2 – Calculate the Salt
Choose a salt percentage in the beginner-safe range (2.25–2.75%). Multiply the meat’s weight by that percentage to get the exact amount of salt required.
If you’re using curing salt, measure it separately and precisely. Never estimate. If you’re unsure whether you need curing salt at all, keep it simple and read the dedicated guide I’ve written on curing salts and nitrates before proceeding.
Accuracy here makes the entire process forgiving later.
Step 3 – Apply the Cure
Apply the measured cure evenly over the entire surface of the meat. Massage it in and make sure every area is covered. If any cure remains in the bowl, use the meat itself to pick it up.
With equilibrium curing, it can feel like “not enough salt.” Trust the math — the correct amount is enough.
Step 4 – Seal and Cure in the Fridge
Place the meat into a bag or vacuum seal it, removing as much air as possible. Put it in the fridge and leave it undisturbed.
A simple rule of thumb is around 4 days per inch (25 mm) of thickness. With equilibrium curing, extra time won’t increase saltiness, so there’s no penalty for going a little longer.
During this stage, liquid will often form in the bag — this is normal. The salt is drawing moisture out and redistributing itself through the meat.
Step 5 – Prepare for Drying
Once curing is complete, remove the meat from the bag and lightly pat it dry. At this point, you can wrap it (if you’re using muslin or casings) or hang it uncovered.
For beginners, uncovered drying is often easier because you can see surface changes clearly.
Step 6 – Hang and Dry
Hang the meat in your drying space with good clearance on all sides. Ideal beginner conditions are roughly:
- 10–15°C (50–60°F)
- 65–80% relative humidity
- Gentle, indirect airflow
You don’t need perfection — you need stability. Sudden swings cause far more problems than slightly imperfect numbers.
Step 7 – Track Weight Loss
Weigh the meat periodically and compare it to the starting weight. Most whole-muscle dry cures are ready somewhere between 30–35% weight loss.
This is more reliable than time alone. Different cuts, fat levels, and environments all dry at different rates.
Step 8 – Judge Readiness
When the target weight loss is reached, the meat should feel firm but not rock-hard. The aroma should be clean, savory, and slightly nutty or mushroom-like.
If something smells sharply unpleasant or chemical, stop and reassess before slicing.
Storing Your Finished Dry-Cured Meat
Once finished, dry-cured meat doesn’t need to be eaten immediately. Storage choice affects texture more than safety.
For beginners, vacuum packing and refrigerating is the most reliable option. It slows further drying and preserves flavor. I cover this in depth in my guide on how to store dry-cured meat properly.
Whole pieces last far longer than sliced ones. I always keep pieces intact and slice only what I plan to serve.
Where to Go Next
This page is intentionally a beginner overview. Once you’ve completed your first successful project, these deeper guides will help you refine and expand:
- Dry Curing Guide Page
- Browse the Dry Cured Meat Category
If you’ve got questions about your first dry cure — or want to sanity-check a setup before you start — leave a comment below. I read everyone, and I’m happy to help.
FAQs About Dry Curing Meat
What is the basic method for dry curing meat?
The basic method for dry curing meat is to weigh the meat, apply the correct amount of salt or cure, let the salt distribute through the meat, then dry it slowly in suitable conditions. Small whole muscle cuts are usually the best place to start for beginners.
Is dry curing the same as brining?
Dry curing and brining both use salt, but they are different methods. Dry curing applies salt directly to the meat, while brining uses salt dissolved in water. Dry curing is commonly used for whole-muscle cured meats, while brining is often used for bacon, ham-style projects, poultry, and fish.
Can beginners dry-cure meat at home?
Beginners can dry-cure meat at home, but it is best to start with smaller whole-muscle cuts rather than large projects like whole prosciutto or traditional salami. Smaller cuts are easier to manage and monitor, and they help you understand salt, drying, humidity, and water loss.
What is the difference between dry curing and dry aging?
Dry curing uses salt and controlled drying to cure meat, while dry aging holds fresh meat in controlled conditions to improve tenderness and flavor. Dry aging and dry curing are often confused, but they are not the same process.
Does cold smoking dry cure meat?
Cold smoking does not dry cure meat by itself. Cold smoking adds smoke flavor and aroma, but the meat still needs to be properly cured, dried, cooked, or otherwise prepared depending on the project.

Tom Mueller
For decades, immersed in studying, working, learning, and teaching the craft of meat curing, sharing the passion and showcasing the world of charcuterie and smoked meat. Read More
Hi Tom
Very interesting page and also helpful links too, I can certainly say that having read all about pancetta I feel confident enough to embark on making a small piece as a starter into the world of dry curing using Cure 2#. I already dry cure my own bacon successfully but having discovered a recipe in my late mothers cookery notes for pancetta I needed to know a little more as there is no mention of cure 2#. Additionally after the first curing process it says to wash the pancetta with half a glass of beer, and allow to dry naturally before adding the second ingredients, hence my interest in reading your take on the procedure. My only thought that is not mentioned in your article is the use of dry curing bags for the second period of curing, in my mum’s notes she just says to pierce the meat in one corner, thread string through the hole and hang the pancetta in the cellar.
Thank you again for a very well written explanation of the dry curing process. Regards
Mike
Hey Michael,
It’s hard sometimes to compare old recipes with equilibrium curing.
If it says to wash with beer and re-apply ingredients if its salt then its a salt box or saturation salt curing- so Im not sure about measuring curing salt#2 if that method is being used.
Dry Curing bag? Do you mean Animal Casings? Netting? It can be used to prevent drying on the surface. The charcuterie course will be out later this year, so it’s going to cover all this! Link should be at the top of the page.
All the best,
Tom
Hi Tom
thanks for your reply, I referred to the dry curing bag, I should have said dry ageing bag. This is a method by which after the first cure, you reapply a further seasoning mixture and then place it into the dry ageing bag, and with a special vacuum strip you use a vacuum sealer to draw the air from the bag, which is actually breathable. Once you have sealed the bag it recommends that the bag is placed in the refrigerator on a wire rack to allow air to circulate and leave it until the pancetta has lost 25 to 30% of its weight, having been weighed after the first cure. I am in fact at that stage now having washed the pork belly in beer, patted it dry, added the second seasoning mix and it is now in its dry ageing bag in the refrigerator, I now await progress and will let you know what the result looks and tastes like, but for now it is a case of being patient.
Regards,
Michael
Hey there, cool haven’t tried it. Yes, indeed the permeable bag lets air flow out! Like a super animal casing kind of! Protecting the meat but allow the cured meat to dry
Hi Tom,
In step 5, after curing, the cure mix is to be rinsed off along with the spices. Why is this necessary? Wouldn’t you want to leave the spices on during the drying process for it to impart more flavour to the meat?
Optional! Depends on the spices too! Washing off with wine can be quite pleasant for the cure!
It’s all about experimenting with this craft!
HI Tom,
Thanks for your reply.
BTW I find your article quite comprehensive with lots of detail so well done thank you for posting.
I did have a go with a piece of meat but had no curing salt on hand at the time. I salted it and after refrigeration took it out and hang to dry in the garage without washing the salt and spices off. It unfortunately turned mouldy.
I’ve got the curing salt now so will have another go, hopefully I’ll be successful.
Cheers,
Beverley
Hey,
Cheers! Bugger, whole muscle meat for me, I often just use sea salt no pink curing salt. If I know the meat is from a quality source. Some airflow helps in random places around the home. Mold is a funny think, like blue or green cheeses?! Black mold is the nemesis. Trust your nose and eyes – they evolved to detect danger! 🙂
Will be providing heaps if images/videos with the course, course link at the top.
Hi,
I’m new to this, I have my first project under way. I am curing in my fridge. Once the curing is complete. What ways can I store the finished product?
I’m thinking about space saving and practicality. This is assuming it doesn’t all get eaten immediately! I just haven’t really seen any pointers on this.
Thanks
Heya,
I found reuseable vac pac bags, but not sure how easy they are to get around the world. So I use a manual pump to suck the air put. This holds the finished product for a lloooonnnng time.
Like years if you want (just take off the white mold beforehand with vinegar and dry the surface a little – dry to the touch ideal).
You could use vac sealer too, but I don’t like using single use plastic
Then just stick these charcuterie packages in your fridge (this also helps when you want to even the case hardening)
Im guessing maybe your in the UK – so here is a link to Amazon UK for these bags – these arent quite what I’ve got, my ones are up to 2 gallon, freezeable and have a open/close valve.
Without vac packing, it will slowly dry out, ideally don’t keep in kitchen fridge because its super dry. Inside a Tupperware box is ok for a few weeks, but again it will dry and can also because not so palatable.
Cheers
Tom
Hey Tom,
I am in the USA (Texas) quite hot and humid. I am trying to make traditional South African Biltong that I remember as a child. Basically it starts out with 6-inch or longer by approx. 1-inch thick piece of Top Round. In the US we are supposed to cure our meat, then heat our meat to 160 F and then smoke, dehydrate or oven dry. In other places people simply soak the meat in vinegar for 30 minutes to an hour, then spice with cracked pepper, salt, sugar and toasted cracked coriander. The meat is then immediately hung in a cool dry place with decent airflow for 3-7 days depending on preference. My questions are, 1. how do I repeat this method keeping in mind the USA guidelines, 2. what cure should I use, #1 or #2,…3. should I wet brine or dry cure and for how long, and 4. after curing do I need to heat my meat to 160 F prior to drying. I made numerous attempts by following the USA guidelines including cure #1 and have never had good results. I own an excalibur dehydrator but I believe the fan is too fast and case hardens the outside. I can build a box and also have a spare standard fridge but no airflow inside which is essential to get a consistent product. Hoping I could get your expert opinion.
Best,
Jackson
how do I repeat this method keeping in mind the USA guidelines? I don’t use USA guidelines – Salt, Smoke and Denaturing Vinegar makes decent anti-fungal and anti-viral barriers. The US regulations are broad, and due to the risk of limitation often very conservative. I sometimes think they look at salt / cold smoke/vinegar/acidic denaturing separately rather than having a combined effect.
what cure should I use, #1 or #2,…3. should I wet brine or dry cure and for how long? I Use salt 45mins, malt vinegar 1hr, add spices to outside and hang (oven with fan with light on works for me around 20C/70CC) 2-3 days
after curing do I need to heat my meat to 160 F prior to drying?. I don’t heat my meat, personal preference I reckon, after much research I don’t use Cure 1 on biltong or cure 2, but as long as you can trust the meat. Also the cases of botulism per year is mainly due to fermented traditional indigenous food or canning.
https://eatcuredmeat.com/can-i-cured-meat-without-sodium-nitrates-nitrites-pink-curing-salt/
All the best,
Tom
how do i store it after its is cured? can i add more herbs, put in a zip lock bag and continue to leave it in fridge?
Do you mean after it’s dried? Yeah I use reuseable sous vide vac pac bags – once they are dried and you don’t have excess mold on them (wipe with vinegar) then I suck air out and stick in my regular fridge. Firstly is equalizes in uneven dryness, secondly it can last years in this state without drying further. Cheer Tom
what is the formula or percentage of spices to add to the salt dty cure mix
How is the amount of spices to add is calculated ?
Depends on the spice, stronger spices more. subtle spices less. cloves per 1000g -0.1% or black peppercorn powderized – up to 1.5% or less or more!
After curing my meat in the fridge I put the meat in my smoker for several hours then back into the fridge until ready.
Ok, how did it work out?
Hi, have read some of the articles in your website, and I congratulate you for your interest and commitment in promoting processes to prepare and preserve meat that not only extend “shelf life”, but also enhance their organoleptic properties. Most interested in safe processes that do not include Pink Curing Salts.
I am fairly new to the endeavor and started doing saturation salt curing not long ago, I now share you comment that equilibrium-based salt and spice curing seems to be the way to go at it. You mention that it lends itself to “smaller batches”, could you expand. Are you referring to cuts of meat in the 5–7-pound range, or do you include higher weights, how much higher. Right now, I am purchasing pork-loins in the 9-10 lb range and cutting in 2 blocks of meat, and saturation processing it that way. I do both at the same time, and use the weight of each cut of meat to calculate the values for hrs of salting, based on 10 hours per pound of cut, and both cuts go into the same container which I cover with a 50/50 mixture of salt and sugar. Thereon, I season them and dry them separately. However, you have planted the seed of equilibrium-based processing and I am making the switch to see and taste the difference. Obviously, the size of the vacuum bag limits the size of cut that may be used. In case of larger whole pieces of meat, no bone, in the 10 lb range, can larger regular bags be used safely? How do you effectively and safely remove the air from the bag?
Hi Dan, thanks for taking the time to write. I use the eq curing for anything up to whole hing leg 25+ pounds prosciutto – with the bone the prosciutto has yielded some issues, after about 6 legs we are going to saturation cure for 1-2 weeks to draw out more around the bone, then eq cure, we use large clothing vacuum bags for storage. Vacuum cleaner sucks all the air out.All the best, Tom – I’ve used eq cure for 20 pound slabs of pork belly for bacon, pancetta – no issues.
Thanks for your reply. Will use that info in my procedures. One more clarification, if I may… I have been digging more into the subject of salt penetration and in some articles the person refers to the relation of quantity (weight) of salt in relation to the weight of meat, and curing time as in relation to the thickness of the cut. In some instances, the thickness is suggested to be the width, in others, the height. Curing time will vary depending on which value you use. Round or roundish pieces pose no issue as it pertains to max diameter. But on a pork-loin or any other piece which tends to flatten (unless placed inside an elastic net which will shape it round(ish), if the piece lays flat (like a brick) and it is wider than higher. What should be used, the width or the height. I recently saw a YouTube video of someone using an online brining calculator, and even though i saw no reference to the terminology it uses Max Diameter or Thickness, and the person referring to it in the video measured the width of a flattened piece of meat rather than the height! I asked the question in a number of forums and I got mixed answers! Thanks for your time! Good luck on your projects, they are quite educational.
Hey Dan, I don’t get to mathematical, my guide is an inch height 3-4 days eq curing, nearly everything I eq cure is for a week minimum. The fat content also plays a part, since it has low water content. A pork belly could have 80% fat, and would take a lot longer to evenly equalise the salt cure throughout. The salt can only move slowly through fat. Remember also the benefit of eq curing, is that 1-2 weeks extra is fine also. All the best, Tom
Hi Tom,
Great page but what if you can’t use the Nitrates & Nitrites (Pink Curing Salt) due to allergies to Nitrite (it gives heavy muscle cramps, and it is a heavy cancer starter).
What would the alternative be, to cure the meat?
Thanks,
Bart
Like most salt curing I do, just sea salt. Here is something else I wrote about this – https://eatcuredmeat.com/dry-curing/can-i-cure-meat-without-sodium-nitrates-nitrites-pink-curing-salt/
Questions on juniper berries and collagen casing. Is there a difference in % juniper between dried, hard, berries and softer, a bit larger berries? I see some recipes call for just a few berries but when I go by weight, there are notably more dried berries than some recipes call for. I’ve purchased juniper from 2 different sources and they are notably different, the small hard dry berries being much lighter. I noted a metallic, astringent flavor in a batch of cured meat that seems to me to be too much juniper.
Regarding collagen casing, I am wrapping my bresaola and lonzo in sheet collagen casing but am seeing notably shorter cures times than expected in a well-controlled 55F, 77-78% cabinet made of an old True commercial fridge. Would double-wrapping in collagen beforr hanging in cabinet be a good or bad idea?
Thanks for all your great advice!
Interesting, the juniper i’ve used has always been soft not fully dry, in a spice grinder it smears but breaks down into small particles. Its a strong aromatic flavor indeed! I use it to balance out more wild gamey flavors. Never tried double wrapping, if you want to age longer, I would vac pac for 6 months after the desired weight loss. Both those dry cured meats have little to no fat so it will dry and shrink faster than a cut with fat (more water content and creates a barrier to drying) hope that helps Tom
Can you suggest a recipe for fresh and cured Italian sausage
do you mean salami? , small casing (hog casing) salami – salt ,pepper, red wine, garlic – classic!
Hi Tom, I’m completely new to curing and back in December I followed your equilibrium method for a 5lb venison “football” roast. We had a hard winter and I wasn’t able to air dry the roast as intended and it ended up staying my fridge for 6 months. I just opened the bag and the smell is fine, the meat is very dark as well. At this point I’m not sure what I should do with the cured cut; should I go ahead and hang it to see where it leads? Cook and eat it now? Discard? I would love any insight!
P.S. I also followed your Red Brat recipe for venison and the sausages came out tremendous!
Cheers,
Brian
Hey I dont have a red brat recipe I think.
Up to you.
6 months too long for me maybe 2
Is it worth the risk?
All the best
Tom