In every meat curing chamber I’ve built over the years, controlling temperature has been one of the most critical components. Whether it’s whole muscle dry curing or fermented salami, holding the right temperature can be the difference between success and failure.
I’ve tested many types of controllers in my DIY curing builds — from simple plug-and-play setups to advanced hardwired systems. The right one for you depends on your fridge, your experience with wiring, and how far you want to go with automation.
Choosing a Temperature Controller for Meat Curing
The goal of any controller is to keep your chamber within the ideal range of 50–60°F (10–15°C). Fridge thermostats aren’t designed for this, especially when you’re trying to cure meat safely over weeks or months. That’s why I use external controllers — they override the fridge’s internal settings and give you precise, stable control.
Plug & Play Controllers (Beginner-Friendly)
If you don’t want to deal with wiring or programming, this type of controller is by far the easiest entry point. They come fully assembled. You just plug your fridge into the controller, insert the temperature probe, and set your desired temp.
I’ve used these with bar fridges, wine fridges, and full-size frost-free units. They’re reliable, fast to set up, and allow you to focus more on curing and less on electronics.
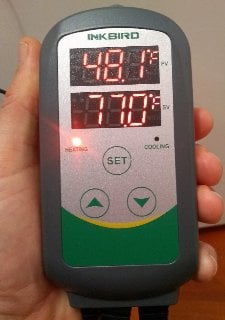
Inkbird ITC-308 (Prewired)
The Inkbird ITC-308 is one of the first plug-and-play controllers I used and still one of the most dependable. It has two outlets — one for cooling, one for heating — so you can plug in both your fridge and a heat source if needed. Setup takes minutes.
The included probe makes it easy to monitor temps inside your chamber without guessing. I’ve used this model in several builds and have had it running nonstop for over a year at times without issue.
It’s not fancy, but it’s consistent. If you’re curing in a frost-free fridge that runs too cold, this controller fixes the problem immediately without any need to modify the fridge itself.
Auber TH-220 WiFi
For more advanced control, the Auber TH-220 WiFi is a great upgrade. It’s still plug-and-play, but it connects to your home network so you can check temperature readings and logs remotely from your phone or computer.
It’s ideal if your chamber is out in a shed, garage, or anywhere you don’t check on every day. I’ll be using this in my next build — I’ve helped others set it up and it’s been a reliable solution with good tech support from Auber Instruments.
The physical build quality is also excellent. It handles both cooling and heating, just like the Inkbird, but gives you more flexibility on alerts and interface options.
Why Plug-and-Play Works for Fridges
Most fridges aren’t built to hold 55°F. They default to keeping food cold — usually under 40°F — which is too cold for dry curing. A plug-and-play controller solves this instantly without needing to mess with the appliance’s wiring or components.
They also work well with humidifiers or fans, especially when you’re just starting and don’t want to run multiple systems off one controller. You can add those later once you understand how your chamber behaves over time.
Once you’ve got your temperature under control with one of these simple units, you can move on to fine-tuning humidity and airflow.
Hardwired Controllers (Advanced Setups)
While plug-and-play controllers are ideal for simplicity, hardwired options give you more flexibility, tighter control, and a cleaner overall setup—if you’re willing to do a bit of electrical work. I’ve used several hardwired systems over the years, and they’ve all required more setup but offered better integration in return.
These are best suited for large upright fridges, double-door curing chambers, or any custom build where you want a fully integrated panel, rather than cables and plugs hanging off the side.
Inkbird ITC-1000
The ITC-1000 is Inkbird’s hardwired version of their classic controller. I’ve used this model in a large two-door curing chamber that I built for long-term dry aging and salami fermentation. It handles cooling and heating just like the plug-and-play version, but it requires you to wire the connections yourself.
Programming is simple once you get the hang of it — just a basic button interface with temperature range settings, delay timers, and output toggles. But wiring it properly does take some care. If you’re not familiar with wiring relays, sensors, and sockets, you’ll want to enlist help or follow a detailed guide.
I combined this controller with a dehumidifier and heating pad in a sealed chamber and found it worked great once dialed in. It’s one of the cheaper hardwired options that still performs well.
Auber Instruments (PID Control)
For more refined control, I eventually stepped up to gear from Auber Instruments. These guys specialize in PID-based controllers — short for Proportional–Integral–Derivative — which hold tighter temperature bands and are common in commercial setups.
In one chamber, I used an Auber temperature controller alongside their humidity unit, and the results were incredibly stable. The interface is more advanced than Inkbird — a bit more technical, but once set up, the results were worth it.
If you’re planning to run a long-term curing chamber or looking to dry ferment salami in tight environmental bands, Auber’s hardware is well worth it. They’re US-based, and the support is excellent. Most of their units are modular, so you can pair temperature and humidity control in one box or separate them as needed.
Setup Tips & Programming
When hardwiring any controller, take your time with layout and cable management. In one of my best builds, I mounted the controller in a waterproof project box, added labeled connections for the fridge and heater, and kept all wires shielded with conduit. It not only performed well — it looked professional too.
One of the biggest challenges in DIY builds is managing space inside the fridge. That’s where an integrated control box makes things easier — no dangling parts or exposed wires. If you’re planning ahead, consider your humidifier, dehumidifier, and fan placement early on, so you’re not reconfiguring after install.
I’ve laid out my design process and controller choice in more detail in my write-up on designs for a meat curing chamber, if you want to see how these pieces fit together in a real build.
For those curious about which controller style to choose, I also recommend checking out my full review of the Inkbird ITC-308 — even if you’re leaning toward hardwired, it helps to understand how both types compare in the field.
Finally, if you want more gear guidance, my post on controllers for curing chamber temperature & humidity gives an overview of specific models I’ve tried and how they integrate into different types of fridges.
What Fridge Are You Using?
Before choosing a controller, the type of fridge you’re working with will influence everything — from wiring and airflow to how well temperature and humidity are held over time. I’ve worked with everything from beat-up old bar fridges to modern wine cabinets, and each behaves differently.
Old Kitchen Fridge vs Wine Fridge
Old kitchen fridges tend to be dry and overly cold. They weren’t designed to hold temps in the 50–60°F (10–15°C) range — most shoot for 34–40°F. That’s why external control is necessary. These fridges are cheap and widely available, which is why they’re so common in DIY curing builds.
Wine fridges, on the other hand, are a little closer to ideal. Many models hover in the 50s Fahrenheit, and they often have gentler cooling cycles. If your model can hold stable temps in the right zone without freezing meat or causing wide swings, it might not even need a controller — but I still use one for consistency.
I go deeper into how these compare in my breakdown on using a modern fridge for dry curing meat — especially useful if you’re repurposing a newer unit with digital thermostats.
Temperature Considerations
Regardless of fridge type, you want your internal chamber temperature to stay between 50–60°F. I tend to aim for 52°F (11°C), which gives me a bit of cushion if conditions swing slightly. Below 50°F slows microbial activity too much, and above 60°F can risk spoilage in some cases.
Digital controllers allow you to set exact upper and lower bounds. I usually program a 2°F differential — so if my setpoint is 52°F, the controller kicks in if temps hit 54°F. It helps keep things stable without cycling the compressor too often.
Humidity Challenges and Solutions
Old kitchen fridges are notorious for running extremely dry — I’ve measured 20–30% RH in empty ones. This is far too low for dry curing, so a humidifier is usually necessary. I use compact ultrasonic models and pair them with a digital hygrometer and humidity controller.
Wine fridges often start around 50% RH, which is closer to acceptable but still a bit dry. Depending on your local climate, even those might need help. For any setup, getting your humidity to stabilize around 70–75% is where you want to be for whole muscle curing.
I go through all the devices I’ve tested for this in my post on compact dehumidifiers for curing chambers — including what to avoid if you don’t want to dry things out too aggressively.
You can also check my list of fans and gentle heating for airflow control if you’re seeing condensation or mold buildup from stagnant air. Airflow and humidity are closely tied together in most chambers.
Sizing Your Meat Curing Chamber
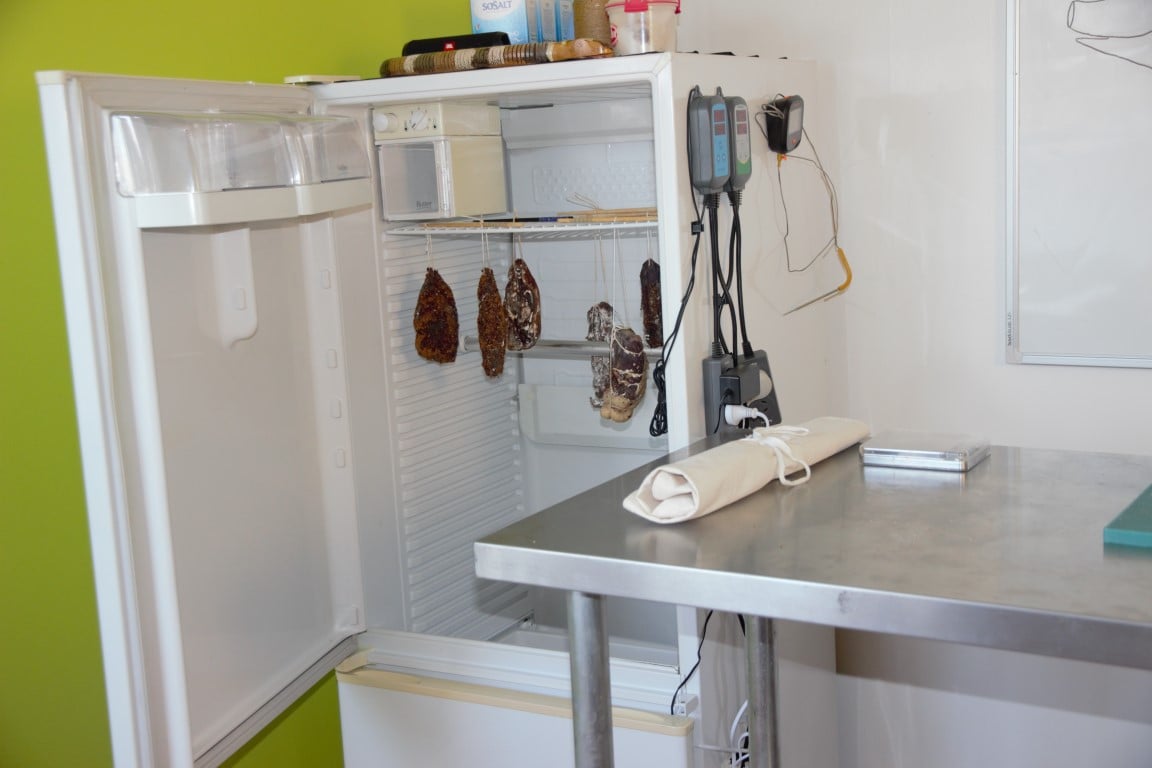
It’s easy to underestimate how much space cured meat takes up — especially once you factor in the gear inside the chamber. Whether you’re planning a compact setup or a full upright fridge, I recommend doing a quick layout sketch before you commit to a size.
Once you start hanging meat, adding humidifiers, fans, racks, and sensors, the usable internal volume shrinks fast. I’ve worked with small bar fridges and large commercial units, and both needed careful planning to avoid crowding and airflow issues.
Volume, Racks & Airflow
If you’re using a mini fridge or bar fridge, expect it to feel tight once you hang two or three muscle cuts. You’ll need to leave room at the bottom for your humidifier and maybe a dehumidifier too — so the actual hanging zone starts about a third of the way up.
I usually remove all the original shelving and add stainless rods or adjustable racks depending on the size. For chambers that use a fan or airflow controller, I make sure nothing obstructs the flow across the chamber — airflow helps avoid localized mold and moisture pockets.
Larger fridges give you more freedom, especially if you’re doing multi-cut curing or aging large items like whole legs. But the tradeoff is increased need for power, humidity control, and potentially multiple sensors to track temperature variation inside.
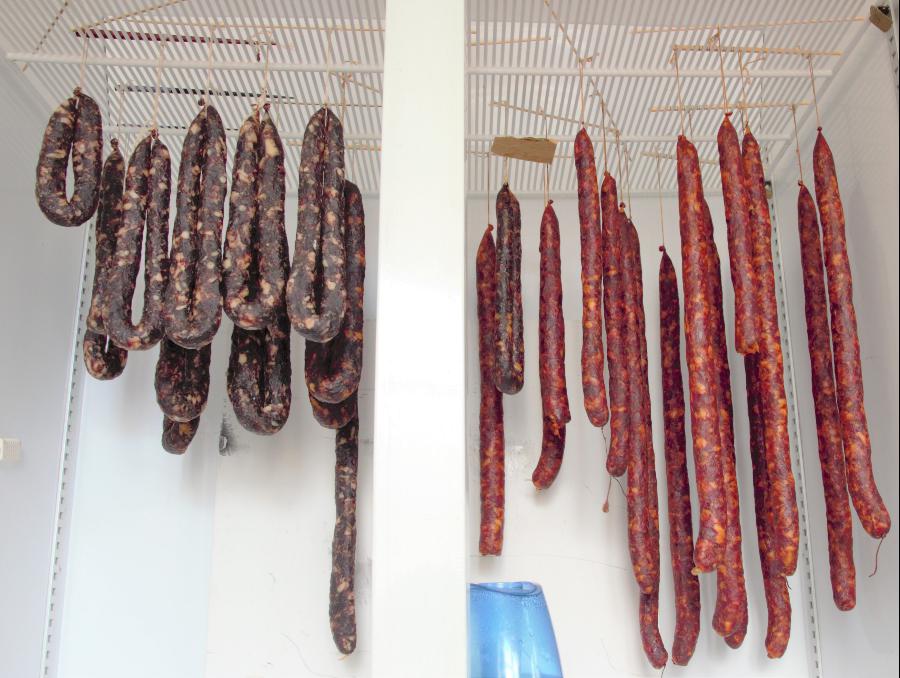
Hanging Space Tips
Always hang your meat with plenty of clearance — at least a few inches from the wall, door, and other cuts. Contact with the chamber walls can create cold spots and uneven drying, which is something I ran into in my early builds.
Keep your hanging hardware adjustable. I use tension rods or racks that can be moved depending on the size of the cut. If I’m curing a bresaola and a coppa at the same time, I make sure they hang at slightly different heights to allow even airflow and drip space.
Also, consider where your sensor probe will hang. It should be in the middle zone — not pressed against the wall or meat — to give you the most accurate ambient reading.
Once your chamber is sized and balanced correctly, managing temperature and humidity becomes much easier. Even a basic setup can run for months with minimal adjustment when everything is spaced properly.
Video: Auber WiFi Controller Demo
To give you a visual idea of how a WiFi-enabled controller works in a curing chamber, here’s a short clip showing the Auber TH-220 interface. You’ll see how it displays real-time data, how the dual output is configured, and why I find this model especially useful for remote setups.
This model isn’t just for meat curing — it’s also popular with homebrewers, cheesemakers, and fermentation enthusiasts. The dual outputs, WiFi logging, and mobile alerts make it one of the most flexible controllers I’ve worked with.
Expert Tips for Setup Success
After years of trial and error with different chambers, here are a few hard-earned tips I can pass along:
- Test the fridge before modifying. Run it for 24 hours to see if it holds steady at your target range before investing in gear.
- Use a dedicated circuit. Don’t run your curing chamber off the same outlet as your freezer or power tools — electrical stability matters.
- Mount the probe properly. Don’t let it dangle too close to the fridge wall or touching meat — aim for mid-chamber height and open airflow.
- Seal light gaps. Any light leak usually means air leak. Use foam weatherstrip or silicone around door seals if needed.
- Start simple. You don’t need all the extras to begin — start with temp control, then add humidity and fans once you understand your chamber’s rhythm.
I’ve rebuilt or adjusted every chamber I’ve owned at least once. That’s normal. What matters most is getting one running and learning from the results. Every chamber behaves a little differently, and that’s part of the craft.
Start with a simple setup. Focus on stable temperature before adding humidity or airflow controls. Every chamber behaves differently, so test and tweak one variable at a time.
Alternatives
If you’re in a cool, stable climate, a high-end wine fridge might hold the right curing temperature without a controller. But in most cases, even passive setups benefit from basic external control to avoid big swings.
Do I need a temperature controller?
Not always, but it ensures stability. Even good wine fridges can drift without one.
What’s better: plug-and-play or hardwired?
Plug-and-play is easier for beginners. Hardwired offers cleaner integration for long-term setups.
What’s the best temperature range for curing?
50–60°F (10–15°C). Most projects aim for 52°F for consistent results.
Have a question about your chamber build or controller setup? Drop it in the comments — I’m happy to help.

Tom Mueller
For decades, immersed in studying, working, learning, and teaching the craft of meat curing, sharing the passion and showcasing the world of charcuterie and smoked meat. Read More
Hi..i am just venturing into homemade meat curing. I live in Sth Australia where now in winter is very cold, but humidity is high and low, drying my salami too much. I want to build similar to what you have built with a fridge. My question is do fridges go to 15 degrees celcius or is the lowest setting much lower? I have looked at the inkbird temp and humidty controllers, can’t find a unit that does both so have to buy 2 units.
Gidday John! 15C for a fridge would only be due to the ambient temp being high or a heat source. Inkbird 608 does 1 temp 1 humidity. But most guys find they need both temp with 2 input and humidity controller with 2 inputs. Frost-free fridges tend to be drier, whilst old fridges with panels on the back tend to be moisture. Humidity is always the one you need to play around with to get in the ‘zone’. Check out the download on DIY chamber on this page. Cheer mate, Tom