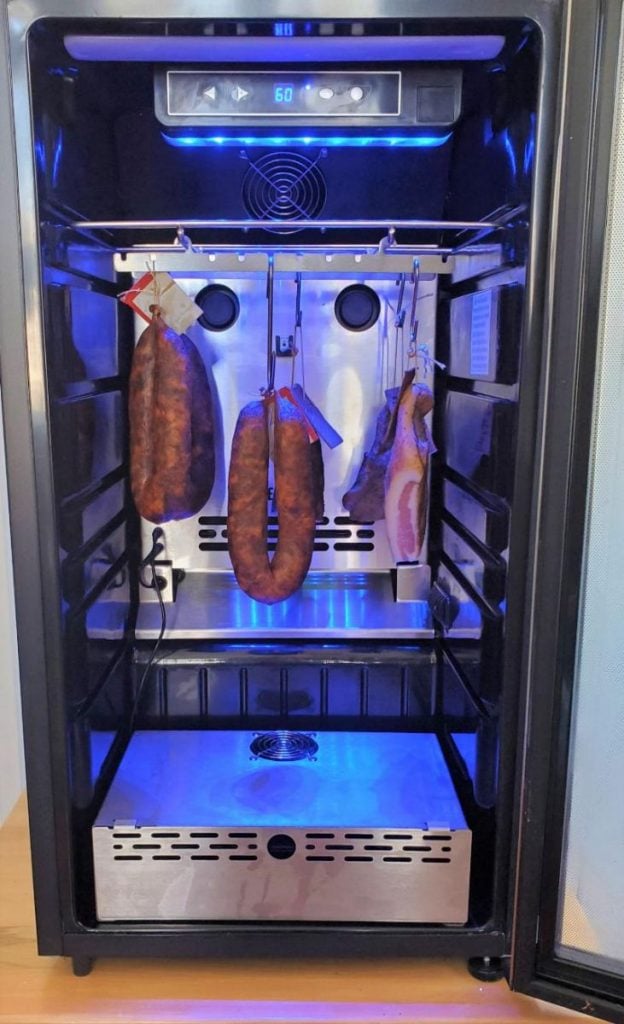
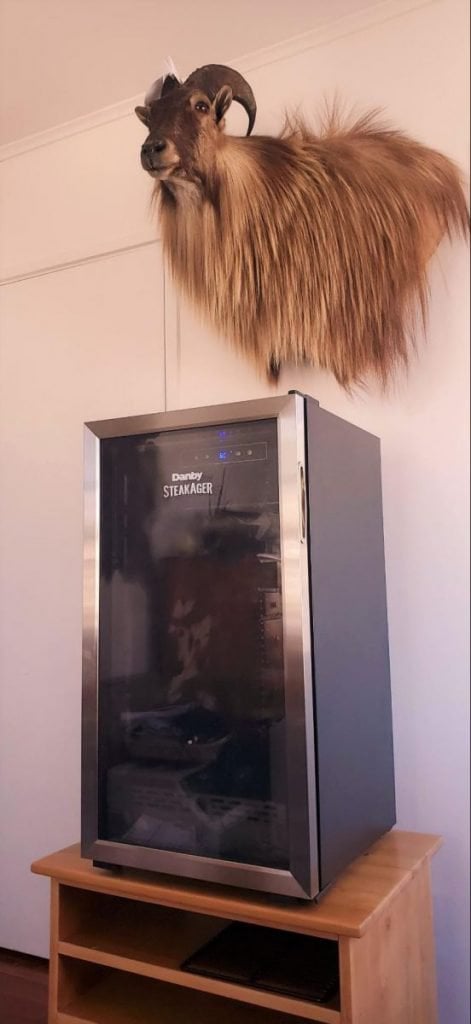
I have been testing & reviewing the SteakAger Pro 40 for quite a few months now with salami, dry-cured bacon, and whole muscle charcuterie at home.
Due to my passion for meat curing and smoking, I have designed and set up various different types of DIY fridge conversions for the controlled environment ideal for making charcuterie-like salami and whole muscle dry-cured meats.
So it all started with somebody in the community emailing SteakAger suggesting I should review the product.
I had a chat with the owner of SteakAger in the U.S, and he very generously sent me a SteakAger Pro with all the kit so I can review it in New Zealand, my home base! Now, he must have a little bit of confidence in this product to be sending something which is definitely a small investment to New Zealand.
Since this blog eat cured meat gets thousands of interested people who want to learn about the craft of charcuterie, it does align well with his target audience, my community!
Here is a short concise summary, then I will expand on all the thoughts and aspects the device has to produce cured charcuterie.
The SteakAger Pro 40 has a temperature and humidity range that can be used for making charcuterie, dry-cured salami, and salumi. It achieves this by a system of effective airflow filtration, controlling temperature ranges between 50-60°F or 10-15°C. The Humidity range is programmed to hold an average of 75%, ideally for dry-cured meats and charcuterie.
Guide to SteakAger Pro 40 for Charcuterie
Since this could be a game-changer for many people that want a small format out-of-the-box solution for making their own whole-muscle dry-cured meats or dry-cured salamis at home, let’s get into the details.
As a comparison, we were butchering a whole pig in classic Italian charcuterie style for whole muscle cured meats. So, I’ve had plenty of cured projects to run side by side to compare the SteakAger Pro 40.
I decided to place some dry-cured cold-smoked Hungarian salami (it’s the house salami around here) in both the StreakAger and a Stagionella commercial fridge a friend recently bought (25x the cost).
What the SteakAger Pro 40 Does
There is a little computer inside this fridge that does most of the work. You have either a temperature range set to dry aging (fresh whole cuts of pork, beef, venison, etc… for aging) which is slightly above freezing or the same temperature as a kitchen fridge.
Or you have a dry curing temperature range that can be set between approximately 50-60°F or 10 to 15°C.
The key to either dry-aging meat or dry curing meat is to have the moisture level high enough so the outside of the meat does not get too dry/hard on the surface of the meat, but low enough to not create too many unwanted bacteria or fungus on the meat.
The challenge with many of the DIY controlled fridge conversions I have created is that depending on how the temperature is cycled and whether the system is frost-free or not, this will have various effects on the humidity inside the fridge.
Then lastly, you have the effect of air filtration and airflow. Also, extraction of air and exchange the moisture. SteakAger takes care of all this automatically.
Of course, thousands of years ago they found caves across Europe reasonably effective for this, with higher moisture, and cooler temperature. Environments conducive to these conditions were also found around rivers/lakes like the Po River near Parma (Prosciutto Parma Dry Cured Ham region).
Definitely, you can dry cure charcuterie by hanging it in areas ‘around’ this climate. But, what a controlled climate fridge does, is provides you consistency and reliability with outcomes (once you have the right settings).
It takes time, energy, and some problem solving to normally get the balance right, the below didn’t just ‘work’.
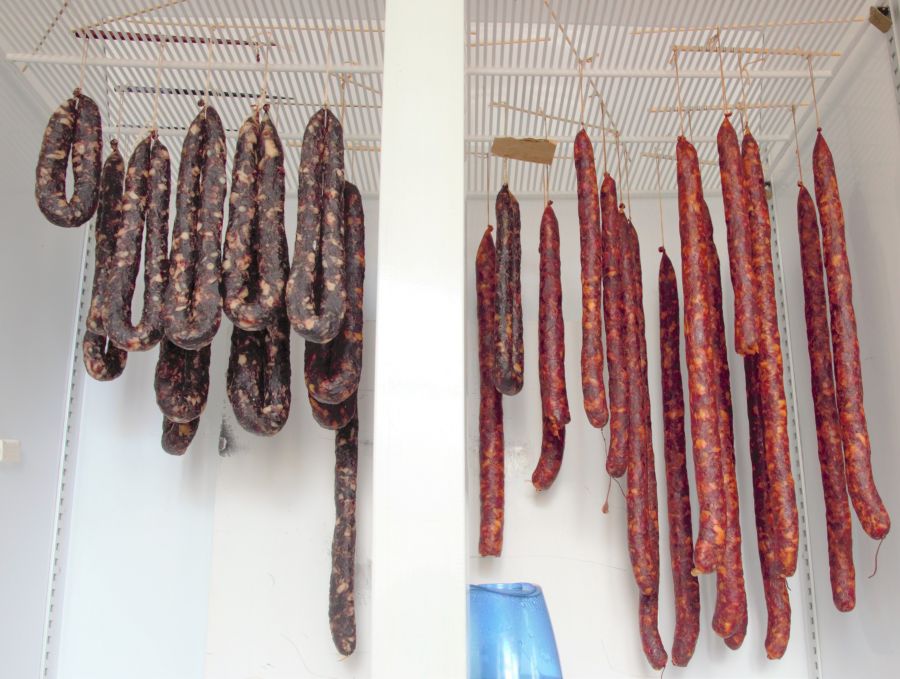
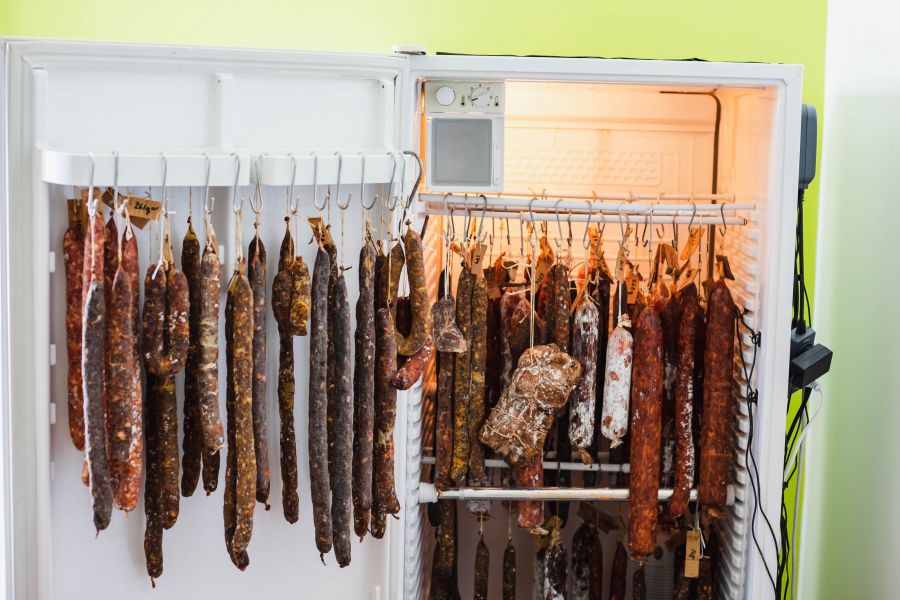
The SteakAger Pro 40 will get the balance right out of the box, which is very cool compared to what I have gone through before, to test, change and redesign the retrofitted kitchen or commercial fridge to control the environment like these:
Accessory Needed for Long Term Dry Aging or for Dry Curing
Humidification System needs to be chosen which is a few hundred dollars and turns the dry-aging fridge into either a long-term dry-aging fridge which I believe is over 50 days.
As well as higher humidity for dry curing of meats & charcuterie.
It plugs into the motherboard and is a stainless steel box with the fan on the top, you then fill a container with water and slip it inside this steel box.
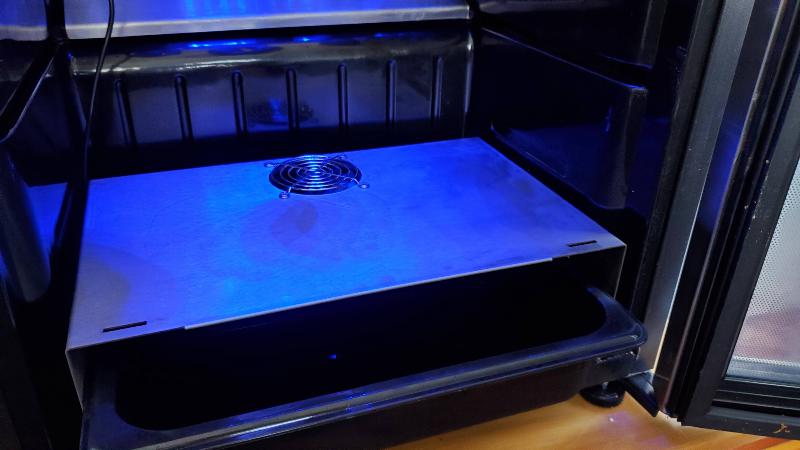
The senses detect when the fan should be turned on, it circulates and draws the moisture upwards toward the meat.
Since you can track the humidification by the app, it swings like any climate-controlled system probably about 10 to 15%. However, the result is that it does average 75% humidity consistently. And I have noticed this when I put cured meats in after curing, and or after a few months as the project has matured.
One of the biggest challenges when doing charcuterie at home is to avoid the phenomenon known as case hardening which is when the humidity is too low and the outside of the meat tries to fast and then the meat spoils the inside. This is why a modern frost-free kitchen fridge can’t do the job, it runs at 20-35% humidity and is much colder than you want for dry-cured meats.
I’ve experienced, and you can ‘dry’ some cured meat that is maybe less than 200grams or 1/2 pound. There is some case hardening but it’s minor.
With the SteakAger Pro 40 including the humidification system, this hurdle will be easily overcome.
Using the Steak Ager for Dry Curing vs Dry Aging
It’s as simple as changing the temperature range and you just click the button until but either one to 4°C more 10 to 15°C.
Charcuterie Capacity in the SteakAger Pro 40
40 pounds or 20 kg is the advertised amount of meat that you can hang inside.
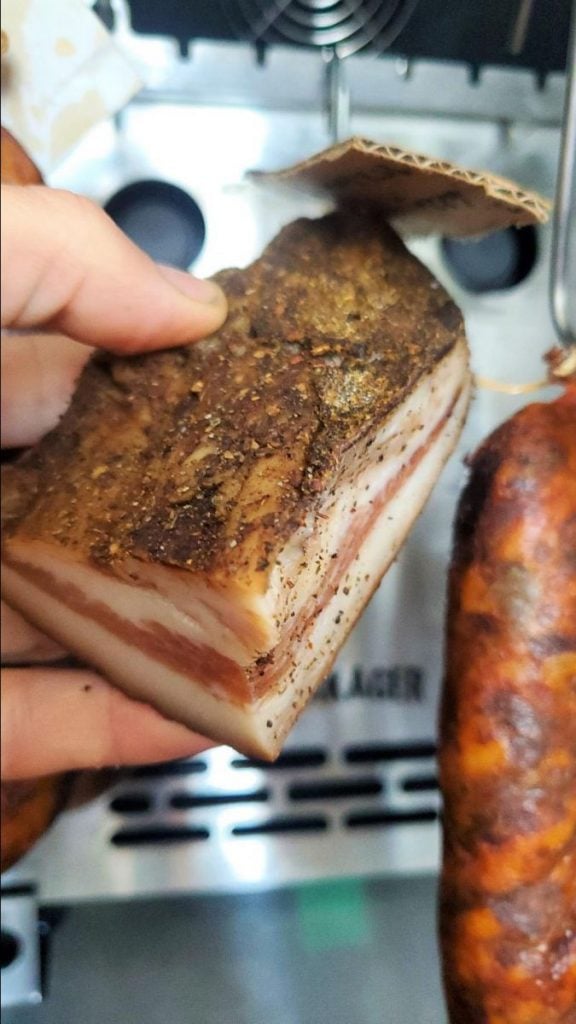
This of course will depend on the shape of the meat. I do have to say there is a smart thing system that gives you quite a few different options including some sliding bars with cutout vintages on the top which means you have space for either butcher twine loops or meat hooks currently I have for probably one-pound cold-smoked Hungarian salamis to one-pound slabs of will belly bacon. These are a couple of different recipes am trying and also a 5-pound slab of my classic cold smokehouse bacon.
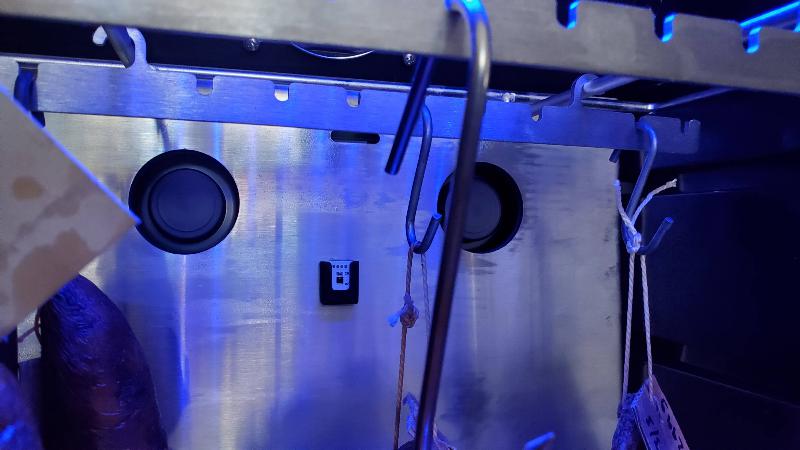
One thing I’ve noticed is you really want to probably have small hooks to maximize the hanging aspects of the meat.
I definitely couldn’t get double the amount of things that I have currently hanging. But it depends on the die mentions of the meat I think I could get comfortably 3x 7-pound slabs of bacon in the SteakAger.
What Does the Steak Ager Pro 40 Do?
Air filtration, temperature sensing regulation, humidity sensing, and regulation.
It has a type of UV light to probably kill off some unwanted bacteria. It’s a very pretty blue.
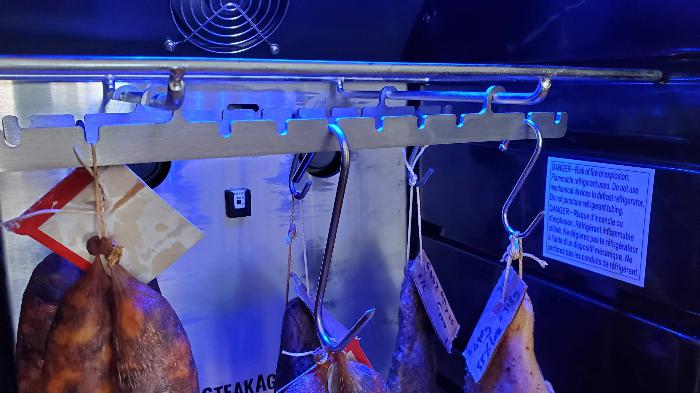
Insulation is good, glass door double glazed I believe.
There does seem to be a fan operating full-time, so you would not want to put this meat curing or dry-aging fridge in an area where you frequent probably.
A cellar or garage would probably be a good idea.
People often display their wine cabinets, however, a wine cabinet often runs often a thermoelectric system, not a compressor-based fridge system which means it is a lot quieter (and not good for converting to a dry curing chamber due to the excess moisture – too keep corks moist often).
I would say the SteakAger is definitely noisier than your kitchen fridge, hence why you would want it out of living areas.
Here are the ranges I’ve been working in.
SteakAger Pro 40 Temperatures and Humidity Range
| Mode | Temperature | Humidity |
| Dry Aging | 34-41°F / 1-5°C | 75-80% |
| Dry Curing | 50°-59°F / 10-15°C | 75-80% |
SteakAger Pro 40 App and Functionality
I’ve found that to be very useful, showing the data of where the temperature and humidity is. It’s a visual check to see how things are going. However, it is not something that controls the friendship via the at all stop
But really, you do not need to control the fridge via the at there really is no purpose for that.
Once you have it connected to your home Wi-Fi, it’s all pretty straightforward from there.
Tips on Using the SteakAger Pro 40 for Charcuterie
I learned that you regularly want to empty the humidifying container, I got some pretty funky mold growth after 6 to 8 weeks in the water.
A 2-minute job.
But to be honest that did not seem to have any effect on the meat that was dry curing. This may have been affected by the decent air filtering system built-in.
There is a hose and another small container for the excessive moisture that gets removed from the SteakAger. It probably would take a few months to fill up the small container, and it just comes off the back near the compressor.
Cost of SteakAger Pro 40 Compared to Other Dry Curing Charcuterie Chambers
SteakAger achieves this instantly, compared to a lot of testing/calibrating and tweaking designs for retrofitting a second-hand fridge, which I have been through.
We are talking $1,000 for a SteakAger vs $300 for a DIY fridge conversion.
When you compared SteakAger to other cabinet small format fridges for dry curing, it’s about 60-70% less investment.
Here is a table pasted from SteakAger:


Summary
If you want a solution to making charcuterie and dry aging, simple and compact. I believe this is the solution you are looking for.
If you want a 5% discount on a SteakAger – Use the code is: eatcuredmeat
Head Over to SteakAger here and check out the Pro 40, just remember if you want to do charcuterie you need the humidification system.

Tom Mueller
For decades, immersed in studying, working, learning, and teaching the craft of meat curing, sharing the passion and showcasing the world of charcuterie and smoked meat. Read More

Think Landjaeger can be cured in the Steakager 40? Or do you think it would not be successful due to the temperature setting not able to get any higher such as 72 degrees?
Hey, no it’s not a fermentation temp type of system. depending on the starter culture (T-SPX or flavours or Italy to something like those), you would need about 68-75F / 20-24C approximately – 80-90%. I’ve done this like a true novice in a bathroom, icebox with a bulb, biltong/jerky box, commerical curing chamber, DIY curing chamber.
If you were to use say the steakager, if it was me I would just use a reptile heat bulb (no light bad for meat and culture) and have it set on a controller like an inkbird.
Here is some more info on fermenting/heat/bulb I wrote – https://eatcuredmeat.com/dependable-gear/diy-curing-chamber-equipment/heating-fans/
Hope that helps,
Cheers
Tom
Thanks for this review! I just bought a SteakAger to make salami and I have been trying to figure it out. Just to clarify, do you cure/incubate your salami at a higher temp/ humidity outside the SteakAger for the first 1-2 days prior to hanging in the SteakAger?
Hi, Yes if I am making fermented salami, it needs to be in a conducive environment for starter cultures to ferment in the salami. Not needed for whole muscle meat curing, although some meat curing factories I’ve visited do it for whole muscle also. The SteakAger Pro is primarily designed for dry aging not dry curing. The addition of the water dry curing system and increasing the temp to 50-60F/10-15C. It can handle small diameter salami making, under 2″ in my experiences. Kindest Regards, Tom
When you were experimenting did you do use any inoculation bacteria, for example if making capicola. I am looking at purchasing one or the dry Ager brand. The price point is a definite factor.
I think I might have plugged the fan for humidification in the wrong plug! So it wasn’t quick working as designed. I’ve now done a run of dry aged fish, which has been superb for pan fried of sashimi, 5-7 days hanging.
No inoculation just whatever was on the meat naturally.
Do you need to spray the outside of the salami with Bactoferm 200 before putting it into the Pro 40?
Hey, I had to backup and restore site, might not have got my comment. Not that I have only used 600. For the Pro 40 though, I didn’t spray last time and got a natural penicillin bloom…boom!
It’s not essential but helps, just depends on if it’s in the air or on the meat!
Wish instructions would have come with my pro 40 .how is dual mode turned on to work humidity in unit . Is blue light the uv light
They have the manuals here – https://www.steakager.com/customer-support/manuals