So I’ll go through the many options for a do-it-yourself (DIY) cold smoker that I have seen, built, or heard about.
Over the years I’ve used everything from crazy simple setups through to checking out commercial systems in butcher shops that cost more than most houses. I still prefer the practical, low-fuss approach, as long as it produces clean smoke and steady results.
Cold smoking becomes simple once the food is prepped the way you want it. For vegetables, salt, dairy, spices, and plenty of other foods, I treat cold smoke as a short flavor session rather than a long project. For many non-meat categories, I often keep it to 30 to 60 minutes so the smoke stays subtle and doesn’t dominate.
Most DIY designs are easy to do at home. The main decision is the chamber you want to use and how you want to separate the smoke source from the food. Once you understand that, you can build a setup that fits your space, whether that is land, lawn, patio, or a small outdoor area.
I’m writing this because I keep seeing people overcomplicate cold smoking. I’ve been in between houses after traveling through Italy and revisiting traditional dry-cured meat techniques, and tonight I’ll be using a pellet tube and a cardboard box to cold smoke a small piece of bacon for a friend. That is the point of DIY: it can be simple and still work well when the fundamentals are right.
Options for a DIY Cold Smoker
- Pile of Sawdust or Wood
- Pellet Tube Cold Smoker
- Maze Cold Smoker
- Grill Retrofit Cold Smoker
- Classic Smoke House Smoke Chamber & Meat Chamber
- Retro Fit Wood or Charcoal Smoke
- Pellet Grill Retrofit Cold Smoker
So as you can see, there are many chamber options. The list is much longer than this, but these are the setups I see most often and the ones that consistently make sense for DIY. The goal is steady smoke, enough airflow, and a chamber that suits what you’re cold smoking.
DIY Equipment, From Rough to Refined
I’ve seen DIY setups evolve from basic improvised parts to tidy builds that look like they came from a workshop. A few examples that come to mind are perforated steel cylinders, a smoke source ducted to a separate chamber, or using an existing grill as the chamber while the smoke generator does the work. Sometimes the simplest builds teach the best lessons because you can clearly see what airflow, distance, and chamber size do.
- Perforated steel cylinder (motor vehicle exhaust)
- A hole in the ground piped/ducted to another chamber
- Any burning or grilling area ducted to a food chamber
That is just off the top of my head. The real trick is choosing a setup that matches your space and the amount you plan to cold smoke.
DIY Cold Smokers I Don’t Like
I’ve seen a lot of designs online and through friends that rely heavily on flimsy aluminum trays, thin foil channels, or improvised cans. I’ve tried some of these shortcuts myself years ago, and they tend to be messy, fragile, and annoying to repeat consistently.
If the goal is a dependable setup you can use again and again, I prefer materials that hold their shape and do not warp the moment you touch them.
For DIY, I’d rather focus on clean airflow, stable placement of the smoke source, and a chamber that closes up reasonably well. That is what makes a setup repeatable, and repeatable is what makes it useful.
Important Factors for a DIY Cold Smoker
Before we get into the specific DIY builds, it helps to understand what makes any cold smoker work well. These few basics decide whether a setup feels effortless or frustrating, no matter what chamber you use.
Airflow and simple draft control
It’s not about bellowing amounts of smoke. I treat cold smoking a bit like low-and-slow barbecue in one key way: clean, steady smoke with good airflow beats thick smoke trapped in a box. When the chamber breathes properly, the smoke stays pleasant and the results stay consistent.
Across Central, Northern, and Eastern Europe, a lot of smokehouses and cabinets use some form of exit control, even if it is basic. Being able to tweak airflow through the chamber is one of the fastest ways to improve outcomes.
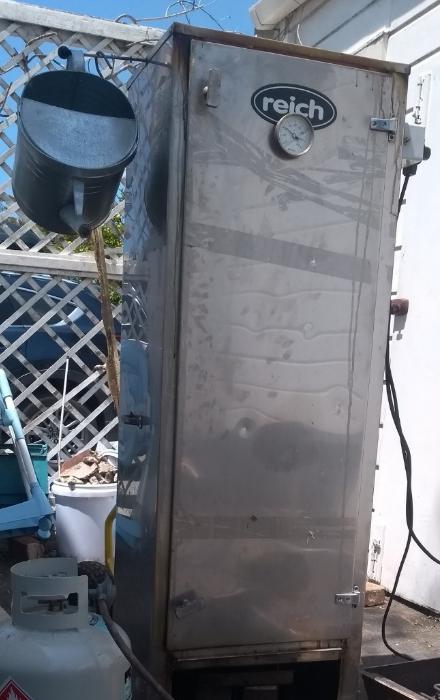
A small German commercial unit I use at a friend’s place has a damper on the narrow chimney outlet. It is simple, but it makes fine adjustments easy when the weather shifts or the smoke behaves differently.
Temperature
For cold smoking I generally aim for 10 to 20°C (50 to 68°F). In my moderate climate, that often means nighttime sessions when the air is naturally cooler and the chamber behaves more predictably. A bigger, heavier chamber usually changes temperature more slowly, while small chambers can shift faster.
When you want more detail on the same idea across different foods, I keep a dedicated guide on cold smoking temperature and setup tips.
It also helps to have a simple analog temperature and humidity gauge inside the chamber. It is quick feedback, and it stops guesswork from creeping into your process.
It’s best to get a simple analog temperature and humidity measuring device like this which combines what you need to know. Or this one has separate gauges but does the same job.
Humidity
Humidity surprises a lot of people because it changes how the surface behaves during longer sessions. In many places, higher humidity tends to show up at night, which is another reason I like nighttime smoking. It keeps the process steady and stops the session from feeling “rushed” by dry air.
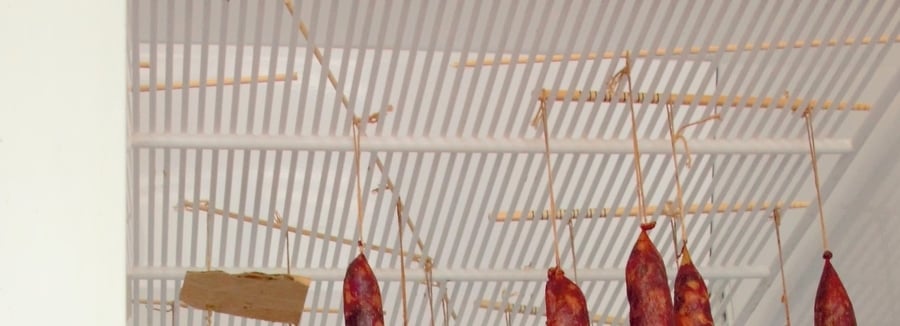
Racks or hanging

For fillets or whole fish, hanging is often the cleanest approach because it keeps contact points to a minimum. Racks work too, especially for flatter pieces, but hanging stays tidy and makes airflow around the food easier.
A simple trick I’ve used for years is tying twine or jute to a tougher section, running it through the rack, then locking it with a chopstick or small piece of wood. It is quick, adjustable, and works when you do not have hanging rails.
Adjustable racking or proper hooks are ideal, but DIY is about making what you have work. As long as the setup is stable and the food has breathing room, you are on the right track.
Big or Small DIY Cold Smoker
- Fridges
- Kettle BBQs
- Filing Cabinets
- Terracotta Pots
- 40 Gallon Drum
- Cardboard Boxes
- Wine Barrels
The first DIY cold smoker I saw was at the back of a Dutch butcher’s when I was a student. It was a tall, heavy steel cabinet with double doors, and the method was almost boringly simple.
He used untreated hardwood offcuts from a furniture maker, lit a small amount briefly, then let it smolder with the door cracked for airflow.
The point is not that everyone needs a steel cabinet. The point is that cold smoking can be straightforward when the smoke source is stable and the chamber has controlled airflow.
Here is a video I made that shows various setups and what I focus on when testing a new DIY chamber.
The 7 DIY Cold Smoker Options Explained
Now that the fundamentals are clear, here are the 7 DIY cold-smoker options I use most often. I’ll keep each one practical, with what’s best for it and how I set it up in real life.
1. Pile of Sawdust or Wood
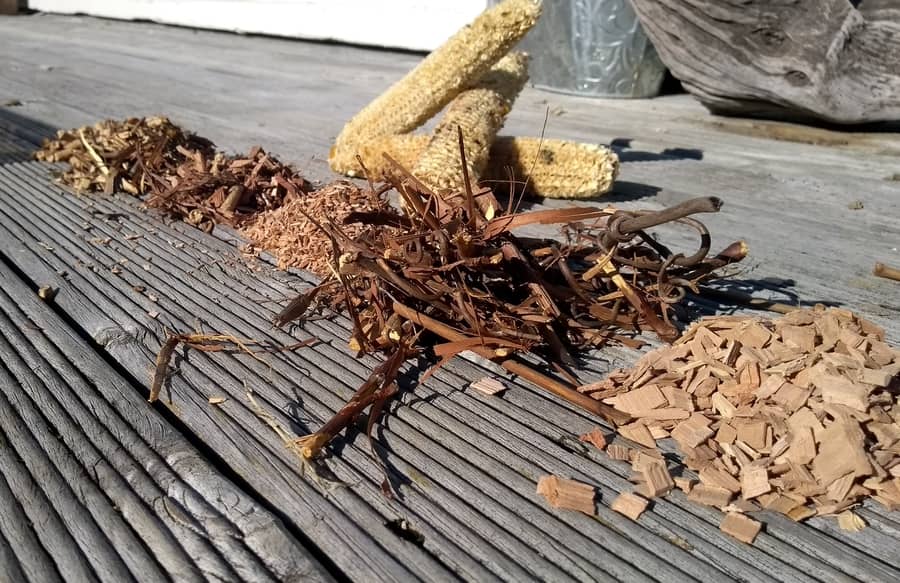
As long as you have dry hardwood and decent airflow, this is the simplest cold smoking approach there is. Get the sawdust, chips, or small wood pieces smoldering, then keep it smoldering rather than flaming. The rest is chamber control and patience.
It can take a little experimentation to find the sweet spot for your chamber, especially if you are working with improvised containers. My best advice is to start with less smoke rather than more, because it is easy to add another session later.
Once you learn how your chamber behaves, this method becomes a reliable baseline for everything else you try.
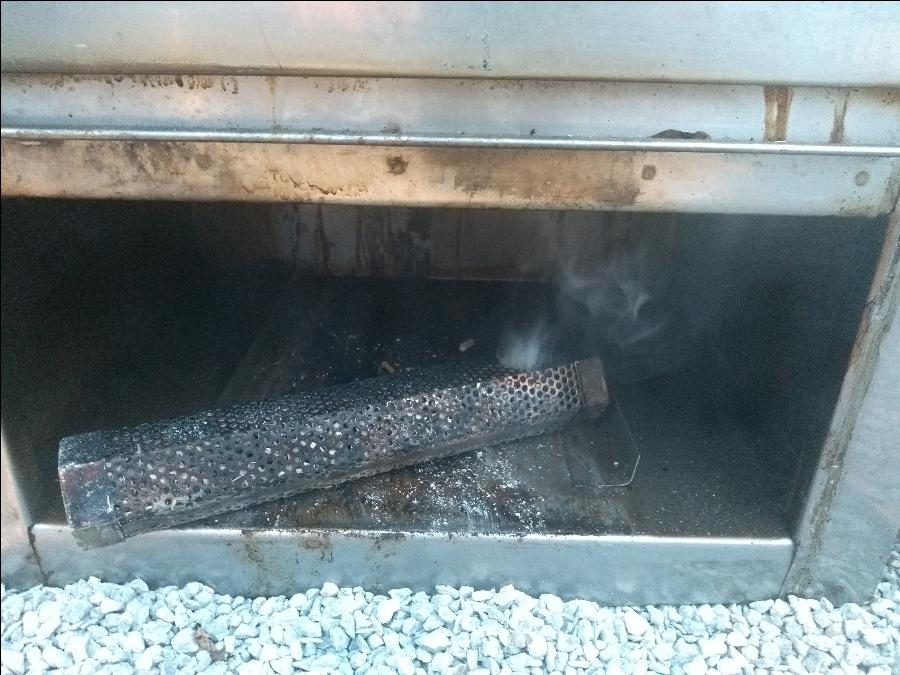
2. Pellet Tube Cold Smoker
A 12-inch pellet tube is one of my favorite DIY tools because it is simple, consistent, and works in almost any chamber.
I’ve used it in cardboard boxes, kettle grills, and stainless commercial units. It is also a great choice when you want to test a new chamber without building anything permanent.
For a deeper breakdown, I wrote a full guide on how a pellet tube smoker works, including how I position it and what affects burn time.
Lighting is where most people struggle at first. I use a decent butane torch or crème brûlée torch rather than a normal lighter, because it gets the pellets going quickly and evenly. Once you have a solid flame established, you can extinguish it and let the tube smolder steadily for hours.

Dry pellets are the key. I sometimes mix in a little chipped grapevine wood or other small additions, but I keep the bulk as pellets so the burn stays stable and predictable.
Here are some tips I talk through with a pellet tube smoker:
3. Maze Cold Smoker
The maze smoker is similar to a pellet tube, but the format changes how it burns. Some designs work well with fine sawdust, while others work better with pellets. When the fuel is right for the maze, it can be a steady, hands-off way to generate smoke for a long session.
Some maze styles only need a tea candle to start, which is handy when you want a simple ignition method. This is the kind of setup I like when I’m doing light smoke sessions and want the smallest possible footprint.
You need a basic lighter like this.
For readers who like official-style step instructions, this external manual page is a useful reference for lighting and basic use here.
4. Grill Retrofit Cold Smoker
A smoke generator with an air pump control can be retrofitted to a gas grill or other chamber. The advantage is extra airflow control, which can make results more repeatable across different weather conditions. It also keeps the smoke source tidy and separate from the chamber.
Smoke Generators (review of one of my favorites) can be fitted to a whole bunch of options, and that extra control over airflow can make a noticeable difference. I also keep a full page on here if you want to compare styles.
5. Smokehouse: Classic Smoke Chamber and Meat Chamber
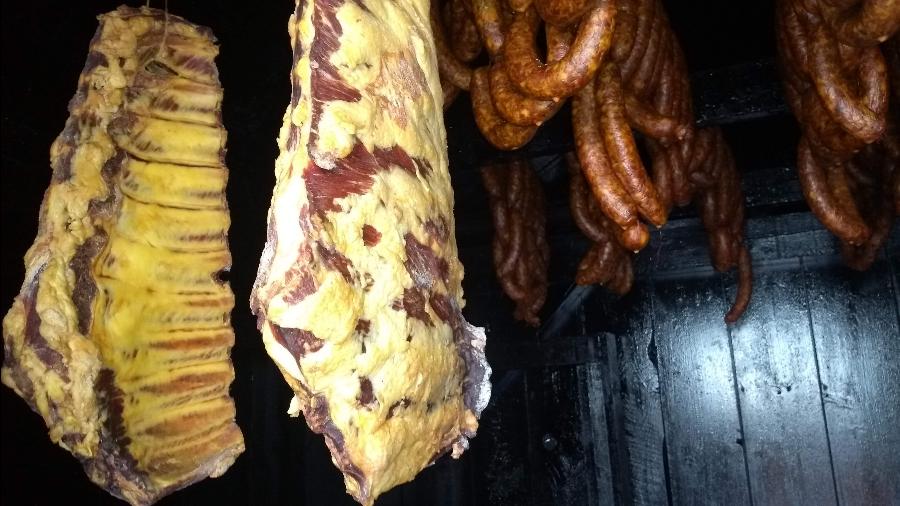
Brick, wood, and concrete are just a few of the materials that work. The principle stays the same: enough space in the chamber, a smoldering rather than flaring smoke source, and separation so the chamber stays in the cold-smoking range.
Some smokehouses use a separate firebox ducted to the main chamber. Others run the smoke source inside the chamber but keep it controlled and low. For design inspiration across materials, LSU AgCenter has practical smokehouse plan ideas on their gov site with smokehouse plans.
6. Retro Fit Wood or Charcoal Smoke
This is one of the rough-and-ready DIY approaches that can still work well. The basic idea is using an existing grill or smoker as the chamber, then adding a pellet tube, maze smoker, or generator so the chamber fills with steady smoke without needing a full rebuild.
Done right, it is a clean upgrade path because you can test the chamber you already own before deciding whether to build something bigger.
7. Pellet Grill Retrofit Cold Smoker
A pellet grill can also work as a chamber when it is not running, since you can place a pellet tube or maze inside and use the existing space. Some people also drill a hole and feed a smoke generator through the back, which is a neat option when you want a dedicated inlet point.
Keeping DIY Simple, Without Guesswork
When people ask me what to do first, I point them toward the simplest reliable tool and a chamber they can control. A pellet tube provides a reliable baseline and lets you focus on airflow, spacing, and temperature behavior rather than reinventing the smoke source.
When you want a clearer picture of what you might spend before you build or buy, I break it down in a guide on the cost of a cold smoker. For readers who like a structured overview of the full approach from equipment through process, I also keep a page on cold smoking theory and equipment.
The biggest improvement usually comes from restraint with smoke and a properly breathing chamber. Once you get that right, even a cardboard box setup can produce surprisingly good results.
Frequently Asked Questions
What is the easiest DIY cold smoker setup to start with?
A pellet tube in a simple chamber is the easiest place to start because it creates steady smoke without complicated parts. It lets you focus on airflow, spacing, and learning how your chamber behaves.
Do I need a damper for DIY cold smoking?
A dedicated damper is helpful but not required. Many DIY setups get similar control by adjusting vents, door gaps, or the exhaust opening so you can fine-tune the draft through the chamber.
Is a maze smoker better than a pellet tube?
Neither is automatically better. A pellet tube is simple and flexible across chambers, while a maze smoker can be excellent when it matches the fuel type and you want a slow, steady burn in a compact format.
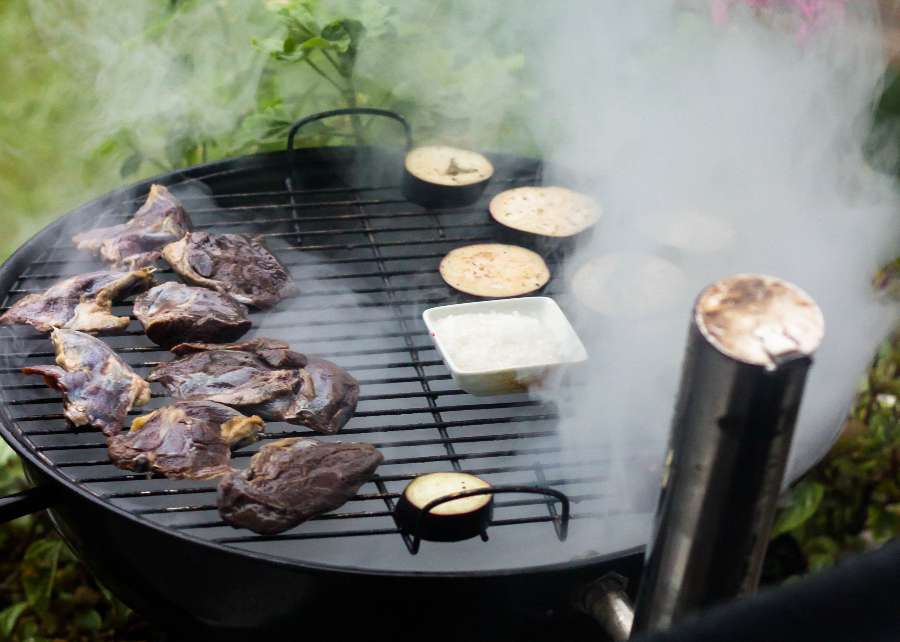
Can I use a kettle grill as a cold smoking chamber?
Yes, a kettle grill works well as a chamber when the smoke source is separated and you keep the session in the cold smoking range. It is also convenient because you can control airflow with the existing vents.
Got a DIY cold smoking setup that surprised you with how well it worked? Drop a comment with what you built, what chamber you used, and what you’d tweak next time.

Tom Mueller
For decades, immersed in studying, working, learning, and teaching the craft of meat curing, sharing the passion and showcasing the world of charcuterie and smoked meat. Read More