When I first started slicing my own dry-cured meats, I underestimated the significant difference a good slicer makes. After months of trying different knives and so-called “home” slicers, I finally invested in a proper deli-style meat slicer — and it completely changed how I serve and enjoy charcuterie.
In this guide, I’ll share what I learned while choosing a slicer for wafer-thin cuts. If you’ve spent time making your own prosciutto, pancetta, bresaola, or other whole-muscle charcuterie, you’ll know how frustrating it is to end up with uneven, torn slices. Achieving that clean, see-through sheet of cured meat requires a specific type of machine.
Through years of trial, testing, and a fair bit of interrogation at butcheries and deli counters, I discovered that most slicers on display in kitchen stores simply aren’t built for fine charcuterie. The good ones have a particular balance of blade, power, precision, and weight that separates them from typical “food slicers.”
KEY POINTS
- Flat, razor-sharp blade — not serrated
- Powerful motor with consistent torque
- Micro-adjustable thickness control
- Heavy metal body for stability
- Built-in sharpener on professional units
- Safety habits: power off, blade closed
When I finally unpacked my first commercial-grade slicer at home, the excitement was real. That first translucent slice of my own cured venison loin made every hour of research worth it. It was smoother, thinner, and more even than anything I’d achieved by hand, and it allowed the flavors to open up exactly as they should.
I had used every knife I owned — carving, chef, even a long flexible filleting blade — but none could reproduce the uniform paper-thin result. With a precision slicer, a few minutes of setup delivered hundreds of perfect slices ready for platters, vacuum-sealing, or quick snacks.
Over time, I tested slicers in various environments, including commercial kitchens, small butcheries, and a few home setups belonging to friends. I also spoke to local deli owners about what they rely on day to day. A pattern emerged — true deli slicers share common design features that make ultra-thin slicing effortless, while most consumer units simply fall short.
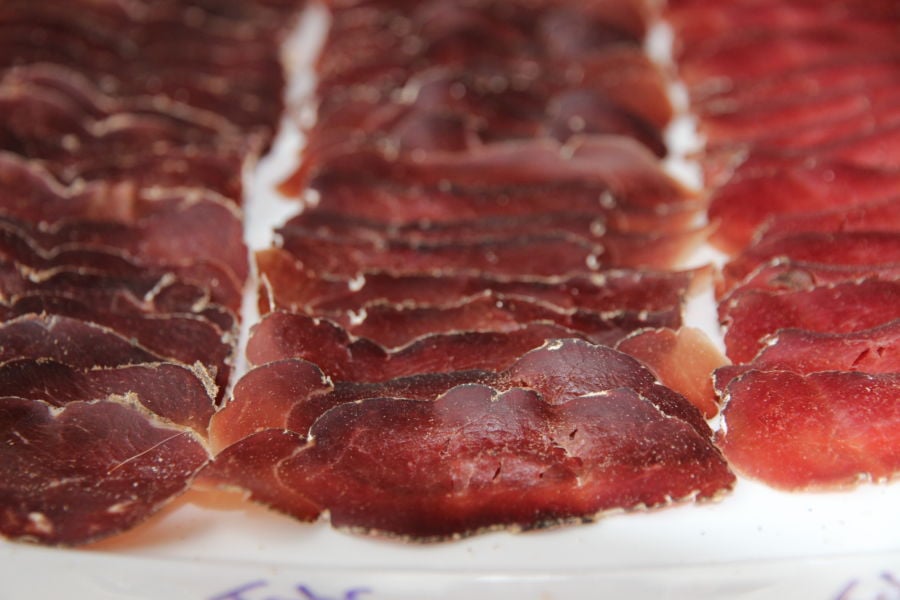
Let’s start by defining what we’re actually aiming for. When I say “wafer-thin,” I mean less than one millimetre — the kind of slice that’s almost transparent when held to the light. Achieving this consistently requires more than just sharpness. It’s about the stability of the carriage, the power of the motor, and the geometry of the blade.
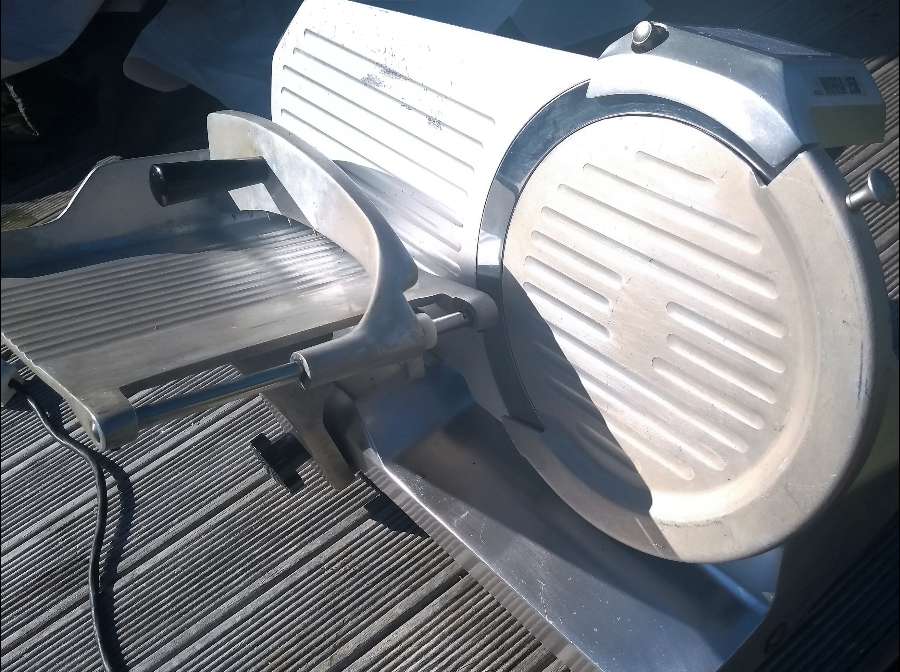
Below, you’ll see one of my early setups with various slicers lined up. They were decent general-purpose kitchen models, but none could produce the level of finesse that dry-cured meats demand. They worked for roast beef, bread, and cooked ham — just not for true charcuterie.
Through testing, I learned that four main components make the most significant difference for cured-meat slicing:
- The blade type and sharpness — flat, not serrated, and honed to a fine edge.
- Motor power — anything under 240 W usually struggles with firm, dry meat.
- Precision thickness control — fine adjustment without flex or delay.
- Weight and build quality — a solid frame prevents vibration and tearing.
Each of these areas affects the next. A sharp blade without enough motor torque just shreds; a strong motor on a lightweight frame causes vibration; and poor adjustment tolerances mean the difference between clean slices and ripped edges. Once you experience how a professional slicer handles resistance, it’s hard to go back.
Before diving into each of these factors, it’s worth noting what kind of foods benefit most from a capable slicer. I use mine not only for bresaola, pancetta, and prosciutto but also for smoked turkey, ham, and even blocks of cheese. With a little care, you can slice bread and cooked meats too — just remember that high-moisture foods will always leave more residue to clean up afterward.
In the next section, we’ll look closely at the blade and power fundamentals that decide whether a slicer can actually produce those delicate, see-through slices. Understanding these basics makes every other choice — price, size, or brand — much simpler.
Blade & Power Fundamentals
The blade is the heart of any slicer, and for thin charcuterie cuts, it’s where most of the difference lies. Many domestic slicers come fitted with a serrated blade, which looks aggressive but performs poorly when you’re working with firm, dry-cured meats. The micro-teeth of a serrated blade tear the fibers instead of gliding through them, leaving ragged edges and uneven slices.
Whenever you visit a professional deli or butcher, take a quick look at their slicer. You’ll notice the blades are perfectly smooth and flat, honed to a mirror finish. That’s the design you want — a flat stainless steel blade that shears cleanly, not one that saws. Once you’ve experienced the difference, it’s impossible to go back to a cheap serrated edge.
I made the mistake early on of buying a slicer with a serrated blade. It could handle bread and cooked roasts beautifully, but as soon as I tried it on bresaola or prosciutto, the slices tore halfway through. That’s when I started comparing commercial slicers side by side and realized how different the engineering really was.
Flat vs. Serrated: Why Serrations Fail on Cured Meat
Cured meat has low moisture and a dense protein structure. The motion of a serrated blade drags the meat rather than slicing it, creating resistance. A true deli blade has a consistent edge angle and surface tension that slides through with minimal friction. When combined with a slow, steady rotation speed, it creates perfectly even slices that almost peel away on their own.
If you’ve ever struggled to slice paper-thin prosciutto at home, the blade edge is most likely the reason. Smooth-edged blades reduce tearing, limit friction, and deliver slices that fold beautifully without curling or sticking.
Motor Power Benchmarks
Once you have the right blade, power becomes the next deciding factor. A slicer with a weak motor might seem fine when you test it on soft food, but it will quickly stall on cured meats like coppa or lonza. For dry, firm meats, 240 watts is the absolute minimum. Most semi-professional units fall in the 300–320 W range, offering enough torque to maintain consistent RPM under resistance.
That extra power not only keeps the cut smooth, it also helps protect the motor from overheating. Underpowered slicers strain and overheat quickly, leading to motor wear and less consistent cutting. A stronger motor means you can slice for longer sessions without losing precision or stressing the machine.
Another sign of quality is the sound and feel when the motor runs. A stable hum with no vibration through the base tells you that the slicer is balanced and well built. If you can feel the table shaking or hear the pitch fluctuating, it’s a red flag that the internal gearing isn’t designed for continuous use.
Finding the Right Balance
Not every home slicer needs to be a 12-inch commercial monster. The goal is to find a balance between capacity, power, and footprint that matches your actual usage.
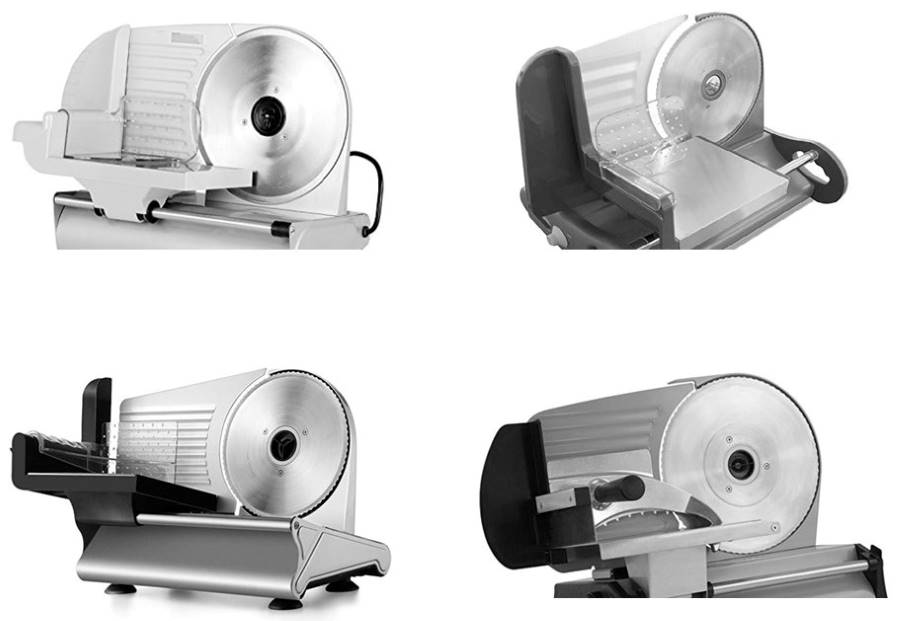
For small projects or light charcuterie slicing, an 8- to 10-inch blade paired with a 250–300 W motor is ideal. Larger blades are great for big cuts like prosciutto legs, but they take up serious counter space and require more careful cleaning.
When you step into the semi-professional range, you start seeing solid cast frames, built-in sharpeners, and better torque-to-speed ratios.
These features make all the difference for transparent slices that don’t crumble or tear. Many of these models also allow you to remove the blade easily for proper cleaning, which is worth it if you’re slicing cured meats regularly.
At the time I bought my slicer, I compared every option I could find. Some were heavy-duty but lacked fine control; others looked sleek but didn’t have the power to cut through aged meats. In the end, I went for a mid-range semi-professional model that ticked all the boxes — and it’s still running perfectly years later.
If you want to see what that kind of slicer looks like and how the specs compare, check out my detailed write-up on deli slicers for home use (models and specs). That’s where I’ve listed the specific machines I’ve used or tested personally, along with their wattage, blade size, and real-world performance on cured meats.
Understanding blade geometry and motor power will help you cut through much of the marketing noise. Many slicers are built for convenience rather than precision, but once you know what to look for — a flat blade, strong motor, and solid frame — you’re already ahead of most shoppers.
Next, we’ll look at precision and thickness control — the part of a slicer that turns a sharp, powerful machine into a true tool for charcuterie.
Precision & Controls
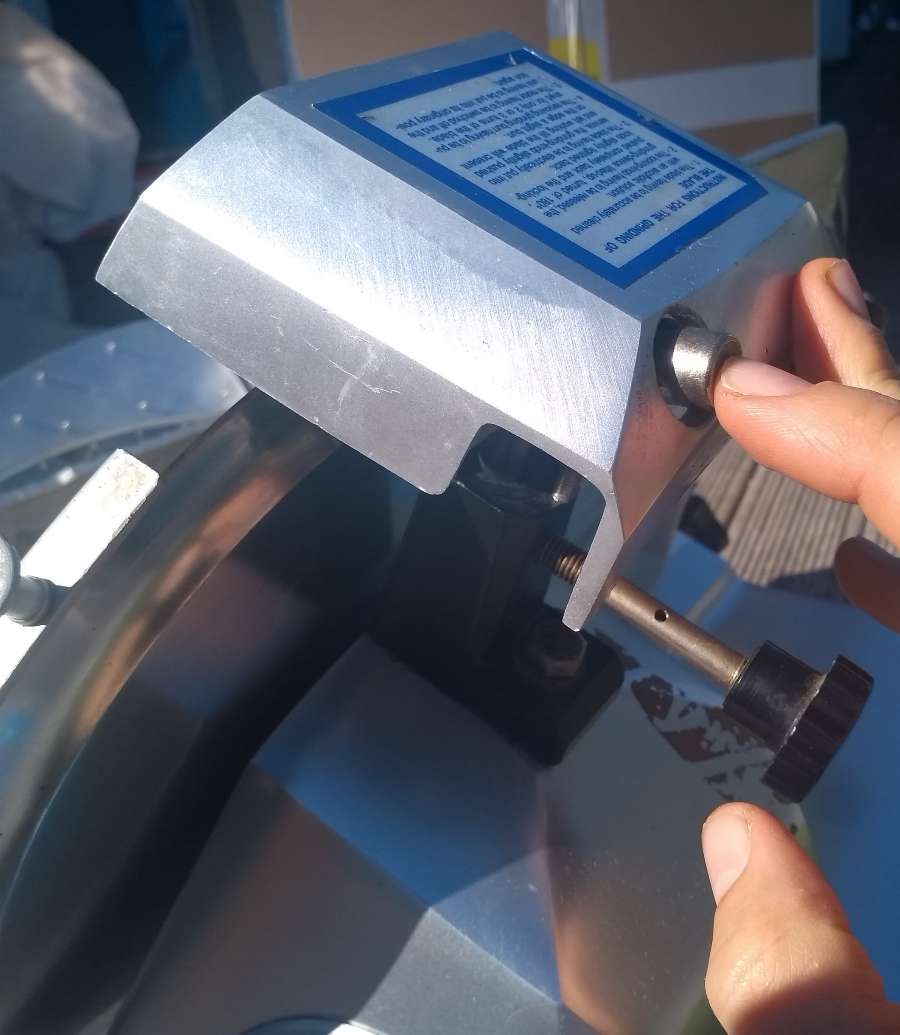
Even with a sharp, powerful slicer, wafer-thin slices only happen when the controls respond accurately. I’ve tried a few slicers where the thickness dial was more of a suggestion than a setting. On the better machines, a small turn of the dial actually translates to a micro adjustment in the blade clearance — that’s what lets you move from 1.5 mm to half a millimetre without any flex or lag.
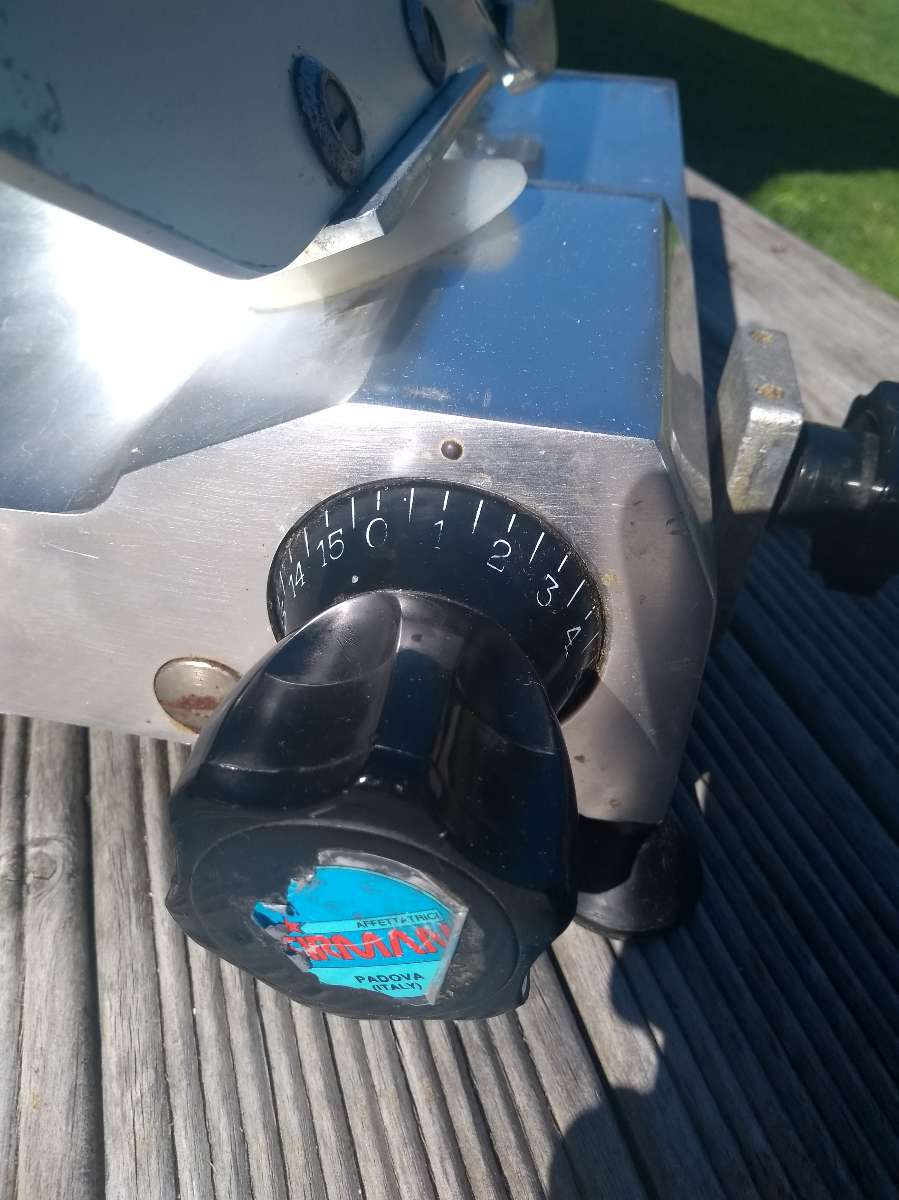
Good slicers have tight mechanical tolerances, meaning there’s no play in the carriage or wobble in the blade mount. That stability allows the blade to pass evenly through the meat from start to finish. When you’re slicing cured meats like bresaola or lonza, that steady feel in the handle tells you immediately whether the machine is well built.
Why Precision Matters for Wafer-Thin Cuts
Dry-cured meats don’t behave like cooked meats. The low moisture content and firm structure mean that every vibration transfers into the slice.
If the adjustment system has slack or flex, you’ll get tiny ripples instead of a smooth sheet. That’s why I always recommend spending a little more for solid adjustment engineering rather than fancy cosmetic design.
On my slicer, I can consistently cut down to about half a millimetre. Any thinner than that and the meat starts to lift slightly from the tray, almost like translucent paper. The difference between 1 mm and 0.5 mm is enormous when you’re tasting prosciutto or capocollo — at that point, the flavor and aroma change completely because the fat melts faster on your tongue.
When the controls are dialed in, you can also maintain better portion control. I can prepare identical slices for vacuum packing or charcuterie boards, which makes presentation and storage much easier. Thin, even slices layer cleanly without sticking or folding back on themselves.
Closing the Blade Between Runs
It’s a simple step that a lot of people skip — always close the blade gap when you finish a slicing session. That habit keeps the cutting edge protected and prevents accidental contact. I’ve worked in kitchens where the slicer stayed open and running during prep hours, and it only takes one distracted reach to create a nasty injury.
When setting up for the next run, opening the blade by the same micro increment again gives you repeatable thickness. It’s one of those small workflow habits that make the process safer and more consistent, especially if multiple people use the slicer in your household or workspace.
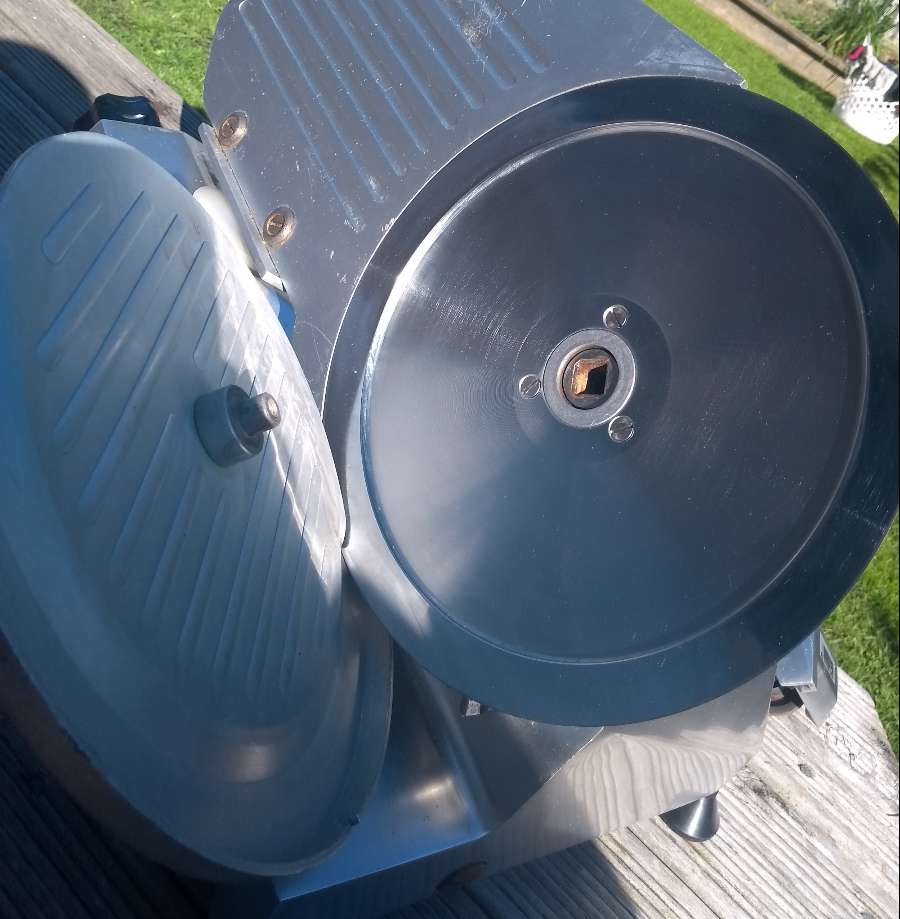
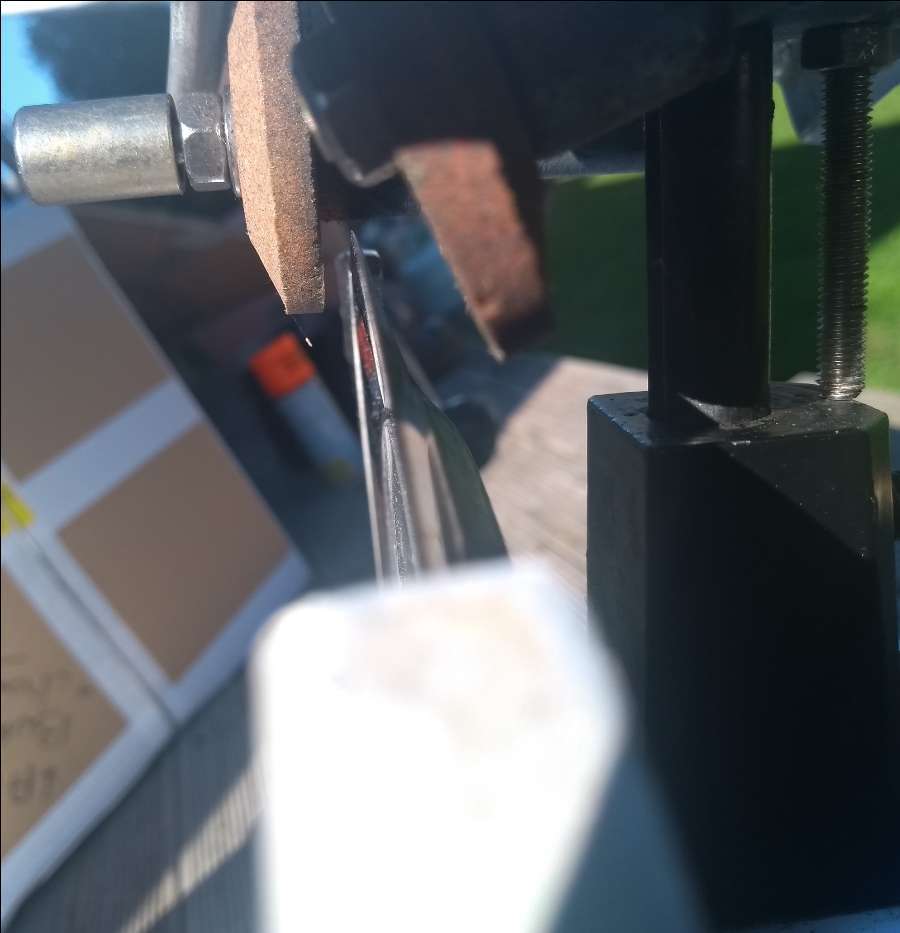
Built-in Sharpeners & Maintenance
If your slicer includes a built-in sharpener, use it often. A few seconds on each wheel after every dozen slicing sessions keeps the blade at peak performance. I usually hold the first wheel for about 30 seconds, then switch to the finishing wheel for 2–3 seconds. You can hear and feel the difference once it’s sharp — the motor sounds smoother, and the blade glides through firm meats like butter.
For slicers without built-in sharpening stones, it’s worth finding a compatible external sharpener or professional service. Sharpness directly affects the thickness consistency and the surface finish of every slice. Dull blades pull at the meat, creating drag that leads to tearing and uneven edges.
Upgrading to Heavy Slicers
The latter have precision engineering and tighter tolerances that can’t be matched at the lower price range. Once you use one, the control and confidence are night and day.
For anyone comparing specifications or trying to decide which unit fits best, I’ve listed several tested machines in my write-up on home meat slicers that specifically are for thin meat slicing. It covers different wattages, blade diameters, and what to expect in real-world slicing performance.
Having that fine-tuned control is what transforms slicing from a chore into something enjoyable. Once you know how to adjust and maintain your slicer properly, you’ll find it hard to settle for anything less than perfect, translucent sheets of cured meat. Next, we’ll look at the other side of the equation — how the slicer’s size, weight, and build quality determine its stability and lifespan.
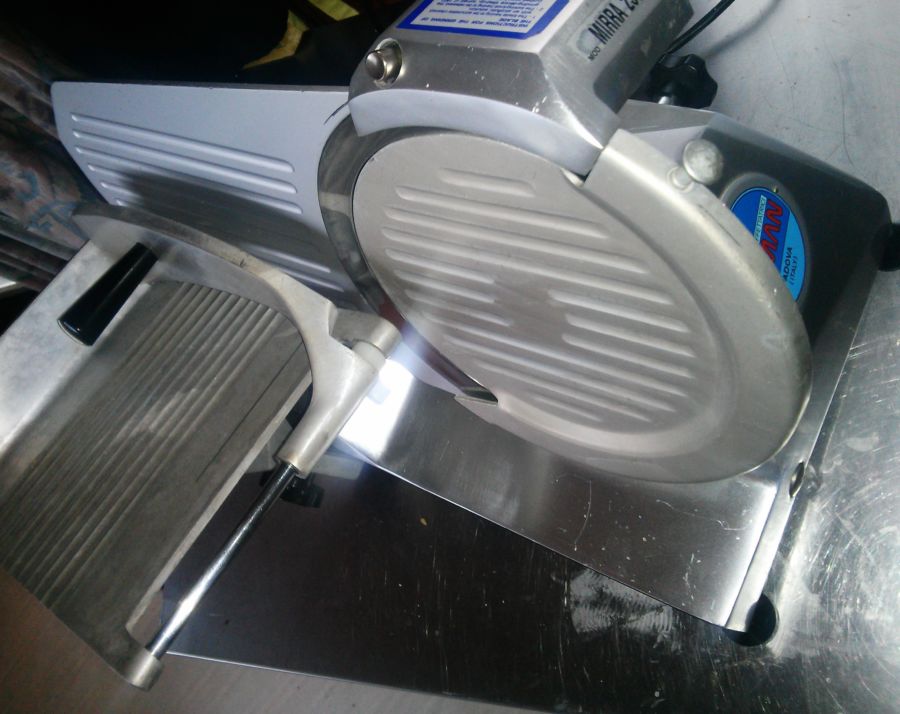
Size, Weight & Build Quality
The next consideration is size and overall design. Most people underestimate the importance of weight in a slicer. A heavier body means less vibration, smoother motion, and more even slices. The cheaper, lightweight models might look similar from a distance, but the difference becomes clear as soon as the blade meets the meat.
My slicer weighs over 40 pounds (18.14 kilograms), and that extra mass is a good thing. It doesn’t wander across the bench or rattle against the table. Instead, it stays steady while the carriage glides back and forth.
Another helpful way to judge build quality is to check how much of the frame is made from cast alloy or stainless steel. Plastic fittings and lightweight trays tend to flex under pressure, which affects both safety and slice quality. For long-term reliability, go for solid metal parts that can be disassembled and cleaned without bending or warping.
Blade Diameter & Food Tray Size
The blade diameter controls how large a piece of meat you can cut. For most home projects, an 8- to 10-inch blade is perfect. If you’re working with whole prosciutto legs or large cured hams, a 12-inch model gives the reach and surface area you’ll need. I find 10 inches to be the sweet spot — big enough for bresaola or coppa, small enough to store easily when not in use.
Tray size matters just as much. A wide, smoothly gliding tray helps maintain a clean slicing motion. You can also trim your meat to fit the tray, which makes slicing easier and reduces uneven pressure near the end of a cut.
Safety, Cleaning & Upkeep
Every commercial kitchen I’ve worked in treats the slicer as one of the most dangerous tools in the room. That’s because it combines a razor-sharp blade with a motor that doesn’t stop instantly. Respecting the machine and using a few basic habits will keep you safe and your slicer performing like new.
Simple Safety Habits
The first rule is straightforward: always switch off the main power when you’re not slicing. Even if you’re just stepping away for a few seconds, get in the habit of cutting the power. The second rule is to close the blade fully between runs. An open blade while cleaning or rearranging the bench is a common cause of injuries, even for professionals.
Keeping these habits automatic ensures that even when you’re working quickly, safety comes first. It also prevents accidental nicks on the cutting edge that can dull or chip the blade over time.
Cleaning Routine
Cleaning a slicer takes a bit of patience but becomes second nature. I usually spend about 10–15 minutes after each use. Unplug the machine, remove the blade guard and carriage, and wipe everything down with warm soapy water. Avoid harsh chemicals or abrasives that can scratch the blade or dull the finish.
Let all parts air dry before reassembly, especially around the adjustment dial and sharpening stones. A light coat of food-safe mineral oil on moving parts helps prevent corrosion, particularly in humid environments. After a few cleanings, the process becomes as routine as washing a cutting board.
Alternatives: Using a Salumi or Prosciutto Knife
Not everyone wants to commit to a slicer, and that’s fine — a dedicated salumi or prosciutto knife can do a decent job with practice. I still use mine for smaller projects or when I’m slicing directly from a cured leg. The key is using the right knife design and taking your time.
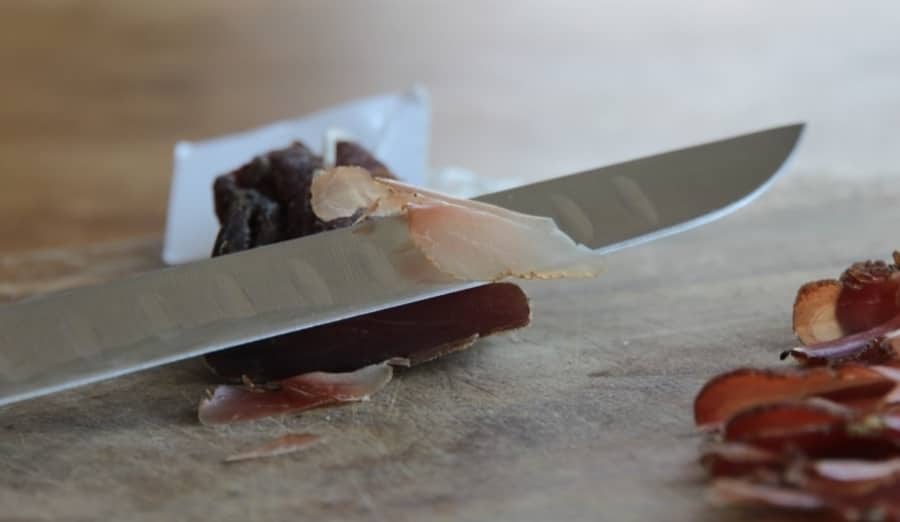
Granton Blade
Look for a knife with a Granton edge — those small oval indentations along the blade. They allow tiny pockets of air to form between the meat and the steel, reducing sticking and drag. The result is a cleaner, smoother stroke that glides through cured meat without tearing.
Technique & Patience
The most significant difference between using a knife and a slicer is the time required. Slow, steady strokes make all the difference. Keep your knife razor sharp, use a smooth slicing motion rather than pressing, and bring the meat to room temperature before cutting. A flexible blade helps follow the contours of larger cuts, such as prosciutto or speck.
Whether you go for a salumi knife or a precision slicer, the goal is always the same — to highlight the flavor and texture of the cured meat. The thinner the slice, the more it melts on your tongue, releasing every bit of aroma you worked months to develop during curing.
You will never cut with a knife as thin as a fit for purpose deli slicer.
Getting the Most Out of Your Slicer
Once you’ve chosen the right slicer, a few habits can keep it working perfectly for years. These are the little things I’ve learned after hundreds of slicing sessions at home and in commercial kitchens.
- Semi-freeze to get wafer thin, if fat gets soft due to ambient temperature
- Sharpen the blade regularly — even the best slicer dulls over time. A sharp blade glides effortlessly and reduces waste.
- Keep your slicer covered when not in use to protect it from dust, moisture, and accidental contact.
For those serious about charcuterie at home, investing in one of the models I’ve listed in my guide to deli slicers for home use (models and specs) is easily worth it. Once you have that precision and smoothness, it becomes one of the most rewarding tools in your setup.’
Frequently Asked Questions
What blade size is best for home slicing?
For most home setups, an 8 to 10 inch blade is ideal. Larger 12 inch slicers are great if you regularly slice whole prosciutto or large cured hams.
How often should I sharpen my slicer blade?
Every 8 to 15 slicing sessions works well. With a built-in sharpener, do a quick 30-second primary grind and a short finishing pass to keep the edge smooth.
Can I slice foods other than cured meat?
Yes. You can slice cooked meats, cheese, and bread. Just clean the machine carefully between different foods to prevent contamination and flavor transfer.
Why avoid serrated blades for dry-cured meat?
Serrated blades tend to tear rather than cleanly slice. A flat, smooth blade cuts thin, even slices of cured meat without damaging the texture.

Tom Mueller
For decades, immersed in studying, working, learning, and teaching the craft of meat curing, sharing the passion and showcasing the world of charcuterie and smoked meat. Read More
Excellent Tom.
Great insights.
Thanks Geoffrey for the encouragement!
Very helpful, can’t find much other info. out there. Can you recommend any specific models, by any chance?
Yes the link here to some entry level options. Or if you want to invest – Sirman slicer!
Thanks so much!
No worries, thanks for the vote of confidence! 🙂
Are there any small meat slicer that do a good job of thin slices ?
I want paper thin slice of my 2 inch wide salami. But I don’t want a 10 inch blade machine !
Are there high quality but thiny meat slicers that actually work ?
I’ll put a link in this post, to another article with some suggestions, KWS do one thats 6 or 7″ – https://eatcuredmeat.com/deli-slicers-for-home-use/