Yes — you can prepare a charcuterie board ahead of time. I do it regularly to remove the last-minute rush. The key is simple: keep it cold, stop airflow from drying it out, and leave the crunchy items (like crackers) until just before serving.
If I’m hosting, I’ll either (1) prepare the entire board and wrap it tightly, or (2) prep the meats and cheeses the day before and assemble everything fresh on the day. Both work. What matters is controlling oxygen exposure and fridge dryness so the cured meat and cheese stay looking and tasting good.
Key Points:
- Preparation can alleviate last-minute stress when creating a charcuterie board; it emphasizes quality over quantity.
- Utilizing plastic wrap or compostable alternatives is recommended for preserving freshness.
- Tips for enhancing the board include arranging contrasting colors, using folding techniques for cured meats, and slicing cheese in advance.
- Preservation methods for cured meat and cheese include beeswax wraps and proper storage to maintain freshness.
Of course, Eat Cured Meat is about making cured meats at home, but I still buy quality products to build a board that feels special. When I’m prepping ahead, I lean more minimalist: fewer items, higher quality, and a layout that looks intentional rather than packed edge-to-edge.
You can either prepare the entire board or prepare the cured meat and cheese up to 24 hours in advance, as long as the board is wrapped and refrigerated beforehand.
Prep Timeline (What I Do)
| When | What To Prep | How To Store It | Why It Works |
|---|---|---|---|
| 24 hours before | Cut cheeses, prep ramekins, prep pickles/olives | Cheese wrapped or in container; wet items sealed | Biggest time-saver, minimal quality loss |
| 12–24 hours before | Place cured meats on the board OR stack/portion them | Assemble the full board if you want it “ready to grab” | Stops drying and keeps meat flexible |
| 2–4 hours before | The board looks finished and stress-free | Wrap again and refrigerate | Add crackers, bread, fragrant herbs, delicate fruit |
| 30–60 minutes before | Add crackers, bread, fragile herbs, delicate fruit | Let it come to Room Temp for serving | Crunch stays crunchy, greens stay fresh |
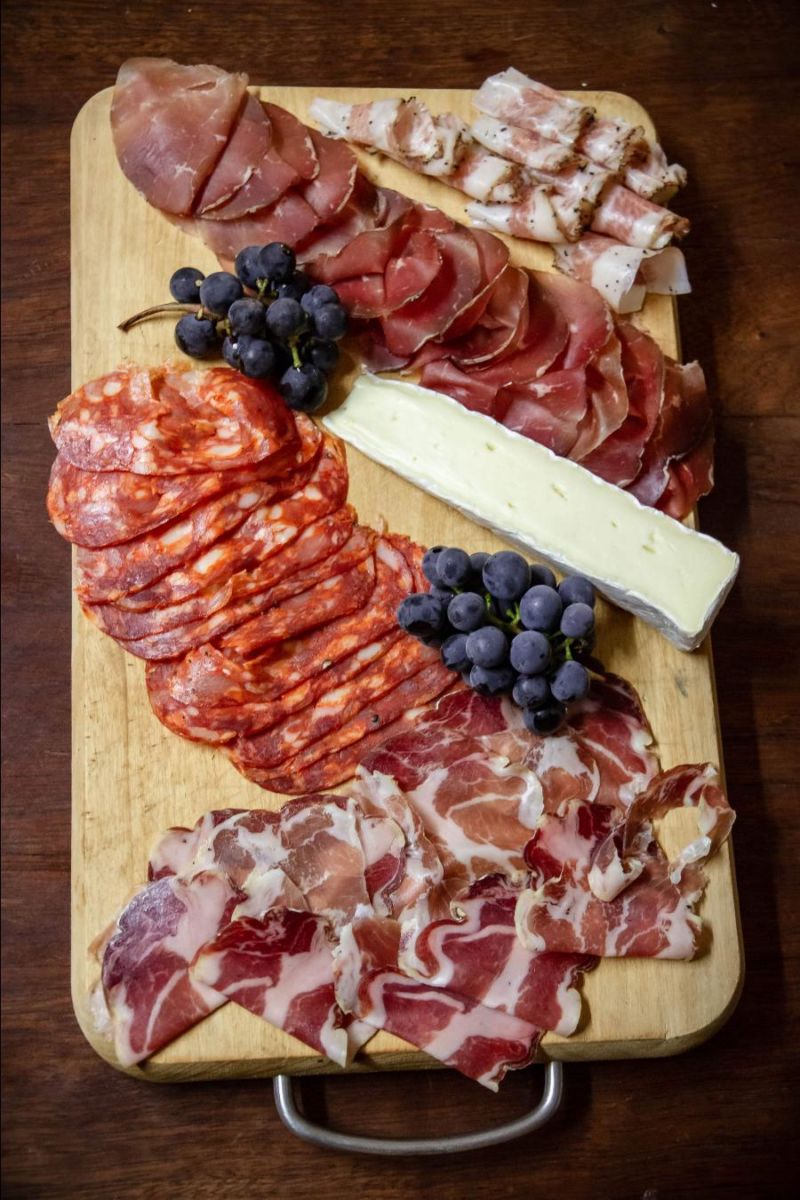
My inspiration comes from classic Italian antipasti platters — the kind that look simple, yet every item is chosen intentionally. When we’ve spent time in Italy, I’ve noticed the best boards aren’t overloaded. They balance salty meats, creamy cheeses, something acidic, something crunchy, and a few bright colors.
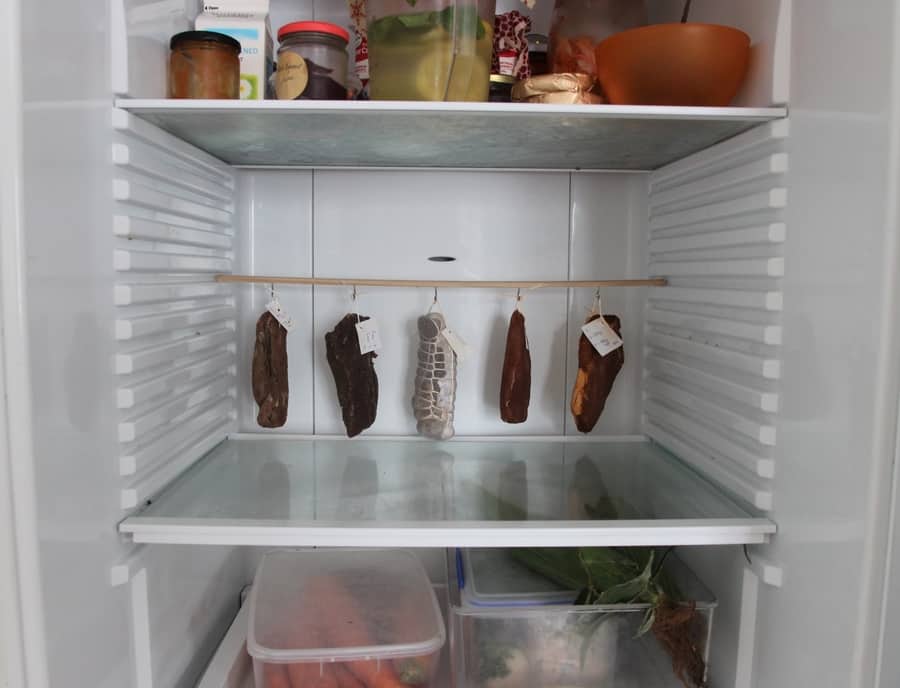
If you’re preparing ahead, remember this: your fridge is a drying machine. Most fridges sit in low humidity, and any airflow will dry out sliced meat and cut cheese fast. That’s why wrapping matters more than almost anything else.
In the next section, I’ll break down exactly how I wrap and refrigerate a prepared board so the meats stay soft, the cheese doesn’t dry out, and nothing picks up weird fridge smells.
Charcuterie Board Preparation & Storage Tips
If I am preparing the whole board the night before, I focus on two things: cold temperature and oxygen control. Those two factors determine whether everything still looks vibrant the next day or slightly tired and dry.
The way you fold cured meat actually helps when prepping ahead. When slices are layered or gently folded instead of laid flat, they are less likely to stick together and tear the next day. It also keeps the board looking three-dimensional rather than compressed and flat.
Wrap It Tight, Keep It Cool
If I fully assemble the board, I wrap it tightly in cling film. The wrap needs to sit flush against the food, not tented above it. Air gaps equal drying. If the board is too large, I use two layers and overlap them.
The fridge is not kind to exposed food. Air circulation inside modern refrigerators quickly pulls moisture away. That is great for leftovers in sealed containers, but not for open-sliced prosciutto or salami. Tight wrapping significantly slows the process.
If you prefer eco-friendly alternatives, a compostable wrap works similarly. Beeswax wraps are excellent for individual cheeses or salami sticks, but usually not large enough for an entire board unless you own oversized sheets.
Preparing the Night Before (My Method)
Often, I do not assemble the full board until the day of serving. Instead, I prep in components:
- Slice cheese and store it wrapped or in airtight containers.
- Portion cured meats and keep them layered in deli paper or loosely folded.
- Prepare olives, pickles, and dips in small sealed containers.
- Leave crackers and bread completely separate.
The next day, I simply arrange everything and add the final touches. This takes ten minutes instead of an hour.
I also keep dips like olive oil and balsamic separate until serving. Acidic liquids can slowly soften nearby items if left on the board overnight.
What Not To Add Early
This is where many people go wrong when preparing ahead:
- Do not add crackers the night before. They soften.
- Do not add fresh herbs too early. They wilt.
- Do not cut fruit too early. It oxidizes.
- Do not leave unwrapped prosciutto exposed. It dries fast.
If you avoid those mistakes, a next-day charcuterie board looks nearly identical to one assembled fresh.
In the next section, I will go deeper into cured meat behavior overnight — especially sliced prosciutto, whole salami, and the difference between artisan dry-cured products and fast commercial versions.
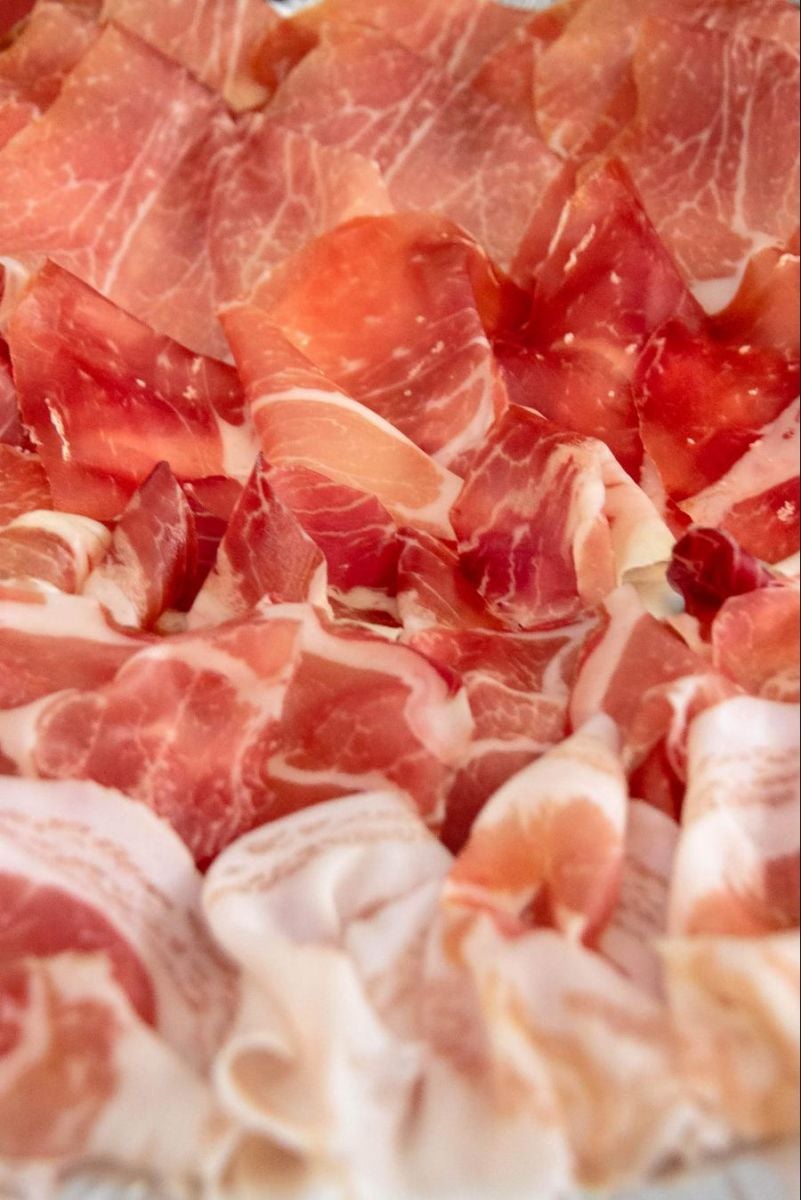
Whole Muscle Salumi & Dry Cured Salami
Prosciutto, Bresaola, Genoa, Picante (Pepperoni)
When preparing ahead, whole muscle salumi behave differently from soft supermarket-style sliced meats. Understanding that difference makes prep much easier.
If you’re buying prosciutto from the deli, it is already sliced thin. Once sliced, it becomes far more vulnerable to oxygen and fridge airflow. In my experience, it is best within 3–5 days. Sometimes up to a week if stored properly, but texture slowly changes.
I’ve found prosciutto stores better loosely wrapped in deli paper inside a lightly sealed bag rather than tightly packed in a rigid plastic container. Containers can trap condensation, which leads to surface moisture and occasional sliminess.
Whole sticks of dry-cured salami are more forgiving. If you remove them from plastic and let them sit wrapped in paper or beeswax in the fridge, they slowly firm up rather than spoil. The flavor often intensifies slightly as moisture continues to reduce.
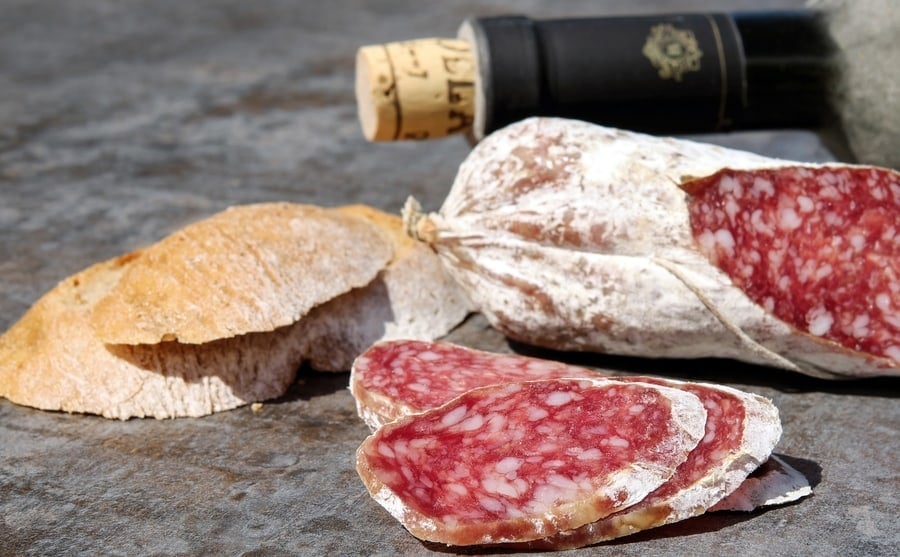
If you buy from an artisan producer, that salami has already been drying for months. It tends to hold up better overnight than rapid-acidified supermarket versions, which are softer and contain more residual moisture.
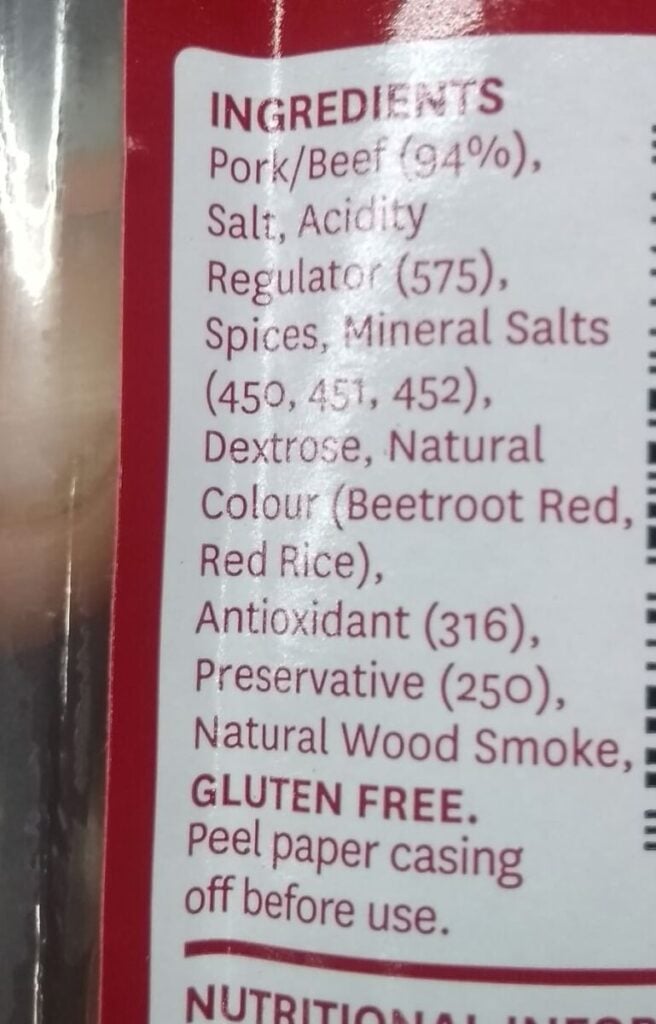
Commercial salami made in days rather than months tends to weep slightly once opened. If preparing ahead, keep it tightly wrapped and avoid stacking it directly under heavy cheeses where moisture can transfer.
Other Charcuterie Preparation
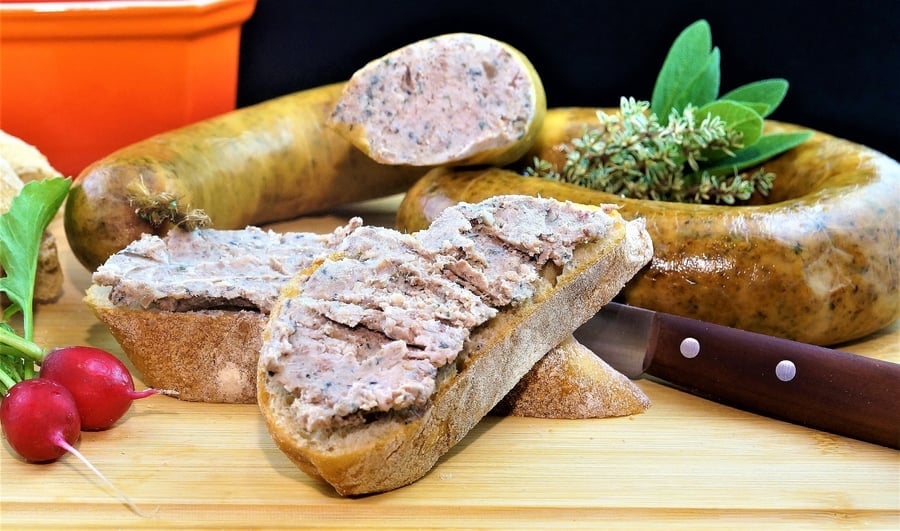
Rillettes and pâtés are different again. Rillettes are preserved in fat and generally hold up overnight if sealed properly. The fat layer acts as a barrier against oxygen.
Pâté, however, behaves more like fresh meat. It should be eaten relatively soon after opening. If preparing ahead, keep it sealed in its original container and transfer to the board shortly before serving.
Anything highly moist or spreadable should be added last to prevent it from softening nearby crackers or from visually mixing into the meat.
What some inspiration? Here I look at different classic from around the world, many examples and contrasts, and styles are contrasted – I called it ideas and inspiration for charcuterie boards.
Final Timing Before Serving
Even when I’m preparing ahead, I always take the board out of the fridge 30–60 minutes before guests arrive. Cured meats taste noticeably better at cool room temperature rather than straight from the fridge.
That short rest allows fats in the salumi to soften slightly, aromas to develop, and texture to improve. It makes a visible difference.
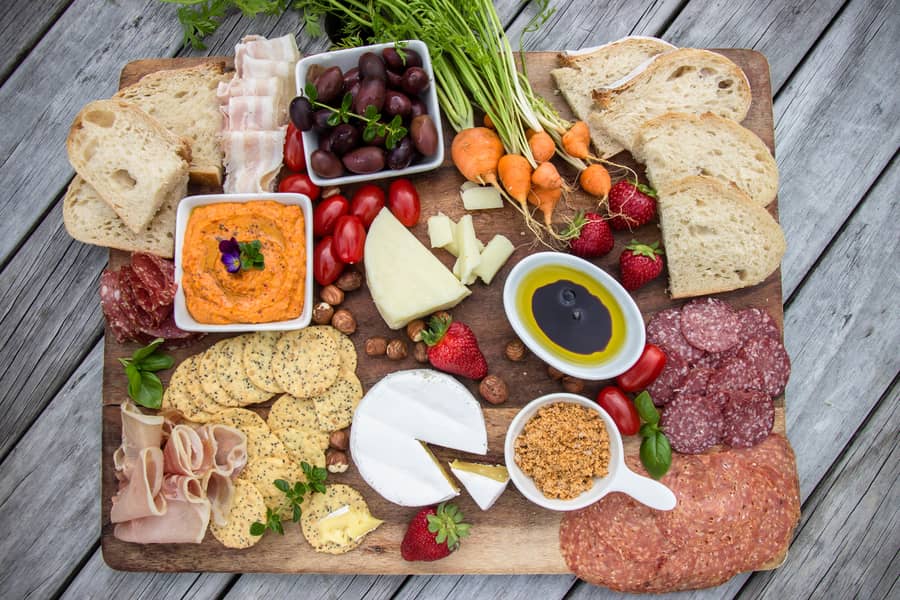
Contrasting Colors & Visual Balance
When I prepare a board ahead of time, I still think visually. A good charcuterie board is not just about preservation; it is about contrast. Reds from salami and prosciutto, creamy yellows from cheese, deep greens from olives or herbs, and something bright like pickled vegetables or fresh fruit.
If I am prepping the night before, I avoid placing very moist ingredients directly against sliced meats. Moisture transfer dulls color and softens texture. Instead, I use small ramekins for olives, chutneys, and oil-based dips so everything stays defined.
TIP – If you buy plain brined olives, add dried oregano, chili flakes, or citrus zest and leave them sealed overnight. The flavor deepens and it feels far more intentional the next day.
Folding Cured Meat Techniques
Properly folding and layering cured meat helps both presentation and overnight storage. If slices are stacked flat, they stick together. If gently folded or rolled, they separate more easily and keep structure.
For larger slices of salami, I often make a small slit halfway and fold inward to create a standing shape. Prosciutto can be loosely rolled or overlapped in waves. This keeps air circulation minimal while still looking full and three-dimensional.
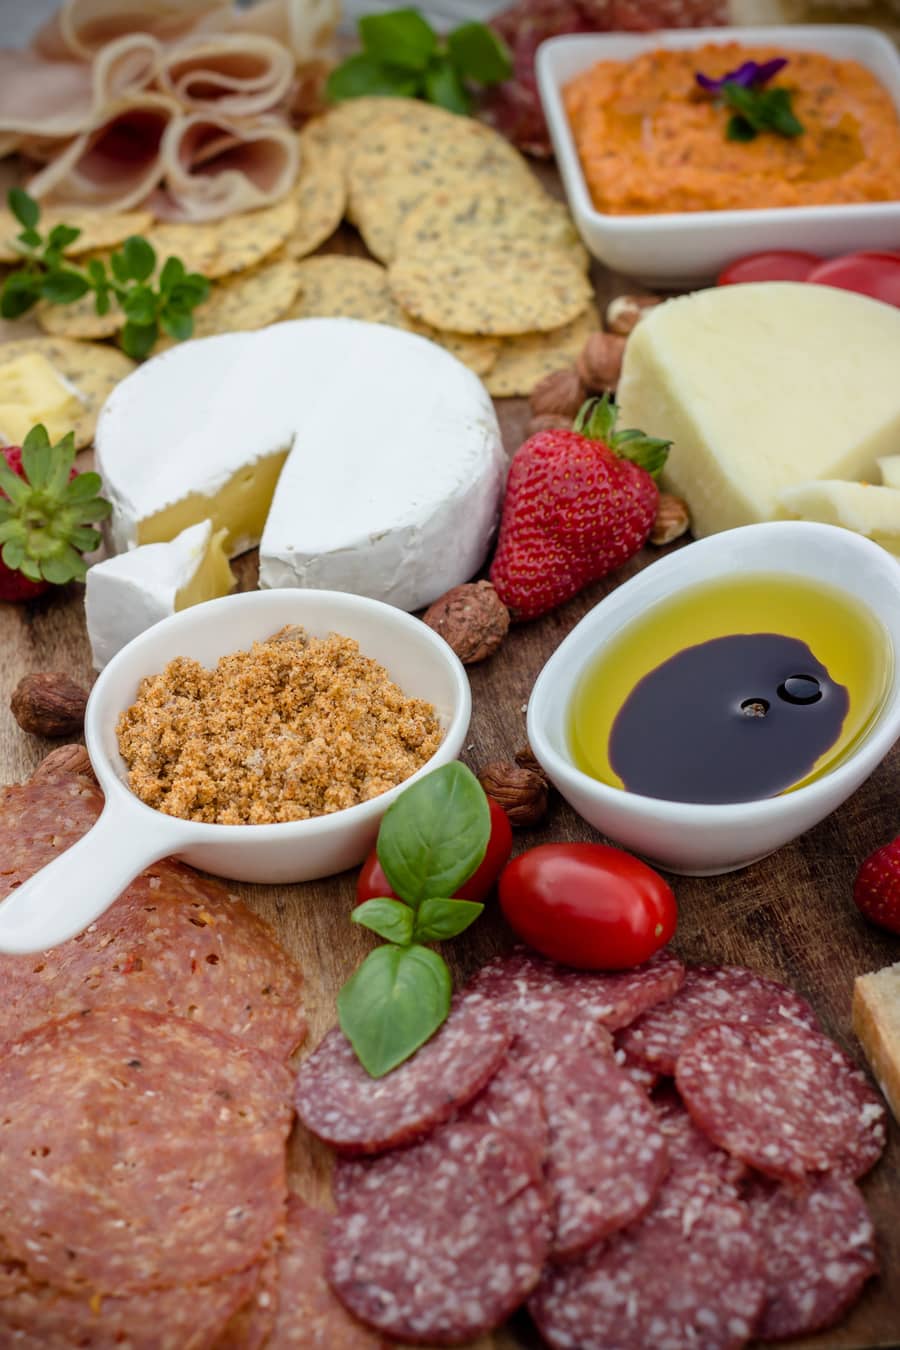
Cheese Arrangement & Slicing Ahead
I prefer slicing cheese ahead of time rather than placing a whole block on the board. Guests can serve themselves easily and it avoids knives moving between meats and cheeses.
Hard cheeses hold up extremely well overnight if wrapped tightly. Semi-soft cheeses need more protection from airflow. Very soft cheeses are best added closer to serving time.
If storing sliced cheese overnight, stack slices with parchment between layers or keep them in a small airtight container to prevent drying around the edges.
Ramekins & Separation
Small ramekins or even egg cups are useful when prepping ahead. Oil, honey, chutneys, or mustards should never sit directly on the board overnight next to dry meats.
Separating wet from dry ingredients keeps textures intact and makes the final board look clean rather than muddled.
Quality Makes Prep Easier
Higher-quality cured meats behave better when stored overnight. Traditional dry-cured salumi continue to dry slowly rather than degrade quickly. That makes them ideal for preparing ahead.
Whether you make your own cured meats or source them from small producers, starting with good ingredients reduces stress dramatically. The board feels structured, balanced, and confident rather than overloaded.
Preparing a charcuterie board ahead of time is not just possible — it is often smarter. With proper wrapping, separation of moist items, and smart timing, you can walk into your event relaxed and ready.
For a Visual Feast of charcuterie boards, check out this page I put together for ideas.
Final Timing Before Serving
If you prepared the board the night before, remove it from the fridge 30–60 minutes before serving. Cured meats taste better slightly cool rather than fridge-cold, and cheese softens just enough to improve texture and aroma.
Add crackers, fresh herbs, delicate fruit, and bread just before guests arrive. That keeps everything crisp and vibrant.
With tight wrapping, cold storage, and smart timing, preparing a charcuterie board ahead of time is not only possible — it is often the easiest way to host without stress.
Can I prepare a charcuterie board 24 hours in advance?
Yes. You can prepare a full charcuterie board up to 24 hours ahead if it is tightly wrapped and refrigerated. For best results, add crackers, bread, and delicate herbs shortly before serving.
Is it better to assemble the whole board or prep ingredients separately?
Both work. I often slice cheeses and portion meats the night before, then assemble the board the day of serving. This keeps textures fresh while still saving time.
How do I stop cured meats from drying out overnight?
Limit oxygen exposure. Wrap the board tightly with cling film or compostable wrap and keep it cold. Avoid leaving sliced meats exposed to fridge airflow.
Should crackers and bread go on the board overnight?
No. Crackers and bread soften in the fridge. Add them 30 to 60 minutes before serving so they stay crisp.
How long does sliced prosciutto last once opened?
Sliced prosciutto is best within three to five days. It can sometimes last up to a week if wrapped well and protected from drying, but texture slowly changes over time.

Tom Mueller
For decades, immersed in studying, working, learning, and teaching the craft of meat curing, sharing the passion and showcasing the world of charcuterie and smoked meat. Read More
How do you keep the meats from drying out and getting Dark in color when creating grazing tables??
Depends on the type of dry cured meat and the season.
If you buy some and it’s within a week, I just keep in a airtight container in fridge.
If it’s a whole muscle, it just it left hanging around the kitchen (it’s already preserved ie. pancetta)
If it’s more then a week, I vac pac seal it.
How do you prevent the crackers from getting stale?
Eat them or remove/restrict oxygen or dont put them next to wet things