Curing meat at home is one of those crafts that can be done in countless ways — from using a regular fridge to building a fully controlled curing chamber. I’ve explored nearly every option over the last couple of decades, and each setup comes with its own advantages, limitations, and cost.
Whether you’re interested in salami, pancetta, coppa, or any other dry-cured meat, understanding what equipment you really need (and what it’ll cost you) is the first step toward consistent, safe results. This breakdown will walk through the main types of setups — from free to full professional — and the kinds of cured meat each one is suited for.
How Much Does a Meat Curing Chamber Cost?
Dry-curing meat successfully requires an environment that stays around 50–60°F (10–15°C) with 65–80% relative humidity. These conditions allow moisture to leave the meat gradually while salt inhibits spoilage. For fermented products like salami, the environment must be even more precise and consistent.
Depending on your budget and level of control, there are several ways to create this environment — some that cost nothing, and others that rival commercial setups in restaurants and artisan salumerias. Below is an overview of these options and the general price range you can expect for each.
Option 1: Cellar, Basement, or Garage (Free)
This is the most traditional and budget-friendly method. A naturally cool and moderately humid space, like a basement or garage, can work well in autumn or spring. These areas often hover around the required 50–60°F with decent humidity. However, they can also be inconsistent — prone to wide temperature swings or pest problems.
I’ve hung meat in a cellar with great results, but only during cooler seasons. A digital hygrometer is essential for testing conditions before you commit. And don’t forget: in traditional European curing, winter was always the preferred season for a reason — stable temps, low bug activity, and steady drying.
Option 2: Regular Kitchen Fridge (Minimal Cost)
If you want to try dry-curing small pieces of meat without investing in equipment, your kitchen fridge can actually work. I’ve used mine for quick pancetta, small bacon slabs, and beef strips under 200 grams. Just keep in mind that fridges run much colder and drier than ideal, often around 35–40°F with 25–45% humidity.
That dryness can lead to case hardening — where the outside of the meat dries too fast and seals in moisture. For short-term projects or lean meats with minimal fat, this isn’t a deal breaker. But you’ll be limited in scale and consistency.
Option 3: DIY Chamber Conversion ($150–$500+)
This is where things start getting serious. Converting a second-hand fridge into a controlled curing chamber is one of the most cost-effective ways to cure 5–20kg of meat reliably. With a temperature controller, humidity controller, humidifier, and fan, you can create near-perfect curing conditions at home.
I’ve built multiple versions of this kind of chamber — some simple, some over-the-top. Depending on what gear you already have, the cost for components can range from $150 to $500 USD. If you want to cure salami, this level of control is essential.
For me, this is the slowest of foods in a time when life happens very fast — it’s therapeutic and tasty.
What You’ll Need for a DIY Curing Chamber
If you’re serious about dry curing — especially larger pieces or fermented salami — then a DIY curing chamber is the sweet spot for cost and control. I’ve built several of these from second-hand fridges, and they’ve helped me consistently cure everything from pancetta to 80kg of hanging salami.
The idea is simple: retrofit a fridge with components that let you control temperature, humidity, and airflow. Here’s what you’ll need, how it all fits together, and a rough idea of what it will cost.
1. Fridge or Wine Cooler
Any upright fridge or wine cooler can be converted into a curing chamber. Wine fridges often run warmer by default, which is handy, but I’ve had great results with regular fridges, too. The main thing is interior height for hanging meats and space for airflow components.
2. Temperature & Humidity Controllers
You’ll need plug-and-play controllers to regulate the environment. One controller switches the fridge compressor on and off to maintain 10–15°C. Another manages a humidifier or dehumidifier to hold 65–80% humidity. This is the most critical part of the setup.
I use INKBIRD devices for both functions — they’re easy to set up and very reliable. For anyone starting out, they simplify the whole process and make troubleshooting much easier.
More on that here in my INKBIRD humidity controller review and my full guide on how to build a curing chamber.
3. Humidifier (and Sometimes Dehumidifier)
Most fridges are too dry to cure meat properly. A small ultrasonic humidifier solves this quickly. In larger builds or when curing a lot of fatty cuts, excess humidity can build up — so a mini dehumidifier may be needed to keep levels stable.
In my big chamber builds, I’ve used both at different times. Some meats (especially salami) naturally release moisture, while leaner cuts need added humidity. Having both options on hand gives you flexibility.
4. Air Circulation Fan
A small fan is essential to avoid mold issues and ensure even drying. I use USB or PC-style fans to gently move air around the chamber. You don’t want strong airflow — just enough to keep things from going stale or trapping moisture in corners.
Some people go further with HEPA filters and intake vents. I’ve kept it simpler with slightly offset door gaskets and passive ventilation, and that’s worked well for most of my home builds.
5. Heating Element (for Salami Fermentation)
Not required for whole muscle curing — but if you plan to ferment dry-cured salami, you’ll need to raise the temperature for 1–2 days. A heat mat, panel heater, or low-wattage bulb on a thermostat does the job. It’s not difficult, just another layer of control to build in if you go down the salami route.
DIY Curing Chamber Component Cost Breakdown
Now that you know the essential parts of a curing chamber, here’s what they actually cost. If you already have a fridge, this project can be surprisingly affordable — but there are a few key areas where spending a bit more can prevent ruined meat later on.
I’ve broken down typical prices below based on my own builds and helping others set up theirs. These numbers reflect what you might expect when shopping online or at big box stores.
Estimated Costs
(Please note I’m generalizing; this is just to give an indication)
| Component | Typical Cost (USD) | Notes |
|---|---|---|
| Second-hand fridge or wine cooler | $0–$150 | Often found free or cheap online |
| Temperature controller | $25–$50 | INKBIRD or similar plug-in controller |
| Humidity controller | $25–$60 | Same as above — often bundled with temp control |
| Ultrasonic humidifier | $15–$40 | Small, refillable tank (1–2L ideal) |
| Mini dehumidifier (optional) | $30–$80 | Useful for large or fatty projects |
| Air circulation fan | $10–$20 | USB or PC fan is usually enough |
| Heating mat or panel (optional) | $15–$35 | For salami fermentation phase only |
| Total (basic setup) | $100–$300 | Varies depending on what you already have |
Budget Smart, But Don’t Cut Corners
I’ve seen people try to save $10–20 by buying off-brand controllers or skipping a humidifier. But if you’re hanging $200 worth of meat in that chamber for 6 weeks, that’s a poor tradeoff. One failed project can cost more than doing it right the first time.
That’s why I always recommend sticking with plug-and-play controllers from brands like INKBIRD, using food-safe components, and setting up a proper test run before loading in your first real batch of meat.
Upgrade Gradually Over Time
You don’t need everything on day one. I started with just a fridge, temp controller, humidifier, and fan — no heating or dehumidifier. As I scaled up, I added extra sensors, backup tanks, and passive venting. Build what works for you now, and refine it as you learn.
The good news is: once it’s dialed in, a DIY curing chamber can last for years and handle everything from whole muscle cures to advanced salami projects. In fact, I still use mine alongside commercial options because they work that well.
Buying a Professional Curing Chamber
For those who want a fully automated solution — or simply don’t have the time or inclination for DIY — there are now several commercial curing chambers available. These range from compact units meant for home enthusiasts to professional-grade systems used in small butcheries and salumerias.
I’ve tested a few of these over the years, including both entry-level and advanced units. While they offer convenience and precision, they also come with a hefty price tag — and some unexpected quirks.
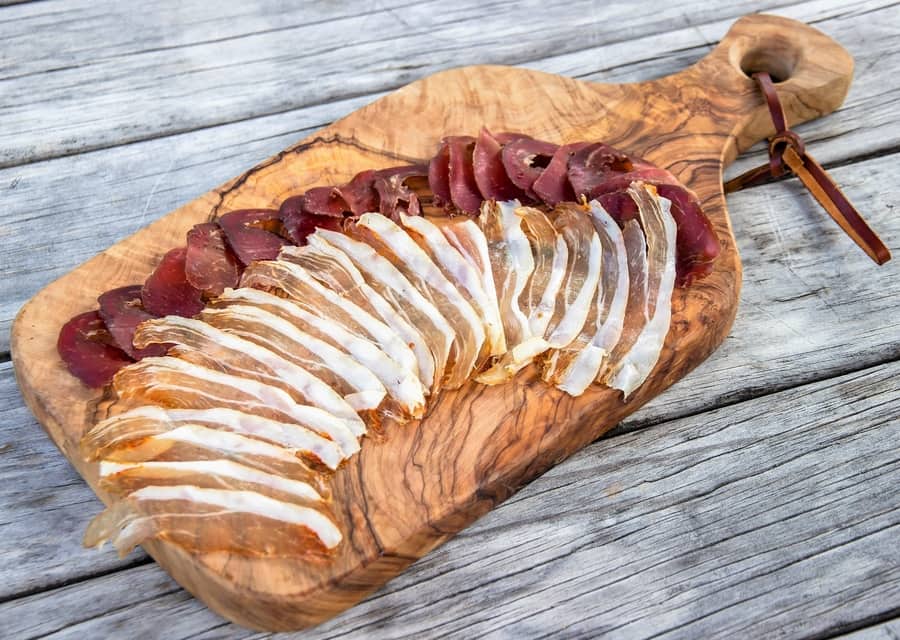
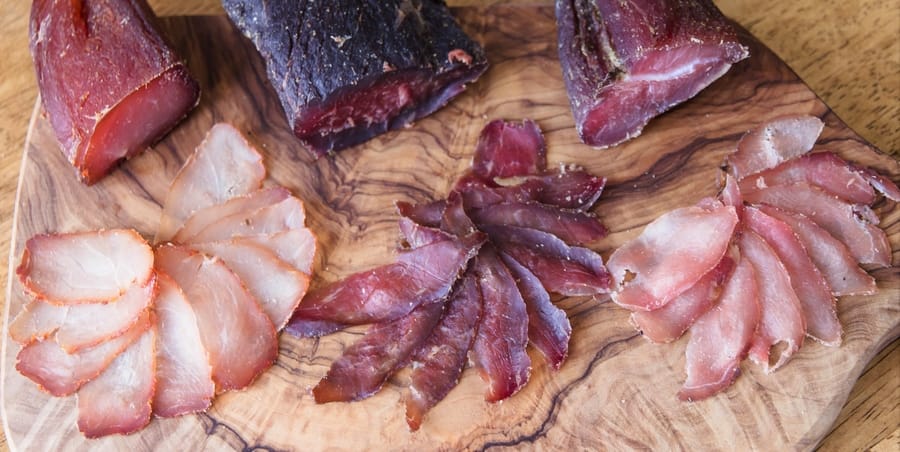
Dry Ager and Dry Curing Fridge
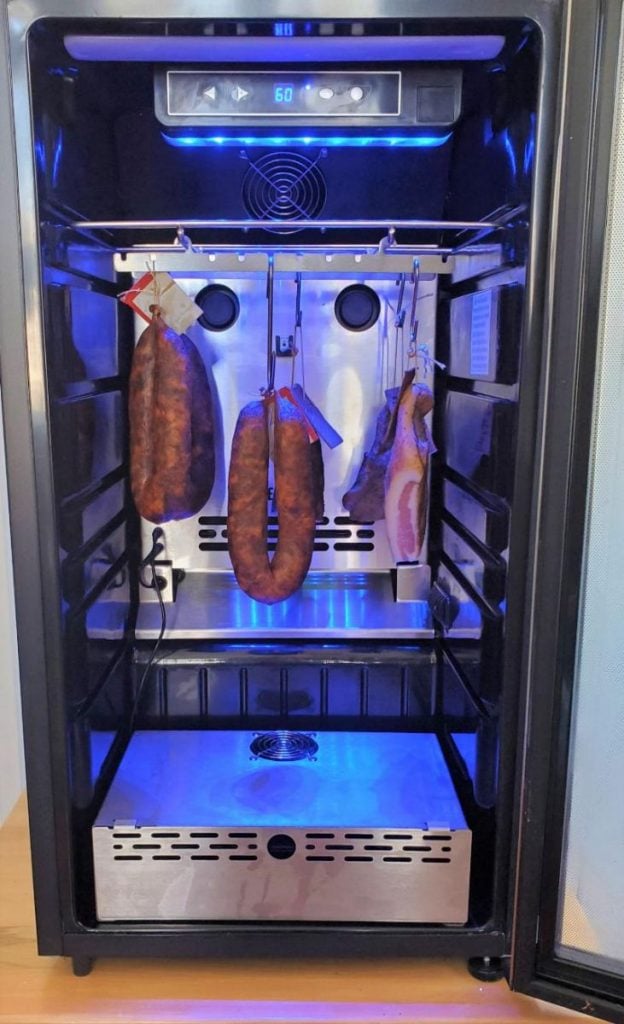
This dry-aging chamber was originally designed for beef, but I used it to cure pancetta and smaller salumi projects. It’s compact and convenient, with built-in humidity and temperature control — but the average humidity stayed around 75%, with some fluctuation. That variability caused some case hardening over time, especially with fattier cuts or long cures.
It’s a good option for beginners who want something off-the-shelf, but in my experience, a well-built DIY chamber performs just as well — if not better — for a fraction of the price.
Professional Curing Cabinet ($15,000–$30,000+)
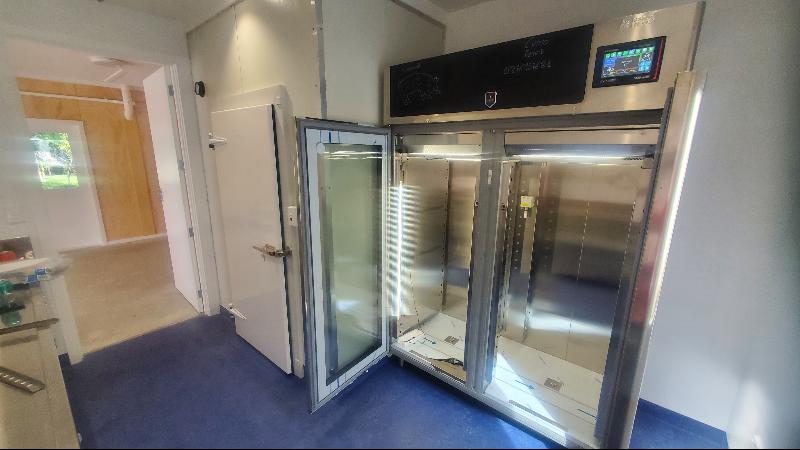
This Italian-made system is at the top end of what’s available commercially. It features multiple programmable settings for different salumi or charcuterie styles, antibacterial interior materials, and exceptional airflow control. My good friend installed one of these for his home curing room — and it’s stunning to look at, but it came with a steep learning curve.
Unless you’re producing cured meat on a commercial scale, this level of investment is hard to justify. The software is powerful but requires training, and it’s easy to misconfigure things like cycle frequency or dew point thresholds if you’re not experienced.
DIY vs. Professional Chambers
In my experience, a well-built DIY fridge chamber using basic components can match or even outperform compact commercial options — especially when it comes to adaptability and cost-effectiveness. You’ll get better results over time because you understand how each variable works, rather than relying on presets.
Professional units are great if you want plug-and-play precision, or if you’re producing large volumes regularly. But for most home curers, the flexibility and low cost of DIY just makes more sense — especially when it can handle salami, whole muscle, and even other uses like aging, drying herbs, or fermenting drinks.
Expert Tip: Test Your Chamber Before You Hang Meat
Before loading your chamber with salami or a slab of pancetta, run it empty for at least 48 hours. Use a hygrometer and thermometer to track whether it holds a steady range of 50–60°F (10–15°C) and 65–80% humidity.
This test run lets you fine-tune settings, identify airflow issues, or see if your humidifier tank needs refilling more often than expected. It also gives you peace of mind before committing valuable meat to the environment.
Alternatives to a Curing Chamber
If building a chamber isn’t an option right now, you can still get started:
- Use a regular fridge for small, lean pieces (under 200g) — pancetta works well this way.
- Hang in a cellar or garage during cooler months — monitor humidity and airflow.
- Try short-term fridge curing for quicker projects (days/1-2 weeks) like bacon or cured duck breast.
How much does it cost to build a curing chamber?
Anywhere from $100–$300 USD depending on what components you already have. Used fridges are often free or cheap, while controllers and humidifiers are very affordable.
Is a curing chamber necessary to make salami?
Yes — salami needs strict control of humidity and temperature during fermentation and drying. A chamber allows you to create a safe, stable environment.
Can I dry cure meat in a normal fridge?
You can dry cure small pieces of meat in a regular fridge if you’re careful. Lean cuts under 200g work best, but larger pieces risk case hardening due to low humidity.
What’s better: DIY or professional curing chambers?
For most home setups, a DIY chamber performs just as well — or better — than many plug-and-play units. Professional chambers are great, but expensive and not always necessary.
Got a question about chamber setup or something didn’t quite go to plan? Feel free to leave a comment below — I’m always happy to help other meat curers dial in their setup.

Tom Mueller
For decades, immersed in studying, working, learning, and teaching the craft of meat curing, sharing the passion and showcasing the world of charcuterie and smoked meat. Read More
Hi,
I would like to have more info about the professional options.
Thanks
Arianna
Hi there,
I have email you a private message with more information.
All the best,
Tom
Hi Tom,
We are looking at a start up around air drying Wagyu from our farm into several styles of charcuterie (primarily spiced) and having the option when not using for charcuterie that we can offer dry aged steaks at times as well. We found an ideal option in the Maturmeat 58″ Glass Door Stainless Steel Twin Meat Aging Cabinet – 220 lb. + 220 lb. / 100 kg. + 100 kg., 220V, 3700W as it allows two separately computer controlled curing processes side by side. We also want to cold smoke during the process using a tray of pellets in the bottom of either side without affecting the other side during the process. The cost is however way beyond us and there are not many other options in Australia to set and walk away (we have other businesses needing us), and/or they are too small (we hope to retail, food service/wholesale and eventually export thus HCAPP data logging is important), and/or they are targeted at dry aging steak and maturing salami which is secondary to our Bresaola, Basturma, Pastrami etc. What solutions may you perhaps have for us with a little electrical reconfiguration if required?
Chris
Hey Chris,
Check out the courses page at the top of each post, there is a booklet you can get.
I would look at a refrigerated shipping container or large commercial fridge. Then get electrical expertise to hardwire controllers for temp and humidity. I think something like commercial mushroom humidifier could work.
Yes commercial charcuterie chambers start from $20-30k for sizes suite for that.
Cheers
Tom
Are you aware of any smaller professional units? I am trying to decide if I want to put a small meat curing chamber or dry aging unit in our basement. Regardless of which one, I am hoping to do something that is sized more like a mini-fridge. Any suggestions would be appreciated.
Check out the free ebook book on this page, or have a look at sausage makers they have some commercial curing fridges price gap between DIY and professional is considerable!
Have you done (or used) the Reserve 50?
Results please.
Never heard of it, looks small capacity and limited hanging options. If they send me one for free, I’ll definitely review it! 🙂