In my first 10 years of curing meat at home, I made plenty of mistakes. There wasn’t much good information available at the time—this was back in the early 2000s when the internet was still pretty limited and niche forums were all you had.
Much of what I learned came from trial and error. Some errors were minor setbacks, but others ruined entire projects.
After now learning techniques across Europe, America, and the world, I’ve learnt a lot.
These days, there’s a lot more guidance out there, but many beginners still fall into the same traps. I want to share the most critical mistakes I’ve made so you can avoid them right from the start.
Common Mistakes When Curing Meat
Let’s break down the most common and costly errors I’ve made while curing meat. I’ve organized them so you can understand what happens, why it’s a problem, and what to do instead.
Over-Salting the Meat During Curing
One of the most frustrating mistakes early on was using too much salt. The classic “salt box” method involves burying the meat in salt, which can easily lead to over-salting, especially if you’re experimenting with different cuts or sizes.
It worked for centuries, but it’s inconsistent. Different muscle structures, fat content, and moisture levels all influence how the salt penetrates. A piece that’s too salty isn’t fun to eat and can’t be fixed once the damage is done.
Learning about alternative techniques helped me shift away from traditional saturation methods, especially for whole-muscle cures where consistency matters.
Equilibrium curing was the answer to this for me.
Not Being in a Cure for Long Enough
I’ve ruined good meat simply by pulling it out of the cure too soon. When using dry salt curing methods, thickness is crucial. If the cut is 5 to 7 inches thick, the salt takes much longer to reach the center of the meat.
At first, I thought leaving the meat in salt for a “standard” timeframe would work. But what you need is full penetration, and the timeline changes based on fat content, temperature, and even how well the salt is packed around the meat.
Pork belly, for instance, is high in fat—sometimes up to 50%—which slows the curing process because salt moves more slowly through fat than lean muscle.
Once I understood this, I started weighing and measuring everything before curing, not just tossing it in salt and hoping for the best.
Not Using Quality Fresh Meat
In the early days, I tried to save money by buying supermarket pork that was on special. I thought it wouldn’t matter—after all, the salt and drying process would take care of everything.
It does not. The texture, flavor, and curing behavior all change when the meat is lower quality or not as fresh. It took a few failed salami projects for me to realize that the starting product sets the tone for the entire outcome.
Looking at the Italian curing tradition, it’s obvious—quality in, quality out. They don’t cut corners on the meat, and I stopped doing it too.
Hygiene and Not Keeping the Meat at Fridge Temperature Before Curing
If you’re doing any trimming, grinding, or stuffing—especially for salami—temperature control is critical. I’ve seen firsthand in salami factories that every stage of the prep is done in refrigerated rooms.
Grinding warm meat risks bacterial growth, spoilage, and changes in texture. I now chill everything before grinding: the meat, the fat, even the grinder parts. It’s extra work, but essential for safety and quality.
Even if you’re doing whole muscle cures, handling the meat cold helps minimize risk before the salt goes to work.
Not Having Optimal Conditions for Drying after Curing
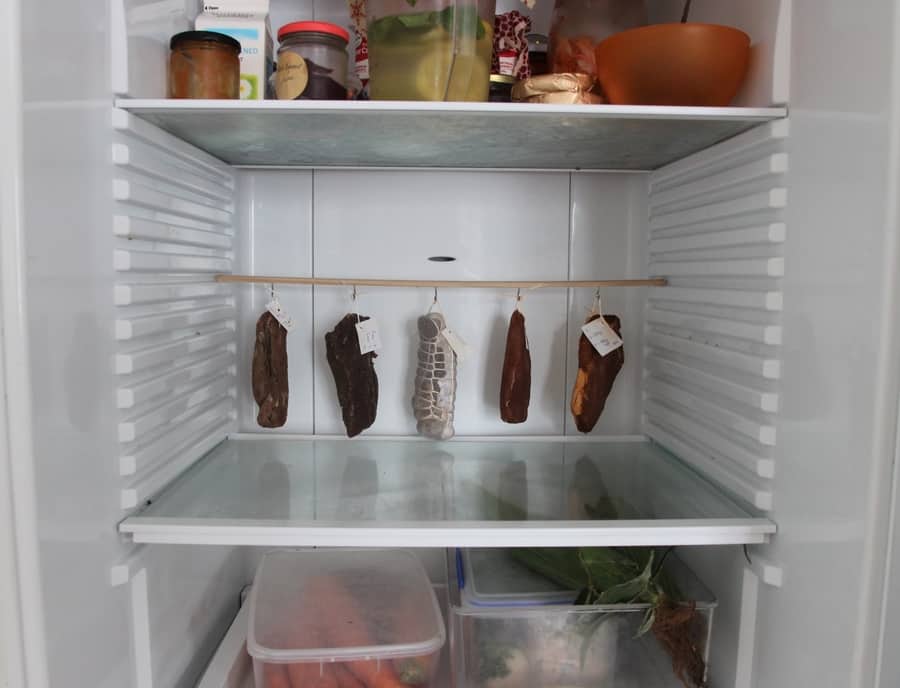
One of the hardest things to get right at home is the drying phase after curing. For small pieces like pancetta or thin pork loin, I experimented with using a standard kitchen fridge. It worked—but the humidity was dangerously low, often dropping to 25–35%.
That’s a recipe for case hardening, where the outside dries too fast and traps moisture inside. In bad cases, it spoils the meat from the center out. I’ve seen this more than once in DIY projects where airflow or humidity wasn’t monitored closely.
Ideally, you want 70–80% humidity and temperatures between 10–15°C (50–60°F). That’s tough in a regular fridge, which is why I ended up building a curing chamber.
To dial in better control, I now rely on humidity and temperature controls designed for meat curing. This changed everything for my drying consistency.
Even if you’re doing small batches, consistent airflow and humidity are key. Some folks think a garage or basement works, but the fluctuations in weather can cause more issues than you’d expect.
For Dry-Cured Salami, Not Creating an Effective Bind During Mixing
When I first started making salami, I thought mixing was just about distributing spices. It’s not. There’s a specific tacky feel you’re trying to create—a sign that you’re extracting myosin, the protein that helps bind the mix together.
This bind is essential. Without it, the salami can develop air pockets or an uneven texture during drying. I’ve sliced open salami that looked beautiful on the outside only to find strange gaps or crumbly meat inside. That’s usually from under-mixing.
It’s not an emulsified product like hot dogs or mortadella, but there still needs to be a uniform, sticky consistency before stuffing. I learned to mix by hand with nitrile gloves until it sticks to my palm when turned upside down. That’s the test I still use today.
Not Paying Attention to the Meat as it Loses Weight/Moisture
I once taught a friend of mine—a busy hospital worker—how to make bresaola at home. He was excited about the process but couldn’t check the meat more than once a week. That became a problem.
Dry-cured meats need regular observation, especially in the first couple of weeks. If humidity drops or temperatures spike, the drying curve changes. Leaving it unchecked could mean spoilage, uneven drying, or mold issues.
I recommend checking at least every 1–2 days in the early stages. If you’re using a converted fridge, temperature and humidity probes are essential—bonus points if they log data or alert you when things drift off target.
This isn’t just about precision—it’s about protecting your time and investment in every piece of meat you’re curing.
Getting the Correct Airflow Around the Meat When Hung
In my early experiments with drying meat, I underestimated the importance of airflow. I assumed a small desk fan in a box would do the trick—big mistake.
Too much airflow dries the exterior too fast, while too little leads to stagnant air and mold risk. I later read that 5 meters per second is a target in some commercial curing environments, but that’s rarely achievable—or even necessary—at home.
The key is **gentle, consistent air exchange**, not just a blasting fan. What matters more is whether the environment has both input and output ventilation. Many fridges, when converted properly, already have some passive air cycling, which can be enough with a bit of modification.
Back in Italy, they still dry meat in caves with naturally perfect conditions. I love that image, but unless you live in Umbria, you’ll probably need to replicate it mechanically. That’s where a proper curing chamber setup comes in.
If you’re new to this side of the craft, I recommend checking out the temperature and humidity guide for building a stable curing environment.
Not Trusting Your Senses
This is one of the most subtle mistakes—and the most important lesson. People often message me photos or descriptions, asking, “Is this still okay?” or “Is this smell normal?”
My answer: trust your nose. Your sense of smell is a potent tool. If something smells rotten or unpleasant, it probably is. But if it smells savory, earthy, or meaty—you’re likely on the right track.
It’s not just about smell, though. I also check texture and visual changes. Is mold forming? Is the casing shrinking too fast or too slow? These small cues add up over time. They become instinctive if you pay attention.
Of course, there’s no replacement for experience, but even in the beginning, your senses will guide you more reliably than second-guessing every step.
Not Following Well Proven Methods and Processes
I’ve had people send me old family recipes scribbled on a napkin or passed down without measurements. While I love the history and tradition, there’s a big gap between nostalgia and food safety.
This is why I always emphasize proven, repeatable methods—especially when you’re starting out. When I ignored this and tried to “wing it,” I ended up wasting time, meat, and energy.
If you want to try traditional salt-curing, use something like the salt box method, but understand the variables involved. Weigh your meat—track time. Keep notes. Without consistency, every project becomes guesswork.
Once you master the foundations, you can start to experiment. Until then, sticking to tested techniques is the fastest way to gain confidence and get delicious results.
Expert Tip: Build a Repeatable Process
One of the biggest breakthroughs for me was treating meat curing like a repeatable system, not just a recipe. Once I started recording weights, salt ratios, start dates, and drying conditions, the results became far more consistent.
If you’re serious about improving, use a logbook or even a digital spreadsheet. Over time, you’ll learn what works and how to adjust based on meat cut, fat content, or seasonal climate.
Alternatives if You’re Not Ready to Cure at Home
If you’re not quite ready to jump into home curing, seek out artisan producers or butchers using traditional techniques. This helps develop your palate and gives you reference points for texture, smell, and flavor.
One great source for understanding how small producers approach curing is this guide from the Slow Food movement, which supports quality dry-cured meat worldwide.
What is the most common mistake when curing meat at home?
The most common mistake I see is over-salting, especially when using the traditional salt box method. This can ruin flavor and make the meat inedible if you’re not weighing properly or leaving it in salt too long.
How do I know if the meat is cured properly?
The best way to tell is by monitoring weight loss (30–40% for whole muscle), checking firmness, and using your senses—look, feel, and especially smell.
Can I use a normal fridge for drying cured meat?
Only for very small cuts under 500g. Regular fridges are too cold and too dry, which can cause case hardening or uneven drying.
What should I do if mold grows on my cured meat?
White mold is usually good, but green, black, or fuzzy mold can indicate a problem. Wipe it with vinegar and monitor closely. Always trust your nose and instincts.
Got a question or a mistake you’ve made while curing meat? Let me know in the comments—happy to help or swap stories.

Tom Mueller
For decades, immersed in studying, working, learning, and teaching the craft of meat curing, sharing the passion and showcasing the world of charcuterie and smoked meat. Read More