When you first step into the world of meat curing and charcuterie at home, it’s both fascinating and rewarding. There are endless ways to approach it, and your path depends on what you want to make, how much time you have, and how deep you want to go.
Over the years, I’ve experimented with nearly every kind of charcuterie project — from quick, flavorful rillettes made in a few hours to dry-cured salami that takes months. Each method has its own rhythm and reward, so I’ve put together a simple guide showing how long different projects take and how challenging they can be.
Charcuterie Project Difficulty & Duration
This table summarizes the time and effort required for each project. It’s based on my hands-on experience making these at home, using everything from portable smokers to full curing chambers.
| Project | Difficulty | Duration |
| Pâté / Rillettes | 2/10 | 2–4 hours |
| Vegetable Preserves / Flavoring | 2/10 | 15–60 minutes |
| Cold Smoked Vegetables | 3/10 | 30–60 minutes |
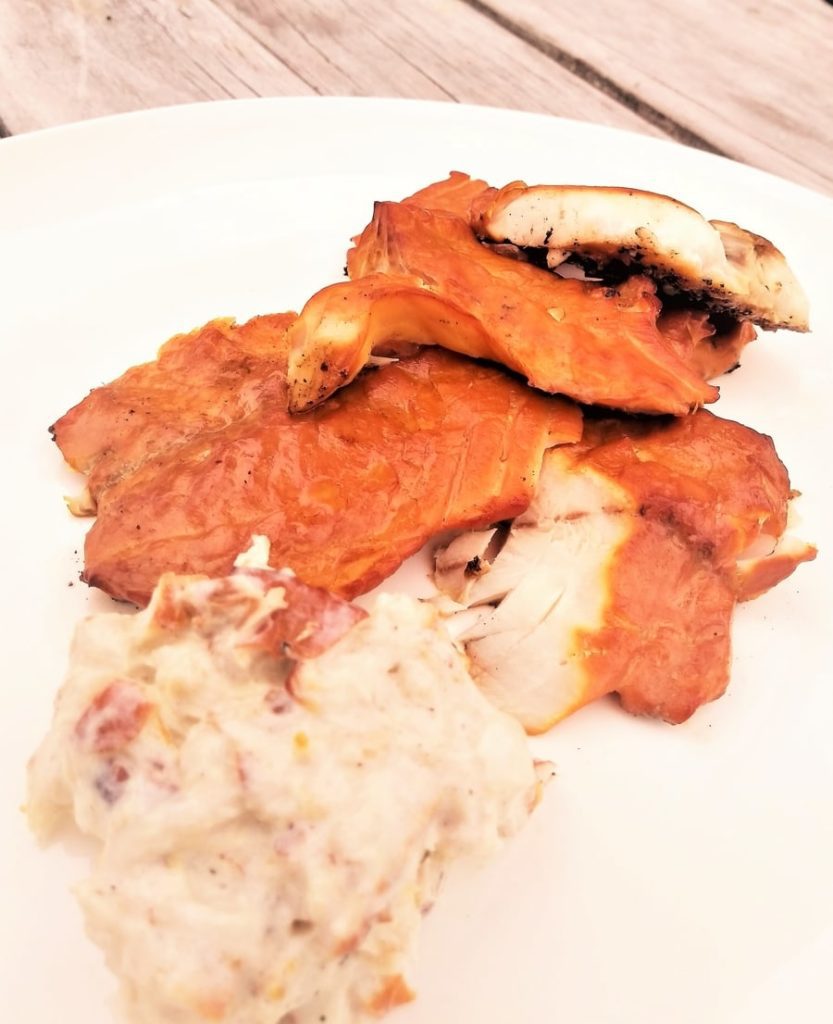
| Hot Smoked Fish or Meat | 4/10 | 4–16 hours |
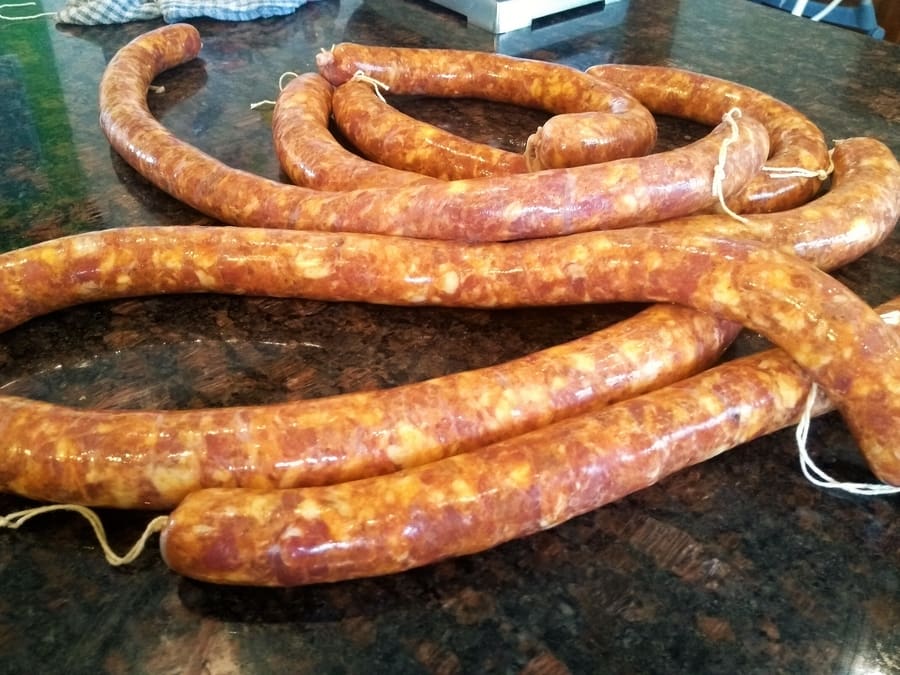
| Fresh Sausages | 4/10 | 4–8 hours |
| Dry Curing Meat in a Regular Fridge | 5/10 | 7–30 days |
| Cold Smoked Meat | 6/10 | 1–3 weeks |
| Dry Cured (Hung) | 7/10 | 2 weeks – 24 months |
| Dry Cured Salami & Emulsified Types | 7/10 | 3 weeks – 24 months |
The timeline is a general guide rather than a rule. A small air-dried bresaola or lonza might be ready in a few weeks, while a full prosciutto leg can take two years. Some methods rely mainly on patience; others demand precise control of temperature and humidity.
What makes this so captivating is how ancient many of these techniques are. Prosciutto alone dates back to Roman times — just pork, salt, and time in a cool, well-ventilated space. Add passion, tradition, and community, and you have the foundation of what we now call charcuterie.
After decades of exploring curing styles from Italy, France, and Central Europe, I’ve learned that time is the invisible ingredient behind every project. Quick preparations like pâté or hot smoking reward you within hours. Long cures like salami or coppa test your patience but offer unmatched satisfaction when done right.
When you understand how difficulty and duration work together, you can choose the project that fits your lifestyle. Beginners can start small — even a few jars of pickled vegetables or a batch of hot-smoked fish count as charcuterie. Once you grasp the fundamentals, you can move toward dry-curing meats or crafting salami in a chamber.
Charcuterie is the original slow food. Each step — from salting and resting to drying and slicing — slows you down and connects you to a centuries-old craft. Whether you’re experimenting with flavors or perfecting consistency, every project deepens your appreciation for preserved foods.
Understanding Dry-Cured Meats
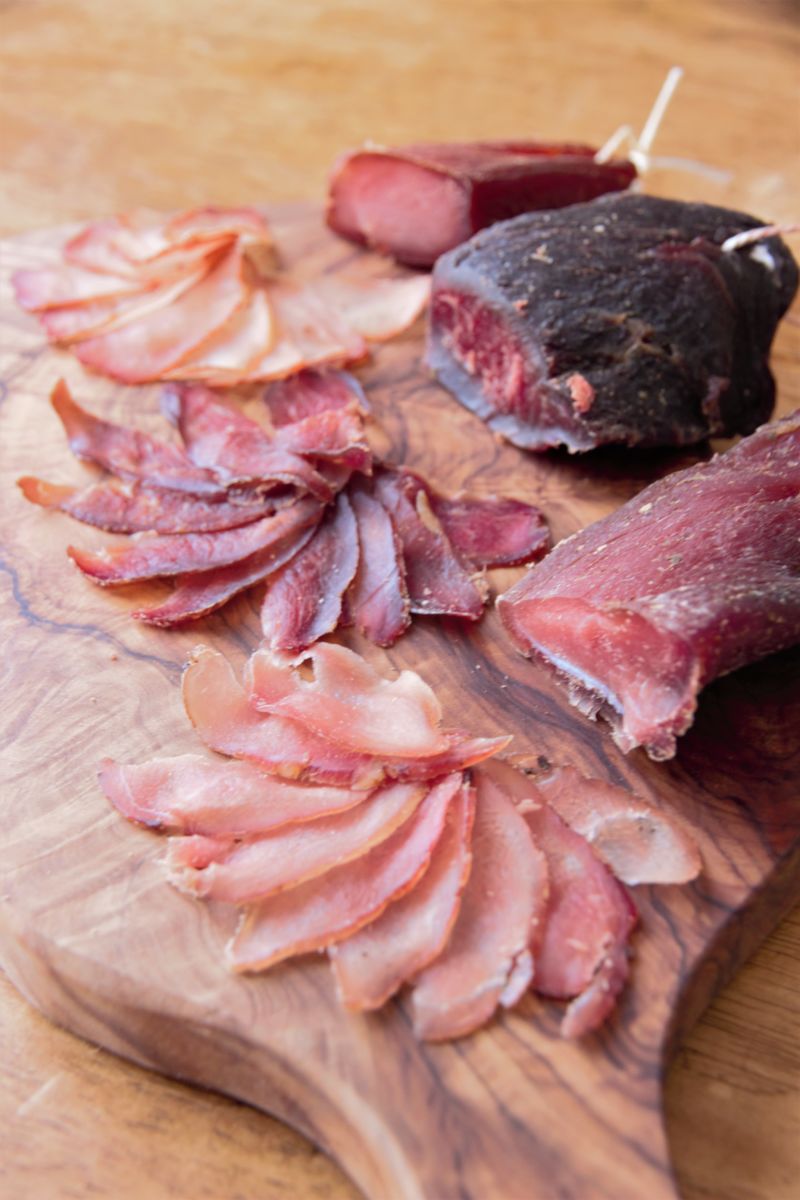
Dry-cured meats are the soul of charcuterie. They’re preserved through salt, time, and controlled airflow — without cooking. The salt draws moisture out, lowering the water activity so bacteria can’t thrive. What’s left behind is concentrated flavor and incredible texture.
Most people already know a few examples like prosciutto, pancetta, or bresaola. These are all made through a careful process of salting, resting, and drying in the right environment. Each region of the world has its take on this method, from Italian coppa to Spanish lomo and French saucisson sec.
Dry curing takes time to master, but small projects are easy to start with. A simple way to experience it is by curing small cuts of meat in your kitchen fridge. I’ve written a full breakdown showing how to do this safely without modifying your refrigerator — see How to Cure Meat in a Regular Fridge for that method.
Smaller cuts like pork loin, venison, or beef topside dry evenly, and you can enjoy them within weeks. The key is consistent temperature, low humidity, and using the right amount of salt by weight. Once you get a feel for the process, you can move on to larger muscles or even whole legs.
Beginner Charcuterie Projects
For those just getting into charcuterie, start with projects that are simple, quick, and give an early sense of accomplishment. These teach core preservation principles without needing specialized gear.
Rillettes – Preserving Meat in Fat
This is more about fat preservation than meat curing, but it does fall under the charcuterie topic.
Rillettes are one of the easiest charcuterie projects you can make. You slowly cook pork, duck, or rabbit until tender, then shred the meat and cover it in rendered fat. Once cooled, it forms a delicious spread with incredible depth of flavor. Stored in the fridge, it can last for weeks.
- Cook meat with salt and aromatics until soft.
- Shred and mix with rendered fat.
- Pack into jars and seal the top with more fat to block air.
- Chill and serve at room temperature on crusty bread.
This is a classic introduction to the idea of preservation without refrigeration or chemicals. The fat acts as a natural seal, keeping oxygen away from the meat beneath.
Liver Pâté
Pâté is another traditional French preparation that teaches control of flavor and texture. It’s made by cooking liver with onions, garlic, and herbs, then blending it smooth and sealing the top with butter. It’s rich, fast, and endlessly customizable with spices or wine reductions.
- Sauté liver with aromatic vegetables and herbs.
- Blend until smooth while still warm.
- Pour into ramekins and seal with melted butter.
I still make small jars of pâté every few months. It’s a low-effort, high-reward project that builds confidence before tackling longer cures.
Marinated & Pickled Vegetables
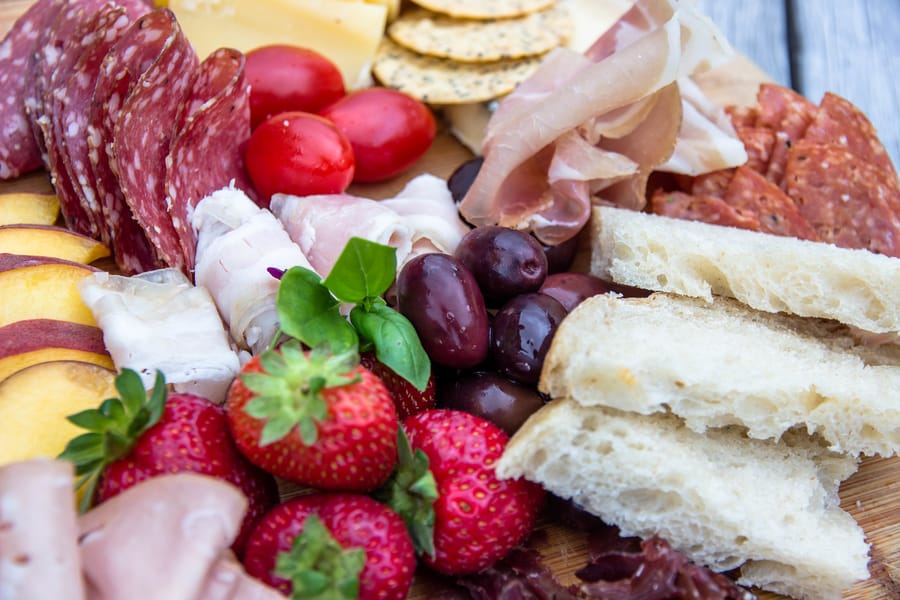
Charcuterie isn’t only about meat. Quick-pickled vegetables and marinated olives are perfect additions to a board and teach balance between acid, salt, and fat. I often take plain olives and flavor them with rosemary, garlic, and peppercorns — after a few days, the transformation is amazing.
Pickled cucumbers or onions help cut through the richness of dry-cured meats and refresh the palate. They also give you something colorful and vibrant to serve alongside your first homemade cured projects.
Once you’ve done a few easy projects like these, you’ll naturally want to move toward hot smoking and dry curing. Those steps require understanding temperature, humidity, and airflow — covered in more depth in my guide on Temperature and Humidity for Meat Curing.
Next are the intermediate projects — still accessible, but with a touch more precision and patience.
Intermediate Charcuterie Projects
Once you’ve built some confidence with easy projects, you can step into intermediate charcuterie. These projects take longer, often need environmental control, and teach you the patience required for true curing. The flavors become deeper, more complex, and far more rewarding.
Dry Curing Meat in a Fridge
This is one of my favorite projects to teach. You can dry cure smaller cuts of meat using a regular kitchen fridge if you follow the right process. It’s simple, safe, and an ideal stepping stone toward chamber curing. I put together a complete guide that shows how to do it from start to finish — How to Cure Meat in a Regular Fridge.
Choose lean, compact cuts like beef topside, venison, or pork loin. Coat with an equilibrium salt cure by weight, wrap in breathable paper or cheesecloth, and allow it to dry slowly. Within a few weeks, the flavor becomes concentrated and the texture firm yet tender.
Humidity control is limited in a fridge, so you’ll need to balance airflow and drying time. The smaller the cut, the easier the result. It’s a great way to understand the rhythm of curing without investing in new equipment.
Cold Smoking
Cold smoking adds another layer of complexity. It doesn’t cook the meat; instead, it infuses a cool, aromatic smoke that deepens flavor and aids preservation. To get this right, your product must be properly cured first, then exposed to smoke in cool conditions — ideally below 25°C (77°F).
People often assume cold smoking is complicated, but it’s surprisingly approachable. With a simple generator, you can do it overnight when the temperature drops. I’ve written a detailed walkthrough showing how to control temperature, airflow, and smoke density — see How to Cold Smoke: The Complete Guide.
I often use this technique for bacon, small cuts of beef, or fish. Cold smoking at home teaches you to respect timing, humidity, and how smoke behaves differently across meats. Once mastered, it opens the door to making classic dry-cured products like coppa or pancetta.
Essential Tools & Gear
Most intermediate projects can be done with gear you already own. A digital scale, a small rack, butcher’s twine, and clean wrapping materials are enough for fridge curing. A small smoke generator or portable smoker will expand your options dramatically.
When you’re ready to scale up, a dedicated curing environment makes all the difference. I’ve documented multiple approaches for hobbyists and professionals alike — from repurposing an old fridge to designing a fully automated setup. You can explore several layouts and ideas in Designs for a Meat Curing Chamber.
At this level, consistency is key. A steady 10–15°C (50–60°F) and 70–80% relative humidity keep your meat drying evenly and prevent case hardening. I experimented for years before settling on my current setup, which balances precision with simplicity. It’s all about creating the right microclimate for the style you love.
Dry curing and cold smoking are the foundation for everything that follows. Once you get comfortable with these methods, you can step into full dry-curing chambers, long-term projects, and the artistry of salami and whole-muscle charcuterie.
Advanced Charcuterie Projects
When you’ve mastered shorter cures and fridge setups, the next step is creating your own controlled environment. This is where precision meets artistry. You can produce traditional salami, coppa, pancetta, or prosciutto-style hams with the right chamber and process.
Building a Curing Chamber
A curing chamber gives you full control over humidity, airflow, and temperature. It allows long-term drying without the risk of over-drying or spoilage. Most people start with a second-hand fridge, adding a humidifier, dehumidifier, and temperature controller.
I’ve experimented with several designs over the years — from basic setups to fully automated systems with Wi-Fi control. Each has its pros and cons depending on your goals and budget. You can see examples and step-by-step layouts in Designs for a Meat Curing Chamber.
Once dialed in, the chamber maintains 12–15°C (53–59°F) and around 75% humidity. That sweet spot encourages gentle moisture loss and even drying. It’s the same environment that transforms a raw pork loin into silky lonza or turns a seasoned ham into beautifully aged prosciutto.
Salami & Salumi
Salami and salumi are where everything comes together — meat science, technique, and patience. These projects can take anywhere from three weeks to two years, depending on the size and style. You’ll work with starter cultures, pink curing salts, and exact humidity control to ferment and dry safely.
I wrote an overview explaining what distinguishes salami from whole-muscle salumi and how they’re made, including timelines and critical control points. You can explore that in Guide to Making Dry Cured Salami (Overview).
Once you’ve built a chamber and made your first few successful batches, you start to understand how different environments, casings, and cultures shape the result. It becomes part science, part intuition. Each batch tells you something new about balance, temperature, and airflow.
Long-term dry curing requires commitment, but there’s nothing more satisfying than slicing into a salami months later and tasting the depth of flavor you created yourself.
Working with Wild Game
Wild game brings its own rewards and challenges. The leaner meat and stronger flavor mean adjustments in salt percentage and fat content. I often dry-cure venison, duck, or even wild pork. The extra care in trimming and handling pays off in complex, earthy results.
Because wild meats are usually harvested in cooler months, they fit perfectly with cold smoking or chamber curing. I always give these cuts the same respect as farmed meat — they take more effort to source, so it’s worth doing them properly from start to finish.
Balancing Art & Patience
Advanced charcuterie is as much about patience as it is precision. From seasoning to slicing, you learn to trust your senses — smell, touch, and even the sound of air moving in your chamber. After years of practice, I still find myself learning something new with every cure.
These advanced projects mark the highest difficulty and most extended duration in the table at the start of this guide. Whether you hang a prosciutto for two years or cure venison bresaola for a month, the reward is the same — depth of flavor, craft, and connection to tradition.
Expert Tips for Success
Start small and focus on learning one variable at a time — whether it’s salt ratio, airflow, or smoke density. The best results come from consistency. Document each project and make small adjustments based on texture, weight loss, and taste.
Use a reliable digital scale and record your salt as a percentage of total meat weight. For dry curing, I typically use equilibrium curing around 2.5–3% salt. This keeps the process predictable and repeatable. For short-term projects, slightly less salt creates a more tender texture.
Patience is your strongest ingredient. The most flavorful meats are the ones that have taken their time. Don’t rush drying, and don’t panic when molds appear — many of them are beneficial and part of natural aging. If you want to learn more about controlling temperature and humidity for consistent results, explore Temperature and Humidity for Meat Curing.
Alternatives & Experimentation
If a full curing chamber feels out of reach, start by experimenting with partial cures, hot smoking, or quick ferments. Many traditional products evolved from adapting to available tools and climate. Even a small space can produce outstanding results if you manage salt and airflow properly.
Each region has its twist on preservation — biltong in South Africa, gravlax in Scandinavia, and duck confit in France. They all share the same foundation of salt, time, and care. The deeper you explore, the more you’ll appreciate how these methods connect cultures and centuries of knowledge.
What are the easiest meat curing projects for beginners?
Pâté, rillettes, and quick-pickled vegetables are great beginner projects. They teach the fundamentals of salt and preservation without needing specialized equipment.
What are the longest meat curing projects?
Whole-muscle dry cures like prosciutto or culatello can take 12 to 24+ months. Salami also falls into long-term projects when fermented and aged under controlled conditions.
Do I need a curing chamber for all dry-cured meats?
No. Small cuts can be cured in a regular fridge following equilibrium curing methods. For consistent long-term drying, a chamber provides the best control of temperature and humidity.
How can I make my dry-cured meats more consistent?
Weigh your meat before and after curing to track moisture loss. Aim for about 30% weight reduction for balanced flavor and texture. Keep detailed notes so you can adjust salt, airflow, and curing time on future batches.
Have you tried curing or smoking at home? Share your favorite project or questions in the comments — I’d love to hear what you’re experimenting with.

Tom Mueller
For decades, immersed in studying, working, learning, and teaching the craft of meat curing, sharing the passion and showcasing the world of charcuterie and smoked meat. Read More