Over decades of curing meat from small home projects to large-scale whole muscle cures, I’ve come to rely heavily on equilibrium curing. It’s the most consistent and flexible method I’ve found for producing reliable results, whether I’m making dry-cured bacon, pancetta, or brined meats.
By using precise salt percentages and giving the meat the right amount of time, equilibrium curing delivers a predictable flavor and texture without the risk of over-salting. It’s a method I now use for most of my curing projects, regardless of whether I’m working with a dry cure or a wet brine.
Guide to Equilibrium Curing
The real strength of equilibrium curing is in its control and accuracy. Instead of guessing or relying on excess salt to “catch” the cure, you measure exactly what’s needed based on the weight of the meat (and water if brining). With this approach, the flavor is balanced every time, and you avoid waste while keeping salt levels within a preferred range.
If you stick to a minimum salt percentage and follow the process, the results are highly repeatable. As long as the meat is left in the cure for long enough, you can expect consistent quality across batches, no matter the cut, fat content, or size.
What is Equilibrium Curing?
Equilibrium curing is the process of applying a calculated percentage of salt based on the weight of the meat. For wet brining, the same calculation can be applied using the total water weight in addition to the meat weight.
For example:
2.5% sea salt = 1,000 grams of meat
0.025 × 1,000 = 25 grams of sea salt
It’s simple, but it relies on accurate weighing. The metric system makes these calculations straightforward — much easier than working with ounces and pounds in the Imperial system.
Be careful with decimal placement, as a small miscalculation can lead to under- or over-salting. This is one reason I often use my curing calculator — it eliminates guesswork and ensures the numbers are correct.
How Equilibrium Curing Differs from the Saltbox Method
The traditional saltbox (or saturation) method involves covering the meat entirely in salt — a technique that works well for preservation but uses far more salt than necessary. While it’s still a valid approach for specific traditional projects, it lacks the precision and efficiency of equilibrium curing.
I still use saltbox curing for huge cuts or specific styles, such as salt pork, salt beef, or whole fish preservation. In these cases, the volume of meat and long curing times make saturation practical.
Also, I’ve found it helpful for pre-equilibrium dry curing prosciutto, whole hing pork leg for one week.
For most whole muscle dry curing, however, I prefer a lower minimum salt level — typically around 2% — which may also include 0.25% pink curing salt (No. 1 or No. 2) depending on the project. This keeps flavor balanced without compromising safety or texture.
Why I Prefer Equilibrium Curing
Equilibrium curing has allowed me to produce consistently excellent cured meats while using less salt overall. This efficiency not only reduces waste but also ensures the flavor profile I’m aiming for comes through clearly without being dominated by saltiness.
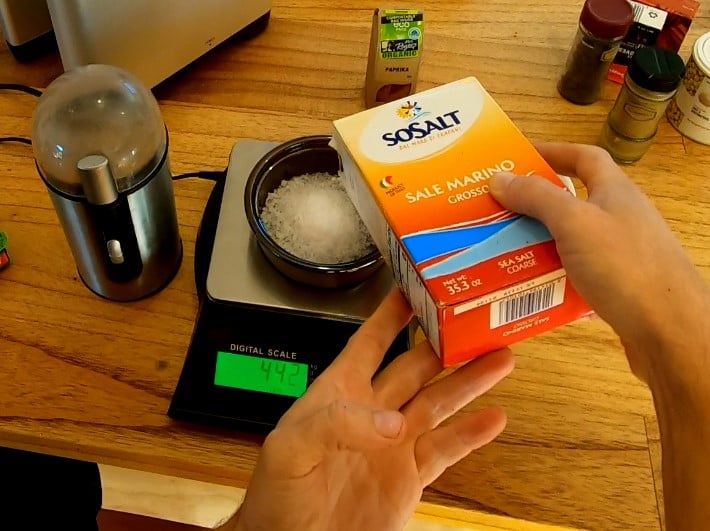
The key piece of equipment you’ll need is a precise digital scale. Ideally, it should measure to at least one decimal place (0.x) — and preferably two (0.xx) for smaller projects. I’ve learned over time that the difference between a well-balanced flavor and an over-salted product often comes down to measurement accuracy.
Volume-based measurements, such as cups and tablespoons, are far less reliable in curing because different salts can vary significantly in density. This is why I almost always work by weight — a method I also recommend in my article on the main ingredients for curing meat.
Curing Time Guidelines
The length of time needed for equilibrium curing depends on several factors, including fat content, storage temperature, and the salt percentage used. Higher fat content generally slows the cure penetration, while cooler temperatures can extend the process slightly.
Fat content of the meat
Storage temperature
Salt concentration in the cure
As a rule of thumb, I allow about one week for every 50 mm (2 inches) of thickness in the cut. Because air is removed from the bag, the curing window is more forgiving — I can leave a piece for an extra week or two without negative effects.
This is one of the big advantages over saturation curing, where the meat must be removed before it becomes overly salty. With equilibrium curing, the process will “wait for you.”
When making something like cold-smoked bacon, I’ve had great results using this method. A small slab of pork belly — around 1 kg — will usually be ready in about a week, as long as the cure has been applied evenly and the meat is stored correctly.
For more detail on storage and preservation approaches, you can read my guide on how to cure meat for long-term storage.
What Equilibrium Curing Can Be Used For
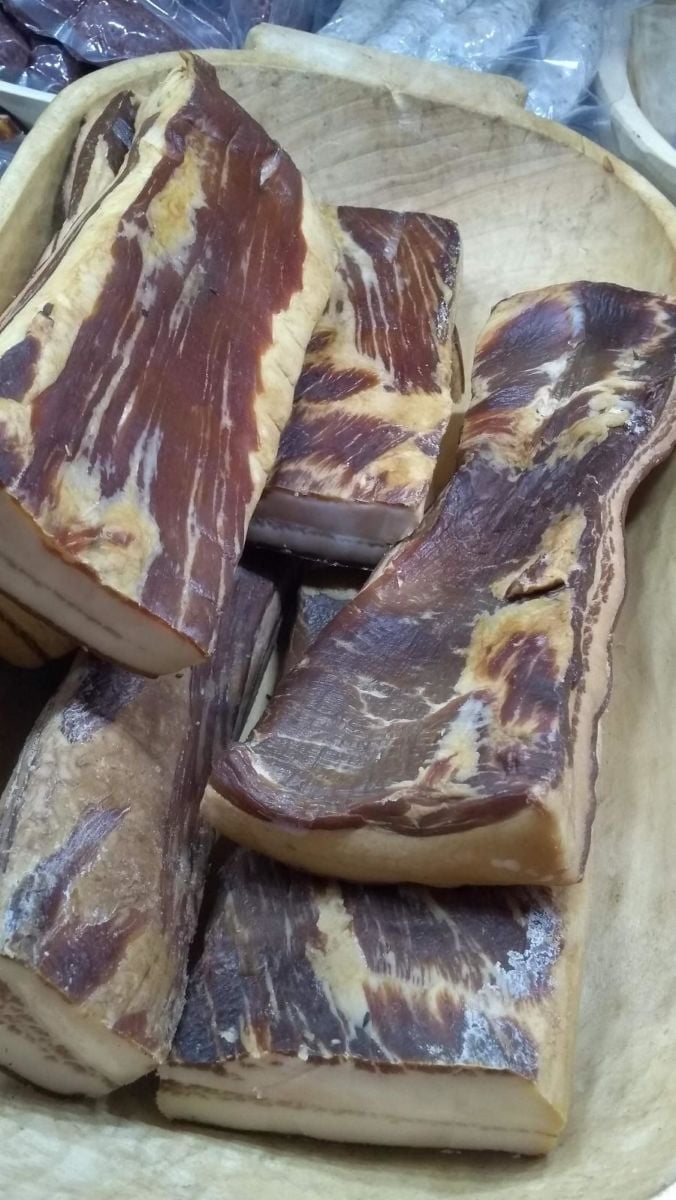
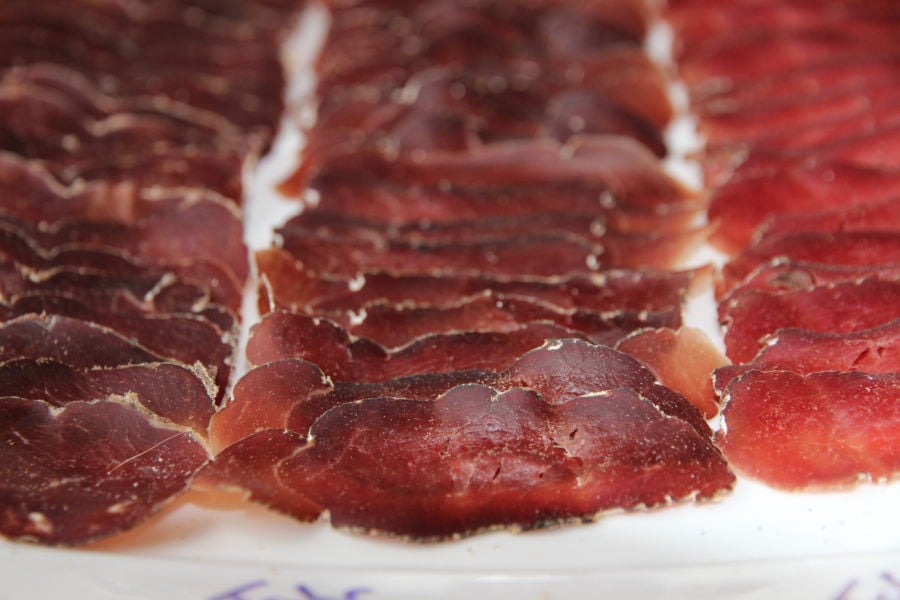
I primarily use equilibrium curing for whole muscle dry-cured meats — cuts like coppa, bresaola, pancetta, and duck prosciutto. However, it’s equally useful for wet brine projects, such as bacon or pastrami, where precise salt control is important.
Outside of charcuterie, the method is valuable for any recipe where accuracy matters more than speed. In commercial kitchens, this level of control is essential for product consistency, and at home it means you can replicate your best results every time.
Dry vs Wet Equilibrium Curing
From my experience and from discussions within the curing community, dry curing is far more common than wet brining when it comes to equilibrium curing. One of the main reasons is that wet brines can dilute the flavors of spices and aromatics, giving a subtler end result. With dry curing, the flavor impact is usually deeper and more pronounced.
That said, wet equilibrium curing still has its place. It can produce a more uniform texture in some cuts and is often preferred for certain styles, such as traditional corned beef or pastrami. It also allows for the infusion of liquid-based flavors, like beer or maple syrup, into the cure.
If you’re new to the concept of cure formulation, my detailed breakdown on different salts for meat curing explains how salt type can influence both wet and dry methods.
Ultimately, the choice between dry and wet equilibrium curing comes down to the style of cured meat you want to make, the flavor profile you’re after, and the texture you prefer. In my kitchen, dry curing is my default, but I’ll switch to wet brining if I want certain flavors to penetrate more evenly or if the recipe calls for it.
Step-by-Step Process
Weigh the meat accurately.
Calculate the exact amount of salt and spices for the cure (and pink curing salt if applicable).
If using wet brining, calculate the water volume and include it in the total weight for the salt percentage.
Measure all cure ingredients with a precise digital scale.
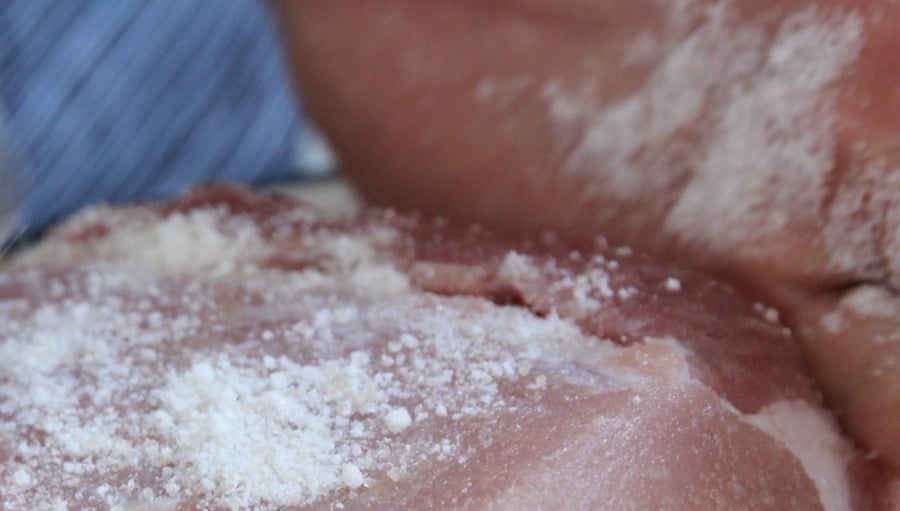
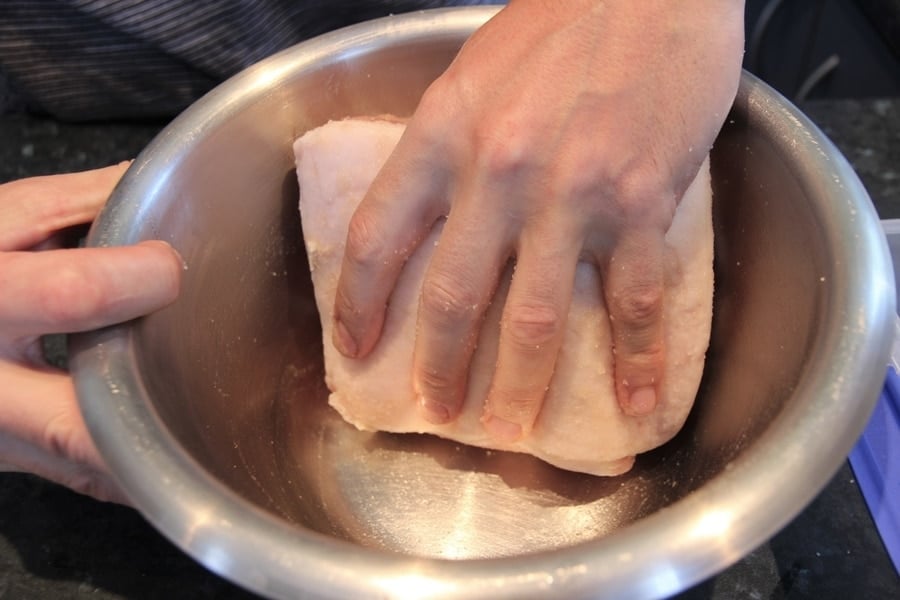
Rub or massage the cure evenly over all surfaces of the meat, ensuring none is left in the mixing bowl.
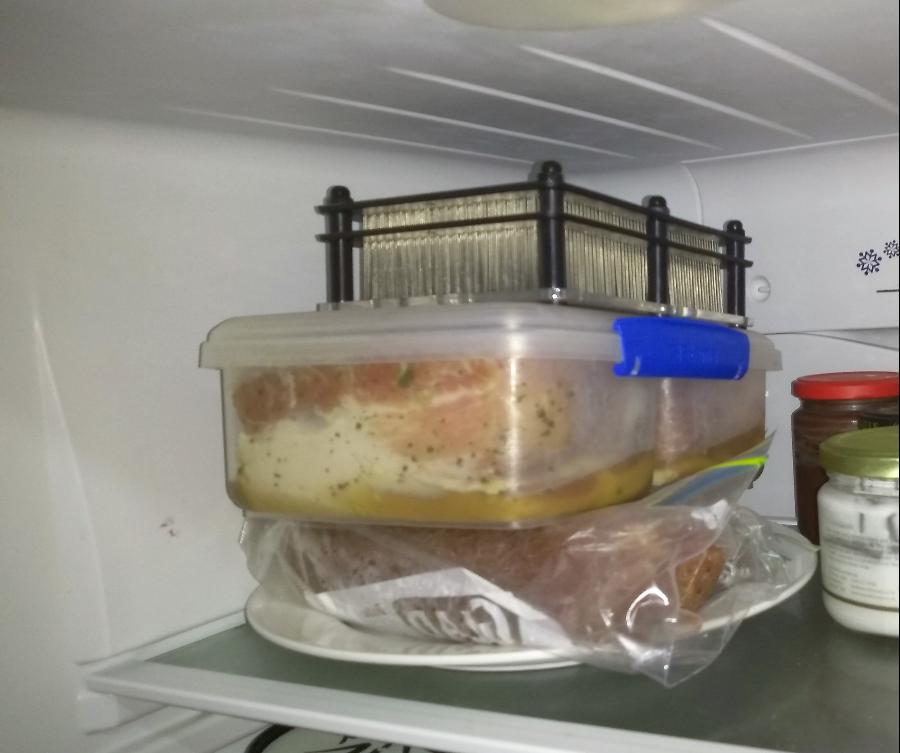
Place the meat in an airtight bag, removing as much air as possible. Vacuum sealing is ideal.
Store the bag in the fridge or at a similar cool, stable temperature.
Optional: Apply weight to the bag to encourage faster cure penetration.
Choosing the Right Salt
Salt is the foundation of any curing process, but not all salts behave the same way. For meat curing, you should avoid salts with additives such as iodine or anti-caking agents, as these can introduce unwanted flavors or textures.
Sea salt and rock salt are both excellent choices, but they vary in crystal size and density. This means that a cup of coarse rock salt will weigh far less than a cup of fine sea salt — and that difference will directly affect the saltiness of the final product if you measure by volume instead of weight.
For equilibrium curing, I often grind salt to a finer consistency using a spice grinder. A finer grind helps it spread evenly across the surface of the meat, allowing for more consistent cure penetration.
If you’re interested in longer-term preservation, I’ve detailed some options in my guide on how to cold smoking bacon, which can follow directly after an equilibrium cure for a layered flavor profile.
Essential Equipment for Equilibrium Curing
Digital Measuring Scales
Accuracy is non-negotiable. Baking scales with a ±2 gram tolerance are not precise enough for curing — you need scales capable of measuring to at least one decimal place, preferably two. Even a 1–2 gram error can make a noticeable difference in smaller batches.
Spice Grinder or Mortar & Pestle
A dedicated spice grinder makes quick work of turning coarse salt and whole spices into a fine, even powder. This not only improves coverage but also helps flavors integrate better during the cure. If you use a mortar and pestle, be prepared for a bit of an arm workout.
Container or Bowl
The right size bowl makes the process cleaner and more efficient. I prefer a stainless steel mixing bowl with rounded sides, which lets me use the meat to collect every last bit of cure from the bowl before bagging.
Airtight Bag
You can use heavy-duty zip-top bags, reusable silicone bags, or vacuum-sealed bags. The key is to remove as much air as possible to create consistent contact between the cure and the meat. Vacuum sealing is the most effective method for this.
Spices & Aromatics in Equilibrium Curing
This is one of my favorite parts of curing — layering unique flavors into the meat. Whether it’s the herbal lift of bay leaves, the piney sharpness of crushed juniper berries, or the smoky sweetness of paprika, the choice of spices can completely change the character of the final product.
I often combine classic aromatics with region-specific ingredients to develop signature flavors. For example, mixing black pepper with New Zealand kawakawa adds a mild, peppery heat, while citrus zest can brighten the flavor of a richer cut.
When using whole spices, I always grind them just before applying the cure to preserve volatile oils and maximize freshness. A fine, even grind also helps ensure even distribution across the meat’s surface.
FAQs
What percentage of salt is needed for equilibrium curing?
For equilibrium curing, you typically need 2% to 3% salt based on the meat’s weight, ensuring proper preservation without excessive saltiness. This method allows for precise salt absorption, preventing over-curing while maintaining consistency in flavor and texture.
How did they cure meat in the old days?
In the past, meat was cured using dry salt, brine, smoke, and air drying to preserve it without refrigeration. Salt was the primary method, drawing out moisture to prevent spoilage, while smoking added antibacterial properties and flavor. In colder climates, meats like prosciutto or bresaola were often air-dried, while warmer regions used heavy salting or fermentation techniques.
What can equilibrium curing be used for?
Equilibrium curing is used for dry-cured meats, charcuterie, and certain brined products, allowing precise salt absorption for controlled preservation. It’s ideal for whole muscle cuts like coppa, bresaola, pancetta, and duck prosciutto, as well as brined items like bacon and pastrami, ensuring consistent flavor and texture without over-salting.
Please feel free to leave a comment below — I’m always interested in hearing your thoughts and experiences with equilibrium curing.

Tom Mueller
For decades, immersed in studying, working, learning, and teaching the craft of meat curing, sharing the passion and showcasing the world of charcuterie and smoked meat. Read More
Great writeup and intro to EQ. Thank you for sharing. I will be linking to this post from my webpage for those who are curious about EQ
Cheers Kjell, I enjoy harvesting a few animals too!
I don’t get this. If the meat is inside a airtight bag how it will dry out and loose 35% weight ?
Hey, stage one equilibrium curing in a bag. (curing is about using salt to inhibit the meat, slow down bacteria).
Stage two, hang and dry – this is where the weight loss occurs. Cheers Tom
And why in “Complete guide” there are zero words about stage two? Just salt, bag, 1 week per 1 pound?
its about curing, here is another page that might help – https://eatcuredmeat.com/how-to-cure-meat-at-home-complete-illustrated-guide/
I think the answer is that once its cured and removed from your cure, you’re done curing. the rest is aging and drying.
For a long time I cured the venison tenderloins using the excess salt method. I tried the equilibrium method on one of the deer this year (at the same time I’m doing the excess salt method), and It looks great so far.
One question though, the equilibrium cured piece seems to have lost moisture a WHOLE lot faster than the excess salt cured. Is that normal?
For the numbers –
Excess salt cure: packed in salt 8/24, left for 36 hrs, hung on 8/25.
Starting weight at hang – 87 g; target weight – 57 g.
Time to hit target weight -14 Days.
Equilibrium cure – seasoned and vaccuum sealed on 8/24. Pulled out of bag on 9/1 (7 days), rinsed and hung same day.
Starting weight at hang – 107 g; target weight – 70 g.
Time to hit target weight – seems to have only been about 6 days.
Does that look right to you?
Hey James,
Here’s my take on this.
Excess Salt / Saturation / Saltbox method = yes your drawing moisture out during the curing phase.
Equilibrium Curing is about precisely inhibiting the meat with salt, reducing water activity inside the meat by using salt to meld with the meat molecules. In a way it’s a wet brine (but done with precision)
the internal fat could also effect it, fat is slower to ‘dry’ out.
A bit of mystery, especially if you have used the precise temp/humidity in a chamber.
If it was me, I would just trust the weight lost target fo sure.
Cheers
Tom
Hi Tom, Thanks for a good overview of the options and for sharing your methods. I do equilibrium cures myself, and agree on the advantages. There might be a typo in this paragraph:
“But when it comes to curing meat, you always want to have salt that doesn’t have any additives. Non-iodized salt or any other thing like an anti-caking agent, which is pretty common should definitely be avoided.” Should it read “Iodized salt”. . . should be avoided? Thanks,
Cassandra
Thanks! Good luck with the curing!
Thinking and typing too fast sometimes! 🙂
Great information, I was using excess of salt method, getting salty meats, now will go into EQ method,
Thanks for all this valuable information
Nice work Gabriel, yeah its a game changer, if you want I also have launched whle muscle curing course course, more on this page
Cheers Tom
congratulations, interesting read. Is there a minimum amount of salt that needs to be respected? I find 2.25% (2% salt + 0.25% cure) produces a salty product. can I drop to 1.75% (1.50% + 0.25) or 2.00 % (1.75% + 0.25)safely?
Thanks! Personally I got min of 2% total with or without pink curing salt
Cheers
T
Hi Tom, Im a novice for sausage making. Today I got my stuffer and last couple of days Im only busy with reading all in and outs. Your EQ is a great article. Appreciate that.
Have one question: do you have an article which discribes the differences between curing salt #1 and#2?
Thanks in advance
Peter Beumer
Sure, here you go!
LINK to curing salt – more and more salami I am making doesn’t have nitrates/nitrites, but I control all other variables closely – ie fresh quality meat, exact salt, often cold smoking, ph/acidity control, winter/temps that are near fridge like!
Hello Tom,
Thank you for the great article. I’m still new to this hobby and have cured some bellies for Pancetta and a whole loin for Canadian Bacon. I’ve had great results. But to my taste they where very salty. I’m using the dry EQ method and using the standard 2.25% sea salt and 0.25% cure #1.
Is there anything scientific about these numbers?
Can I use less sea salt, say 1.85 and keep cure #1 the same?
Thanks again!
Hey there I’ve grown more fond these days of around 2%, if you were to use #1 that would be 1.75% sea salt and 0.25% #1.
I’ve been studying a lot of commercially dry cured product packaging and noticed 1.8g per 100 grams (1.8%…). But personally always do 2%+
All the best,
Tom
Do you have to cook the meat after these different methods, or does it depend on the type of meat? Im thinking rabbit, deer, trout. Ive started my first equilibrium cure last night with some slices of chicken, but I havent been able to find anything on line that says whether you can eat it after curing, or if it still has to be cooked, and if it still has to be cooked, how you cook the cured meat. Per method, of course.
Are you curing to dry or curing to cook? Chicken hold a lot of bacteria so I wouldn’t use it for dry curing. I have a course on this above at the top if you are wanting to dry curing meats. Deer I do a lot of, trout can be like salmon ie. a Gravlox style and rabbit I am not sure about – yet to try!
Hey Tom,
Great write up!!! Very informative. I do have a question about equilibrium curing a whole muscle that has a bone in it. Lets say a leg of lamb or something similar. How do you calculate the salt and cure % for situations like this?%
Thanks, I like your channel too 🙂
I stick to the total weight regardless of bone weight to work out %’s. Keep it simple I say.
Cheers
Tom
Do you blend the spices with the salt and then cure, or spice prior to drying?
Definitely salt and spices, then you can add a coating of spices like peppercorns or chili before hanging/drying if you want also.
Hi Tom, i just gave it a shot and have cold smoked the meat for 3 hours (after 9 days of curing).
the meat inside the smoking chamber is now all sweaty and wet.
Question:
should i pat dry it before placing back in my curing (wine) fridge ?
or
just put it in the fridge and leave all the moisture on it ?
Did you form a pellicle? What about ambient temp outside vs temp inside? I wont need to pat dry cold smoked meat, because I can’t recall it being sweaty and wet! all the best, Tom
Hello Tom,
I’m sorry to inform you I paid for your course and I can’t get into it, almost as if I was locked out. I paid you about 1 1/2 years ago for your course.
But you now, I’m wet curing a whole pork belly. 5.76kgs. I’m going with 1.80% salt. My question how long should I leave the belly soak submerged in the brine?
Thank you.
Hi Dale, I’ve sent you a reset via email.
It depends on what your making! T
hello, I followed your instructions for curing small cuts of pork using the equilibrium method and they turned out well. i want to try curing a full pork loin. i have a small curing chamber that is set to 52f and about 80% humidity. i also have successfully grown powdery white mold taken from a dry-cured ham and transplanted it onto the meats i’ve cured.
i have curing salts #1 and #2. i used #1 for the small cuts as you suggested in your article on using a fridge to cure. i’ve read that larger, longer-curing cuts should be cured with #2. would you suggest using #2 on a full pork loin? also, is it a good idea to tie the loin into a cylindrical shape with butcher’s twine? some of the recipes i’ve read for lonza/lonzino say to tie it up, but i don’t know if that’s just to make it look nice or if it has some practical purpose. if i do tie it up, do i do that after curing in the fridge and rinsing off the meat, or do i tie it up, then let it cure in salt, then rinse and hang?
thank you for your help. your website has lots of valuable information.
Heya, yes if you want to tie, I do this after curing. It’s mainly for shape, thats about it. Looks nice too. Cure #2 is if the project takes more then 30 days, since the nitrites break down to nitrates over the longer drying/curing period. Meat over 2.2pds/1kg generally takes more then 1 month to finish I find. Hope this helps, Tom
that’s very helpful. thank you. my first attempt at equilibrium curing turned out well. the white mold grew successfully and i got the weight down to about 50%. it ended up surprisingly delicious.
wish me luck with the full pork loin. if it’s as good as the little ones then i’m going to really get into this.
Travis Trout! Great name, all good. Glad to be of use. It’s a glorious skills and hobby! Tom
Please define small cut of meat – I wrote about smalls cuts dry curing here – https://eatcuredmeat.com/dry-curing/how-to-cure-meat-in-a-fridge-without-modifying-it/
under 1/2 pd, 250 grams
Hello Tom, thank you for a great article, very clear. I start 2 pig jowls to make guanciale. I used 2.5% for my salt calculation, no curing salt. I sous-vide both jowls individually and left then in the fridge for 14 days (each is about 900 grams).
1 of then seemed firmer with fairly hard skin, what I would expect after curing but the other had more of a light color and soft, almost rubery skin.
Any idea why this might be?
Thank you Jonathan!
HEY J, natural anatomy variations I’m guessing, maybe the jowl was different on the pig (chewed one side more). They’ll both be definitely salt cured after 14 days. all the best, Tom
Does dry curing apply to making lardo?
Yes, but the way I’ve learnt is to wrap it up so no light. It’s not hung but more just left to infuse the salt dry cure. Traditionally down on top of a mountain in marble!
Excelente.. me gusta, quiero emprender y las técnicas son en extremo importante