After decades of smoking meat, from wild venison to farm-raised pork and ocean-caught fish, I’ve learned that one small detail makes a huge difference in the final flavor: the pellicle.
Whether you’re hot- or cold-smoking, forming a proper pellicle helps that clean, beautiful smoky taste cling evenly to the surface of your meat.
It’s a step that’s often skipped or misunderstood, especially in quick how-to guides.
Yet if you want a deep smoke profile, rich color, and balanced surface texture, learning how to form a pellicle is essential.
Once you experience the difference, you’ll stop treating it like an optional extra.
In this guide, I’ll explain what a pellicle is, why it matters, and how to form it for consistent results.
Everything here comes from hands-on experience across countless smoking sessions and environments, from cold winter sheds to humid coastal kitchens.
What Is a Pellicle for Smoked Meat?
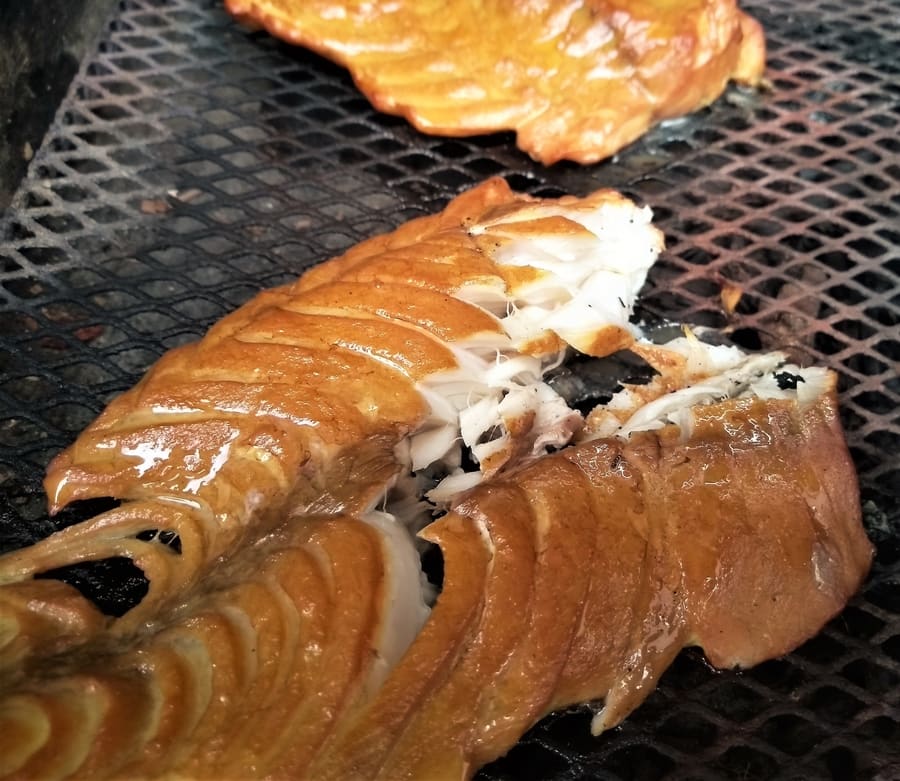
A pellicle is a thin, tacky film that forms naturally on the surface of meat once it has been dried after curing or brining. The meat proteins on the surface dry, and it allows the smoke to stick more effectively.
You might not always see it clearly, but you can feel it.
The surface turns slightly sticky, which is your sign that the proteins have tightened and created a skin that can hold smoke evenly.
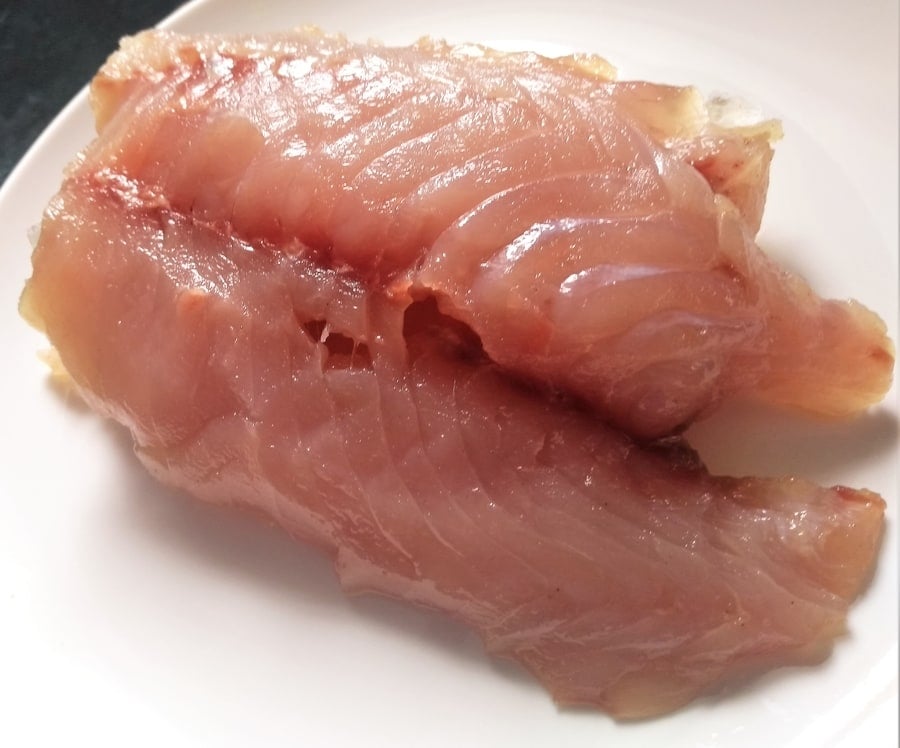
This film develops as moisture evaporates and surface proteins bind together.
That tacky layer gives smoke something to hold onto, which helps create the deep amber or mahogany tone we associate with well-smoked meats. Especially with multiple smoking sessions.
Why the Pellicle Matters
Forming a pellicle is more than tradition.
Practical food science affects how smoke adheres, how flavor develops, and how the surface behaves during the smoking process.
Get this step right, and the difference shows up in both taste and appearance.
- Flavor absorption: The tacky layer helps smoke compounds bind evenly, which builds a deeper, cleaner smoke flavor
- Color formation: It promotes a golden-brown ot golden-yellowish hue
- Texture protection: A good pellicle helps prevent surface drying, so the exterior stays soft rather than becoming leathery. However, be careful not to over-dry and then smoke; I’ve found that can make it leathery.
- Cleaner smoke finish: With better adhesion, you are less likely to get uneven residue or a sooty, dusty look.
It is not complicated, but it rewards patience and attention to conditions. I’ll give an approximate guide to how long it takes below.
How to Form a Pellicle
Forming a pellicle does not require special equipment.
It requires the right environment, meaning airflow, temperature, and time.It can be incredibly simple.
Over the years, I have done this in garage setups, fridges, sheds, and dedicated curing spaces.
The rules that work stay the same in every location.
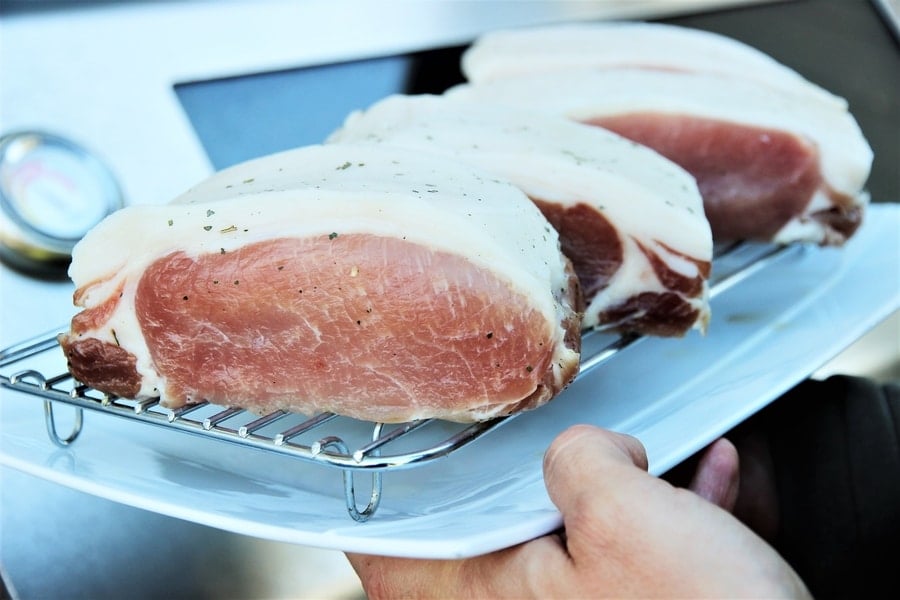
- Airflow: Place the meat on a rack or hang it so air can circulate around the surface
- Surface prep: Pat the exterior dry first so you are not trying to dry standing moisture
- Temperature: Keep it cool so the surface dries gradually and evenly
- Fan assistance: A small fan can help prevent humid dead spots and speed up surface drying
- Timing: Thin pieces can be ready quickly, while thick cuts often need several hours or overnight
The doneness test is simple. When the surface feels slightly tacky to the touch, it is ready to smoke.
If it still feels slick or wet, it needs more time and better airflow.
Tip: Aim for “tacky and glossy”
A common mistake I see is over-drying the surface.
If you blast a strong fan at close range, the outside can firm up too fast while the rest of the process becomes uneven.
I prefer gentle airflow and a little patience, or just covered in a frost-free fridge.
That usually creates a more even pellicle, especially on fish and lean meats.
How Long Does It Take to Form a Pellicle?
The time depends on the cut, thickness, temperature, humidity, and airflow.
I have formed pellicles in under an hour for thin fillets, and I have left thicker cuts overnight when conditions demanded it.
The goal is always the same.
You are aiming for tacky, not wet.
Smaller items, such as fish fillets or thin bacon pieces, can develop a pellicle quickly.
Thicker cuts, such as pork belly or turkey breast, can take most of the day to cook in higher humidity.
| Type of Meat | Approx. Time | Ideal Time |
|---|---|---|
| Pork Belly / Bacon | 1–4 hours | Overnight (8–12 hours) |
| Trout / Salmon Fillet | 30–60 mins | 1–4 hours |
| Chicken / Turkey Breast | 2–4 hours | 3–6 hours |
| Seafood (Mussels / Scallops) | 30–60 mins | 1–3 hours |
| Whole Fish (under 3kg / 6lb) | 2–4 hours | Overnight |
Use the table as a starting point, not a rule carved in stone.
Your best indicator is the surface feel.
If it is slightly sticky and looks a bit glossy, you are ready to smoke.
If it is slippery, give it more time and improve airflow around the food.
If you want a practical reference for dialing in consistent cold smoking conditions, this cold smoking temperature table is the one I point people to most often.
For bacon specifically, the pellicle step is one of the easiest ways to improve appearance fast, and this guide on making bacon at home shows how it affects color and smoke adhesion on cured pork belly.
Best Environments to Form a Pellicle
I have tried forming pellicles in humid kitchens, outdoor sheds, garages, and converted fridges.
If the air is stagnant, it’ll take a long time to dry out.
If the space is too warm, you shorten your timing window and often end up rushing the process.
- Fridge: Ideal for smaller cuts and fish fillets. Leave the meat uncovered on a wire rack so air can circulate freely.
- Garage or Shed: Works well for larger batches when the temperature stays moderate. A small fan helps keep air moving.
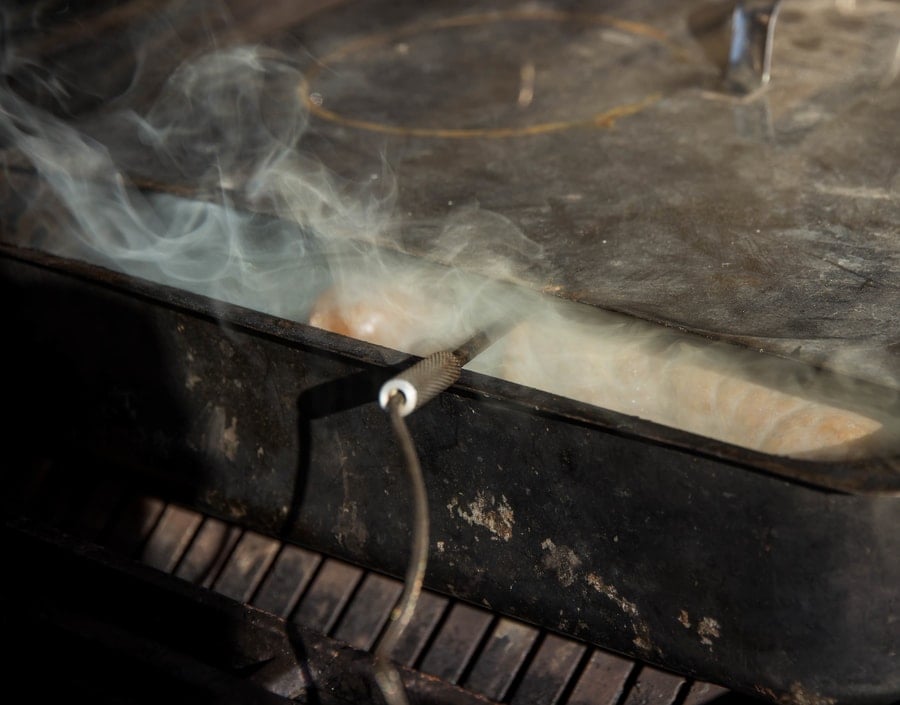
- Inside the Smoker: If your smoker is cool and dry before lighting, rest the meat inside with vents open so it can dry evenly. A bit of wind can help with this.
- DIY Box or Cabinet: A simple box plus gentle airflow can work in mild conditions when space is tight.
When you are cold smoking, smoke delivery tools and airflow management matter more than most people expect.
If you are teaching someone the basics, I also like using this quick explainer on what cold smoking means, so expectations are clear before they start timing pellicles and smoke sessions.
Even when you move beyond meat, the same principle applies.
Pellicle vs. Bark: What’s the Difference?
This is where many beginners get confused. The pellicle and the bark are not the same thing.
A pellicle forms before smoking, creating a tacky surface for smoke to cling to.
A bark develops during low and slow hot smoking, when heat and rubs caramelize and dry into a crust.
- Pellicle: Tacky surface formed by drying before smoking; improves smoke adhesion and color
- Bark: Crust that forms from spice rubs and caramelization during long cooks with heat
When you cold smoke or do short hot smoking sessions, a pellicle is essential.
There is not enough time or heat to develop true bark, so the pellicle becomes your main tool for achieving even smoke color and flavor.
How the Pellicle Affects Smoke Flavor
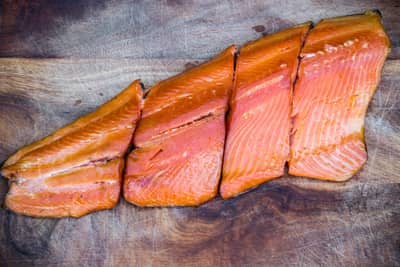
The pellicle gives smoke compounds, mainly phenols, a surface to attach to. Especially after a resting period in a container.
That is what creates the smooth, layered flavor people associate with great smoked food.
Without that surface layer, smoke can settle unevenly or remain faint, and the difference is clearly evident in both taste and color.
Wood choice matters here, too.
Lighter woods like apple and alder create a gentler aroma, while stronger options like hickory or oak can cling more aggressively to the pellicle.
For a deeper breakdown of how smoke compounds develop and behave, the external guide from AmazingRibs – Science of Smoke is a solid reference.
Why You Should Always Form a Pellicle
After years of experimenting with different meats and smoking setups, I can confidently say that forming a pellicle is one of the simplest ways to improve smoked food.
It does not require special tools.
It requires time, air circulation, and a cool environment so the surface dries the right way.
- Improves how smoke adheres to the surface
- Builds more even smoke flavor
- Promotes a more appealing golden to reddish-brown color
- Helps reduce uneven residue and patchiness
- Supports more consistent results across different smokers
The pellicle step is especially valuable for cold smoking projects that run under a few hours.
In those sessions, heat is not strong enough to create a good surface layer on its own, so your preparation matters more.
If you are curing at home and want a method that improves consistency, this guide on the equilibrium curing method pairs well with pellicle formation because it helps you control the process before drying.
Alternatives: What if you cannot form a proper pellicle, but want smoke flavor?
Liquid smoke is like the essential oil of smoke, used very sparingly – it can create the smoke flavor, actually, without even smoking.
It can be the true flavor of pellicle formation and cold/hot smoking – in my opinion.
Quality Control Checklist: How to Know the Pellicle Is Ready
A pellicle is easier to judge by touch than by a timer.
I use a simple checklist every time, especially when humidity or airflow changes from one day to the next.
If you are trying to connect the pellicle step to the bigger process, the Complete Guide to Cold Smoking is where I send people who want the full workflow in one place.
If you are dialing in smoke delivery equipment, the Smokai Smoke Generator Review shows how different generators behave across both cold and hot smoking setups..
Further Reading & Related Guides
If you want more detailed techniques and experiments I’ve documented over the years, these cold smoking resources are worth exploring:
- Cold Smoking Temperature Table & Tips
- All the Ways to Make Bacon at Home
- How Does a Smoker Tube Work? (Cold or Hot Smoking Guide)
- What Does Cold Smoked Mean? (Such as: Bacon, Cheese)
- Cold Smoking Theory & Equipment (PDF Guide)
What is a pellicle on smoked meat?
A pellicle is a tacky layer that forms on the surface of meat after curing or drying. It allows smoke particles to stick evenly during hot or cold smoking.
How long does it take to form a pellicle?
Depending on the meat and airflow, it usually takes from 30 minutes for thin fish to up to 12 hours for thick cuts like pork belly.
Can I form a pellicle in the fridge?
Yes. Place the meat uncovered on a wire rack with good airflow. Many fridges with active circulation form an ideal pellicle overnight.
Do I need a pellicle for cold smoking?
Yes, it’s essential. The pellicle helps smoke flavor and color bind evenly across the surface without relying on heat to set the exterior. Although starting the cold smoking with light smoked for several hours, with hanging cured meat can begin the process.
Have you noticed how forming a pellicle changes the flavor or color of your smoked meat? Share your results or questions in the comments below.

Tom Mueller
For decades, immersed in studying, working, learning, and teaching the craft of meat curing, sharing the passion and showcasing the world of charcuterie and smoked meat. Read More