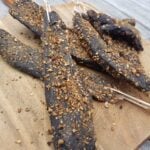
Traditional Biltong Recipe (Classic & EQ Methods)
Making Biltong with salt, acidity and drying, a shelf stable snack, and a South African Classic!
Ingredients
- 1000 g Meat Lean Red Meat, Beef Topside, Venison, Rump, Silverside
- 2.5 g Salt (0.25% of meat weight) approx 1 cup course salt per 1kg/2pds of meat
- Malt vinegar 2 tbsp per 500 g meat
- Toasted coriander seeds cracked/crushed to coat after vinegar
Instructions
-
Cut the meat into ½–1 inch thick slabs, cutting with the grain.

-
Classic Method: Salt for 1 hour, wipe/rinse/scrap

-
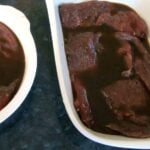
Soak in malt vinegar for 1 hour.
-
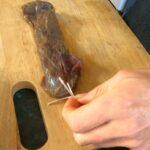
Poke hole through thinnest end of slab of meat, tie twine or use S hook
-
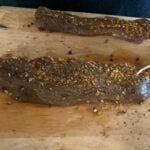
Coat the damp meat with toasted, cracked coriander (or the EQ spice mix) so it sticks well.
-
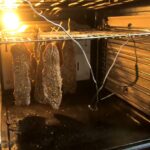
Dry the meat: hang with a fan, use a dehydrator on low, or use a curing chamber at ~25°C / 80°F and 50–60% RH for 2–4 days (aim for ≥35% weight loss).
-
Store in a brown paper bag in a cool place. Lasts 2–3 weeks or longer depending on dryness.
Recipe Notes
-
Biltong is cured, not cooked — salt and vinegar denature the proteins, changing the texture and helping preserve the meat before drying.
-
Airflow and humidity are key. Aim for 50–70% RH and around (20-40°C) or 70-100°F for drying
-
Always cut with the grain for that classic chewy texture.
-
Lean cuts like rump, topside, or venison leg dry evenly and safely. Avoid fatty or marbled cuts.
-
Toasting coriander just before using it releases its aroma and gives that distinct biltong flavor.
-
Classic method (1 hr salt + 1 hr vinegar) gives a fast, traditional result with a more rustic flavor.
-
EQ method gives precision — you can control salt levels and consistency batch to batch.
-
For a softer “wet” style biltong, dry for less time and keep a little moisture in the center.
-
For longer shelf life, dry more thoroughly until at least 40-50% weight loss.
-
Store in a brown paper bag in a cool area. Avoid plastic or airtight containers, which trap moisture.
-
Optional: add a light cold smoke before drying for extra depth and complexity.
-
Keep everything clean — utensils, hands, and workspace — to avoid contamination during curing and drying.